Search This Blog

Showing posts with label Snack. Show all posts

Sunday, October 11, 2015

Onion Strings

DSC_0088_OnionStrings2

Each year, my sister and her husband join us for an Apple Cider Doughnut making day.  It's one of my favorite days of the fall.  In the last few years, we've decided that we may as well put the hot oil to good use and fry something else!  We now follow up the doughnuts with these Onion Strings from the Pioneer Woman.  They are so good, they may even beat the doughnuts...no seriously, they are that good! We only deep fry once a year, so you better bet we are getting the most out of it and making these. If you ever find yourself with a pot of hot oil, try these. They will not disappoint!

Onion Strings

Ingredients:
1 whole large onion, sliced very thin
2 cups buttermilk
2 cups all-purpose flour
1 scant tablespoon table salt
1/4 - 1/2 teaspoon cayenne pepper
1 - 2 quarts Canola oil
Salt and freshly ground black pepper to taste

Directions: 

1. Place sliced onions in a baking dish, cover with buttermilk, and soak for at least an hour.

2. Combine dry ingredients and set aside.

3. Heat oil to 375F in a Dutch oven. Grab a handful of onions, throw into the flour mixture, tap to shake off excess, and plunge into hot oil. Fry for a few minutes and remove as soon as golden brown. Season with salt and pepper as desired and serve immediately.

4. Repeat with remaining onions.

DSC_0084_OnionStrings1

Source: Pioneer Woman

Sunday, October 23, 2011

Crescent Mummy Dogs

DSCN7232_labeled_ed

After seeing these adorable Mummy Dogs on Picky Palate, I made them for a little pre-Halloween get together last year. I didn't get a chance to post them before Halloween, so I saved the post for this year. I used light crescent rolls and turkey hot dogs to make them a bit healthier. You can even use breadstick dough if you prefer. These were delicious and so festive! They are perfect for a Halloween party - whether as a main dish or as a snack. I think kids would love these as well.

Crescent Mummy Dogs

Ingredients:
1 can of crescent rolls (I used light); you may use breadstick dough if you prefer
1 package hot dogs (I used turkey hot dogs)
mustard
nonstick cooking spray

Directions:
Preheat oven to 375F.
1. Separate crescent roll dough at perforations. Cut into thin strips of dough.

2. Wrap strips of dough around each hot dog to resemble mummy wrappings (as shown in photo), pressing loose edges together so they stick and stay in place.

3. Place wrapped hot dogs on a baking sheet and spray dough lightly with cooking spray.

4. Bake for 13 - 17 minutes, or until dough is light golden brown and hot dogs are heated through.

5. Use mustard to dot eyes onto mummy faces, and serve with your favorite condiments.

Source: Inspiration from Picky Palate, recipe from Pillsbury

Thursday, July 21, 2011

Salsa Showdown!

When my good friends Melissa and Kathleen visited in May, I wanted to do something fun and special. The three of us absolutely love the salsa from our favorite Mexican restaurant in Peoria, IL (where we went to college). The restaurant is Carlos O'Kelly's. Yes it's a chain, but their salsa is made in-house (Melissa should know, she worked there!) Our plan was for them to drive from Chicago and stop in Springfield at the Carlos O'Kelly's that's right off the highway to pick up some salsa on their way to St. Louis. Unfortunately, Melissa was informed that the restaurant had suddenly closed! I had no choice but to arrange a Salsa Showdown and make my three favorite salsas for us to taste test!

My all-time favorite salsa for years has been the Black Bean(less) Salsa. If you read my original post about it, you'll know that it was this very salsa that got Kathleen to eat red onions! One day, I saw this Fresh Homemade Salsa on Annie's blog and it looked so delicious. I loved that it closely resembled restaurant-style salsa in appearance. Of course I have room in my life for more than one salsa, right? Especially when they are as different as these two! Wow, this salsa is amazing and I was happy to have a more traditional salsa to serve with
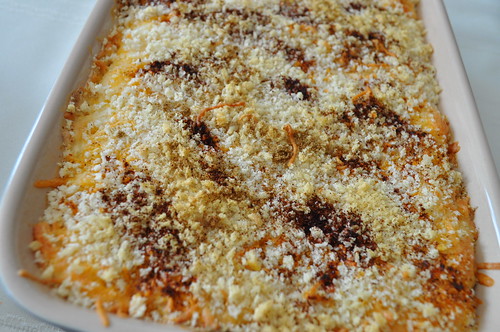
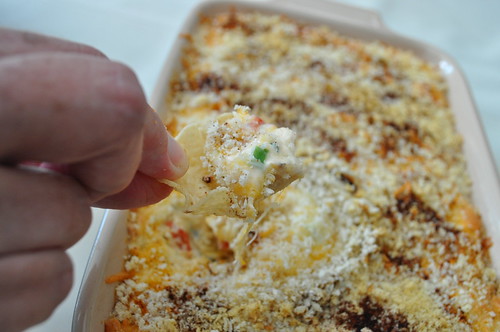
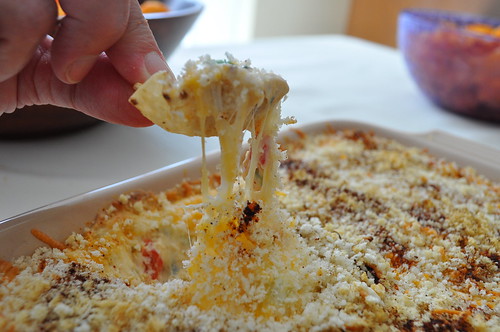
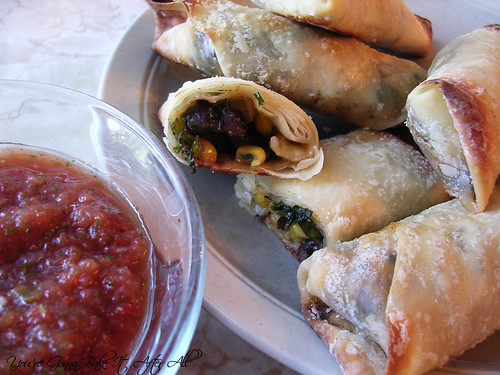
 enchiladas, quesadillas, and fajitas. Then I did a dumb thing...or a brilliant thing...I saw Pioneer Woman's Restaurant-Style salsa and just HAD to try it. Uh oh, I loved it. Now what was I to do? The Black Bean(less) Salsa is very different and I actually prefer it with just tortilla chips, not on other Mexican food, so it doesn't really count, but these two red salsas are very similar...almost similar enough that I had to choose one, but how? I don't know about you, but I simply cannot make a decision unless I have two things side-by-side. This called for a Salsa Showdown, not unlike my Magic Brownie showdown, Ricotta Pancakes two ways, and my Great Pumpkin Bread-Off. I had wanted to do this, oh, ever since I tried Pioneer Woman's salsa. Finally I had the perfect opportunity and the perfect little guinea pigs (or fruit flies if you know what I do for a living) for my experiment :-)

I made the three salsas in one night and stored them in ambiguously marked containers labeled A, B, and C. Only I knew the identity of the salsas. Now let's get down to the details of the Showdown:

The taste testers: Bob, Melissa, and Kathleen.
The mission: determine the best salsa according to taste, texture, and overall appeal.
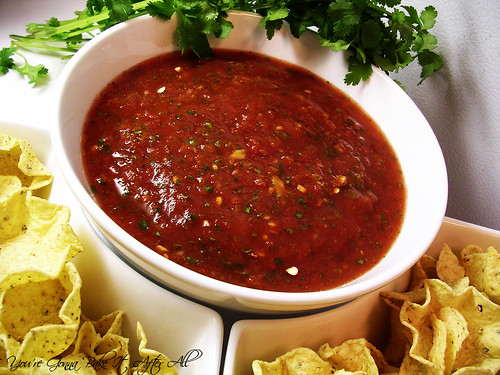
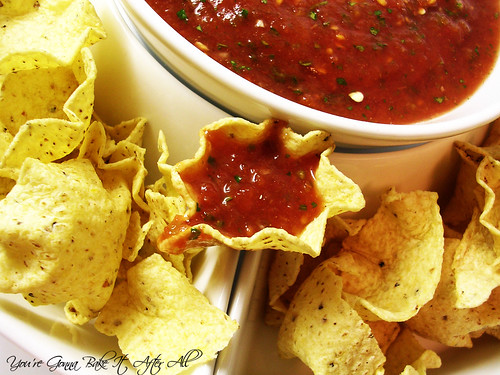
The vehicle for said salsas: Tostitos scoops.

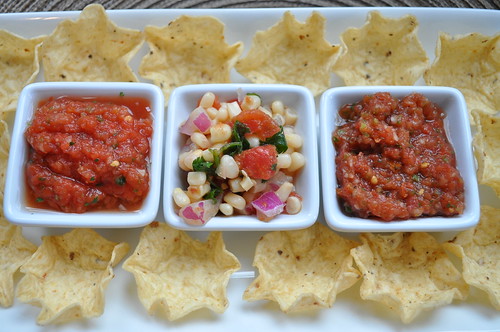
Meet the contenders:

DSC_0586_2

In this (left) corner, weighing in at 3 ounces (just kidding!) we have 
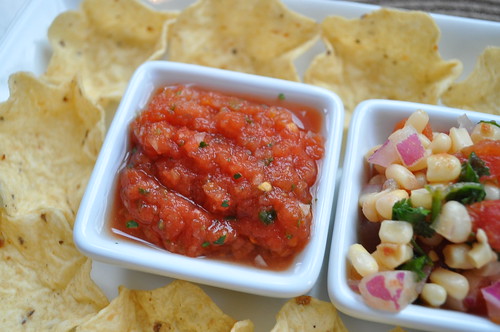
Salsa A from Pioneer Woman.

DSC_0583_2

And in this (right) corner, we have 
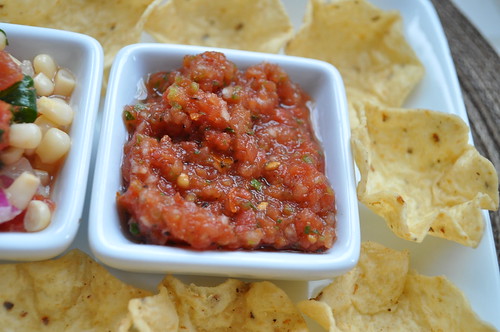
Salsa B from Annie's Eats.

DSC_0585_2

It's pretty obvious, but Salsa C is the Black Bean(less) Salsa in the center.

DSC_0584_2

To be fair, I told the taste testers not to consider this salsa in their vote since it is so different. I really just made it because it's Kathleen's fav and I wanted Melissa to try it out (oh and I love it too!)

A little description of each:

Salsa A: A scrumptious combination of Rotel tomatoes, canned whole tomatoes, onion, jalapeno, and all the usual yummy suspects.

Salsa B: A delectable blend of fresh tomatoes, canned fire-roasted tomatoes (my personal addition), yellow onion, cumin, jalapenos, garlic, and a touch of red wine vinegar.

Salsa C: This salsa combines the sweetness of shoepeg corn, the spiciness of Rotel tomatoes, and the zestiness of red onions. Cumin, fresh lime juice, and cilantro add brightness and freshness.

The verdicts (wow it's even hard for me to type that word after the horrific Anthony trial!):

1) Because Bob has a hard time following directions, he performed his test before they arrived. His immediate answer was "Salsa A" - he thought it had a fresher taste. I thought this was funny because this salsa has no actual fresh tomatoes in it, as opposed to Salsa B which does.

2) Melissa agreed with Bob - Salsa A was the winner for her, though this was a close call. Also citing "fresh tasting" as a reason for her choice.

3) Kathleen also agreed that Salsa A was her preference. Again the "fresh" word came up, and this was close for her too.

4) So maybe you're wondering what I think?? Sorry folks, it's a hung jury - I sort of prefer Salsa B! I think it's because I used fire-roasted tomatoes and I just love that smoky taste they impart. I probably shouldn't have done that for fairness. I feel like I performed an uncontrolled experiment! I love both Salsa A and Salsa B, but I kept going back to Salsa B . . . again . . . and again. This presents a major problem for me because I was hoping Bob and I would agree on a clear winner and I would have my "go to" recipe. No such luck!

Now on the tasters' opinions of the Black Bean(less) Salsa - all 3 agreed that they loved this salsa and that it wasn't fair to compare it to the more traditional salsas. Personally, I could not agree more. It's just wonderful! No, seriously try it!

So there you have it, mostly a win for Pioneer Woman's Restaurant-Style Salsa with one holdout (me!) for Annie's Eats Fresh Homemade Salsa.

Have I finished my salsa quest? Not a chance. I still plan to make an at-home version of one of my favorite restaurant salsas...and no, it's NOT Carlos O'Kelly's ;-)

Friday, July 15, 2011

Jalapeno Popper Dip

DSC_0905

DSC_0914

I've posted before about my love of dips. I think they're the perfect party food, and there are so many options. When I saw this recipe for Jalapeno Popper Dip, I immediately saved it to try. Jalapeno poppers are pretty popular in my family, so I thought a dip that combines those flavors would go over well.

Bob and I hosted a graduation party BBQ for my new brother-in-law Steve, and I thought this dip would be a nice addition. Diced jalapenos mixed with cream cheese and spices, topped with a delicious layer of Mexican blend cheese and panko bread crumbs? Yum. This dip was delicious, and the fam loved it. It's definitely not too spicy but had a nice balance of flavors. I'm sure it would be great served with carrots and celery, but I prefer Tostitos Scoops!

And just look at that cheesiness!
DSC_0912

Thanks for lending me a "hand" Mom!

Jalapeno Popper Dip

Ingredients:
2 8-ounce packages cream cheese (I used 1/3 less fat), at room temperature
1/2 cup mayonnaise (I used light)
1/2 cup roasted red bell peppers, chopped
6 jalapeno peppers, seeded, ribbed and finely diced
2 cloves garlic, minced
2 tablespoons cilantro, finely chopped
2 tablespoons lime juice
1 1/2 cups Mexican blend shredded cheese, divided
1 teaspoon Ancho chili powder
1 teaspoon ground cumin
1 cup panko bread crumbs (I actually reduced this to about 1/2 cup)

Directions:
Preheat oven to 350 degrees.
1. In a medium bowl, combine cream cheese and mayo.

2. Add bell peppers, jalapenos, garlic, cilantro, lime juice, 1/2 cup shredded cheese, and half of the chili powder and cumin. Mix well to combine to a uniform mixture.

3. Spread dip into a baking dish, smoothing into an even layer. (I used an 11 x 7-inch dish)

4. Top with remaining shredded cheese, cover with bread crumbs and sprinkle with remaining chili powder and cumin.

5. Bake approximately 30 minutes until cheese is hot and bubbly and the breadcrumbs are golden brown.

6. Serve warm or at room temperature with tortilla chips.

Source: Adapted from Homemade by Holman

Friday, December 10, 2010

Holiday Recipe Round-Up

With the abundance of Holiday parties coming up, I wanted to compile a post of my favorite Holiday recipes. Last year I did a series called the 12 Days of Christmas and presented some tried and true recipes that I've come to depend on as holiday staples. While I am certainly trying some new recipes this year, I still turn to these classics to round out my baking. I can safely say that each and every one of these (with the exception of the Buche de Noel, for lack of time) will make an appearance in my kitchen this season. I am also including some of my favorite appetizers, because a holiday party is not quite complete without them!

Sweets:

DSCN4221_labeled
- my grandma's recipe. Buttery, bite-sized, and all around perfect.

DSCN4661_labeled
- also my grandma's recipe with my spin to make them chewier. Hands down the best oatmeal cookie I've ever had.

DSCN4539_labeled
- people go nuts for this stuff, it is THAT good!

DSCN4518_labeled
- sounds a little odd but the combination is spot on in this perfectly-spiced treat.

DSCN4502_labeled
- no lemon in this poppyseed bread! This is an incredibly moist and flavorful bread with the flavors of butter and almond extract. The sweet drizzle on the crispy top adds another dimension to this already tasty confection.

DSCN4594_labeled
- simple yet elegant. Surprise your friends with this easy homemade candy!

DSCN4644_labeled
- the perfect accompaniment to a cup of coffee or tea! I am still surprised by how much I LOVE this recipe! It's one of my favorites from all of last year.

As someone who doesn't like marshmallows, I was shocked that I enjoyed these. Soft and melt-in-your-mouth good. And one of my favorite inventions from last year:

Coconut and Chocolate Covered Homemade MarshmallowsDSCN4683_labeled
- I don't often try to develop my own "recipes" but I did for this one and I am so happy with the result. Serve these as candy!

DSCN4665_labeled
Nothing beats a good macaroon in my book. Try dipping the bottoms in chocolate - a little tip from my friend Kat!

- buttery goodness with a chocolate flavor. So good topped with crushed peppermint!

DSCN4709_labeled
If you're ambitious or have an event where you want to impress others with your baking skills, this is the recipe for you! This classic French dessert is fun to make and even more enjoyable to decorate!

DSCN4787_labeled
- surely a sugar rush but this festive punch will put you in the holiday spirit and it's always a hit with kids.

DSCN4767_labeled
- convince yourself these are a healthy option at an otherwise sugar-covered table. Filled with sweet, fluffy marshmallow cream cheese, this finger food is easily popped in your mouth with little mess.

DSCN6132_labeled
- buttery cookies with flavors of chocolate and coffee.

Savories:

DSCN4307_labeled
can't even describe the deliciousness . . .

- one of my favorite holiday appetizers!

- no one will know they are turkey!

DSCN4776_labeled
- bubbly and cheesy . . . enough said.

Unbelievably good. I am always amazed each time I make them. These are always a crowd favorite and the picture does NOT do them justice. I will make an effort to get a better shot this year!

DSCN4048_labeled
Common ingredients come together in an uncommonly good dip.

DSCN6538_labeled
Ina sure knows her dips, and this one is fantastic. What better way to enjoy veggies than drowning them in caramelized onions, sour cream, and cream cheese?!

The flavors of buffalo wings without the mess!

- an awesome dip without the hefty price tag!

You can rarely go wrong with bacon . . . try using turkey bacon for a slightly healthy alternative - your guests will never know the difference!


That's it for the round-up! I will post details about my holiday party next week! Have a happy and safe weekend! :)

Thursday, October 7, 2010

Restaurant Style Hummus

DSCN7039_labeled

DSCN7037_labeled

Hummus is one of my favorite snacks, but until recently I had never made it at home. This version from Cook's Illustrated is super creamy and flavorful. I love the kick of cayenne, and the texture is perfect. Hummus is great with a variety of raw veggies or my personal favorite - Stacy's Simply Naked Pita Chips!

Restaurant Style Hummus

Ingredients:
3 tablespoons juice from 1 to 2 lemons
1/4 cup water
6 tablespoons tahini , stirred well
2 tablespoons extra-virgin olive oil, plus extra for drizzling
1 14-ounce can chickpeas , drained and rinsed
1 small garlic clove , minced or pressed through garlic press (about 1/2 teaspoon)
1/2 teaspoon table salt
1/4 teaspoon ground cumin
Pinch cayenne
1 tablespoon minced fresh cilantro or parsley leaves

Directions:
1. Combine lemon juice and water in small bowl or measuring cup. Whisk together tahini and 2 tablespoons oil in second small bowl or measuring cup. Set aside 2 tablespoons chickpeas for garnish.

2. Process remaining chickpeas, garlic, salt, cumin, and cayenne in food processor until almost fully ground, about 15 seconds. Scrape down bowl with rubber spatula. With machine running, add lemon juice-water mixture in steady stream through feed tube. Scrape down bowl and continue to process for 1 minute. With machine running, add oil-tahini mixture in steady stream through feed tube; continue to process until hummus is smooth and creamy, about 15 seconds, scraping down bowl as needed.

3. Transfer hummus to serving bowl, sprinkle reserved chickpeas and parsley/cilantro over surface, cover with plastic wrap, and let stand until flavors meld, at least 30 minutes. Drizzle with olive oil, if desired, and serve.

Source: Adapted from Cook's Illustrated

Tuesday, September 14, 2010

Baked Southwestern Egg Rolls

DSCN6879_labeled

I love the Southwestern egg rolls served at a popular chain restaurant, but I know how horrible they must be nutrition-wise! I was so excited to see this recipe for Baked Southwestern Egg Rolls. I love to take otherwise unhealthy restaurant dishes and turn them into much healthier versions.

I took these to a Trivia Night sponsored by my cousin's company to benefit the Muscular Dystrophy Association. These were a great addition to the treats our table brought, which I'm sure were critical to our team's taking home the 1st place award!

I've never worked with store-bought egg roll wrappers before, but they are so neat! I have so many ideas of fillings for these - both savory and sweet. These are great leftover too.

Baked Southwestern Egg Rolls

Ingredients:
2 cups frozen corn, thawed
1 15-ounce can black beans, rinsed and drained
1 10-ounce package frozen chopped spinach, thawed and squeezed dry
2 cups shredded Mexican cheese blend
1 4-ounce can diced green chiles, drained
4 green onions, chopped
1 teaspoon ground cumin
1/2 teaspoon chili powder
1 tsp. salt
1/2 teaspoon pepper
1/4 teaspoon cayenne pepper
egg roll wrappers (about 24 total)

Directions:
Preheat oven to 425F.
1. In a large bowl, combine everything but the egg roll wrappers. Mix well to blend.

2. Lay an egg roll wrapper out on a work surface so that one of the corners is pointing toward you and place 1/4 cup of the filling in the center. Fold the tip closest to you up over the filling, roll a bit, then take the points pointing outward (to the sides) and fold them in toward the center. Continue rolling into an egg roll shape until a small part of the remaining point is still free. Dip a finger in water or beaten egg and lightly brush on the edges of the free corner. Finish rolling and press to seal closed. Repeat with the remaining wrappers and filling.

3. Lightly oil a baking sheet with cooking spray. Place the sealed egg rolls on the baking sheet seam side down and spray the tops of the egg rolls with cooking spray. Bake for about 15 minutes, or until lightly brown, turning halfway through baking. Serve warm with salsa.

Source: Annie's Eats

Thursday, August 12, 2010

Caprese Salad Skewers

DSCN6704_labeled

DSCN6708_labeled

DSCN6707_labeled

DSCN6713_labeled

I have some big news to share - we bought a house!!! It actually happened the same week as our "house heart-break." We were able to move past that and ended up finding a great house that suits us well. Within a few hours of making the offer, the sellers had countered, and we had accepted. We were able to get a 60-day escrow so we don't overlap with our current lease, so we close September 17. We are really excited! I waited until after the inspection to announce it, so hopefully we won't have any snags along the way.

Because we are no longer spending every week night house hunting, I've felt a little more up for cooking, so hopefully the pace of my posts will pick up a bit :)

I actually made this fun appetizer to take to a work potluck several weeks ago. I saw the idea on some blogs last summer and have wanted to try it ever since. The concept is so simple that it doesn't really require a recipe, rather just a list of ingredients and basic instructions. So here goes:

Caprese Salad Skewers

Ingredients:
Cherry tomatoes
Fresh mozzarella balls (or cubes)
Fresh basil leaves
4 - 6" wooden skewers
Garlic pepper/salt, optional
Balsamic vinegar
Extra virgin olive oil

Directions:
Assemble tomatoes, mozzarella, and basil on skewers. Sprinkle with garlic pepper/salt (I used a McCormick grinder), to taste. Chill until ready to serve. Offer balsamic vinegar and olive oil while serving.

Friday, June 11, 2010

Prosciutto and Melon

DSCN6523_labeled

DSCN6531_labeled

DSCN6534_labeled

I made these little bites for my aunt's pool party on Memorial Day weekend. Bob has loved prosciutto and melon ever since the first time he tried it many years ago. He loves the combination of the sweet melon and the salty prosciutto. Since I won't eat any meat other than poultry, I didn't try them, but Bob was really happy with how they turned out. These are an easy appetizer for outdoor barbecues and picnics!

Prosciutto and Melon

Ingredients:
1 large cantalope
~6 ounces thin-sliced prosciutto
mint or basil leaves, optional

wooden toothpicks

Directions:
1. Cut each slice of prosciutto crosswise into four strips.

2. Trim about 1/2-inch off the top and bottom of the melon to reveal the inner fruit and create a flat surface.

3. Stand the melon on one of the sliced, flat ends. Following the natural round shape of the melon, use a very sharp knife to remove the skin, turning the melon as you make each cut. Make sure your cuts are deep enough to cut beneath the rind and expose the vibrantly colored flesh, but be careful not to cut off too much of the fruit. Do not cut the melon in half.

4. Using a melon baller or small cookie scoop, press firmly into the flesh to create an indentation; twist in an even, clockwise motion to scoop out a round ball. Cutting as closely as possible, continue making balls until all that is left is a large melon "wiffle ball." You will have more melon balls than are needed for the canapes.

5. Take a piece of of sliced prosciutto and wrap it around a melon ball. Secure with a wooden toothpick. Arrange on a platter. Repeat with the remaining melon balls. Garnish platter with mint or basil leaves, if desired.

Source: Adapted from the Viking Range Corporation

Friday, June 4, 2010

Pan-Fried Onion Dip

DSCN6538_labeled

I made this dip for a Memorial Day pool party at my aunt's house. Everyone loved it, and I thought it had a great flavor. The onions are so sweet and delicious, and the cayenne adds a nice kick. Ina has done it again! Serve this dip with your favorite veggies or chips.

I have a great dessert coming up next week. Have a great weekend! :)

Pan-Fried Onion Dip

Ingredients:
2 large yellow onions
4 tablespoons unsalted butter
1/4 cup vegetable oil
1/4 teaspoon ground cayenne pepper
1 teaspoon kosher salt
1/2 teaspoon freshly ground black pepper
4 ounces cream cheese, at room temperature
1/2 cup sour cream
1/2 cup mayonnaise

Directions:
1. Cut the onions in half and then slice them into 1/8-inch thick half-rounds. (You will have about 3 cups of onions.)

2. Heat the butter and oil in a large saute pan over medium heat. Add the onions, cayenne, salt, and pepper and saute for 10 minutes. Reduce the heat to medium-low and cook, stirring occasionally, for 20 more minutes until the onions are browned and caramelized. Allow the onions to cool. *I did this the night before and stored the onions in a covered dish in the fridge. As I transferred the onions to the dish, I made sure to leave the excess grease in the pan.

3. Place the cream cheese, sour cream, and mayonnaise in the bowl of an electric mixer fitted with the paddle attachment and beat until smooth. Add the onions and mix well. Taste for seasonings. Serve at room temperature.

Source: Adapted from the Barefoot Contessa Cookbook via FoodNetwork.com

Monday, February 22, 2010

Restaurant Style Salsa

DSCN5235_labeled

DSCN5244_labeled

I've recently rediscovered the Pioneer Woman. This may sound a little strange, but I went to her blog off and on several years ago. For some reason, it was really confusing to me. This was before my Google Reader days, and all those different forums - photography, cooking, etc. - were just overwhelming, so much to the point that I didn't visit very often. After all the buzz about her cookbook tour this past Fall, I added her to my Google Reader and have been pleasantly surprised. I see why so many people love her blog. I know it will be a great resource for me when I finally take the plunge and get a DSLR camera too!

Recently PW posted this Restaurant Style Salsa. Now, I have two favorite salsa recipes already (here and here), but her pictures looked so good and I figured it couldn't hurt to try another, so I made it for Superbowl. The problem is that I now have 3 favorite salsas! I can't decide among them! The black bean(less) salsa is an entirely different beast in my mind, but PW's is very similar to this one, yet I love them both. Maybe someday I will make them side by side, but I have a feeling I will just keep going back and forth between them :) Plus, each batch makes a LOT of salsa!

PW's salsa is exceptionally fresh tasting, despite not having any fresh tomatoes. It's really delicious. With how quick and simple it is to whip up a batch of fresh salsa, it makes me think twice about buying it from the store (Unless Rick Bayless's Frontera salsa is on sale of course!) As of now, I plan to keep making all of these salsas, and often :)

Restaurant Style Salsa

Ingredients:
1 28-ounce can whole tomatoes with juice
2 10-ounce cans Rotel diced tomatoes and green chilies*
1/4 cup chopped onion
1 clove garlic, minced
1 whole jalapeno, quartered and sliced thin*
1/4 teaspoon sugar
1/4 teaspoon salt
1/4 teaspoon ground cumin
1/2 cup cilantro (more to taste)
juice from 1/2 lime

*PW used 1 can regular and 1 can mild Rotel and included the seeds/ribs of the jalapeno. I could only find regular Rotel, so I began by leaving out the ribs and seeds. It wasn't quite spicy enough, so I dumped them in. Then it was pretty spicy, maybe a little too spicy. Use your judgement depending on the heat you prefer!

Directions:
1. Combine whole tomatoes, Rotel, onion, jalapeno, garlic, sugar, salt, cumin, lime juice, and cilantro in a blender or food processor. Pulse until you the salsa to the consistency you prefer (around 10 to 15 pulses).

2. Test seasonings with a tortilla chip (love this part!) and adjust as needed.

3. Refrigerate for at least an hour. Serve with tortilla chips or your favorite Mexican fare.

Sunday, January 3, 2010

Welcome 2010!

Happy New Year! I have been dreaming about 2010 for a LONG time. I started graduate school in Chicago in 2004 knowing that I would not be done until close to 2010, at which point I planned to move back to St. Louis where my entire family lives. Meanwhile, Bob decided to go back to school, knowing he would graduate in the spring of 2010. We both feel that our lives have sort of been on hold during this time - waiting to have more time (and space) for our hobbies and interests. So, 2010 is a big year for Bob and I:

His graduation and my hooding ceremony:


A big move to St. Louis:

New jobs: (Bob will be working as a PT and I'll be working with fruit flies!)


House shopping:


And one of my favorite parts is that my cousin Chris, who joined the Navy just as I was starting graduate school, will have completed his service and is moving back to St. Louis too.
I am beyond excited to be near my parents and extended family again!

Since it's the beginning of a brand new year, I'd like to reflect back on 2009. I feel like I have grown so much in my cooking since starting this blog last March - it has really pushed me beyond my comfort zone and forced me to try new things. I have now worked with mock marzipan, royal icing, and yeast breads, just to name a few. I am so thankful to each and every one of you who read my blog and who comment on the recipes I post!

To celebrate the occasion, I've decided to go through the things I made in 2009 and choose my favorites. I realized I couldn't pick just one favorite of each category of food, so I decided to just pick my top recipes and list them here. This is hard because I typically only post something if I really like it, so I usually recommend it all. To be featured in this list, the recipe must meet my standards - most importantly, taste amazing - when I read the title of these recipes my mouth actually starts watering - that's how good they are. As a cooking blogger, it's difficult for me to repeat recipes because there are SO MANY fabulous ones out there to try (I have about a million starred in Google reader to prove it!) To be honest, it's really only the super special recipes that I actually make a second time. These are recipes that I plan to make again and again. Sometimes it's not even my choice - it's that Bob requests them over and over. Funnily enough, a lot of my top recipes are from Giada De Laurentiis! Not on purpose, it's just how it turned out.

In no particular order, this is my list of "must makes" from 2009:

Blueberry Ricotta Pancakes - This is a simple recipe from Giada because it uses store bought pancake mix, but it's a semi-homemade approach that tastes incredible. The ricotta cheese really elevates the pancakes to a new level. I am a pancake snob and only like them super light and fluffy, and these pancakes deliver!

Panzanella - I absolutely LOVE this classic tomato and bread salad recipe of Giada's. Perfect for summer when tomatoes are at their peak, but still great the rest of the year.

Chicken Tortilla Soup - I have made many chicken tortilla soups before and never quite found the right one . . . until this one. I love it's simplicity - no corn, no beans, just a super tasty broth with a few veggies, and some chicken of course. The toppings are exceptional. I think each of them adds another flavor dimension. I recently made this for my family and they loved it!

Ribollita - I would have to say this was one of my most surprising recipes (it's Giada's). The whole time making it I was convinced I would hate it - it didn't look appetizing and I really planned on having to eat crackers for dinner. Not only did I eat the soup, I had a second bowl. It was that good. And now here it is on my top recipes lists for 2009. Go figure!

Chicken Gyros - I have made these at least 5 times in the last 5 months! They are SOOO good. The most recent time I made an amazingly delicious flat bread, which I will post soon. It took these from awesome to indescribable :)

Garlic Chicken - Serve with rice, serve with rice noodles, just serve!

Triple T Deluxe Pizza - One of the only recipe on this list that is my own, and it's not even a recipe! The crust is from Cook's Illustrated and truly makes the pizza. The toppings are a great combination, I think. This was the first time I made pizza at home and thought, "hey, this is better than I can get delivered" - no joke.

Rigatoni with Sausage, Pepper, and Onions - Just thinking about this dish makes my mouth water (another Giada recipe). The sweet onions and peppers, the tangy tomato sauce, the comforting pasta, and one of my favorite flavors - marsala wine. This is one of my favorite dishes of all time!

Chicken with Dijon Mascarpone Sauce - Love this recipe! Yet another one from Giada - what can I say, she's knows good Italian food! Get your mascarpone cheese at Trader Joe's if you can - so much cheaper. This recipe is so indulgent. I save it for special occasions and company.

Fresh Salsa - The first time I made this, I was skeptical. How could I like it more than the great salsas you get in Mexican restaurants? I was mistaken - this salsa is right up there with the best of them. It's fantastic served with quesadillas, enchiladas, or tacos, or by itself with tortilla chips. I served this as an appetizer when my cousin and her boyfriend were over one night. He kept saying how good it was, then kept apologizing for repeating himself - it was cute :)

Spinach and Chicken Quesadillas - My favorite quesadilla recipe so far! In my opinion it's the fajita seasoning that makes it special (I credit Annie for that addition!) It was through this recipe that I realized my love of Monterey Jack cheese - it's perfect for Mexican food!

Tres Leches Coconut Cupcakes with Dulce de Leche Buttercream - Wow. Seriously that word sums it up. These were incredible. I still have people at work say to me "you know, you can make those anytime, you don't have to dress them up as Easter Chicks." I take a LOT of desserts into work, and for this one to stand out as much as it did really shows it's a great recipe. I can't wait to make these for my dad because I know he will LOVE them!

Pumpkin-Chocolate Tart - Not only is this one of my favorite desserts in terms of decoration, but this tart is fantastic. The combination of the sour cream and pumpkin makes a super tasty filling. The gingerbread-tasting crust is spicy and delicious, and it's coated in solid chocolate! I plan to make this again next fall for sure.

Chocolate and Toasted Coconut Covered Homemade Marshmallows - Homemade marshmallows are fabulous on their own, but as soon as I dipped them in chocolate and rolled them in toasted coconut, I had a hit! These are just like candy. My only mistake was not making more of them! Next year, I will be prepared with plenty of chocolate and coconut on hand to make a bunch of these.

Triple Chocolate Biscotti - I'm certainly not a biscotti expert, since these were the first I've ever tasted, but what a great little cookie! I loved the combination of white and bittersweet chocolates. These are great on their own or dipped in your favorite coffee, tea, or even milk.

Chicken Marbella - This is such a famous recipe and probably needs no introduction, but if you've never tried it, you must. Great for a crowd or a small group with yummy leftovers, the flavors in this dish are truly wonderful.

Double Chocolate Layer Cake - Decadent and rich - this dessert is perfect for chocolate lovers like yours truly. I'm not surprised it's the most accessed recipe on Epicurious.com!

Spicy Roasted Chicken - Pam has several great looking chicken recipes - all of which I'd love to try. This one is so delicious. I love the spices and the chicken turned out very juicy.

Chicken Pesto Pizza - I loved this pizza! It's a blend of sweet peppers, zucchini, and chicken, flavored with Italian seasoning. The ingredients magically combine to make one fantastic dish.

Bailey's Irish Cream Cheesecake - Of all the cheesecakes I've made, this is my favorite. Such a creamy filling covered in ganache - yum!

And just for fun, these are the top posts that have received the most hits according to Google Analytics:

1. Bacon Stuffed Cherry Tomato Appetizers (Thanks for the recipe Kat!!!)

  © Blogger template Brownium by Ourblogtemplates.com 2009

Back to TOP