Search This Blog

Showing posts with label Blueberry. Show all posts

Tuesday, May 26, 2015

Blueberry Boy Bait


DSC_0101_ed

Another gem from my America's Test Kitchen Cookbook. The story goes that the girl who created this recipe for the Pillsbury Grand National Baking Contest said that teenage boys found this cake irresistible.  I don't make a habit of entertaining teenage boys (ha!), but Bob loved this cake and I still consider him a boy.  Of course, ATK improved upon the original recipe by swapping out shortening and subbing some of the granulated sugar with brown sugar. The result is a moist, simple cake perfect for brunch or an afternoon treat.

Blueberry Boy Bait

Note: if using frozen blueberries, do not let them thaw or they will discolor the batter.

Ingredients:
For the cake:
2 cups (10 ounces) plus 1 teaspoon unbleached all-purpose flour
1 tablespoon baking powder
1 teaspoon table salt
16 tablespoons (2 sticks) unsalted butter, softened
3/4 cup packed (5 1/4 ounces) light brown sugar
1/2 cup (3 1/2 ounces) granulated sugar
3 large eggs
1 cup whole milk
1/2 cup blueberries, fresh or frozen (see note)

For the topping:
1/2 cup blueberries, fresh or frozen (see note)
1/4 cup (1 3/4 ounces) granulated sugar
1/2 teaspoon ground cinnamon

Directions:
1. Adjust an oven rack to the middle position and heat to 350F.  Grease and flour a 13 x 9-inch baking pan.

2. Whisk 2 cups of the flour, the baking powder, and salt together in a medium bowl. With an electric mixer, beat the butter and sugars on medium-high speed until fluffy, about 2 minutes.

3. Add the eggs, one at a time, beating until just incorporated. Reduce the speed to medium and beat in one-third of the flour mixture until incorporated; beat in 1/2 cup of the milk. Beat in half of the remaining flour mixture, then the remaining 1/2 cup milk and finally the remaining flour mixture.

4. Toss the blueberries in a small bowl with the remaining 1 teaspoon flour. Using a rubber spatula, gently fold the blueberries into the batter. Spread the batter into the prepared pan.

5. For the topping, scatter the blueberries over the top of the batter.

DSC_0070_ed


6. Stir the sugar and cinnamon together in a small bowl and sprinkle over the batter. Bake until a toothpick inserted in the center of the cake comes out clean, 45 to 50 minutes. Cool in the pan for 20 minutes, then turn out and place on a serving platter (topping side up). Serve warm or at room temperature.  The cake can be stored in an airtight container at room temperature for up to 3 days.

DSC_0078_ed


DSC_0096_ed

Thursday, April 29, 2010

Blueberry Vanilla Cupcakes with Blueberry Ganache

*So I posted this Thursday morning and it ended up showing in Google reader for April 25! I'm reposting so it comes up as new in GR.

DSCN6166_labeled

DSCN6152_labeled

Today is my last data presentation to my lab before we move, and my last day in the lab is tomorrow. It's a bittersweet transition. As much as I look forward to starting a new project in a slightly different field of study, I will miss my boss and coworkers. The saying "beginnings are scary and endings are sad" flashes through my mind a lot, because I am beginning a new chapter of my life and ending a previous one. These last few days I have been cleaning out all of my stuff from the lab, and it's actually been a pretty liberating experience - throwing out SO much makes me feel like I am starting with a clean slate, and that's always a good thing.

Because this is my last lab meeting, I thought long and hard about what treat I wanted to take. If you remember, my lab gave me my KitchenAid mixer as a gift for finishing my PhD, so I try to thank them with baked goods as often as I can! I have been trying to use up what I have in the freezer, so the abundance of Michigan blueberries seemed like a good place to start. I decided to combine components of two recipes I've made in the past - adapting the Blackberry Vanilla Cupcakes to include blueberries instead, and topping them with blueberry ganache. Ever since I first made the blueberry ganache it's been on my mind. It's truly a unique flavor; as Bob put it, "the blueberries add such a brightness to the ganache." :) Someone's been watching too much Top Chef Masters and Chopped!

I can't report on how the lab liked these because they haven't tried them yet! I'll update the post with the results later. I gave Bob his usual taste-testing cupcake, and he loved it - said the cupcake was nice and fluffy, and you can tell from the above quote that he likes the ganache! I had a bite of his, and it was great. Love, love, love this ganache. I HIGHLY recommend trying it - soon! I am already brainstorming up different ways to use it. As I was putting the ganache in the fridge to cool, I spotted some strawberries, so I dipped some in the ganache and put them on a separate plate to cool - awesome!

One note about this recipe - the cupcakes tend to overflow if filled too high, and they bake up with very flat tops rather than rounded. I think if you fill 2/3 of the cup you'll have much better results than I did. The edges stuck to my pan and each one looks like I chewed around the entire cupcake . . . hopefully my coworkers won't mind!


Blueberry Vanilla Cupcakes with Blueberry Ganache

Makes approximately 13-15 cupcakes

Ingredients:
For the cupcakes:
1 cup flour
2 teaspoons baking powder
1 teaspoon salt
6 Tablespoons unsalted butter, at room temperature
1 cup sugar
1 teaspoon vanilla extract
2 eggs, at room temperature
1/2 cup milk
1/2 cup blueberry puree*

*Fresh or frozen blueberries, pureed in a food processor or blender and strained through a fine-mesh sieve. Approximately 1 cup of frozen blueberries was enough for me to get 1/2 cup puree. To facilitate straining the puree, whisk the blueberry mixture as you strain it through the sieve.

For the ganache:
1 12-ounce bag best-quality semisweet chocolate chips
2 cups frozen blueberries
1/2 cup sugar
1/2 cup heavy cream
4 Tablespoons unsalted butter

Directions:
1. Preheat the oven to 350F and line a cupcake pan with paper liners.

2. In a small bowl, stir (or sift) together flour, baking powder, and salt. Set aside.

3. In a liquid measuring cup (or small bowl), whisk together the milk and blueberry puree. Set aside.

4. In the bowl of stand mixer, cream together the butter and sugar on medium speed until light and fluffy.

5. Add the eggs one at a time, scraping down the bowl between additions, add the vanilla extract.

6. Add half of the dry ingredients to the large bowl and mix on low speed until just combined. Add the blueberry mixture, and mix on low until just combined. Mix in the remaining dry ingredients on low speed until just incorporated. Do not overmix.

7. Divide the batter evenly between the cupcakes, filling 2/3 full.

8. Bake 12 - 15 minutes or until a toothpick inserted in the center comes out clean. Allow to cool in the pan 10 - 15 minutes. Transfer to a wire rack and allow to cool completely. *I stored the cooled cupcakes in a covered cake pan overnight and made the ganache the next evening. This way I had time to clean the sieve and chill the ganache properly.

9. To make the ganache, place the chocolate chips in a large mixing bowl and set aside.

10. Place the blueberries and sugar in a small saucepan over medium heat. Cook and stir until the mixture becomes sauce-like and bubbly. Pour into a sieve or strainer that is placed over the bowl containing the chocolate chips to catch the blueberry liquid. Discard the remaining blueberries.

3. Bring the cream and butter to just below boiling in a small saucepan over medium heat. Pour the hot mixture over the chocolate and let stand for 30 seconds. Stir the mixture until smooth.

4. In order to achieve a consistency desired for piping, cover bowl of ganache with plastic wrap and chill until piping consistency is reached (approximately 1 - 2 hours).

5. Pipe ganache as desired (I used a large star tip).

Source: Cupcake recipe adapted from Coconut & Lime, ganache adapted from Picky Palate

Thursday, April 15, 2010

Blueberry Buttermilk pancakes

DSCN5406_labeled

To be honest, I don't usually care for homemade pancakes, and I certainly don't like pancakes from restaurants. My favorite pancakes are actually Aunt Jemima's Complete Buttermilk Pancakes, but not made the way the box recommends. I like them with more water, so the batter is very pourable, making for a very fluffy, light pancake. This may sound like breakfast blasphemy to some, but like I said, I'm just being honest :)

Several weeks ago I had some leftover buttermilk from another recipe, and I decided to search for a buttermilk pancake recipe. Because I had an abundance of Michigan blueberries in my freezer, I went with Blueberry Buttermilk Pancakes. These pancakes were great! They were light and fluffy and had a delicious buttery flavor. As much as I love blueberry pancakes, I'd love to make these without the blueberries too. These just might have been better than my beloved Aunt Jemima Pancakes!

In the mood for some unique pancakes? Check out these Ricotta Pancakes or Blue Cornmeal Pancakes!

Blueberry Buttermilk Pancakes

Yields 2 to 3 servings

Ingredients:
1 cup all-purpose flour
2 Tablespoons sugar
1 1/8 teaspoon baking powder
1/4 teaspoon baking soda
1/4 teaspoon salt
1 egg
1 cup buttermilk
2 Tablespoons melted unsalted butter, plus some for frying
1/2 cup blueberries, fresh or frozen

Directions:
1. In a large bowl, sift together the flour, sugar, baking powder, baking soda, and salt.

2. Beat the eggs with the buttermilk and melted butter. Combine the dry and wet ingredients into a lumpy batter, being careful not to overmix (Overmixing results in flat, heavy pancakes!).

3. Heat some butter in a skillet over medium heat. Spoon 1/3 cup batter into the skillet and sprinkle the top with some of the blueberries. Cook for 2 - 3 minutes on each side.

4. Serve with maple syrup or topping(s) of choice.

Source: Adapted from Food Network

Sunday, January 3, 2010

Welcome 2010!

Happy New Year! I have been dreaming about 2010 for a LONG time. I started graduate school in Chicago in 2004 knowing that I would not be done until close to 2010, at which point I planned to move back to St. Louis where my entire family lives. Meanwhile, Bob decided to go back to school, knowing he would graduate in the spring of 2010. We both feel that our lives have sort of been on hold during this time - waiting to have more time (and space) for our hobbies and interests. So, 2010 is a big year for Bob and I:

His graduation and my hooding ceremony:


A big move to St. Louis:

New jobs: (Bob will be working as a PT and I'll be working with fruit flies!)


House shopping:


And one of my favorite parts is that my cousin Chris, who joined the Navy just as I was starting graduate school, will have completed his service and is moving back to St. Louis too.
I am beyond excited to be near my parents and extended family again!

Since it's the beginning of a brand new year, I'd like to reflect back on 2009. I feel like I have grown so much in my cooking since starting this blog last March - it has really pushed me beyond my comfort zone and forced me to try new things. I have now worked with mock marzipan, royal icing, and yeast breads, just to name a few. I am so thankful to each and every one of you who read my blog and who comment on the recipes I post!

To celebrate the occasion, I've decided to go through the things I made in 2009 and choose my favorites. I realized I couldn't pick just one favorite of each category of food, so I decided to just pick my top recipes and list them here. This is hard because I typically only post something if I really like it, so I usually recommend it all. To be featured in this list, the recipe must meet my standards - most importantly, taste amazing - when I read the title of these recipes my mouth actually starts watering - that's how good they are. As a cooking blogger, it's difficult for me to repeat recipes because there are SO MANY fabulous ones out there to try (I have about a million starred in Google reader to prove it!) To be honest, it's really only the super special recipes that I actually make a second time. These are recipes that I plan to make again and again. Sometimes it's not even my choice - it's that Bob requests them over and over. Funnily enough, a lot of my top recipes are from Giada De Laurentiis! Not on purpose, it's just how it turned out.

In no particular order, this is my list of "must makes" from 2009:

Blueberry Ricotta Pancakes - This is a simple recipe from Giada because it uses store bought pancake mix, but it's a semi-homemade approach that tastes incredible. The ricotta cheese really elevates the pancakes to a new level. I am a pancake snob and only like them super light and fluffy, and these pancakes deliver!

Panzanella - I absolutely LOVE this classic tomato and bread salad recipe of Giada's. Perfect for summer when tomatoes are at their peak, but still great the rest of the year.

Chicken Tortilla Soup - I have made many chicken tortilla soups before and never quite found the right one . . . until this one. I love it's simplicity - no corn, no beans, just a super tasty broth with a few veggies, and some chicken of course. The toppings are exceptional. I think each of them adds another flavor dimension. I recently made this for my family and they loved it!

Ribollita - I would have to say this was one of my most surprising recipes (it's Giada's). The whole time making it I was convinced I would hate it - it didn't look appetizing and I really planned on having to eat crackers for dinner. Not only did I eat the soup, I had a second bowl. It was that good. And now here it is on my top recipes lists for 2009. Go figure!

Chicken Gyros - I have made these at least 5 times in the last 5 months! They are SOOO good. The most recent time I made an amazingly delicious flat bread, which I will post soon. It took these from awesome to indescribable :)

Garlic Chicken - Serve with rice, serve with rice noodles, just serve!

Triple T Deluxe Pizza - One of the only recipe on this list that is my own, and it's not even a recipe! The crust is from Cook's Illustrated and truly makes the pizza. The toppings are a great combination, I think. This was the first time I made pizza at home and thought, "hey, this is better than I can get delivered" - no joke.

Rigatoni with Sausage, Pepper, and Onions - Just thinking about this dish makes my mouth water (another Giada recipe). The sweet onions and peppers, the tangy tomato sauce, the comforting pasta, and one of my favorite flavors - marsala wine. This is one of my favorite dishes of all time!

Chicken with Dijon Mascarpone Sauce - Love this recipe! Yet another one from Giada - what can I say, she's knows good Italian food! Get your mascarpone cheese at Trader Joe's if you can - so much cheaper. This recipe is so indulgent. I save it for special occasions and company.

Fresh Salsa - The first time I made this, I was skeptical. How could I like it more than the great salsas you get in Mexican restaurants? I was mistaken - this salsa is right up there with the best of them. It's fantastic served with quesadillas, enchiladas, or tacos, or by itself with tortilla chips. I served this as an appetizer when my cousin and her boyfriend were over one night. He kept saying how good it was, then kept apologizing for repeating himself - it was cute :)

Spinach and Chicken Quesadillas - My favorite quesadilla recipe so far! In my opinion it's the fajita seasoning that makes it special (I credit Annie for that addition!) It was through this recipe that I realized my love of Monterey Jack cheese - it's perfect for Mexican food!

Tres Leches Coconut Cupcakes with Dulce de Leche Buttercream - Wow. Seriously that word sums it up. These were incredible. I still have people at work say to me "you know, you can make those anytime, you don't have to dress them up as Easter Chicks." I take a LOT of desserts into work, and for this one to stand out as much as it did really shows it's a great recipe. I can't wait to make these for my dad because I know he will LOVE them!

Pumpkin-Chocolate Tart - Not only is this one of my favorite desserts in terms of decoration, but this tart is fantastic. The combination of the sour cream and pumpkin makes a super tasty filling. The gingerbread-tasting crust is spicy and delicious, and it's coated in solid chocolate! I plan to make this again next fall for sure.

Chocolate and Toasted Coconut Covered Homemade Marshmallows - Homemade marshmallows are fabulous on their own, but as soon as I dipped them in chocolate and rolled them in toasted coconut, I had a hit! These are just like candy. My only mistake was not making more of them! Next year, I will be prepared with plenty of chocolate and coconut on hand to make a bunch of these.

Triple Chocolate Biscotti - I'm certainly not a biscotti expert, since these were the first I've ever tasted, but what a great little cookie! I loved the combination of white and bittersweet chocolates. These are great on their own or dipped in your favorite coffee, tea, or even milk.

Chicken Marbella - This is such a famous recipe and probably needs no introduction, but if you've never tried it, you must. Great for a crowd or a small group with yummy leftovers, the flavors in this dish are truly wonderful.

Double Chocolate Layer Cake - Decadent and rich - this dessert is perfect for chocolate lovers like yours truly. I'm not surprised it's the most accessed recipe on Epicurious.com!

Spicy Roasted Chicken - Pam has several great looking chicken recipes - all of which I'd love to try. This one is so delicious. I love the spices and the chicken turned out very juicy.

Chicken Pesto Pizza - I loved this pizza! It's a blend of sweet peppers, zucchini, and chicken, flavored with Italian seasoning. The ingredients magically combine to make one fantastic dish.

Bailey's Irish Cream Cheesecake - Of all the cheesecakes I've made, this is my favorite. Such a creamy filling covered in ganache - yum!

And just for fun, these are the top posts that have received the most hits according to Google Analytics:

1. Bacon Stuffed Cherry Tomato Appetizers (Thanks for the recipe Kat!!!)

Monday, October 12, 2009

Peach Blueberry Crumbles and a restaurant review!

This summer Bob and I visited my sister and her boyfriend in Michigan. On our way home we did something I've always wanted to do - blueberry picking! We had so much fun seeing the blueberry bushes and picking two varieties of our own blueberries. I think there's something to be said about seeing food growing and realizing where it comes from - too often I forget about that when I grocery shop.

We now have a freezer full of blueberries! I made this recipe back in August when we had some fresh Michigan peaches as well, but I'm sure frozen peaches would work wonderfully. I actually used the rest of the peaches we had and made up a big batch of this filling which is in the freezer for a rainy day when I'm missing my summer fruits!

These crumbles were so delicious, as you can imagine! In my book, you can't go wrong with peaches, blueberries, and a crumb topping!

And lastly, when I started my blog I had a certain 'vision' (stated below) about the different things I would include. One of these things was restaurant reviews - which I've never actually done before. However, since Bob and I have actually been to several new restaurants lately with all the visiting parents, I thought I would share our thoughts for those of you living in or planning to visit Chicago.

Several weeks ago Bob's dad was in Chicago on business, so we all went to Roy's. The owner of Roy's is Roy Yamaguchi, who competed in Top Chef Masters. Roy's restaurants are actually in a number of states, so check their website to see if there's one near you! The cuisine is called Hawaiian Fusion, and it was fantastic! Bob and his dad shared the spare ribs appetizer, and we all split the lobster potstickers with miso brown butter. They thought the ribs were wonderful - very tender. I loved the potstickers! I would have never thought a butter sauce would pair perfectly with potstickers, but it really did. Bob had the scallops with squash puree, spinach, and pumpkin seeds - he said it was soooo amazing. His dad had the Butterfish, which he said was incredible. And I had a chicken dish, which was really delicious (I'm slowly easing my way into seafood - at least I ate the lobster potstickers!). We decided not to order their specialty chocolate souffle, but I'd love to go back to try it! Just a note on the menu - it changes often, so these items may not necessarily still be available, but this restaurant is fabulous so I'm sure anything you get there would be great!

Ok, recipe time:


Peach Blueberry Crumbles

Serves 2 (originally recipe serves 5-6).

Ingredients:
For the fruit:
2 peaches
Squeeze of lemon juice
1 Tablespoon + 1 teaspoon granulated sugar
2 teaspoons all-purpose flour
2 Tablespoons + 2 teaspoons (1/6 cup) fresh blueberries

For the crumble:
2 Tablespoons + 2 teaspoons (1/6 cup) all-purpose flour
1 Tablespoon + 1 teaspoon granulated sugar
2 teaspoons light brown sugar, lightly packed
dash of salt
dash of cinnamon
1 Tablespoon + 1 teaspoon cold unsalted butter, diced

Directions:
Preheat oven to 350F.
1. Make the fruit: Place peaches in boiling water for 30 seconds to 1 minute, then immediately transfer to cold water. Peel peaches and slice. Combine lemon juice, sugar, and flour in a small bowl, then gently toss in peaches and blueberries. Let sit for 5 minutes, then spoon into 2 ramekins.

2. Make the topping: Combine flour, sugars, salt, cinnamon, and butter with an electric mixer until the butter is the size of peas. Rub the mixture with your fingers until it's in big crumbles, then sprinkle it over the fruit.

3. Place the ramekins on a sheet pan lined with parchment paper and bake for 40 - 45 minutes, until tops are browned and crisp, and juices are bubbly.

Enjoy! :)

Source: Adapted from Aggie's Kitchen (originally from Barefoot Contessa)

Tuesday, October 6, 2009

Introducing the BEST gift . . .


I had the public seminar for my thesis on Friday - technically a requirement for our graduate program, but it's more of a fun day where a student's family comes to celebrate. After my talk, we all headed to a conference room for cake and champagne, and my wonderful and generous lab gave me a gift - A KITCHENAID MIXER!!!!!!!!!!!!!!!!!!!!!!!!!!!! I was in shock! I guess I talk about wanting one more than I thought - haha. They know I love purple, so they got it in Boysenberry - seriously a beautiful color. I never thought I would be able to decide on what color mixer to get some day, so I'm thrilled that the decision has been made for me and that I LOVE IT! I also love that every time I look at it I will remember that they gave it to me. I have so many recipes that I can make with my new mixer, and so many things that will be so much easier! Of course I will have to pick something amazing to make for a future lab meeting :)

And because I feel strange posting without a recipe, here's something I made a while ago - Blueberry Pocket Pies. I used this filling and this crust recipe, and got the idea from Mini Baker to use cookie cutters to make them into fun shapes. The only problem with these was that there is a skewed ratio of crust to filling - I guess I prefer a little more filling, so next time I'll make them bigger. I also cooked the filling before putting it into the pies, and I think this was the wrong way to go, because the filling sort of evaporated once in the pies. I think keeping the berries raw and letting them cook for the first time in the pies will help maintain the moisture. I know it's no longer blueberry season, but if you're like me and have a freezer full of blueberries, this is a great way to use them up!

Out of curiosity, do most people out there have KitchenAid mixers? (It always seems that way to me!) What color is yours? :)


Wednesday, August 19, 2009

Dark Chocolate Mascarpone Brownies with Blueberry Ganache

I feel like such a blog slacker lately!  Between all of the traveling we have been doing and writing my dissertation, things have been so busy this month! Luckily I have been able to make a few things in the meantime.

Sometimes I like going through the archives of my favorite cooking blogs to discover recipes that may have been posted before I became a reader. Several months ago, I was doing this for Jenny's blog, Picky Palate. I came across this recipe for Dark Chocolate Mascarpone Brownies with Blueberry Ganache - don't they just sound decadent?!? I saved the recipe to my desktop and waited for an excuse to make them. Each time I opened my laptop, there the recipe sat taunting me. I finally made the decision that I would make these for a lunch our lab was having to say goodbye to our summer undergraduate student before she returned to college. 

These brownies were delicious! Although I prefer a more chewy brownie, these are more cake-like, so I just pretended it was a very moist cake. My favorite part is the ganache - seriously brilliant idea of Jenny's to add the blueberry sauce/syrup - it gives the best flavor. I think many other versions of this would be great too - add a little raspberry or strawberry syrup, or even some Framboise! In summary, the brownies were good, but the ganache was amazing!!!

One question to toss out there - why do people pronounce it "maRSCapone" when it's spelled "maSCARpone"???  I think in Italian the proper way to say it "mas-car-pon-AY," but what do we say in America without sounding like don't know the word? This always bugs me!
Dark Chocolate Mascarpone Brownies with Blueberry Ganache

Ingredients:
1 cup unsalted butter
2/4 cup best-quality semisweet chocolate chips (such as Ghirardelli)
1 cup sugar
1/2 cup Hershey's Dark cocoa powder
8 ounces mascarpone cheese, softened
6 eggs
2 teaspoons vanilla extract
1 cup all-purpose flour
1/2 teaspoon fine salt
Ganache, recipe below

Directions:
Preheat oven to 325F.  
1. Butter a 13 x 9-inch pan or 2 9-inch round pans and set aside.

2. In a small saucepan, melt the butter and bring it to just below a boil. Place the chocolate chips in a large bowl. Pour the hot butter over the chips and let stand for 30 seconds. Stir until completely melted. 

3. Sift in the sugar and cocoa powder. Beat in the mascarpone, eggs, and vanilla.  Mix until smooth. Gently fold the flour and salt into the batter.

4. Pour the batter into the prepared baking pan(s) and spread evenly. Bake for 45 - 50 minutes for the 13 x 9 pan (I used 2 9-inch round pans and it only took 20 minutes!)

5. Cool for 10 - 15 minutes. Spread the warm ganache over the brownies. Allow the ganache to set completely before cutting into squares.


Blueberry Ganache

Ingredients:
1 12-ounce bag best-quality semisweet chocolate chips
2 cups frozen blueberries
1/2 cup sugar
1/2 cup heavy cream
4 Tablespoons unsalted butter

Directions:
1. Place the chocolate chips in a large mixing bowl and set aside.

2. Place the blueberries and sugar in a small saucepan over medium heat. Cook and stir until the mixture becomes sauce-like and bubbly. Pour into a sieve or strainer that is placed over the bowl containing the chocolate chips to catch the blueberry liquid. Discard the remaining blueberries. 

3. Bring the cream and butter to just below boiling in a small saucepan over medium heat. Pour the hot mixture over the chocolate and let stand for 30 seconds. Stir the mixture until smooth. The ganache should be warm when used for spreading.

Source: Picky Palate

Tuesday, August 4, 2009

Fresh Blueberry Pie

Last week blueberries on sale for 99 cents a pint!  (They are typically $4.99 a pint at our store). So, I bought 4 pints to use and freeze! My dad suggested that I make a pie with a "criss-cross top," which I thought was a fantastic idea considering I've never made a lattice topped pie before but have always wanted to.  This pie was delicious! It was a little less sweet than the Mixed Berry Pie, which was almost like a jam . . . mmm jam. This pie was perfect paired with whipped cream!

Fresh Blueberry Pie

Ingredients:
Pie crust for a 2-crust 9-inch pie
4 cups fresh blueberries, rinsed and dried
1/2 cup sugar
2 Tablespoons lemon juice (~1 medium lemon)
2 teaspoons finely grated lemon zest (I used all of the zest of the medium lemon)
2 Tablespoons cornstarch
dash of salt
milk to brush on crust and sugar to sprinkle on top

Directions:
Preheat oven to 425F.
1. Prepare crust. Press the bottom crust in a pie plate. 

2. In a large bowl, add sugar, lemon juice and zest, cornstarch, and salt. Mix well. Add fresh berries and stir to coat evenly. Transfer berries to pie plate containing the bottom crust.

3. Roll top crust out into a large oval (~10 inches x 8 inches). Using a clear plastic ruler and a knife or pizza cutter, cut strips of desired width (mine were 1-inch).  Lay parallel strips across the berries, all in one direction.  Fold back every other strip and then lay a strip perpendicularly across berries (to make lattice). Continue to do this by alternating which strips are folded back. You may leave as much space as you desire between the strips - you can even leave no space at all, which simply makes a solid top crust with a beautiful design, but in this case you might want to roll the dough thinner otherwise the top crust will be a double layer (and you would run out of dough!)

4. If desired, brush top crust with milk (I used skim), then sprinkle with sugar.

5. Bake for 40-50 minutes or until crust is golden. You may need to cover the edges with aluminum foil after 10-20 minutes to prevent them from over-browning.

6. After baking, let pie cool at least a few hours before slicing. Enjoy with some whipped cream!!! 

Source: Adapted from the Pie and Pastry Bible

Monday, July 20, 2009

Fresh Berry Tart

I have wanted to make a tart for a very long time - years even - and in particular this Fresh Berry Tart, as it's on the cover of one of my favorite cookbooks. Unfortunately, I did not have a tart pan and could never rationalize buying one just to satisfy my tart-making urge. Earlier this summer, my mom gave me a hand-me-down tart pan, and I couldn't wait to use it. My cousin's birthday was in mid-June, and she loves fresh fruit, so I thought it was the perfect opportunity to experiment with my first tart. 

Like I've said before, the recipes in the Pie and Pastry Bible are lengthy and include a lot of details, which are extremely helpful but can make assembling a dessert like this somewhat overwhelming. For example, the book groups recipes by type - the dough recipes are first, followed by the pastry cream recipes, and then other recipes for add-ins. This means that the actual tart recipe refers you to one page for the crust recipe, to another for the pastry cream, and then to a third for the whipped cream that is added to the pastry cream. I'm exhausted just thinking about it! :) I hope that I've been able to simplify the recipe here. When broken down into steps, it's really not that difficult or time consuming, it just takes some organization. 

I dropped this tart off with my cousin on her birthday, but there was a little extra dough and filling, so I filled a ramekin with it so Bob and I could taste test beforehand. We really liked this tart, especially the pastry cream! I will definitely be trying more varieties in the future!


Fresh Berry Tart

Ingredients:
1 batch Sweet Cookie Tart Crust (see recipe below)
1 batch Whipped Cream Pastry Cream (see recipe below)
3-4 cups fresh berries, rinsed and dried
3 Tablespoons + 1/3 cup apricot preserves, warmed and strained 

Directions:
1. Brush cooled crust with 3 Tablespoons strained warmed apricot preserves. 

2. Put whipped cream pastry cream inside shell. Arrange fruit on top. Refrigerate for 1-3 hours.

3. Brush strained warmed apricot preserves (~1/3 cup) on top. Serve immediately or refrigerate for up to an hour before serving.

Sweet Cookie Tart Crust
(Pate Sucree)

For a 9 1/2- or 10-inch by 1-inch tart pan

Ingredients:
8 Tablespoons unsalted butter, cold, cut into 1-inch cubes
1/4 cup superfine sugar (can pulse regular sugar in food processor to make superfine)
200 grams (1 1/2 scant cups - dip and sweep method) all-purpose flour
1/8 teaspoon salt
1 large egg yolk
2 Tablespoons heavy cream

Directions:
1. Prepare the tart pan by greasing and lightly flouring, tapping out excess flour (or use Baker's Joy).

2. In a food processor with a metal blade, pulse the butter and sugar about 15 times or until the butter is no larger than small peas. 

3. In a small bowl, stir together the yolk and cream. Add it to the mixture and pulse just until incorporated, about 8 times. The dough will still be in crumbly pieces. Empty into a plastic bag and press the dough from the outside just until it holds together.

4. Remove the dough from the plastic bad and place it on a very large piece of plastic wrap. Using the plastic wrap, knead the dough a few times until the dough becomes one smooth piece. Flatten it into a 6-inch disc.

5. Wrap the dough and refrigerate for 30 minutes, or freeze for 10 minutes until firm enough to pat into the pan or to roll. 

6. Roll the dough to 11 inches (for a 9 1/2-inch tart pan) between pieces of floured plastic wrap. Slip dough onto a baking sheet and into the refrigerator for a few minutes before transferring to the tart pan. 

7. Put dough into pan and chill 1 hour. Meanwhile preheat oven to 400F (for at least 20 minutes before baking crust).

8. Spray a piece of parchment paper with cooking spray and fit into tart, add rice or beans as weights.

9. Bake tart on a baking sheet for 5 minutes, then lower the heat to 375F for 15 to 20 minutes or until set. If not set, the dough will stick to the parchment paper. If this is the case, lift out the weights with the parchment and prick dough lightly, then continue baking for 10 to 15 minutes more.

Pastry Cream

Ingredients:
2 large eggs
3 Tablespoons cornstarch
2 liquid cups half-and-half
1/2 cup sugar
1 teaspoon pure vanilla extract
a pinch of salt
1 Tablespoon unsalted butter 

Directions:
1. Have a strainer set over a small bowl near the range.

2. In a separate small bowl, whisk together the eggs and cornstarch. Gradually add 1/4 cup of the half-and-half, whisking until the mixture is smooth and the cornstarch is dissolved.

3. Place the sugar in a medium, heavy, nonreactive saucepan. Stir in the remaining 1 3/4 cups half-and-half and the salt. Over medium heat, bring the mixture to a full boil, stirring occasionally. Whisk 2 tablespoons of this mixture into the egg mixture. Pass the egg mixture through a strainer into a small bowl. 

4. Bring the half-and-half mixture back to a boil over medium heat. Quickly add all of the egg mixture, whisking rapidly. Continue whisking rapidly for about 20 to 30 seconds, being sure to go to the bottom edge of the pan. 

5. The mixture will become very thick. Remove the mixture from the heat and whisk in the butter. Whisk in the vanilla extract at this point. 

6. Immediately pour the mixture into a bowl and place a piece of greased plastic wrap directly on top of the cream to prevent a skin from forming. Allow to cool to room temperature, about 1 hour, then refrigerate until cold.

7. For whipped cream pastry cream, fold whipped cream into the plain pastry cream. Use from 1/2 to 1 1/4 cups heavy cream, whipped. To prevent thinning, it is preferable to use gelatin-stabilized whipped cream (see Superstabilized Whipped Cream below).

Superstabilized Whipped Cream

Ingredients:
1/2 teaspoon gelatin
1 Tablespoon water
1/2 liquid cup heavy cream, cold
1 teaspoon sugar

Directions: 
1. Refrigerate the mixing bowl and beater for at least 15 minutes.

2. In a small heatproof measuring cup, place the gelatin and water and allow it to sit for 5 minutes. Set the cup in a pan of simmering water for a few minutes, stirring occasionally until the gelatin is dissolved (or microwave on high power for a few seconds, stirring once of twice). Set it aside briefly. (The mixture must still be warm, or it will lump when added to the cold cream.)

3. In the chilled mixing bowl, beat the cream and sugar until the cream just begins to thicken. Gradually beat in the warm gelatin mixture and beat just until stiff peaks form when the beater is raised.

Store:  Refrigerated, up to 3 days

Source:  Adapted from the Pie and Pastry Bible

Friday, July 10, 2009

Easy Cheese Danish

My dad saw Ina Garten make these Cheese Danish when I was home back in March. He kept asking when I was going to make them for him :) I went home the weekend before Father's Day and thought that was the perfect time to try this recipe. I had made Blueberry Ricotta Pancakes for breakfast (which by the way are even better with my favorite pancake mix, Aunt Jemima!) so we had some blueberries left over. My sister suggested I stick a few in some of the danish, and it was a great idea! The ones with blueberries were a hit! The combination of lemon and blueberry went really well together, otherwise the lemon is a bit overpowering. I might suggest backing off on the lemon zest if you don't use blueberries, unless you really like lemon.

This was my first time working with puff pastry. I have to say, it's amazing! I really couldn't believe how wonderfully it puffed up in the oven. This is such a quick, simple recipe that would be great for a brunch or even as dessert!

With blueberries:
Without blueberries:


Easy Cheese Danish

Ingredients:
8 ounces cream cheese (I used light)
1/3 cup sugar
2 large or extra-large egg yolks, at room temperature
2 Tablespoons ricotta cheese (I used part-skim)
1 teaspoon pure vanilla extract
1/4 teaspoon kosher salt
1 Tablespoon grated lemon zest, or less to taste (~2 lemons)
2 sheets (1 box) frozen puff pastry, thawed
1 egg, beaten with 1 Tablespoon water (for egg wash)
fresh blueberries, optional

Directions:
1. Preheat oven to 400F. Line a sheet pan with parchment paper.

2. Place the cream cheese and sugar in the bowl of an electric mixer and cream together on low until smooth. With mixer still on low, add the egg yolks, ricotta, vanilla, salt, and lemon zest and mix until just combined. Don't whip!

3. Unfold 1 sheet puff pastry onto a lightly floured board and roll it slightly with a floured rolling pin until it's a 10 by 10-inch square. Cut the sheets into quarters with a sharp knife.
 
4. Place a heaping tablespoon of cheese filling into the middle of each of the 4 squares. Brush the border of each pastry with egg wash and fold 2 opposite corners to the center, brushing and overlapping the corners of each pastry so they firmly stick together. Brush the top of the pastries with egg wash. Place the pastries on the prepared sheet pan. Repeat with the second sheet of puff pastry and refrigerate the filled Danish for 15 minutes.

5. Bake the pastries for about 20 minutes, rotating the pan once during baking, until puffed and brown. Serve warm.

Monday, June 15, 2009

Ricotta Pancakes - Two Ways

A couple years ago Bob's parents saw a recipe for ricotta pancakes on Food Network. They made them for us when we were visiting, and they were so good. Several weeks ago I decided I wanted to make some ricotta pancakes. Not sure exactly which recipe they used, I went to the Food Network website. I found this one by Bobby Flay and this one by Giada de Laurentiis. Not able to decide between them, I decided to have a face off between the two recipes. I didn't make them on the same day, but I've included my review of each recipe below. For the Lemon Ricotta pancakes, I made a blackberry syrup, given the recent sales on blackberries. Giada's Blueberry Ricotta Pancakes come with a recipe for honey syrup, so I made that. While these recipes are quite different, their common ingredient ricotta cheese makes for a nice, airy pancake. I really don't like dense, heavy pancakes, so this was a big plus in my book. And both pancakes are great served with some delicious Oscar Mayer turkey bacon!

Lemon Ricotta Pancakes
Ingredients:
3/4 cup all-purpose flour
1 Tablespoon baking powder
1/2 teaspoon ground nutmeg
1/4 teaspoon salt
2 Tablespoons sugar
1 cup ricotta cheese
2 eggs
2/3 cup milk
1 lemon, zested and juiced
Butter, for griddle

Directions:
1. Preheat a nonstick griddle.

2. Combine flour, baking powder, nutmeg, salt, and sugar in a small bowl. Whisk together the cheese, eggs, milk, and lemon juice and zest in a large bowl.

3. Whisk the flour mixture into the wet ingredients until just combined.

4. Brush the hot griddle with butter. For each pancake, pour approximately 1/4 cup measure of the batter on the griddle and cook until light and golden. Repeat until no batter remains.

Review: These pancakes cook up light and fluffy. We liked the taste, although the lemon flavor may be a bit too prominent. I knew when I saw nutmeg in this recipe that I should have just omitted it. Nutmeg is fine in apple pie, and I think it's cute when Bob says to me "You're a nut, Meg," but I tend to find it odd in other food. For these pancakes the nutmeg is a bit too over-powering. Maybe cinnamon might have been better, or nothing at all. Overall, we liked these pancakes and I think this recipe has real promise, with a few minor adjustments to suit our preference. To be fair, I did not serve them with the lemon curd and fresh raspberries as Bobby suggests but rather a blackberry syrup (see below).

Source: Bobby Flay

Blackberry Syrup

Ingredients:
Original recipe:
3 cups fresh blackberries
3/4 cup sugar
1 1/2 teaspoons grated lemon zest
1/3 cup water

Scaled down:
3/4 cup fresh blackberries
3 Tablespoon sugar
1/2 teaspoon grated lemon zest
1 1/2 Tablespoons water

Directions:
1. In a heavy saucepan, combine blackberries, sugar, lemon zest, and water. Mix gently. Cook over medium heat, stirring constantly, until sugar dissolves.

2. Bring to a boil over medium-high heat. Reduce heat and simmer uncovered for 8 minutes, stirring occasionally until fruit is soft.

3. While cooking 2-3 minutes more, gently mash fruit against sides of pan with a wooden spoon or a spatula.

4. Cool to lukewarm. If desired, strain syrup by pressing through a fine-mesh sieve. Original recipe reportedly yields 2 cups with pulp, or 1 cup strained syrup.

Review: This syrup was absolutely delicious, but from 3/4 cup fresh blackberries, all I got was what is shown in the picture - about a tablespoon of syrup! This is because I strained out the seeds through a fine-mesh strainer. I think it might be worthwhile to puree the blackberries before heating them up because so much of the possible syrup is lost during straining. Also, I probably could have thinned the syrup with a little more water. It was more like a jam in the end.

Source: Adapted from Cooks.com

Blueberry Ricotta Pancakes

Ingredients:
For the honey syrup:
1/3 cup water
1/3 cup sugar
1/3 cup honey

For the pancakes:
1 2/3 cups water
1 1/2 teaspoons vanilla extract
2 cups pancake and waffle mix (Giada recommends Krusteaz; I like Aunt Jemima)
1 cup whole milk ricotta cheese (I used part skim b/c I'm a rebel!)
2/3 cup frozen blueberries
Melted butter

Directions:
Make the honey syrup: Stir 1/3 cup water and sugar in a small saucepan over medium heat until the sugar dissolves, about 5 minutes. Stir in the honey. Set aside and keep the honey syrup warm.

Make the pancakes:
1. Using a rubber spatula, stir 1 2/3 cups water and vanilla in a large bowl. Add the pancake mix and stir until just moistened but still lumpy.

2. Stir in the ricotta to gently incorporate but maintain a lumpy batter. Fold in the blueberries.

3. Heat a griddle over medium heat. Brush with the melted butter. Working in batches, spoon 1/4 cup of batter onto the griddle for each pancake (I use a 1/4 cup measuring cup).

4. Cook until golden brown, about 3 minutes per side.

5. Serve with the honey syrup.

Review: I made these for my mom, sister, Bob, and myself, and we all really liked them! Again the ricotta makes for a light and airy pancake (which I love!). If you've never had a ricotta pancake before and worry that you will taste cheese, don't, because you probably would never know there was ricotta in there unless someone told you. All of us thought the honey syrup was a nice change from the typical maple. The blueberries were delicious too. While these pancakes are more 'semi-homemade' because of the mix, they take less time to make, which is always a good a thing! Giada recommended Krusteaz mix, so I went with her suggestion. For straight up pancakes and waffles, I like Aunt Jemima's complete mix because it's more airy than say Hungry Jack or Bisquick, but I thought that it might end up being too light mixed with the ricotta. I think the important thing is just to use a complete pancake/waffle mix, rather than one that requires other add-ins like eggs.

Source: Giada De Laurentiis

To summarize, although both recipes put up a good fight, we have to declare Giada's as the winner!!!

Monday, May 25, 2009

Blueberry Crumb Bars

Happy Memorial Day! I first made these bars last August and have made them two additional times since then. They are really good! If I could change anything, I would alter the filling to crumb ratio. Although we love the crumb topping and crust, Bob and I agree that we would like more blueberry filling. Next time I make these, instead of using a 13x9 pan, I will make 1/2 the amount of crumbs and put it in an 8-inch square baking dish, but keep the amount of filling the same. One could just double the amount of filling and use a 13x9 pan, but 8 cups of blueberries would make for a pretty expensive dessert! The original recipe says to cut the butter and egg into the dry ingredients with a pastry blender. I decided to use my food processor to do this, following a method similar to my favorite pie dough. I think my crumbs come out much smaller because of this, and maybe they soak up the blueberriness? (I know that's not a word.)


Blueberry Crumb Bars

Ingredients:
3 cups all-purpose flour
1 teaspoon baking powder 
1/4 teaspoon salt
1 cup sugar
1 cup cold butter
1 egg
zest and juice of 1 lemon
4 cups fresh blueberries
1/2 cup sugar
4 teaspoons cornstarch

Directions:
1. Preheat oven to 375F. Grease a 9x13-inch pan.

2. In the bowl of a food processor, add flour, baking powder, salt, 1 cup sugar, and lemon zest, and pulse briefly to mix. Add cold butter (cut into tablespoon-sized chunks) and the egg, and pulse until the mixture is crumbly yet sticks together. Alternatively, cut the butter and egg into the dry ingredients using a fork or a pastry blender. Pat half the dough into the prepared pan for the bottom crust. 

3. In a medium bowl, stir together the sugar, cornstarch, and lemon juice. Gently mix in the blueberries. Sprinkle the blueberry mixture evenly over the crust.

4. Crumble the remaining dough on top of the blueberries.

5. Bake for 45 minutes or until top is slightly brown. Cool completely before cutting into squares. I typically cool the bars in the pan to room temperature then place the pan in the fridge overnight and cut them the next day. I think this is a bit easier.

Source: Adapted from Annie's Eats, originally from Smitten Kitchen and AllRecipes

Wednesday, April 29, 2009

Blueberry Muffins

Two Saturdays ago, half of my lab had to go into work for a big radioactivity experiment. I had seen this Blueberry Muffin recipe in Cook's Illustrated and thought this was the perfect opportunity to try it out. Maybe because it was early on a Saturday, but I totally messed up making this recipe. In my defense, I think the directions could have been a tad more clear (I've amended the recipe below). Despite my errors, they turned out delicious! I'm sure they'd be even better made the right way :)

The idea behind this recipe, according to the author, is to have a blueberry muffin recipe that works with any kind of blueberry - even the 'watery supermarket kind.' To do this, she came up with a simple jam that you swirl into the batter before baking. She also provided a few options for topping the muffins. I went with the lemon-sugar as listed in the original recipe, but I'd love to try the streusel topping next!
Best Blueberry Muffins

Makes 12 muffins

Ingredients:
For the Lemon-Sugar Topping:
1/2 cup (2 1/3 ounces) sugar
1 1/2 teaspoons finely grated lemon zest from 1 lemon


For the Muffins:
2 cups (about 10 ounces) fresh blueberries, picked over*
1 1/8 cups (8 ounces) plus 1 teaspoon sugar
2 1/2 cups (12 1/2 ounces) unbleached all-purpose flour
2 1/2 teaspoons baking powder
1 teaspoon table salt
2 large eggs
4 Tablespoons (1/2 stick) unsalted butter, melted and cooled slightly
1/4 cup vegetable oil
1 cup buttermilk**
1 1/2 teaspoons vanilla extract

Notes:
*To use frozen blueberries, substitute 2 cups frozen blueberries for fresh. Cook 1 cup berries as directed in step 3. Rinse remaining cup berries under cold water and dry well. In step 4, toss dried berries in flour mixture before adding egg mixture.

**If buttermilk is unavailable, substitute 3/4 cup plain whole-milk or low-fat yogurt thinned with 1/4 cup milk. I made my own buttermilk by adding 1 Tablespoon white vinegar to 1 cup of skim milk.

Directions:
Make the topping:
1. Stir together sugar and lemon zest in a small bowl until combined; set aside.
Make the muffins:
2. Adjust oven rack to upper-middle position and heat to 425F. Spray standard muffin tin with nonstick cooking spray. I used a silicon muffin pan with muffin liners.

3. Bring 1 cup blueberries and 1 teaspoon sugar to simmer in a small saucepan over medium heat. Cook, mashing berries with spoon several times and stirring frequently, until berries have broken down and mixture is thickened and reduced to 1/4 cup, about 6 minutes. Transfer to small bowl and cool to room temperature, 10 to 15 minutes.

4. Whisk flour, baking powder, and salt together in a large bowl.

5. In a separate, medium-sized bowl, whisk remaining 1 1/8 cups sugar and eggs together until thick and homogenous, about 45 seconds. Slowly whisk in butter and oil until combined. Whisk in buttermilk and vanilla until combined.

6. Using a rubber spatula, fold egg mixture and remaining cup blueberries into flour mixture until just moistened. Batter will be very lumpy with a few spots of dry flour; do not overmix.

7. Use an ice cream scoop or large spoon to divide batter equally among prepared muffin cups. Batter should completely fill cups and mound slightly.

8. Spoon a teaspoon of cooked berry mixture into the center of each mound of batter. Using a chopstick or skewer, gently swirl berry filling into batter using figure-eight motion. Sprinkle lemon-sugar evenly over muffins. Try not to sprinkle evenly over pan like I did - I was in a hurry :)
9. Bake until muffin tops are golden and just firm, 17 to 19 minutes, rotating muffin tin from front to back halfway through baking time. Cool muffins in muffin tin for 5 minutes, then transfer too wire rack and cool 5 minutes before serving.

Streusel Topping

Follow Best Bleuberry Muffin recipe, omitting Lemon-Sugar Topping. Prepare streusel by combining 3 Tablespoons granulated sugar, 3 Tablespoons dark brown sugar, a pinch of table salt, and 1/2 cup plus 3 Tablespoons (3 1/2 ounces) unbleached all-purpose flour in a small bowl. Drizzle with 5 Tablespoons warm, melted unsalted butter and toss with a fork until evenly moistened and misture forms large chunks and some pea-sized pieces throughout. Proceed with recipe as directed, sprinkle streusel topping over muffins before baking.

Source: Adapted from Cook's Illustrated

Saturday, March 14, 2009

Mixed Berry Pie for Pi Day!

My sister is a high school math teacher, which is why I know that today is Pi Day.  You know, pi = 3.14 and it's March 14th, get it? Anyone? No? Right . . .   

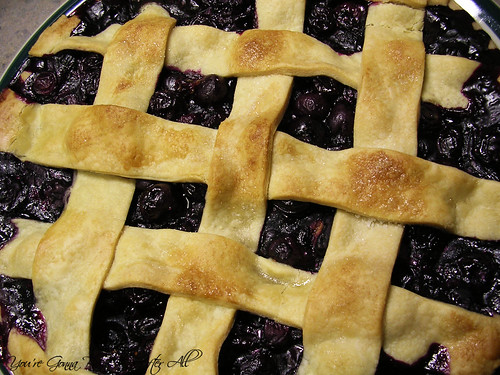
Anyway, in honor of Pi Day, I am posting the first from-scratch pie I ever made.  Back in 2007, my boss brought in her copy of Rose Levy Beranbaum's The Pie and Pastry Bible 
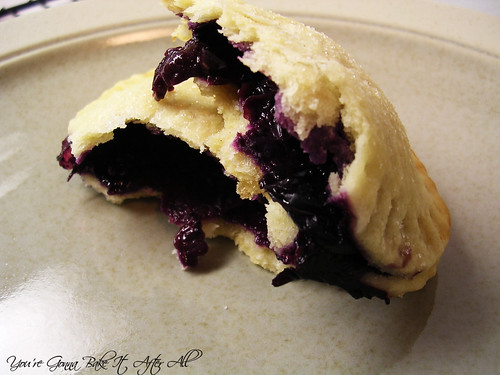
for a lab mate of mine, who then baked a Blueberry/Peach pie to share with the lab.  I had never tried blueberry pie before and didn't think I would like it, but it was sooooo good!  I don't know why I ever hesitated to try blueberry pie!  And the crust was amazing, which is odd because I usually don't like crust.  It turns out, she made it from scratch!  What?!  A pie crust that didn't come from a Pillsbury box?  (No offense, Mom!)  I never thought making a crust from scratch could be so different from the store bought ones, but it was.  
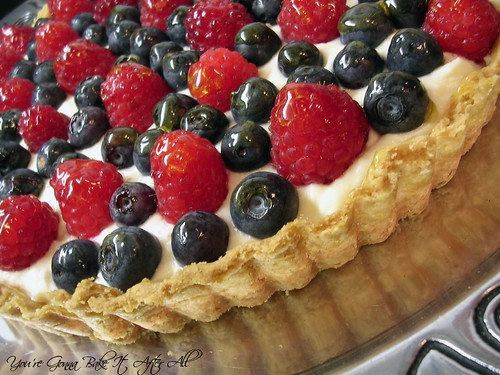
Doesn't the tart on the cover look delish?!?  I had this copy of the cookbook on loan until I received my own, along with Ms. Beranbaum's Cake Bible (more on that later), for Christmas 2008 from my mother-in-law - are you seeing a theme here :)  We both love cookbooks!  I absolutely love The Pie and Pastry Bible.  First of all, Ms. Beranbaum includes all of her measurements in terms of weight, which I love.  She also explains a lot of the science of baking - why certain steps are taken, what it really means if dough is under/over-worked, etc. And she includes tips for successful baking and troubleshooting ideas.  I can see where some might get overwhelmed by all the text - I did at first - but it really is a great, comprehensive guide to pies and pastries.  

I am also inspired by Ms. Beranbaum's beginnings as a baker.  She had no experience baking when she first got married, and learned everything she knows throughout her adult life.  That reassures me that I'm not 'behind' the learning curve; there's still hope!

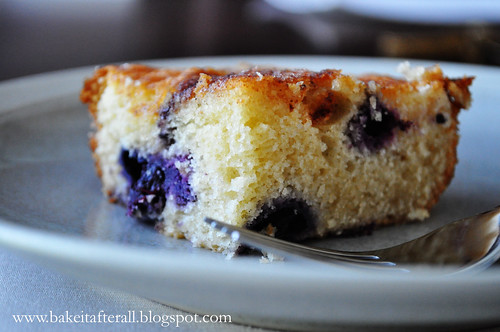
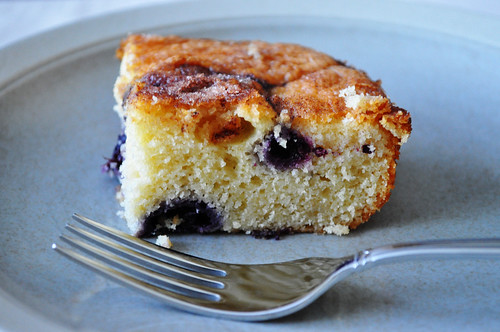
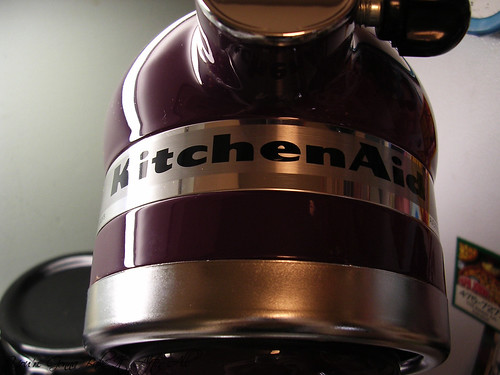
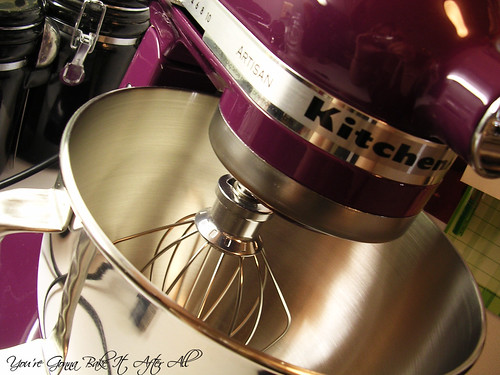
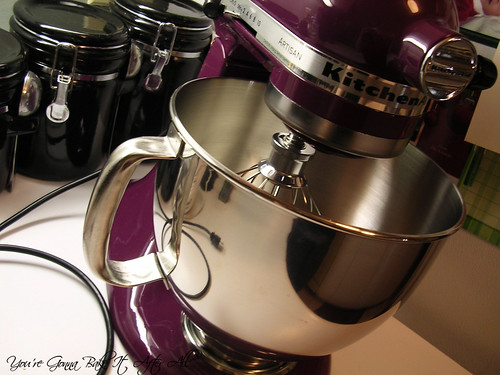
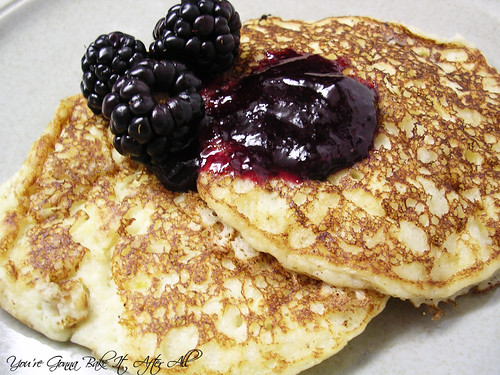
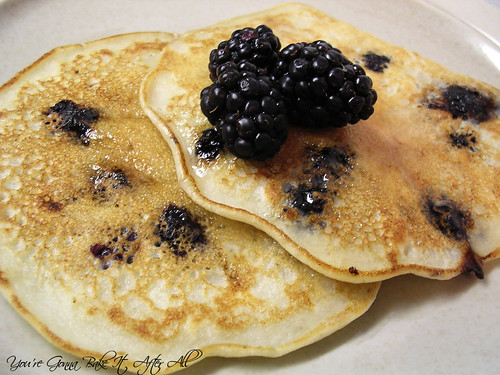
Now on to the pie.  After discovering my love for blueberry pie, I decided to make one on my own following the recipe for "Blueberry/Cranberry Internet Pie" as a guide.  I love all kinds of berries, so I though substituting mixed berries (strawberries, raspberries, blackberries, and blueberries) for the cranberries would be a good start.  The pie was so awesome that I made it again for my dad's birthday last year.  I'm including the recipe for both the crust and the filling. I love this crust recipe because it can be made in a food processor.  Unfortunately, I don't have a KitchenAid stand mixer (yet!  That's another post all it's own), so a lot of recipes are off limits for me, specifically a lot of breads and doughs - that is unless I want to knead by hand all day, which I don't!  

This is a pretty long recipe, so if you have your own crust in mind, just skip to the filling part. The whole process is a bit time consuming, but can be broken up over the course of a few days, so it's not too bad.  

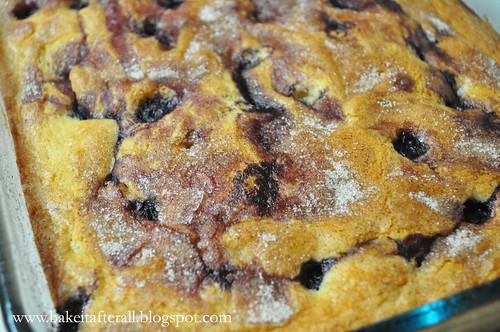
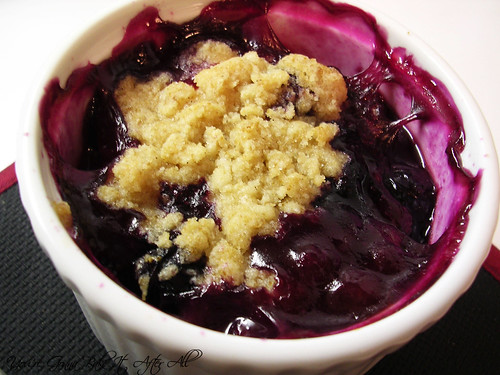
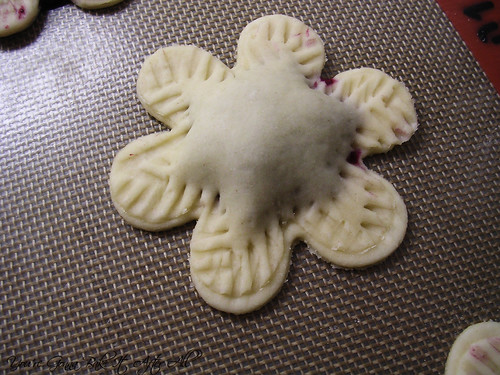
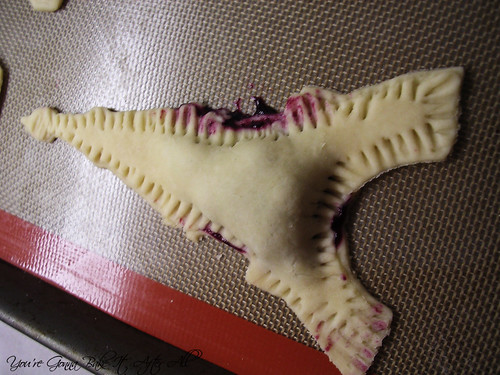
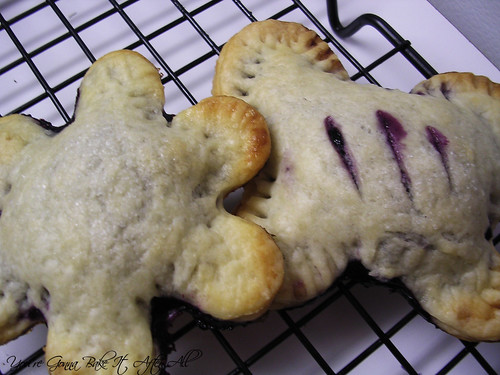
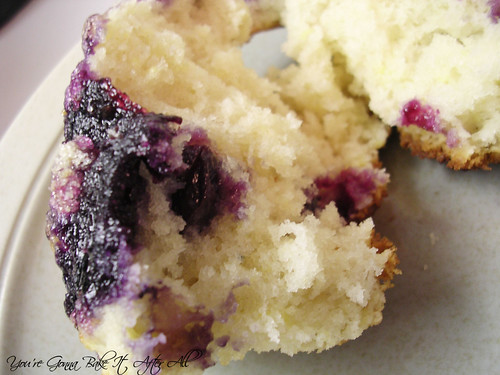
The filling burst through the top crust, so I recommend more slits to vent.

Basic Flaky Pie Crust

For a 2-crust 9-inch pie

Ingredients:
14 Tablespoons (200 g) unsalted butter, cold
2 1/4 c. + 2 Tablespoons (or 2 1/4 c. dip and sweep method*, or 320 g) pastry flour** or bleached all-purpose flour
1/4 + 1/8 teaspoon salt
Optional:  1/4 teaspoon baking powder (if not using, double the salt)
5 to 7 Tablespoons ice water
1 Tablespoon cider vinegar

*Dip and sweep method is explained under "Pointers for success for making flaky pie crusts"
**Commercial or homemade pastry flour is recommended , as it will result in a more tender crust than one made with all-purpose flour (see below how to make your own pastry flour)

Directions:
1. Divide the butter into two parts, about two thirds to one third:  4.5 oz and 2.5 oz (9 T and 5 T).  Cut the butter into 3/4-inch cubes.  Wrap each portion of butter with plastic wrap. Refrigerate the larger amount and freeze the smaller amount for at least 30 minutes.  Place the flour, salt, and optional baking powder in a recloseable gallon-size freezer bag and freeze for at least 30 minutes.  

2. Place the flour mixture in a food processor with the metal blade and process for a few seconds to combine.  Set the bag aside.  

3. Add the larger amount of butter cubes to the flour and process for about 20 seconds or until the mixture resembles course meal.  Add the remaining frozen butter cubes and pulse until all the frozen butter is the size of peas.  (Toss with a fork to see it better).

4. Add the lowest amount of ice water and the vinegar and pulse 6 times.  Pinch a small amount of the mixture together between your fingers.  If it does not hold together, add half the remaining water and pulse 3 times.  Try pinching the mixture again.  If necessary, add the remaining water, pulsing 3 times to incorporate it.  The mixture will be in particles and will not hold together without being pinched.

5. Divide the crust mixture in half at this point (for top and bottom crusts), place each portion in a plastic bag.

6. Holding both ends of the bag opening with your fingers, knead the mixture by alternately pressing it, from the outside of the bag, with the knuckles and heels of your hand until the mixture holds together in one piece and feels slightly stretchy when pulled.

7. Separately wrap doughs with plastic wrap, flatten into discs, and refrigerate for at least 45 minutes, preferably overnight.  

Storage:  Refrigerated, up to 2 days; frozen, up to 3 months.

Making your own pastry flour:  if using a scale, do two thirds bleached all-purpose flour to one third cake flour by weight.  If measuring by volume, use the following proportions:  4 cups of bleached all-purpose flour, measured by dip and sweep, and 2 1/4 cups of cake flour, measured by dip and sweep.  Stir the flours lightly before measuring and mix them well after combining them to blend them evenly.  This will make 6 1/4 cups of pastry flour (almost 2 pounds).  Store it airtight.

POINTERS FOR SUCCESS FOR MAKING FLAKY PIE CRUSTS

* For flaky crust, ingredients must be cold to start with and stay cold.
* Use the correct flour.  It is practically impossible to make a flaky crust or even one that holds together using cake flour and equally difficult to make a tender crust using unbleached all-purpose or bread flour.
* If using baking powder, be sure not to use SAS baking powders, which contain sodium aluminum sulfate, or the crust will have a bitter aftertaste.  Use an all-phosphate product containing calcium acid phosphate, such as Rumford, available in some supermarkets and most health food stores. (I found Rumford at my local grocery store - it's next to the Clabber Girl brand in a red container).
* If not weighing the flour, use the dip and sweep method:  Lightly stir the flour, then dip the cup into the flour and sweep off the excess with a metal spatula or knife.
* Brush off any excess flour on top of the dough after shaping it, as it will taste bitter after baking.


Blueberry/Mixed Berry Pie 

Ingredients:
Basic Flaky Pie Crust for a 2-crust 9-inch pie
1 1/2 cups sugar (amount for the blue/cran pie, so you can probably reduce it, I used between 3/4 cup to 1 cup)
1/3 cup cornstarch (dip and sweep method)
1 Tablespoon finely grated lemon zest 
3 Tablespoons freshly squeezed lemon juice
a pinch of salt
2 packages or 1 1/2 pounds (680 grams) frozen blueberries
1 package frozen mixed berries
1 Tablespoon heavy cream or milk
1 Tablespoon sugar

Directions:
1. Make the dough.

2. Remove the dough for the bottom crust from the refrigerator.  If necessary, allow it to sit for about 10 minutes or until it is soft enough to roll.

3. On a floured pastry cloth or between two sheets of lightly floured plastic wrap, roll the bottom crust 1/8 inch thick or less and large enough to cut a 13-inch circle.  Transfer it to the pie pan, easing it in to fit up against the sides.  Trim, if necessary, to 1/4 inch past the edge of the pan.  Cover it with plastic wrap and refrigerate it for a minimum of 30 minutes and a maximum of 3 hours.

4. In a large non-reactive saucepan, stir together the sugar, cornstarch, lemon zest, lemon juice, and salt.  Add the blueberries and mixed berries and toss to coat them well.  Allow the mixture to sit for about 30 minutes or until a little liquid starts to form.  

5. Cook the berries over medium heat, stirring constantly, until very thickened and some of the the berries are just beginning to burst, about 8 to 10 minutes after it comes to a boil.  Remove the pan from heat and allow the mixture to cool completely, without stirring, about 1 hour.

6. Transfer the berry mixture to the pie shell.

7. Roll out the top crust large enough to cut a 12-inch circle.  Use an expandable flan ring or a cardboard template and a sharp knife as a guide to cut the circle.

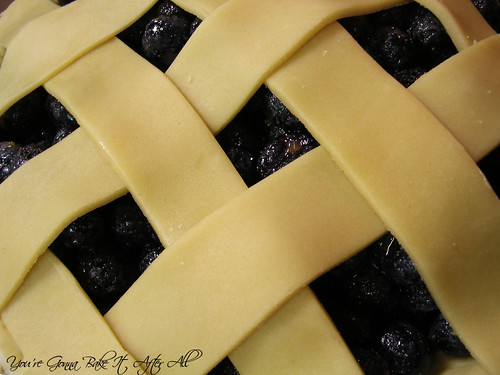
8. Moisten the edges of the bottom crust with water and place the top crust over the fruit.  Tuck the overhang under the bottom crust border and press down all around the top to seal it.  Reroll the scraps no more than 1/8 inch thick and cut them into decorative shapes.  Brush the top crust with cream or milk and arrange the decorative pieces on top of it, overlapping them slightly.  Brush them with the remaining cream or milk and sprinkle all over with the sugar.

9. Cover the pie loosely with plastic wrap and refrigerate it for 1 hour before baking to chill and relax the pastry.  This will maintain flakiness and help to keep the crust from skrinking.

10. Preheat the oven to 375F at least 20 minutes before baking.  Set one oven rack at the lowest level and one at the highest level and place a baking stone or baking sheet on the lower rack before preheating.  

11. To make a steam vent use a small cutter, the bottom of a pastry tube, or a knife to cut a small hole (about 1 inch) in the middle of the top crust.  Lift out the cut round of pastry and discard it.  I think a few slits should be cut to prevent the mixture from splitting through the top crust, which happened the first time I made this pie as shown in the picture above.  Set the pie directly on the stone and bake for 40 minutes.  Transfer the pie to the upper rack and continue baking for 20 to 30 minutes or until the crust is golden brown.  (The filling will not bubble).  After 1 hour, protect the edges from overbrowning with a foil ring.

12. Cool the pie on a rack for at least 6 hours before serving.

Store:  Room temperature, up to 3 days.

Her notes:  I find that in my oven it works well to bake this pie for the first 40 minutes directly on the floor of the oven instead of the bottom shelf.  Frozen blueberries work well for this filling because they release their juices more quickly than fresh ones, but fresh blueberries are fine to use as well.

My notes:  I tried baking on the oven floor, and even the lowest rack, and the bottom got too brown, too fast.  I suggest just baking it on the middle rack and monitoring it every so often.

Source:  Adapted from The Pie and Pastry Bible

  © Blogger template Brownium by Ourblogtemplates.com 2009

Back to TOP