Search This Blog

Showing posts with label Vegetarian. Show all posts

Sunday, October 18, 2015

Baked Ziti

DSC_0487_BakedZiti

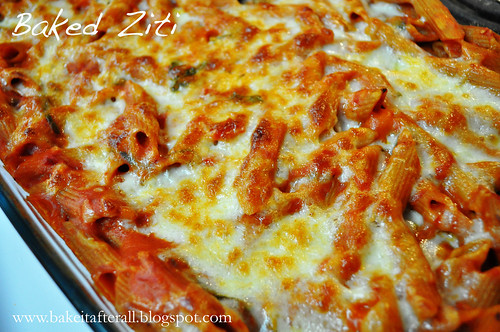
I started making this Baked Ziti when Bob and I were on a Sopranos kick many, many years ago. We had rented the last season from mail-order Netflix and watched multiple episodes a night. It was the influence of the Sopranos that led Bob to start referring to this recipe as "Meghan's Effing Ziti." Anyone who has seen this show will understand why. This makes a big pan of ziti - enough for the two of us for dinner and leftovers for lunch the rest of the week, so I like to make it on Sundays or Mondays. It's a great "Meatless Monday" meal!

Baked Ziti

Ingredients:
1 tablespoon olive oil
6 garlic cloves, minced
1/4 teaspoon red pepper flakes
Salt and ground black pepper
1 28-ounce can crushed tomatoes
3 cups water
12 ounces ziti (3 3/4 cups)
1/2 cup heavy cream (I usually use milk or fat-free half-and-half)
1/2 cup grated Parmesan cheese
1/4 cup minced fresh basil (or 1 tablespoon + 1 teaspoon dried)
1 cup shredded mozzarella cheese

Directions:
1. Adjust oven rack to middle position and heat oven to 475F.

2. Combine oil, garlic, pepper flakes, and 1/2 teaspoon salt in 12-inch ovensafe nonstick skillet and saute over medium-high heat until fragrant, about 1 minute. Add crushed tomatoes, water, ziti, and 1/2 teaspoon salt. Cover and cook, stirring often and adjusting heat as needed to maintain vigorous simmer, until ziti is almost tender, 15 to 18 minutes.

3. Stir in cream, Parmesan, and basil. Season with salt and pepper to taste. (At this point, I transfer the pasta to a 13x9-inch Pyrex dish). Sprinkle mozzarella evenly over pan. Transfer skillet to oven and bake until cheese has melted and browned, about 10 minutes. Serve.

Source: Adapted from The Best 30 Minute Recipe cookbook

Sunday, October 11, 2015

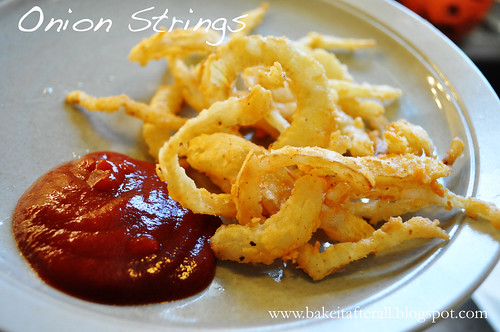
Onion Strings

DSC_0088_OnionStrings2

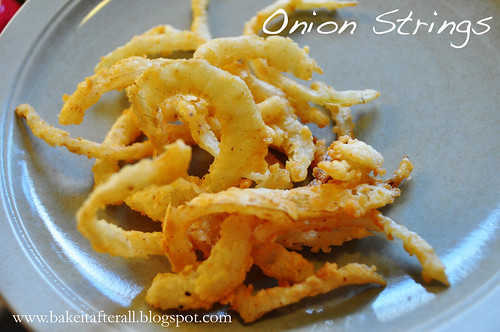
Each year, my sister and her husband join us for an Apple Cider Doughnut making day.  It's one of my favorite days of the fall.  In the last few years, we've decided that we may as well put the hot oil to good use and fry something else!  We now follow up the doughnuts with these Onion Strings from the Pioneer Woman.  They are so good, they may even beat the doughnuts...no seriously, they are that good! We only deep fry once a year, so you better bet we are getting the most out of it and making these. If you ever find yourself with a pot of hot oil, try these. They will not disappoint!

Onion Strings

Ingredients:
1 whole large onion, sliced very thin
2 cups buttermilk
2 cups all-purpose flour
1 scant tablespoon table salt
1/4 - 1/2 teaspoon cayenne pepper
1 - 2 quarts Canola oil
Salt and freshly ground black pepper to taste

Directions: 

1. Place sliced onions in a baking dish, cover with buttermilk, and soak for at least an hour.

2. Combine dry ingredients and set aside.

3. Heat oil to 375F in a Dutch oven. Grab a handful of onions, throw into the flour mixture, tap to shake off excess, and plunge into hot oil. Fry for a few minutes and remove as soon as golden brown. Season with salt and pepper as desired and serve immediately.

4. Repeat with remaining onions.

DSC_0084_OnionStrings1

Source: Pioneer Woman

Wednesday, August 26, 2015

Baked Jalapeño Poppers

IMG_1490_JalapenoPoppers


One of my favorite things about summer is the seasonal vegetables and fruit, especially if it's from our or our friends' gardens. Our neighbors gave us a bunch of their homegrown jalapeños.  All of my recipes that call for jalapeños usually only use 1 or 2, not 11! My mom suggested I make jalapeño poppers, so I found this recipe via Pinterest and was excited to try it. These were so, so good.  Everyone loved them, even Ava.  She was really sad that she only got 1 and talked about them for a long time after.  Bob and I decided that we need to serve them at our annual Halloween party and call them "Halloweeño Poppers" :-)

Baked Jalapeño Poppers

Ingredients:
1 tablespoon olive oil
1/2 cup Panko breadcrumbs
4 ounces cream cheese, softened
1/2 cup sharp cheddar cheese
1/2 teaspoon garlic powder
1/4 teaspoon onion powder
kosher salt and freshly ground black pepper, to taste,
6 jalapeños, halved lengthwise, seeds sand membranes removed (I always use disposable kitchen gloves when I do this) Note: my jalapeños were homegrown from a neighbor and pretty small so I ended up using 11 of them.

Directions:
Preheat oven to 350F.

1. Line a baking sheet with foil or parchment paper.

2. Heat olive oil in a small skillet over medium-high heat. Add Panko and cook until browned, stirring frequently, about 3 minutes. Transfer to a bowl and set aside.

3. In a medium bowl, cream together cream cheese, cheddar, garlic and onion powders, salt and pepper.

4. Spoon the filling into each jalapeño cavity. Place on prepared baking sheet, filled side up, and bake until the filling is runny and golden, about 15 - 20 minutes.

5. Sprinkle with the toasted Panko and serve immediately.

Source: Adapted from Damn Delicious

Thursday, August 20, 2015

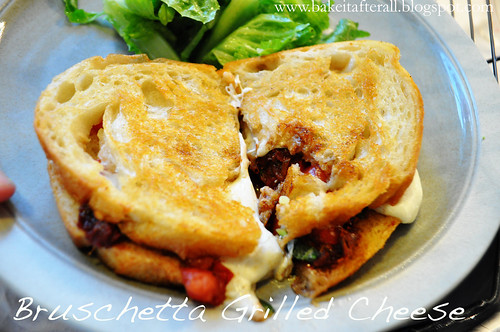
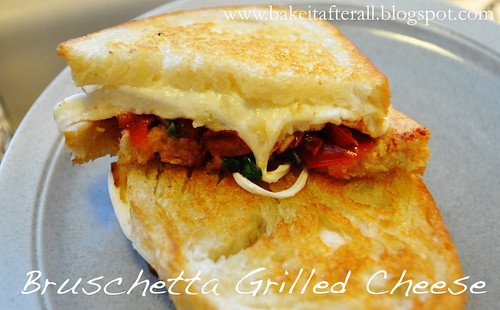
Bruschetta Grilled Cheese Sandwiches

DSC_0061_BruschettaGrilledCheese


There are many versions of Caprese Grilled Cheese out there, where you sandwich fresh mozzarella, tomato, and basil between 2 slices of bread, but I decided to use my favorite bruschetta mixture instead. This sandwich reminded me of the Tomato & Mozzarella Panini that Panera used to serve (although it is no longer on the menu!!)  I loved that sandwich and was thrilled to make a version at home.

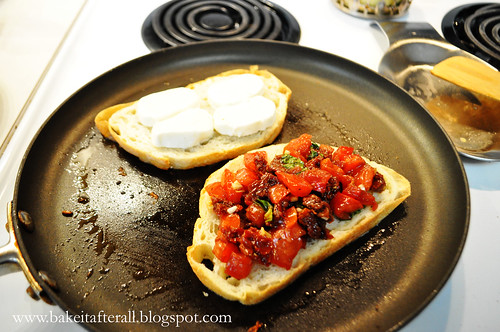
Initially I used butter for the bread like a typical grilled cheese, but Bob and I agreed that olive oil works better in fitting with the bruschetta aspect. This sandwich was a little tricky to flip so I troubleshooted it and came up with a way to avoid flipping the sandwich - grilling each piece of bread separately and only flipping the cheese side when the cheese has started to melt and adhere to the bread. The result is one of our new favorite dinners!

Bruschetta Grilled Cheese Sandwiches

Makes at least 4 large sandwiches, likely more

Ingredients:
6 Roma (plum) tomatoes (or 2 large tomatoes), chopped
1/2 cup sun-dried tomatoes, packed in oil
2 cloves minced garlic
1 tablespoon olive oil
2 tablespoons balsamic vinegar
1/4 cup fresh basil, stems removed
1/4 teaspoon salt
1/4 teaspoon ground black pepper
1/2 loaf good quality bakery bread, sliced
olive oil, for spreading on bread
8 ounces fresh mozzarella, cut into slices

Directions:

1. Combine fresh and sun-dried tomatoes, garlic, olive oil, vinegar, basil, salt and pepper in a medium bowl and set aside for 10 minutes.

2. Drizzle slices of bread with olive oil on one side and use a pastry brush to distribute evenly.

3. Place one slide of bread, oil side down, in a sauté or pancake pan that has been heated to medium. Add slices of mozzarella to the top of this slice.

4. After the cheese slice has cooked for about a minute, add the second slice of bread to the pan, oil side down. Top with bruschetta mixture (use slotted spoon to avoid transferring too much liquid).

DSC_0063_BruschettaGrilledCheese

5. Once the cheese has started to melt and that slice of bread is golden, flip this slice over on top of the bread with the bruschetta on it to make a sandwich.  Continue to grill until cheese is melty bread is golden and toasty.

6. Serve warm!
BruschettaGrilledCheese

Sunday, August 16, 2015

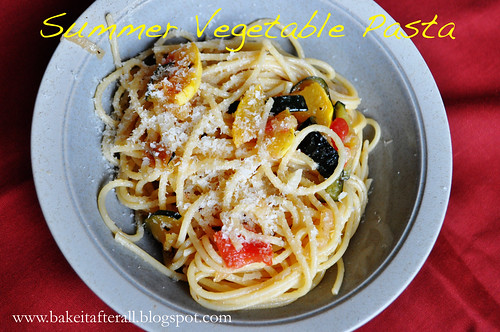
Summer Vegetable Pasta

DSC_0136_SummerVegetablePasta

My mom developed this recipe years ago when she would get fresh Chinese noodles from a client at the office where she worked. My sister and I loved it so much. When she stopped receiving the noodles, she started making the dish with linguine. I haven't had this pasta in years and was reminded of it when a neighbor gave us a HUGE zucchini and yellow squash from her sister's farm.  Just to give you an idea of how big this zucchini was, I used 1/3 of it in this pasta, 1/3 to make 2 big loaves of zucchini bread, and the 1/3 for other recipes!  Here's a picture- keep in mind those bananas are the scale bar and they are average-sized bananas!


I'm so glad I've rediscovered this recipe. The girls were a little leery of the veggies but actually tried them. Pasta is always a hit with them!

Summer Vegetable Pasta

Ingredients:
1 tablespoon butter
1 tablespoon olive oil
1 clove garlic, minced
1 onion, cut in half and then thinly sliced
1 - 2 large yellow squash, cut in half lengthwise, seeds scooped and discarded, cut into 1/4-inch slices
1 - 2 zucchini, cut in half lengthwise then cut into 1/4-inch slices
Italian or Greek seasoning
Dill weed
Salt and pepper to taste
2 tomatoes, peeled, seeded and chopped
1 pound spaghetti or linguine
lots of Parmesan cheese (1/2 cup to 1 cup or more if you desire), plus extra for serving

Directions:

1. Bring a large pot of water to a boil.

2. Melt the butter in a large saucepan and add the olive oil.  Add minced garlic. Sauté for 30 seconds, then add onion, squash and zucchini. Season with Italian or Greek seasoning, dill, salt and pepper.

3. Cook, stirring occasionally, until vegetables soften. May need to put a lid on top of the veggies after a while to allow the steam to help soften.

4. Meanwhile, cook pasta in salted water according to package directions.

5. After vegetables have softened and started to brown, add the chopped tomatoes and cook for 1 minute.  Add the hot, drained pasta to the pan and stir to combine.  Add the grated Parmesan cheese. Taste to check if salt is needed.

6. Serve with extra Parmesan on top.

Source: my mom :-)

Thursday, August 13, 2015

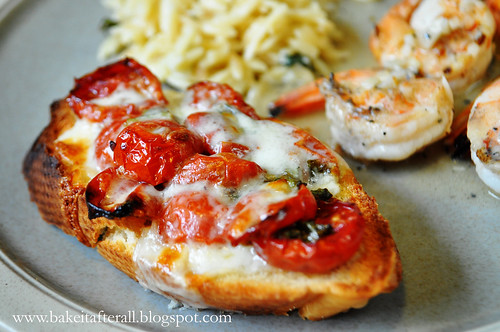
Oven-Dried Tomato Bruschetta


DSC_0072_ed


One of my favorite appetizers is this Double Tomato Bruschetta. It combines fresh and sun-dried tomatoes with the usual bruschetta ingredients and is topped with mozzarella cheese prior to baking. When I had some leftover Oven-Dried Tomatoes in the fridge, I decided to turn them into bruschetta.  The result was amazing!  We served it with Parmesan Basil Orzo and Grilled Shrimp.  Delicious!

Oven-Dried Tomato Bruschetta

Ingredients:
~2 cups Oven-Dried Tomatoes
1 clove minced garlic
1 tablespoon olive oil
2 tablespoons balsamic vinegar
1/4 cup fresh basil, stems removed
Salt and pepper to taste
1 French baguette
shredded mozzarella cheese (depends on the number of bruschetta you make, approx. 2 cups for a full loaf of bread)

 Directions:
Preheat oven on broiler setting.

1. In a large bowl, combine the tomatoes, garlic, olive oil, vinegar, basil, salt, and pepper. Allow the mixture to sit for 10 minutes.

 2. Meanwhile, cut the baguette into 3/4-inch slices. On a jelly roll pan covered in foil, drizzle olive oil and spread evenly with a pastry brush. Place the baguette slices on top, then drizzled them with olive oil and spread evenly with a pastry brush.

3. Broil the bread slices until crispy, turning halfway through (a few minutes on each side- watch closely as things can burn quickly under the broiler).

4. Using a slotted spoon to leave behind excess liquid, divide the tomato mixture evenly over the baguette slices. Top the slices with mozzarella cheese.

5. Broil for 5 minutes, or until the cheese is melted.


Thursday, July 21, 2011

Salsa Showdown!

When my good friends Melissa and Kathleen visited in May, I wanted to do something fun and special. The three of us absolutely love the salsa from our favorite Mexican restaurant in Peoria, IL (where we went to college). The restaurant is Carlos O'Kelly's. Yes it's a chain, but their salsa is made in-house (Melissa should know, she worked there!) Our plan was for them to drive from Chicago and stop in Springfield at the Carlos O'Kelly's that's right off the highway to pick up some salsa on their way to St. Louis. Unfortunately, Melissa was informed that the restaurant had suddenly closed! I had no choice but to arrange a Salsa Showdown and make my three favorite salsas for us to taste test!

My all-time favorite salsa for years has been the Black Bean(less) Salsa. If you read my original post about it, you'll know that it was this very salsa that got Kathleen to eat red onions! One day, I saw this Fresh Homemade Salsa on Annie's blog and it looked so delicious. I loved that it closely resembled restaurant-style salsa in appearance. Of course I have room in my life for more than one salsa, right? Especially when they are as different as these two! Wow, this salsa is amazing and I was happy to have a more traditional salsa to serve with enchiladas, quesadillas, and fajitas. Then I did a dumb thing...or a brilliant thing...I saw Pioneer Woman's Restaurant-Style salsa and just HAD to try it. Uh oh, I loved it. Now what was I to do? The Black Bean(less) Salsa is very different and I actually prefer it with just tortilla chips, not on other Mexican food, so it doesn't really count, but these two red salsas are very similar...almost similar enough that I had to choose one, but how? I don't know about you, but I simply cannot make a decision unless I have two things side-by-side. This called for a Salsa Showdown, not unlike my Magic Brownie showdown, Ricotta Pancakes two ways, and my Great Pumpkin Bread-Off. I had wanted to do this, oh, ever since I tried Pioneer Woman's salsa. Finally I had the perfect opportunity and the perfect little guinea pigs (or fruit flies if you know what I do for a living) for my experiment :-)

I made the three salsas in one night and stored them in ambiguously marked containers labeled A, B, and C. Only I knew the identity of the salsas. Now let's get down to the details of the Showdown:

The taste testers: Bob, Melissa, and Kathleen.
The mission: determine the best salsa according to taste, texture, and overall appeal.
The vehicle for said salsas: Tostitos scoops.

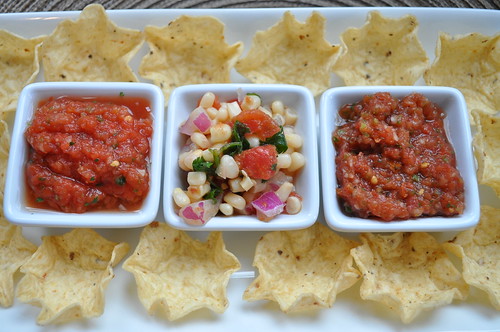
Meet the contenders:

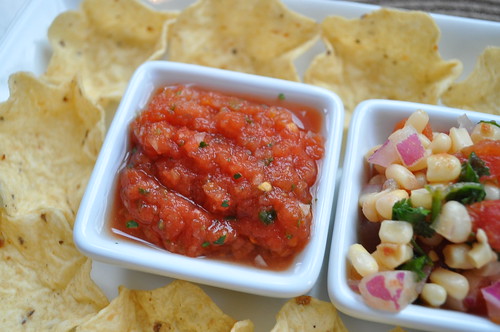
DSC_0586_2

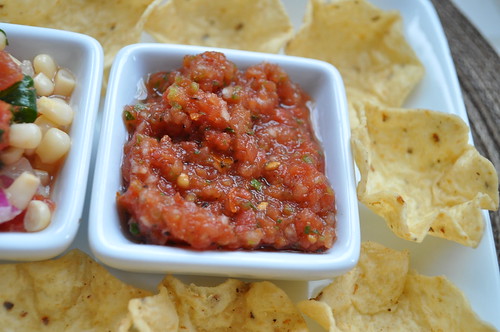
In this (left) corner, weighing in at 3 ounces (just kidding!) we have Salsa A from Pioneer Woman.

DSC_0583_2

And in this (right) corner, we have Salsa B from Annie's Eats.

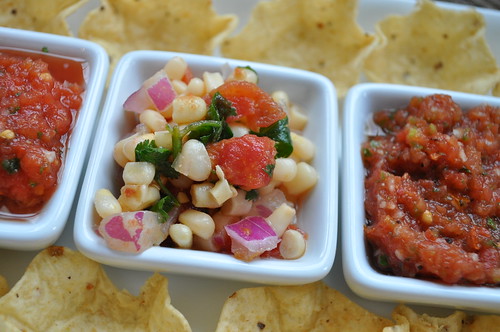
DSC_0585_2

It's pretty obvious, but Salsa C is the Black Bean(less) Salsa in the center.

DSC_0584_2

To be fair, I told the taste testers not to consider this salsa in their vote since it is so different. I really just made it because it's Kathleen's fav and I wanted Melissa to try it out (oh and I love it too!)

A little description of each:

Salsa A: A scrumptious combination of Rotel tomatoes, canned whole tomatoes, onion, jalapeno, and all the usual yummy suspects.

Salsa B: A delectable blend of fresh tomatoes, canned fire-roasted tomatoes (my personal addition), yellow onion, cumin, jalapenos, garlic, and a touch of red wine vinegar.

Salsa C: This salsa combines the sweetness of shoepeg corn, the spiciness of Rotel tomatoes, and the zestiness of red onions. Cumin, fresh lime juice, and cilantro add brightness and freshness.

The verdicts (wow it's even hard for me to type that word after the horrific Anthony trial!):

1) Because Bob has a hard time following directions, he performed his test before they arrived. His immediate answer was "Salsa A" - he thought it had a fresher taste. I thought this was funny because this salsa has no actual fresh tomatoes in it, as opposed to Salsa B which does.

2) Melissa agreed with Bob - Salsa A was the winner for her, though this was a close call. Also citing "fresh tasting" as a reason for her choice.

3) Kathleen also agreed that Salsa A was her preference. Again the "fresh" word came up, and this was close for her too.

4) So maybe you're wondering what I think?? Sorry folks, it's a hung jury - I sort of prefer Salsa B! I think it's because I used fire-roasted tomatoes and I just love that smoky taste they impart. I probably shouldn't have done that for fairness. I feel like I performed an uncontrolled experiment! I love both Salsa A and Salsa B, but I kept going back to Salsa B . . . again . . . and again. This presents a major problem for me because I was hoping Bob and I would agree on a clear winner and I would have my "go to" recipe. No such luck!

Now on the tasters' opinions of the Black Bean(less) Salsa - all 3 agreed that they loved this salsa and that it wasn't fair to compare it to the more traditional salsas. Personally, I could not agree more. It's just wonderful! No, seriously try it!

So there you have it, mostly a win for Pioneer Woman's Restaurant-Style Salsa with one holdout (me!) for Annie's Eats Fresh Homemade Salsa.

Have I finished my salsa quest? Not a chance. I still plan to make an at-home version of one of my favorite restaurant salsas...and no, it's NOT Carlos O'Kelly's ;-)

Friday, July 15, 2011

Jalapeno Popper Dip

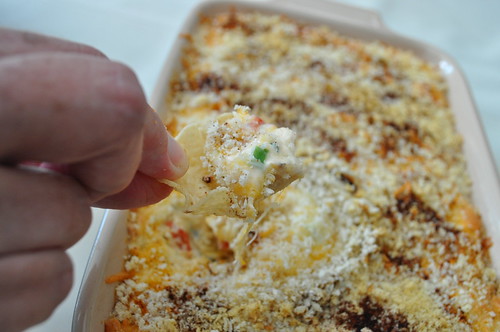
DSC_0905

DSC_0914

I've posted before about my love of dips. I think they're the perfect party food, and there are so many options. When I saw this recipe for Jalapeno Popper Dip, I immediately saved it to try. Jalapeno poppers are pretty popular in my family, so I thought a dip that combines those flavors would go over well.

Bob and I hosted a graduation party BBQ for my new brother-in-law Steve, and I thought this dip would be a nice addition. Diced jalapenos mixed with cream cheese and spices, topped with a delicious layer of Mexican blend cheese and panko bread crumbs? Yum. This dip was delicious, and the fam loved it. It's definitely not too spicy but had a nice balance of flavors. I'm sure it would be great served with carrots and celery, but I prefer Tostitos Scoops!

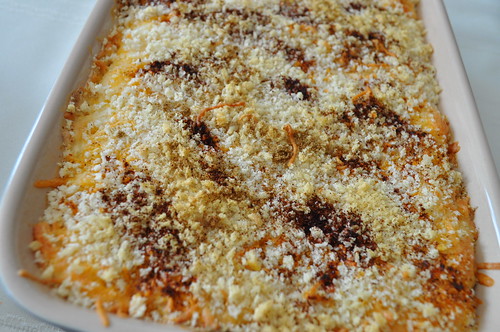
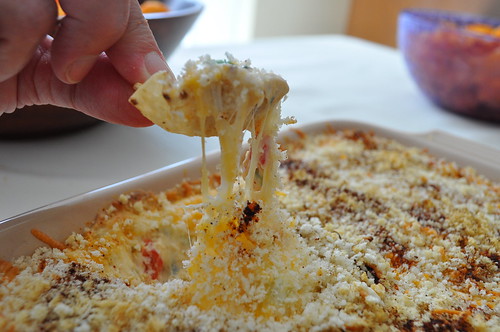
And just look at that cheesiness!
DSC_0912

Thanks for lending me a "hand" Mom!

Jalapeno Popper Dip

Ingredients:
2 8-ounce packages cream cheese (I used 1/3 less fat), at room temperature
1/2 cup mayonnaise (I used light)
1/2 cup roasted red bell peppers, chopped
6 jalapeno peppers, seeded, ribbed and finely diced
2 cloves garlic, minced
2 tablespoons cilantro, finely chopped
2 tablespoons lime juice
1 1/2 cups Mexican blend shredded cheese, divided
1 teaspoon Ancho chili powder
1 teaspoon ground cumin
1 cup panko bread crumbs (I actually reduced this to about 1/2 cup)

Directions:
Preheat oven to 350 degrees.
1. In a medium bowl, combine cream cheese and mayo.

2. Add bell peppers, jalapenos, garlic, cilantro, lime juice, 1/2 cup shredded cheese, and half of the chili powder and cumin. Mix well to combine to a uniform mixture.

3. Spread dip into a baking dish, smoothing into an even layer. (I used an 11 x 7-inch dish)

4. Top with remaining shredded cheese, cover with bread crumbs and sprinkle with remaining chili powder and cumin.

5. Bake approximately 30 minutes until cheese is hot and bubbly and the breadcrumbs are golden brown.

6. Serve warm or at room temperature with tortilla chips.

Source: Adapted from Homemade by Holman

Wednesday, March 2, 2011

Mashed Potatoes and Root Vegetables

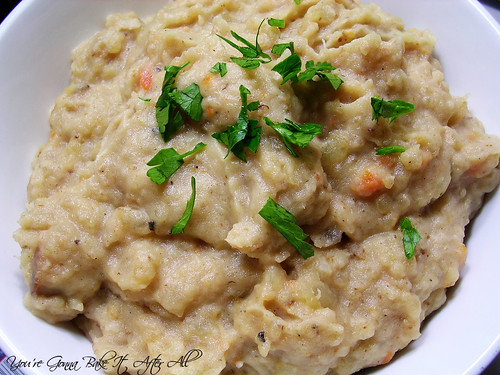
DSCN8077_labeled

I realize it's now March (how did that happen?!), but it's still chilly in these parts so I have a few more winter recipes for you. I wanted to make these mashed potatoes the moment I first flipped through my America's Test Kitchen cookbook last March, but decided to wait for winter for the seasonal produce. Although the recipe calls for some vegetables I have NEVER worked with (or eaten for that matter!), it just sounded so wintery and hearty.

I am SO glad we made this recipe because these mashed potatoes are the BEST ever!!! Bob and I both agreed that they are our favorite mashed potatoes of all time - better than any restaurant or homemade version. The root veggies are caramelized in butter, which brings out a distinct sweetness. The potatoes are unbelievably creamy in texture (thanks to the butter and half-and-half), while still maintaining small chunks of potato so you know it's the real stuff. We served these with a delicious chicken recipe I'll be posting soon!

Mashed Potatoes and Root Vegetables

Serves 4

Ingredients:
4 tablespoons (1/2 stick) unsalted butter
8 ounces carrots, parsnips, turnips, or celery root, peeled; carrots or parsnips cut into 1/4-inch thick half-moons; turnips or celery root cut into 1/2-inch dice (about 1 1/2 cups)*
1 1/2 pounds Yukon Gold potatoes (about 3 medium), peeled, quartered lengthwise, and cut crosswise into 1/4-inch-thick slices; rinsed well in 3 or 4 changes of cold water and drained well
1/3 cup low-sodium chicken broth
Table salt
3/4 cup half-and-half, warmed
3 tablespoons minced fresh chives, optional
Ground black pepper

*I used all 4, approximately 2 ounces of each.

Directions:
1. Melt the butter in a large saucepan over medium heat. Add the root vegetables and cook, stirring occasionally, until the butter is browned and the vegetables are dark brown and caramelized, 10 to 12 minutes. (If after 4 minutes the veggies have not started to brown, increase the heat to medium-high).

2. Add the potatoes, broth, and 3/4 teaspoon salt, and stir to combine. Cook, covered, over low heat (the broth should simmer gently; do not boil), stirring occasionally, until the potatoes fall apart easily when poked with a fork and all the liquid has been absorbed, 25 to 30 minutes. (If the liquid does not gently simmer after a few minutes, increase the heat to medium-low). Remove the pan from the heat; remove the lid and allow the steam to escape for 2 minutes.

3. Gently mash the potatoes and root vegetables in the saucepan with a potato masher (do not mash vigorously). Gently fold in the half-and-half and chives. Season with salt and pepper to taste and serve.

Source: The Complete America's Test Kitchen TV Show Cookbook

Thursday, October 7, 2010

Restaurant Style Hummus

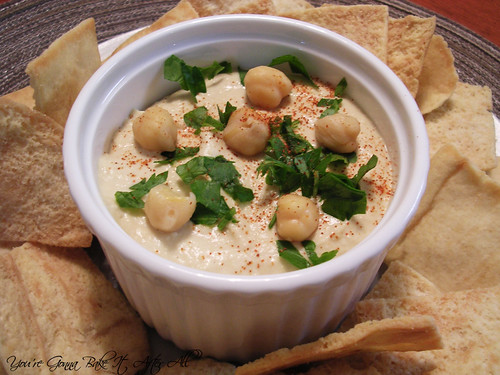
DSCN7039_labeled

DSCN7037_labeled

Hummus is one of my favorite snacks, but until recently I had never made it at home. This version from Cook's Illustrated is super creamy and flavorful. I love the kick of cayenne, and the texture is perfect. Hummus is great with a variety of raw veggies or my personal favorite - Stacy's Simply Naked Pita Chips!

Restaurant Style Hummus

Ingredients:
3 tablespoons juice from 1 to 2 lemons
1/4 cup water
6 tablespoons tahini , stirred well
2 tablespoons extra-virgin olive oil, plus extra for drizzling
1 14-ounce can chickpeas , drained and rinsed
1 small garlic clove , minced or pressed through garlic press (about 1/2 teaspoon)
1/2 teaspoon table salt
1/4 teaspoon ground cumin
Pinch cayenne
1 tablespoon minced fresh cilantro or parsley leaves

Directions:
1. Combine lemon juice and water in small bowl or measuring cup. Whisk together tahini and 2 tablespoons oil in second small bowl or measuring cup. Set aside 2 tablespoons chickpeas for garnish.

2. Process remaining chickpeas, garlic, salt, cumin, and cayenne in food processor until almost fully ground, about 15 seconds. Scrape down bowl with rubber spatula. With machine running, add lemon juice-water mixture in steady stream through feed tube. Scrape down bowl and continue to process for 1 minute. With machine running, add oil-tahini mixture in steady stream through feed tube; continue to process until hummus is smooth and creamy, about 15 seconds, scraping down bowl as needed.

3. Transfer hummus to serving bowl, sprinkle reserved chickpeas and parsley/cilantro over surface, cover with plastic wrap, and let stand until flavors meld, at least 30 minutes. Drizzle with olive oil, if desired, and serve.

Source: Adapted from Cook's Illustrated

Tuesday, September 14, 2010

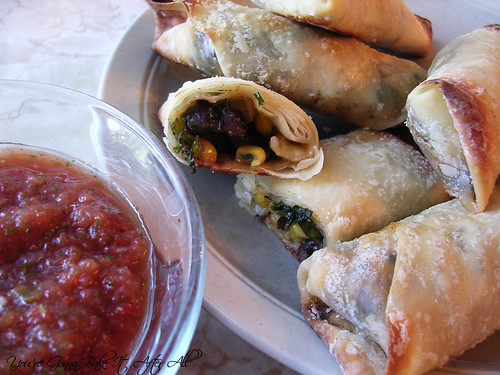
Baked Southwestern Egg Rolls

DSCN6879_labeled

I love the Southwestern egg rolls served at a popular chain restaurant, but I know how horrible they must be nutrition-wise! I was so excited to see this recipe for Baked Southwestern Egg Rolls. I love to take otherwise unhealthy restaurant dishes and turn them into much healthier versions.

I took these to a Trivia Night sponsored by my cousin's company to benefit the Muscular Dystrophy Association. These were a great addition to the treats our table brought, which I'm sure were critical to our team's taking home the 1st place award!

I've never worked with store-bought egg roll wrappers before, but they are so neat! I have so many ideas of fillings for these - both savory and sweet. These are great leftover too.

Baked Southwestern Egg Rolls

Ingredients:
2 cups frozen corn, thawed
1 15-ounce can black beans, rinsed and drained
1 10-ounce package frozen chopped spinach, thawed and squeezed dry
2 cups shredded Mexican cheese blend
1 4-ounce can diced green chiles, drained
4 green onions, chopped
1 teaspoon ground cumin
1/2 teaspoon chili powder
1 tsp. salt
1/2 teaspoon pepper
1/4 teaspoon cayenne pepper
egg roll wrappers (about 24 total)

Directions:
Preheat oven to 425F.
1. In a large bowl, combine everything but the egg roll wrappers. Mix well to blend.

2. Lay an egg roll wrapper out on a work surface so that one of the corners is pointing toward you and place 1/4 cup of the filling in the center. Fold the tip closest to you up over the filling, roll a bit, then take the points pointing outward (to the sides) and fold them in toward the center. Continue rolling into an egg roll shape until a small part of the remaining point is still free. Dip a finger in water or beaten egg and lightly brush on the edges of the free corner. Finish rolling and press to seal closed. Repeat with the remaining wrappers and filling.

3. Lightly oil a baking sheet with cooking spray. Place the sealed egg rolls on the baking sheet seam side down and spray the tops of the egg rolls with cooking spray. Bake for about 15 minutes, or until lightly brown, turning halfway through baking. Serve warm with salsa.

Source: Annie's Eats

Thursday, August 12, 2010

Caprese Salad Skewers

DSCN6704_labeled

DSCN6708_labeled

DSCN6707_labeled

DSCN6713_labeled

I have some big news to share - we bought a house!!! It actually happened the same week as our "house heart-break." We were able to move past that and ended up finding a great house that suits us well. Within a few hours of making the offer, the sellers had countered, and we had accepted. We were able to get a 60-day escrow so we don't overlap with our current lease, so we close September 17. We are really excited! I waited until after the inspection to announce it, so hopefully we won't have any snags along the way.

Because we are no longer spending every week night house hunting, I've felt a little more up for cooking, so hopefully the pace of my posts will pick up a bit :)

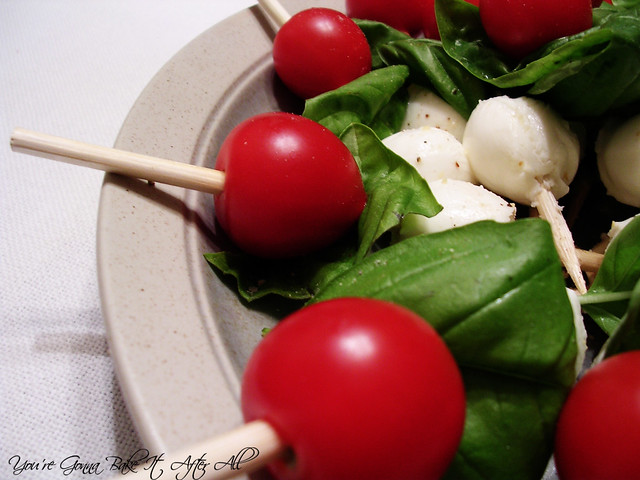
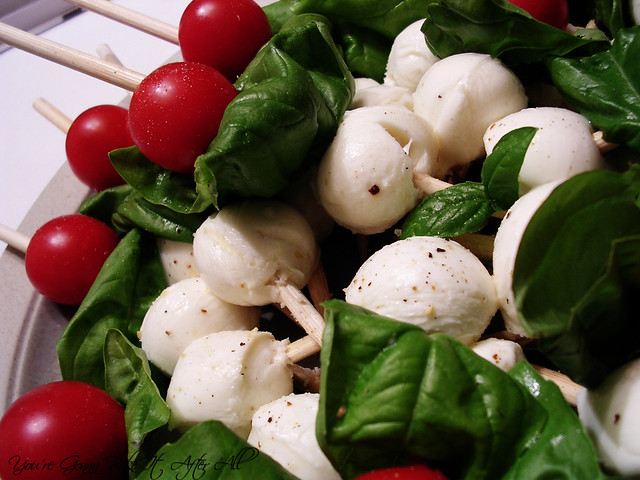
I actually made this fun appetizer to take to a work potluck several weeks ago. I saw the idea on some blogs last summer and have wanted to try it ever since. The concept is so simple that it doesn't really require a recipe, rather just a list of ingredients and basic instructions. So here goes:

Caprese Salad Skewers

Ingredients:
Cherry tomatoes
Fresh mozzarella balls (or cubes)
Fresh basil leaves
4 - 6" wooden skewers
Garlic pepper/salt, optional
Balsamic vinegar
Extra virgin olive oil

Directions:
Assemble tomatoes, mozzarella, and basil on skewers. Sprinkle with garlic pepper/salt (I used a McCormick grinder), to taste. Chill until ready to serve. Offer balsamic vinegar and olive oil while serving.

Thursday, July 22, 2010

Thin-Crust Pizza

DSC00293_labeled

DSC00291_labeled

Does anyone still read my blog?! I am SO behind on posts it's ridiculous! We are forging full speed ahead in the house hunting process, and it is time-consuming! We had our first "house heart-break" this week - a house we were seriously considering was sold right from under us. We found out the night before we were going to see it and possibly make an offer :-( Very sad, but we've decided not to let time go by wallowing in our sorrow, so we're on to the next. I don't want to rush a purchase by any means, but the thought of being in a home by fall and hosting Thanksgiving is so exciting. I'll keep you posted!

Another reason for my lack of posts is my job. I decided to be brave and take on an area of research VERY foreign to me for my postdoc . . . either I'm brave or stupid because it is SO hard. I feel like I know nothing and I'm starting from scratch. I know that beginning any new job is difficult and there will always be an adjustment period, but I hate that part! I guess I thought that with all my experience I'd be able to pick things up faster - nope!

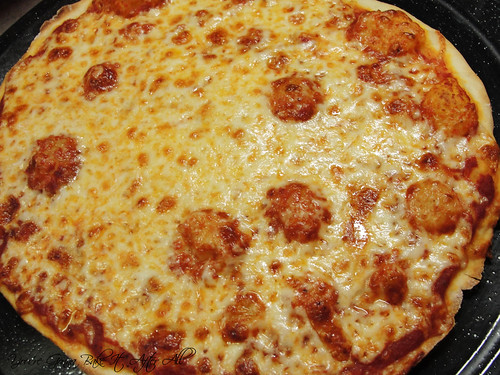
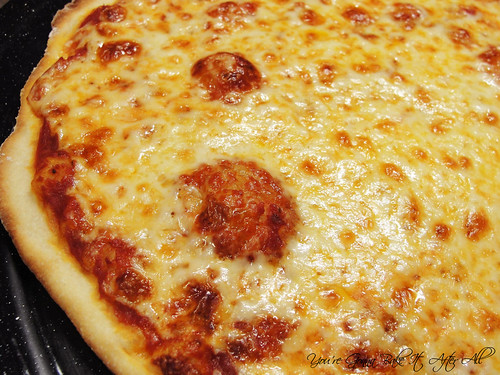
While I have not been cooking nearly as much as I should, I have managed to make a few things these past few weeks. One of my favorites is this Thin-Crust Pizza. The dough is so simple to put together, and it rises overnight in the fridge so the actual time preparing the pizza the day of is very minimal. The dough rolls out nicely, and the toppings couldn't be easier. We really liked this pizza, and I think it would be great with any of YFT (your favorite toppings).

I will try my hardest not to let this much time go by between posts again! :)

Thin-Crust Pizza

Ingredients:
For the dough:
1 3/4 - 2 cups (8 3/4 to 10 ounces) unbleached all-purpose flour, plus extra for the work surface
1/2 teaspoon instant or rapid-rise yeast
1/2 teaspoon honey
1/2 teaspoon table salt
1/4 cup olive oil
3/4 cup warm water (110 degrees)

For the toppings:
1 cup (or a little more) Quick Tomato Sauce for Pizza (recipe follows)
8 ounces whole milk mozzarella cheese, shredded (about 2 cups; fresh is NOT recommended because of the high moisture content - use shrink-wrapped kind)

Directions:
1. To make the dough, pulse 1 3/4 cups flour, the yeast, honey, and salt in a food processor fitted with a dough blade, if possible. Process until combined, about 5 seconds.

2. With the machine running, pour the oil and then the water through the feed tube and process until the dough forms a ball, about 30 seconds. If after 30 seconds the dough is sticky and clings to the blade, add the remaining 1/4 cup flour 1 tablespoon at a time. Turn the dough out onto a work surface.

3. Divide the dough in half and place each piece in a gallon-sized, heavy-duty zipper-lock bag and seal. Refrigerate overnight or up to 48 hours.

4. One hour before baking the pizza, adjust an oven rack to the lowest position, set a pizza stone on the rack, and heat the oven to 500 degrees.

5. Remove the dough from the plastic bags. Set each piece in the center of a lightly floured large sheet of parchment paper. Cover each with two 18-inch lengths of plastic wrap, overlapping them in the center; let the dough rest for 10 minutes.

6. Setting one piece of dough aside, roll the other into a 14-inch round with an even thickness, using the tackiness of the dough against the parchment to help roll it. If the parchment wrinkles, flip the dough sandwich over and smooth the wrinkles with a metal bench scraper.

7. Peel the plastic wrap off the top of the rolled dough. Spread 1/2 cup of the tomato sauce to the edges of the dough. Sprinkle with 1 cup of the cheese.

8. Slip the dough with the parchment onto a pizza peel or rimless baking sheet. Slide the pizza, parchment and all, on to the hot pizza stone. Bake until a deep golden brown, about 10 minutes. Remove the pizza from the oven with a pizza peel or pull the parchment with the pizza onto a baking sheet. Transfer the pizza to a cutting board, slide the parchment out from under the pizza, and slide it onto a wire rack. Cook 2 minutes until crisp; slide to a cutting board, cut into wedges, and serve.

9. While the first pizza is baking, repeat steps 6 and 7 to roll and top the second pizza; allow the baking stone ot reheat for 15 minutes after baking the first pizza, then repeat step 8 to bake the second pizza.


Quick Tomato Sauce for Pizza

Ingredients:
1 14.5-ounce can crushed tomatoes
1 tablespoon olive oil
1 medium garlic clove, minced or pressed through a garlic press (about 1 teaspoon)
table salt and ground black pepper

Directions:
1. Process the tomatoes in a food processor until smooth, about 5 pulses.

2. Heat the oil and garlic in a medium saucepan over medium heat until the garlic is fragrant, about 30 seconds. Stir in the tomatoes; bring to a simmer and cook, uncovered, until the sauce thickens, about 15 minutes. Season with salt and pepper to taste.

Source: The Complete America's Test Kitchen TV Show Cookbook

Friday, June 25, 2010

Italian Charcoal-Grilled Corn


DSCN6650_labeled

DSCN6655_labeled

My aunt and uncle recently gave Bob and I a small charcoal grill for a housewarming gift. We have used it several times and love the taste of charcoal-grilled food. My dad bought us a chimney starter, and it's amazing! I highly recommend it to anyone who cooks with charcoal. It seriously makes the entire process go so much faster.

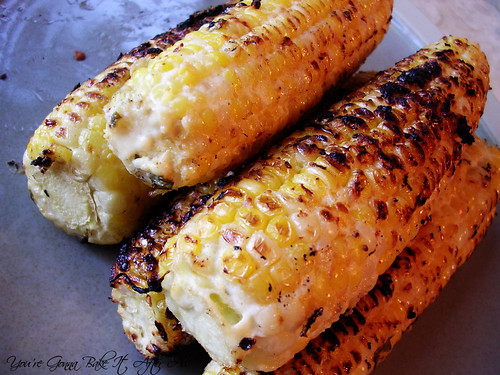
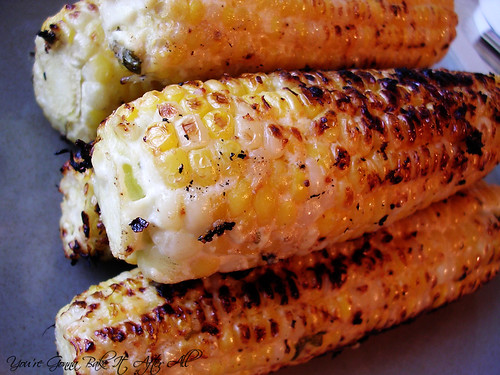
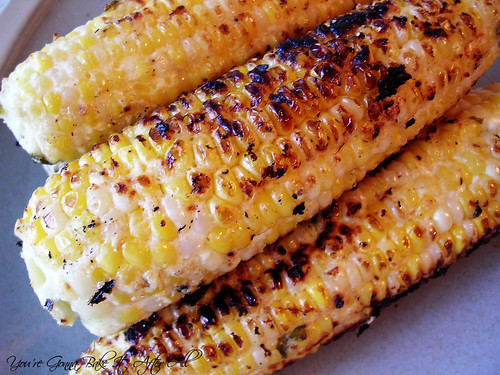
For Father's Day, Bob and I made dinner for my Dad and Mom, and I knew I wanted to use the grill for a portion of the meal. Bob decided to make steak with a special sauce from my Complete America's Test Kitchen TV Show Cookbook, which is actually made on the stovetop and in the oven. I turned to this cookbook for a side dish. Charcoal-grilled corn stood out as something unique, and the Mexican-Style corn looked fantastic. Because we were going for more of an Italian theme (I served antipasti and Double Tomato Bruschetta - my Dad's FAVORITE - as appetizers), I decided to give the corn an Italian twist by using basil instead of cilantro, Parmesan cheese instead of queso fresco, and lemon juice instead of lime. I also decided to grill the corn with the cheese/herb mixture on it, instead of tossing the grilled corn in the mixture.

This corn is simple to whip up and is really delicious. The charcoal gave the corn a nice flavor, as did the coating. The corn is perfectly seasoned with this recipe - no need for extra salt or butter!

Italian Charcoal-Grilled Corn

Ingredients:
4 teaspoons vegetable poil plus extra for the cooking grate
1 1/2 ounces Parmesan cheese, grated (about 1/2 cup)
1/4 cup mayonnaise
3 tablespoons sour cream
3 tablespoons chopped fresh basil leaves
4 teaspoon juice from 1 lemon
1 medium garlic clove, minced or pressed through a garlic press (about 1 tsp)
1/4 teaspoon ground black pepper
1/4 teaspoon table salt
6 large ears corn, husks and silk removed

Directions:
1. Light a lareg chimney started filled with charcoal (about 6 quarts) and allow to burn until the coals are partially covered witha layer of ash, about 20 minutes.

2. Build a modified two-level fire by arranging all the coals over half of the grill, leaving the other half empty. Set the cooking grate in place, cover, and heat the grate until hot, about 5 minutes. Use a grill brush to scrape the cooking grate clean. Dip a wad of paper towels in vegetable oil holding the wad with tongs, oil the cooking grate (we just used Pam for grilling and sprayed it on the grate while it was suspended in the air with tongs - away from the flames!)

3. Meanwhile, combine the cheese, mayonnaise, sour cream, basil, lemon juice, garlic, pepper, and salt in a large bowl. Add corn and toss to coat evenly.

4. Grill the corn until lightly charred on all sides, 7 to 12 minutes total. Serve immediately.

Source: Adapted from the Complete America's Test Kitchen TV Show Cookbook


DSCN6652_labeled

Friday, June 18, 2010

Pasta with Sun-dried Tomatoes

DSCN6596_labeled

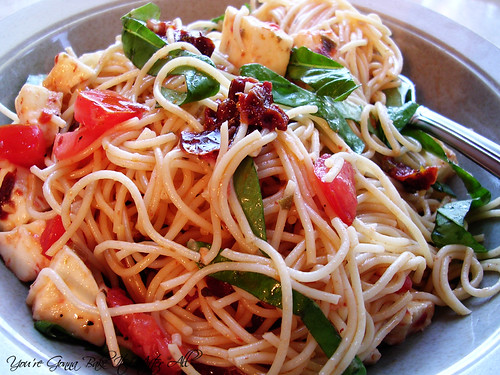
This is a great summer pasta! Tomatoes, mozzarella, and basil are some of my favorite flavors, and this dish combines them in perfect balance. Ina has a knack for great pasta dishes, so I knew I would love this one. I served it as our main dish, but it would be a great side as well.

I cut this recipe in half except for the pasta because I wanted to stretch the ingredients; however, I think Ina had it right, so I've posted the original. I also left out the olives because Bob hates them. I had intended to add them to my plate but forgot. This is especially great if you have a ton of fresh basil in your garden like I do - the leaves are gigantic! :)

Pasta with Sun-dried Tomatoes

Ingredients:
1/2 pound fusilli (spirals) pasta, or pasta of choice (I used angel hair)
Kosher salt
Olive oil
1 pound ripe tomatoes, medium-diced
3/4 cup good black olives, such as kalamata, pitted and diced (optional)
1 pound fresh mozzarella, medium-diced
6 sun-dried tomatoes in oil, drained and chopped

For the dressing:
5 sun-dried tomatoes in oil, drained
2 tablespoons red wine vinegar
6 tablespoons good olive oil
1 garlic clove, diced
1 teaspoon capers, drained
2 teaspoons kosher salt
3/4 teaspoon freshly ground black pepper
1 cup freshly grated Parmesan
1 cup packed basil leaves, julienned

Directions:
1. Cook the pasta in a large pot of boiling salted water with a splash of oil to keep it from sticking together. Boil for 12 minutes, or according to the directions on the package. Drain well and allow to cool.

2. Place the pasta in a bowl and add the tomatoes, olives, mozzarella, and chopped sun-dried tomatoes.

3. For the dressing, combine the sun-dried tomatoes, vinegar, olive oil, garlic, capers, salt, and pepper in a food processor until almost smooth.

4. Pour the dressing over the pasta, sprinkle with the Parmesan and basil, and toss well.

Source: Ina Garten's Barefoot Contessa Family Style via Foodnetwork.com

Friday, June 4, 2010

Pan-Fried Onion Dip

DSCN6538_labeled

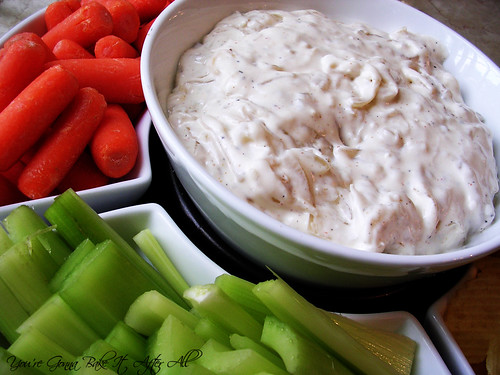
I made this dip for a Memorial Day pool party at my aunt's house. Everyone loved it, and I thought it had a great flavor. The onions are so sweet and delicious, and the cayenne adds a nice kick. Ina has done it again! Serve this dip with your favorite veggies or chips.

I have a great dessert coming up next week. Have a great weekend! :)

Pan-Fried Onion Dip

Ingredients:
2 large yellow onions
4 tablespoons unsalted butter
1/4 cup vegetable oil
1/4 teaspoon ground cayenne pepper
1 teaspoon kosher salt
1/2 teaspoon freshly ground black pepper
4 ounces cream cheese, at room temperature
1/2 cup sour cream
1/2 cup mayonnaise

Directions:
1. Cut the onions in half and then slice them into 1/8-inch thick half-rounds. (You will have about 3 cups of onions.)

2. Heat the butter and oil in a large saute pan over medium heat. Add the onions, cayenne, salt, and pepper and saute for 10 minutes. Reduce the heat to medium-low and cook, stirring occasionally, for 20 more minutes until the onions are browned and caramelized. Allow the onions to cool. *I did this the night before and stored the onions in a covered dish in the fridge. As I transferred the onions to the dish, I made sure to leave the excess grease in the pan.

3. Place the cream cheese, sour cream, and mayonnaise in the bowl of an electric mixer fitted with the paddle attachment and beat until smooth. Add the onions and mix well. Taste for seasonings. Serve at room temperature.

Source: Adapted from the Barefoot Contessa Cookbook via FoodNetwork.com

Tuesday, May 18, 2010

Guest Post: Mushroom and Mascarpone Ravioli

Since I've been out of the country, packing for our move, and will be losing internet access tonight (yikes!), my sister Lisa and her boyfriend Steve offered to do a guest post for me! They are both fantastic cooks, as I've mentioned before (here, here, and here), and have great palates, so you're in for a treat with this recipe. Hope to see you all soon with a recipe from my NEW kitchen! :)


Since Meghan will be busy packing and moving this week, I thought I would help her out by offering her this recipe to post. Steve and I had some mushrooms in the fridge that we wanted to use, so we decided to make mushroom ravioli. We found a recipe for Mushroom and Mascarpone Ravioli on allrecipes.com and thought it would be perfect since we had a container of the cheese in the fridge as well. It sounded so good and we had never made homemade ravioli before, so I was really excited to try this recipe out!

We had to make a few substitutions and slight changes because we didn’t have a couple of the ingredients, but overall we stayed fairly true to the recipe. One major change, however, was to use homemade pasta instead of the wonton wrappers. Steve got a pasta roller for Christmas, and we’ve wanted to make ravioli with it. The pasta can be topped with any sauce you want, but we topped it with just a little olive oil, chopped cherry tomatoes, black pepper, and Parmesan cheese. The filling of this ravioli is the real star of the recipe, so I would recommend trying to follow the filling recipe as best as you can to get the amazing flavor it adds. Some of the reviewers on allrecipes.com said this was the best ravioli filling they had ever eaten. I would have to agree! It really is that good!

If you use homemade pasta for the ravioli, I recommend making the pasta dough first and then making the filling while the dough is resting. Then you can roll out the pasta and fill it with the mixture. Enjoy!


Homemade Pasta

Ingredients:
In general, use 100 oz (about 1 cup) all-purpose flour for every 1 egg. For this recipe we used:
400 oz (about 1 cup) all-purpose flour
4 eggs
Extra flour for flouring countertop, dough, and pasta machine

Directions:
1. Put flour into a large bowl. In separate bowl, whisk eggs together.

2. Make a large well in the center of the flour and pour the eggs into the well.

3. With a fork, mix the flour into the eggs in the well. Continue mixing until the flour and eggs form a dough.

4. Shape the dough into a ball and knead it by hand on a floured countertop for 5 – 7 minutes. If the dough gets too dry, wet your hands and continue to knead. Alternately, if the dough is too sticky, add a little flour. Note: You want to have a pasta dough that tends on the dry side as it will need to be this way in order to not stick to your pasta maker, roller, etc.

5. Cover the pasta dough with the inverted bowl and let rest for one-half hour.

6. When dough has rested, slice into around 6 equally-sized pieces (to give you a top and bottom to your ravioli). Roll each piece of dough through the floured pasta roller. (Our roller has settings 1-9, and we rolled the dough up to a 6.)

7. Lay pasta sheets separately on a floured surface. (This is very important because we laid ours on top of each other and they stuck together. We had to re-roll the dough.)


Mushroom and Mascarpone Ravioli

4 servings

Ingredients:
1 tablespoon olive oil
2 large shallots, minced (We only had one shallot)
8 ounces fresh mushrooms, chopped (We used white mushrooms and shitakes)
1 tablespoon chopped fresh thyme (We substituted one-quarter tablespoon of finely chopped dried thyme)
2 tablespoons minced garlic
1 tablespoon chopped fresh chives (We substituted 1 green onion)
1 (8 ounce) container mascarpone cheese
salt and pepper to taste
32 (3.5 inch square) wonton wrappers (We made our own pasta instead – See recipe above)
1 egg, beaten
2 tablespoons milk

Directions:
1. Heat the olive oil in a large skillet over medium-high heat. Add the shallots; cook and stir until starting to brown. Reduce the heat to medium and add the mushrooms, thyme, garlic and chives; continue to cook until the liquid from the mushrooms has evaporated, 5 to 10 minutes. Remove from the heat and set aside to cool.

2. In a medium bowl, stir together the mascarpone cheese and mushroom mixture. Season to taste with salt and pepper; set aside.

3. *Lay out 16 wonton wrappers on a clean surface. Whisk together the egg and milk in a small cup. Brush the egg wash onto the wrappers. Place one tablespoon of the cheese mixture onto the center of each square. Place a second wonton wrapper over the top of the filling and press to seal the edges. You may refrigerate the ravioli on a baking tray covered with plastic wrap.

4. Bring a large pot of lightly salted water to a boil. Add the ravioli one at a time and cook until they float to the top, 3 to 4 minutes. (We cooked our ravioli at a simmer for about 10 minutes as recommended by a reviewer to prevent ravioli from opening up.)

5. Top with a little olive oil, pepper, and Parmesan cheese (or any other sauce) and enjoy!

*Step 3, if using homemade pasta: Drop the filling mixture by tablespoons onto one of the pasta sheets, leaving 1-2 inches between each spoonful. Whisk together the egg and milk in a small cup. Brush the egg wash onto the sheet in between and around the filling, wherever dough is exposed. Place another pasta sheet on top of the first, and press the top sheet onto the second, being careful not to press the filling out from the sheets. Press around the filling to form the pockets of filling. Use a biscuit cutter, pasta cutter, or scalloped edge cookie cutter to cut around each pocket of filling, forming the ravioli.

Source: Adapted from Allrecipes.com

Friday, April 23, 2010

Spinach Souffle

Happy Friday!!! Next week is my last week at work before the big move. I can't believe that I will be leaving after 6 years in my lab. It's been a lot of work winding things down and organizing all of my notes and supplies in a way that my project can be continued after I leave, so there's been absolutely no time for new recipes. I am so anxious to get back into the kitchen!!!

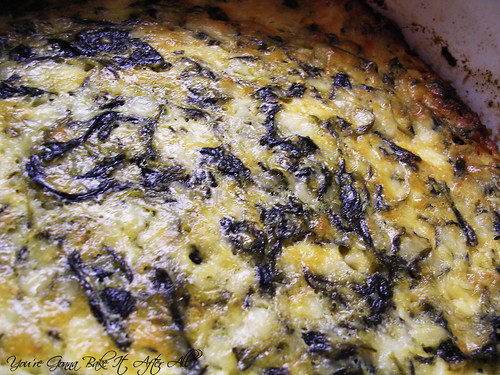
I made this souffle for the Christmas dinner I hosted for Bob's parents last year. It's my mom's recipe, which she received from a friend many years ago. Although I counted this as one of the vegetables at our meal, it's one of those vegetable dishes that has so much other delicious stuff (like butter, cheese, and eggs!) that probably cancel out the healthfulness of the actual veggie! My mother-in-law suggested it could be used as a quiche filling, because the texture of this souffle is very similar to that of quiche. I think other veggies could be added to this recipe, like artichokes or mushrooms.

One note about this recipe is that it has to be made in advance so it can sit in the fridge for 4-5 hours. For big dinners where you're trying to coordinate multiple dishes, this can actually be an advantage because you prep it early and pop it in the oven an hour before dinner!

Spinach Souffle

Ingredients:
1 package frozen spinach, thawed and all liquid squeezed out
1 pound cottage cheese
3 eggs
1/4 cup (1/2 stick) butter, melted
4 ounces grated cheddar cheese
3 Tablespoons flour
1/2 teaspoon salt

Directions:
Preheat oven to 350F and grease a casserole dish (I used a 10-inch round dish).
1. Mix in order listed above. Pour into casserole dish. Place in refrigerator for 4-5 hours.

2. Stir mixture, then bake for 1 hour.

Source: My Mom

Thursday, April 8, 2010

Crash Hot Potatoes


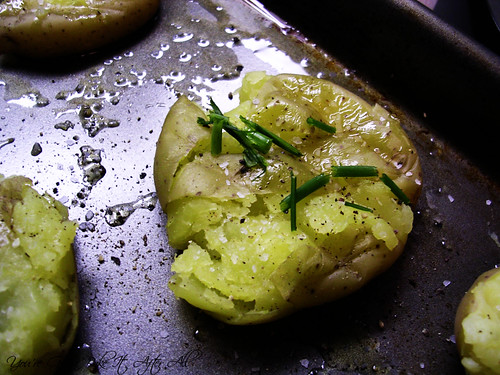
Here is another recipe from the Pioneer Woman. It may sound simple, but I don't have a problem with simple - I actually like a simple recipe if the results are delicious, which these are. I made the full recipe thinking that we'd have a lot leftover . . . turns out we didn't! These were so tasty that Bob and I kept going back for more until they were gone! I think I even pushed the main dish aside in favor of more potatoes :)

These are my submission to this month's Side Dish Showdown. I have made a real effort to make more side dishes this year, even though it's tough for me. This is yet another potato, but for so long I was a little intimidated by potatoes that once I got on a roll, I just kept going!

Side Dish Showdown Blogger Event

I can't remember what I served these with, but it was definitely some type of chicken. These potatoes would go perfectly with steak too!

Crash Hot Potatoes

Ingredients:
12 whole new potatoes or other small round potatoes
3 Tablespoons olive oil
Kosher salt, to taste
Black pepper, to taste
Rosemary or other herbs of choice (I used chives), to taste

Directions:
Preheat oven to 450F.
1. Bring a pot of water to a boil. Add a generous amount of salt. Add potatoes and cook until fork-tender.

2. On a sheet pan, generously drizzle olive oil. Place tender potatoes on the cookie sheet leaving plenty of room between each potato.

3. With a potato masher, gently press down each potato until it slightly mashes, rotate the potato masher 90 degrees and mash again. Brush the tops of each crushed potato genouersly with more olive oil.

4. Sprinkle potatoes with kosher salt, fresh ground black pepper, and fresh chopped herbs.


5. Bake for 20 - 25 minutes until golden brown.

Source: Adapted from The Pioneer Woman Cooks

Wednesday, March 24, 2010

Chinese Slaw

Today is the last day to enter my giveaway - contest ends at 10pm CST!

My mom has been making this slaw for years, and I'm sure there are many versions of it floating around, but we really love it so I thought I'd share ours. This is not your traditional slaw - it has a light-tasting vinaigrette dressing and a nice crunch from the Ramen noodles, sunflower seeds, and almonds (if you use them!). The weather here in Chicago is starting to turn milder, so I figured it was a good time to share this slaw. It always reminds me of barbecues and summer, but it's great any time of year.

Chinese Slaw

Ingredients:
Slaw:
1 pound shredded cabbage (bagged; I like the kind with carrots and green/purple cabbage for color)
2 packages Ramen dry soup mix (beef flavored is traditionally used but I've made it with chicken)
1 bunch green onions, sliced thin
1 small package sliced almonds (about 2/3 cup), toasted (or use roasted Almond Accents)*
1 cup dry roasted sunflower seed kernels

Dressing:
Spices from Ramen noodles
1/2 cup sugar
1 cup salad oil (I used Canola)
1/3 cup cider vinegar

*We eliminate these if I'm eating it because of my nut allergy. No one seems to notice or mind too much :)

Directions:
1. Crush Ramen package before opening to crumble noodles. Remove seasoning packet and prepare dressing. Refrigerate dressing.

2. Layer slaw ingredients in a bowl, cover and refrigerate.

3. Toss slaw with dressing just before serving.

Source: My mom (through family friends)

  © Blogger template Brownium by Ourblogtemplates.com 2009

Back to TOP