Showing posts with label Pumpkin. Show all posts
Showing posts with label Pumpkin. Show all posts
Monday, September 14, 2015
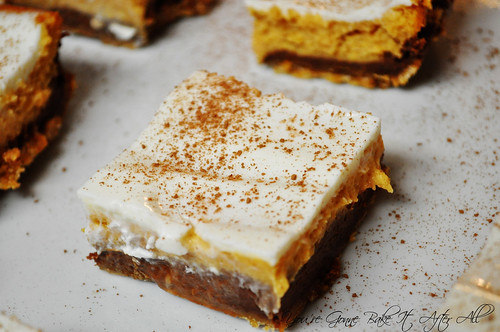
Pumpkin-Chocolate Cheesecake Bars
Although I didn't always think so, pumpkin and chocolate is such a great combination. Years ago in the fall, one of my labmates brought these Pumpkin-Chocolate Cheesecake Bars to a lab meeting. They are similar in theory to the Chocolate-Pumpkin Cheesecake Bars, but in these bars the chocolate and the pumpkin are layered rather than swirled, and the crust is graham cracker rather than chocolate cookies. These bars also have a delicious sour cream topping, and if I remember correctly, the cheesecake layers in these bars are slightly less firm than the Chocolate-Pumpkin Cheesecake Bars. I am happy to have both bar recipes to make during my favorite time of year!
Pumpkin-Chocolate Cheesecake Bars
Makes 24 to 36 bars
Ingredients:
1 1/4 cups graham cracker crumbs
1/4 cup sugar
1/3 cup butter, melted
2 8-ounce packages cream cheese, softened
1 3/4 cups sugar
3 eggs
1 cup canned pumpkin
1/2 teaspoon pumpkin pie spice
1/2 teaspoon ground cinnamon
1/2 teaspoon vanilla
1/4 teaspoon salt
6 ounces semisweet chocolate, cut up (or 3 ounces semi-; 3 ounces bittersweet)
1 tablespoon bourbon, optional
2 tablespoons butter
1 1/4 cups sour cream
1/4 cup sugar
Grated fresh nutmeg and/or milk chocolate or semisweet chocolate curls
Directions:
1. Preheat oven to 325F. Lightly grease a 13x9-inch baking pan; set aside.
2. In a medium bowl, combine graham cracker crumbs and 1/4 cup sugar. Stir in the 1/3 cup melted butter. Press mixture evenly into bottom of the prepared baking pan; set aside.
3. In a large bowl, combine cream cheese and the 1 3/4 cups sugar. Beat with an electric mixer on medium speed until smooth. Add eggs, one at a time, beating on low speed after each addition just until combined. Beat in pumpkin, pumpkin pie spice, cinnamon, vanilla, and salt on low speed just until combined. Remove 1-1/4 cups of the mixture and set aside in a separate bowl (this mixture will have the chocolate added to it).
4. In a small heavy saucepan, combine the 6 ounces chocolate, the bourbon if using, and the 2 tablespoons butter. Cook and stir over low heat until melted. Whisk chocolate mixture into the 1 1/4 cups pumpkin mixture. Pour over crust, spreading evenly. Bake for 15 minutes.
5. Carefully pour the remaining pumpkin mixture over baked chocolate layer, spreading evenly. Bake for 40 to 45 minutes more or until filling is puffed and center is set. Cool on a wire rack for 30 minutes.
6. In a small bowl, combine sour cream and 1/4 cup sugar. Gently spread over bars. Cool completely. Cover and chill for at least 3 hours. Cut into bars.
* Before serving, sprinkle with nutmeg and/or chocolate curls.
*To make triangle-shape bars, cut the cookies crosswise into four strips. Then cut each strip into five triangles (you'll end up with two half-triangles from the ends of each strip).
To Make Ahead: Bake and chill as directed; cut into bars. Place in a single layer in an airtight container; cover. Store in the refrigerator for up to 3 days. Do not freeze.
Source: Adapted from Midwest Living
Sunday, November 13, 2011
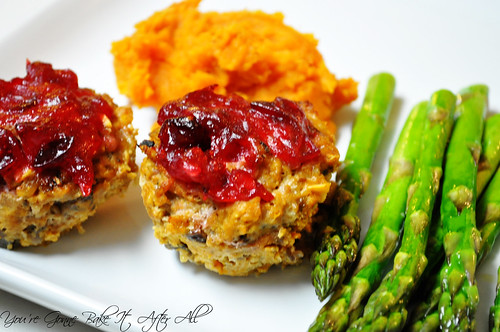
Turkey-Pumpkin Meatloaf Muffins with Cranberry Glaze
This is the ultimate November recipe if you ask me - turkey, pumpkin, and cranberries?! I spoke before about my desire to incorporate more pumpkin into heathy dishes, and this recipe does just that. The ground turkey is combined with chopped and sauteed mushrooms and onions, and then with rolled oats, egg whites, and of course pumpkin. Just like the Turkey-Pumpkin Chili, the pumpkin flavor isn't prominent here, if you can distinguish it at all, but rather it adds some moisture. The simple cranberry glaze is a nice addition - a bit of sweet and sour baked on top. I may try playing around with the herbs next time. This time I added thyme and rosemary and may swap the rosemary for sage or another seasoning commonly used with turkey.
I love meatloaf muffins because they are already divided into individual portions, and it's super easy to pack up a couple for lunches. Bob and I were both excited that there was enough leftover for both of us to have a lunch the next day, and then some. I served these with Smashed Sweet Potatoes and roasted asparagus. With how busy we've been lately, I haven't had much time to focus on make truly balanced dinners, so it felt really good to get back to it. This dinner really got us pumped for Thanksgiving!
Turkey-Pumpkin Meatloaf Muffins with Cranberry Glaze
Servings: 12 muffins
Ingredients:
For the muffins:
2 teaspoons extra-virgin olive oil
1 cup finely chopped onion
1 8-ounce package mushrooms, chopped finely
2 cloves minced garlic (or pressed through a garlic press)
1 pound 93% lean ground turkey
1 cup pumpkin puree
1 egg white
1/3 cup rolled oats
1 8-ounce package mushrooms, chopped finely
2 cloves minced garlic (or pressed through a garlic press)
1 pound 93% lean ground turkey
1 cup pumpkin puree
1 egg white
1/3 cup rolled oats
1 tablespoon Worcestershire sauce
1/4 teaspoon dried thyme, broken into smaller pieces (or sage)
1/4 teaspoon dried thyme, broken into smaller pieces (or sage)
1/4 teaspoon dried rosemary
1/2 teaspoon kosher salt (I just guessed an amount and thought it could use more salt, so you may want to up this to 3/4 teaspoon)
1/2 teaspoon kosher salt (I just guessed an amount and thought it could use more salt, so you may want to up this to 3/4 teaspoon)
freshly ground black pepper
For the glaze:
1 cup fresh cranberries
1/4 cup sugar
1/4 cup water
Directions:
For the glaze:
1 cup fresh cranberries
1/4 cup sugar
1/4 cup water
Directions:
Preheat oven to 400F. Spray a standard 12-cup muffin tin with nonstick cooking spray.
1. Heat the oil in a nonstick skillet over medium heat. Cook the onions until softened, about 8 minutes. Add the mushrooms and garlic and cook for about 5 minutes more, or until vegetables are tender.
1. Heat the oil in a nonstick skillet over medium heat. Cook the onions until softened, about 8 minutes. Add the mushrooms and garlic and cook for about 5 minutes more, or until vegetables are tender.
2. Add veggies to a bowl with the turkey, pumpkin, egg white, oats, Worcestershire, herbs, salt, and pepper. Toss gently to combine. Divide the mixture evenly among the muffin tin. Place in the oven, bake for 20 minutes.
3. Meanwhile, combine cranberries, sugar, and water in a small saucepan. Bring to a boil and then simmer for 10 - 15 minutes. Spoon onto the meatloaf muffins, and bake for another 15 minutes. Make sure to test the internal temperature of the meatloaves to make sure it registers at a safe temperature for poultry (165F being the absolute lowest, although mine were considerably above and still very moist). Remove from the oven and let rest for 5 minutes before serving.
3. Meanwhile, combine cranberries, sugar, and water in a small saucepan. Bring to a boil and then simmer for 10 - 15 minutes. Spoon onto the meatloaf muffins, and bake for another 15 minutes. Make sure to test the internal temperature of the meatloaves to make sure it registers at a safe temperature for poultry (165F being the absolute lowest, although mine were considerably above and still very moist). Remove from the oven and let rest for 5 minutes before serving.
Source: Adapted from Cara's Cravings
Thursday, November 3, 2011
Pumpkin Yeast Bread
This is an oooold recipe - meaning that I made it a long time ago. In fact, these photos were taken in my apartment kitchen in Chicago . . . in December 2009! By the time I loaded them on my computer, pumpkin season was pretty much over. I planned to post this recipe last fall but never did. So here we are.
This is a really good bread recipe - just a hint of sweetness and a mellow pumpkin flavor. It's great for the leftover turkey sandwiches that we all love to enjoy throughout the holidays. I plan to make this again this year and follow Annie's example of creating a Thanksgiving leftover panini - yum!
Pumpkin Yeast Bread
Ingredients:
1/2 cup warm water
1 1/2 tablespoon instant yeast
2/3 cup warm milk
2 large eggs
1 1/2 cups pumpkin puree
2 tablespoons vegetable oil
1/2 cup brown sugar
2 teaspoons salt
1/2 teaspoon ground cinnamon
1/4 teaspoon ground ginger
1/4 teaspoon ground nutmeg
Dash of ground cloves
6 1/2 cups bread flour (approximately)
Directions:
1. In the bowl of an electric mixer fitted with the paddle attachment, combine the warm water and yeast. Add in the milk, eggs, pumpkin, oil, brown sugar, salt, and spices. Mix briefly to combine.
2. Add 4 cups of the bread flour to the bowl, and mix until a sticky dough has formed. Switch to the dough hook. With the mixer on low speed, gradually add the remaining flour until you have a dough that is smooth and elastic, and not sticky.
3. Transfer the dough to a well-oiled bowl, turning once to coat the dough. Cover the bowl with a damp kitchen towel and let the dough rise until doubled in size, about 1 hour.
4. Turn the dough out onto a lightly floured work surface. Divide in half. Press each pieces into a rectangle about 1 inch thick and no longer than 9 inches long. With the long side of the dough facing you, roll the dough firmly into a cylinder, pressing down to make sure the dough sticks to itself. Turn the loaf seam-side up and pinch the seam closed. Place the loaves in two well-oiled 9 x 5-inch loaf pans and press down gently so the dough touches all four sides of the pan. Cover with a towel and let rise until almost doubled, about 45 minutes.
5. Preheat the oven to 375F. Bake the loaves for about 30 minutes, or until an instant-read thermometer inserted into the loaf reads 190F. Transfer to a wire rack and let cool.
Source: Annie's Eats, originally adapted from King Arthur Flour
Monday, October 31, 2011
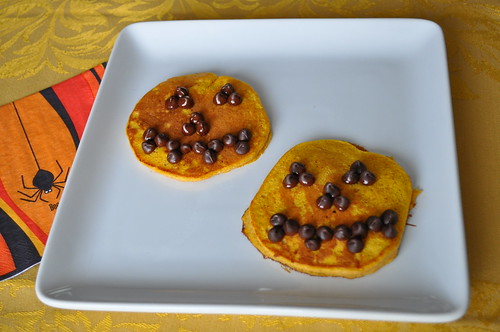
Happy Halloween with Pumpkin Pancakes!!!
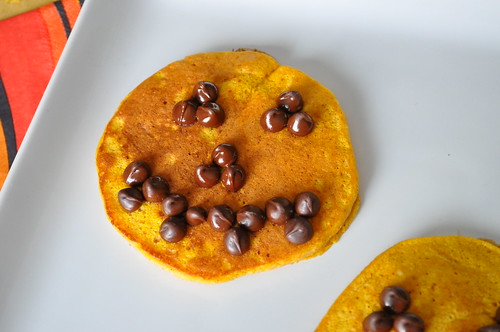
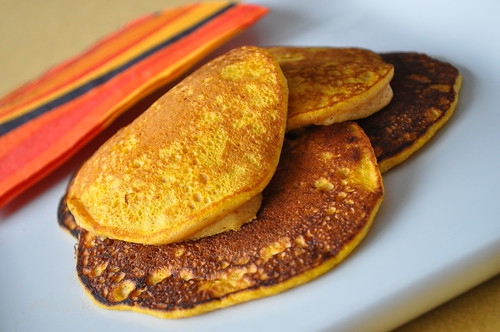
Happy Halloween! Just a last minute recipe with an idea that turns ordinary pancakes into a festive treat. I have wanted to try pumpkin pancakes for a while now, and I started thinking about how to make them more Halloween-oriented - why not use chocolate chips to make them into jack-o-lanterns? My mom used to make pancakes in Mickey Mouse shapes and used chocolate chips for the face, so this concept is virtually the same.
In my opinion, pancakes should be light and fluffy, but too often the pancakes I order in restaurants are heavy and dense. Like the pumpkin waffles, this recipe uses the technique of whipping up egg whites to fold into the batter; I think this creates a super fluffy pancake. We really loved these pancakes, although they could use more pumpkin spice flavor. Next time I'll probably double the pumpkin pie spice.
Have a spooktacular day!
Pumpkin Pancakes
Servings: 2 - 3
Ingredients:
1/2 cup all-purpose flour
1 tablespoon sugar
1 teaspoon baking powder
1/2 teaspoon pumpkin pie spice (double this to bump up pumpkin spice flavor)
1/4 teaspoon salt
1/2 cup skim milk
1/2 cup pumpkin puree
2 large eggs, separated
2 tablespoon unsalted butter, melted
1/2 teaspoon vanilla extract
Directions:
1. In a large bowl, whisk together the flour, sugar, baking powder, pumpkin pie spice, and salt.
2. In a separate bowl, combine the milk, pumpkin puree, egg yolks, melted butter, and vanilla extract together, whisking to blend until smooth.
3. Add the wet ingredients to the dry ingredients, mixing with a spatula until just combined.
4. In the bowl of an electric mixer, beat the egg whites until thick and stiff.
5. Gently fold the egg whites into the pancake batter until fully incorporated.
6. Meanwhile, heat a frying pan over medium heat.
7. Lightly spray the pan with cooking spray or use butter or butter substitute (we like Brummel & Brown). Pour batter onto pan in 1/4-cup increments (I like scooping it with a 1/4 cup measuring cup and using the bottom of the cup to smooth out the thick batter).
9. Transfer each cooked pancake to a warm plate (or one in the microwave to prevent cooling) and repeat with the remaining batter.
10. Serve with your favorite pancake toppings.
Servings: 2 - 3
Ingredients:
1/2 cup all-purpose flour
1 tablespoon sugar
1 teaspoon baking powder
1/2 teaspoon pumpkin pie spice (double this to bump up pumpkin spice flavor)
1/4 teaspoon salt
1/2 cup skim milk
1/2 cup pumpkin puree
2 large eggs, separated
2 tablespoon unsalted butter, melted
1/2 teaspoon vanilla extract
Directions:
1. In a large bowl, whisk together the flour, sugar, baking powder, pumpkin pie spice, and salt.
2. In a separate bowl, combine the milk, pumpkin puree, egg yolks, melted butter, and vanilla extract together, whisking to blend until smooth.
3. Add the wet ingredients to the dry ingredients, mixing with a spatula until just combined.
4. In the bowl of an electric mixer, beat the egg whites until thick and stiff.
5. Gently fold the egg whites into the pancake batter until fully incorporated.
6. Meanwhile, heat a frying pan over medium heat.
7. Lightly spray the pan with cooking spray or use butter or butter substitute (we like Brummel & Brown). Pour batter onto pan in 1/4-cup increments (I like scooping it with a 1/4 cup measuring cup and using the bottom of the cup to smooth out the thick batter).
8. Cook each pancake until lightly browned on each side, about 1 minute per side. Air bubbles will start to reach the surface of the pancake and escape, indicating that it may be time to flip.
9. Transfer each cooked pancake to a warm plate (or one in the microwave to prevent cooling) and repeat with the remaining batter.
10. Serve with your favorite pancake toppings.
Source: Adapted from The Curvy Carrot, originally from Bon Appetit via Epicurious
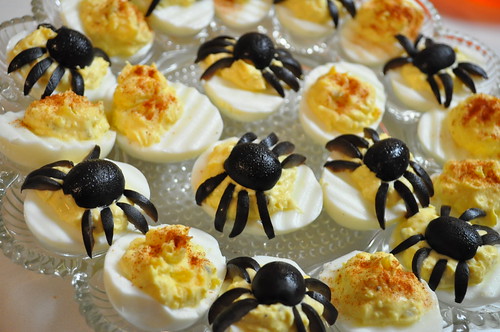
Some deviled eggs my mom made with black olive spiders on top! :)
HAPPY HALLOWEEN!!!
Wednesday, October 19, 2011
Pumpkin Cornbread
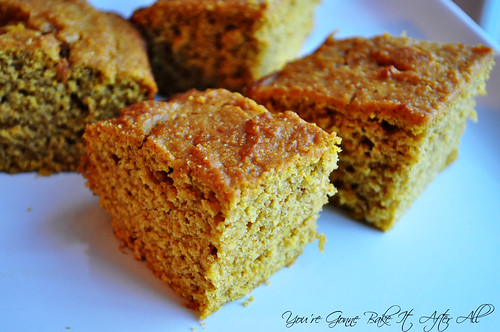
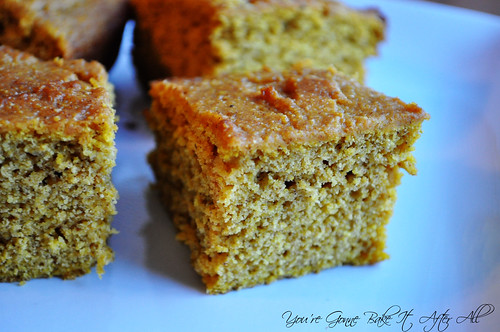
I saw this Pumpkin Cornbread recipe the day before I planned to make the Turkey Pumpkin Chili - score! Cornbread is the perfect accompaniment to chili, and what better side to serve with pumpkin chili than pumpkin cornbread?!
This cornbread was fantastic! Some cornbread recipes result in bread that is slightly on the dry side, but this one isn't. It's not moist like a cake, but in cornbread terms it's definitely moist; I think the olive oil helps keep it from getting dry. This recipe is simple and quick to throw together. We both loved this cornbread and will be making it again soon!
Pumpkin Cornbread
Ingredients:
1 cup all-purpose flour
1 tablespoon baking powder
1 teaspoon Kosher salt
1/2 tablespoons ground cinnamon
1/4 teaspoons ground nutmeg
1/2 cup packed brown sugar
1 cup cornmeal
2 whole eggs
1 cup pumpkin puree
1/4 cup olive oil
1 tablespoon molasses
Directions:
Preheat the oven to 400F and grease an 8 x 8-inch baking dish (or spray with nonstick cooking spray).
Preheat the oven to 400F and grease an 8 x 8-inch baking dish (or spray with nonstick cooking spray).
1. In a medium bowl, whisk together the flour, baking powder, salt, spices, brown sugar, and cornmeal.
2. In a small bowl or glass measuring cup, lightly beat the eggs, and then stir in the pumpkin, oil, and molasses.
3. Stir the wet ingredients into the dry ingredients just until combined, and then pour the batter into the pan, smoothing out the top as much as possible.
4. Bake 30 minutes or until a knife inserted in the center comes out clean. Serve warm.
Source: Tasty Kitchen
Sunday, October 16, 2011
Turkey Pumpkin Chili
As if it isn't already apparent, I love cooking and baking with pumpkin. Pumpkin is actually very healthy; it's high in vitamin A and fiber. The problem is that most pumpkin recipes are desserts or sweets where the health benefits are often overshadowed by sugar, butter, oil, etc. Don't get me wrong, I certainly enjoy those recipes, but I love to find healthy recipes that incorporate pumpkin as well.
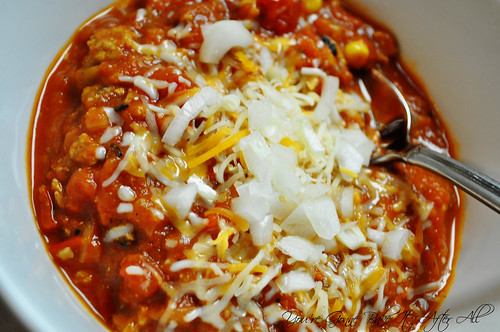
Cara posted this Turkey Pumpkin Chili last year and I immediately bookmarked it. After making the very spicy Turkey Chili last month, I decided to try another variety. This chili is no where near as spicy as the Turkey Chili I posted last month; it actually has a nice amount of spice for my taste. While you may not even taste the pumpkin itself, it nicely thickens the chili and adds an almost creamy element. The labs on our floor are having a Pumpkin and Chili potluck next month, and I plan to bring this chili - it covers both categories!
Turkey Pumpkin Chili
Ingredients:
1 cup chopped onion
3 cloves of garlic, minced
2 medium sized green peppers (or 1 red; 1 green), diced
3 cloves of garlic, minced
2 medium sized green peppers (or 1 red; 1 green), diced
1 pound ground turkey
1 tablespoon chili powder
2 teaspoon cumin
1 teaspoon cinnamon
1 teaspoon Mexican oregano (I used regular oregano)
1 small can (4-ounce) diced green chili peppers
15 ounce can beans of choice, drained and rinsed
1/2 cup frozen corn kernels
28-ounce can crushed tomatoes
14-ounce can diced tomatoes
15-ounce can pumpkin puree, or 2 cups homemade
Pumpkin beer, optional
Directions:
1. Spray a large pot with nonstick cooking spray and place over medium heat. Add the onions and cook for about 5 minutes, until just softened. Add the garlic and bell peppers, and cook about 5 minutes more until tender. Add the ground turkey and cook until browned, breaking it up into bite-sized pieces. Season with salt, pepper, chili powder, cumin, cinnamon, and oregano.
2. Add pumpkin beer if using. Cook until mostly reduced, then continue.
3. Stir in remaining ingredients, bring to a boil, then reduce heat and simmer for 20-30 minutes to blend flavors.
Alternatively, just brown the turkey with the seasonings and combine with remaining ingredients in a crockpot. Cook on low for 6-8 hours.
4. Serve with your favorite chili toppings - ours are shredded cheese and chopped onions.
Source: Cara's Cravings
Thursday, October 13, 2011
Pumpkin Waffles
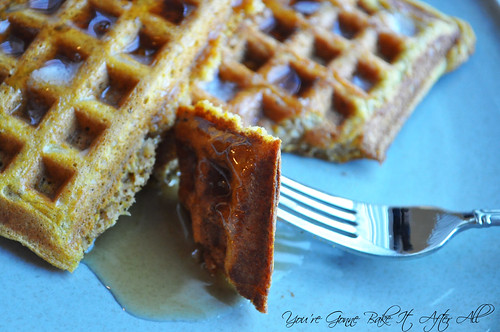
I had a recipe for pumpkin waffles that required the batter sit in the fridge overnight, intending to make the batter on a Saturday night so we could have them for breakfast on Sunday. Time got away from me and it was too late to start making waffle batter, so I decided to search for a recipe in the morning that didn't require an overnight incubation. Thankfully I found this one on Smitten Kitchen.
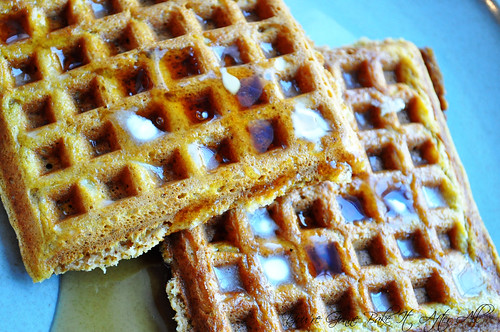
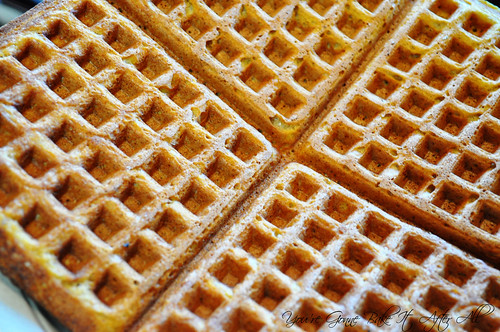
We loved these waffles! The whipped egg whites make for a fluffy interior, and the outside is still nice and crispy like a waffle should be in my opinion. These sort of taste like pumpkin bread! This recipes makes a lot of waffles, so we have the leftovers in our freezer. I look forward to being able to pop one in the toaster for a quick weekday breakfast!
Makes 5 full traditional (not Belgian) waffles (20 squares)
Ingredients:
2 1/2 cups all-purpose flour
1/3 cup packed light brown sugar
2 1/4 teaspoons baking powder
1 teaspoon baking soda
1/2 teaspoon salt
2 teaspoons ground cinnamon
1 teaspoon ground ginger
1/4 teaspoon ground cloves
4 large eggs, separated
2 cups well-shaken buttermilk*
1 cup canned solid-pack pumpkin
3/4 stick (6 tablespoons) unsalted butter, melted
Vegetable oil for brushing waffle iron or cooking spray
*Or use 2 cups milk with 2 tablespoons vinegar and allow to curdle for 10 minutes.
Directions:
Preheat oven to 250°F and preheat waffle iron.
1. Sift together flour, brown sugar, baking powder, baking soda, salt, and spices.
2. Whisk egg yolks in a large bowl with buttermilk, pumpkin, and butter until smooth. Whisk in dry ingredients just until combined.
3. In a mixing bowl with a whisk attachment, whisk the egg whites until they hold soft peaks. Fold them gently into the waffle batter until just combined.
4. Brush waffle iron lightly with oil or spray with cooking spray (I like to use Pam for Grilling because it's a high temperature formula and holds up better to heat of my waffle iron). Pour or spoon batter into waffle iron, spreading quickly. Cook according to manufacturer’s instructions. (When I make waffles, I like to transfer the batter to a pourable measuring cup and pour it onto the waffle iron. I don't even bother spreading the batter because the weight of my waffle iron's lid spreads it nicely).
5. If serving many people, transfer waffles to rack in oven to keep warm and crisp. Repeat with remaining batter. I just cool my extra waffles on a cooling rack, break up the squares, wrap them in waxed paper, and pack them up in freezer bags. Then they are ready to pop in the toaster from frozen.
Source: Adapted from Smitten Kitchen
Sunday, October 9, 2011
Pumpkin Scones
I've only made scones one other time (Chocolate Chip Scones), and I really loved them. When Annie posted these pumpkin scones almost two years ago, I immediately planned to make them. I mentioned before that sometimes I never get around to making a recipe and it gets pushed to the next year . . . that is exactly what happened with these scones, although twice. I've even bought the buttermilk twice before!
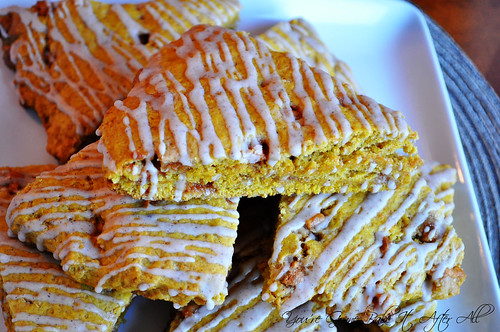
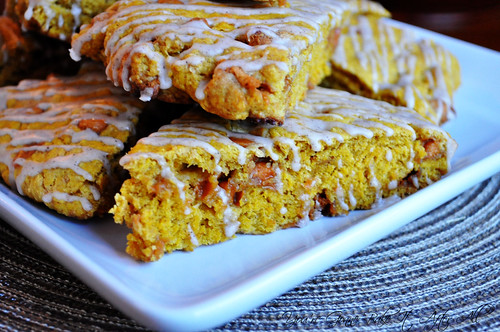
I was determined this fall to finally make these scones! We had planned a girls shopping day so I decided to bring the scones to have before we started our day. These scones are not what I think of as typical scones; they are more like a cake. My mom didn't even want to try one because she's not a big scone fan, but she thought these were more like a coffee cake, and she loved them! In fact, everyone loved these, including Bob who is a self-proclaimed pumpkin-hater! (We have since discovered his dislike of pumpkin is really a dislike of the texture of pumpkin pie!) The butterscotch chips really do add a great flavor to the scones, and the spicy glaze is nice as well. Bob has already asked me, several times, to make these again - that's a winner in my book!
Pumpkin Scones
Ingredients:
For the scones:
2 cups all-purpose flour
1/3 cup packed brown sugar
1/2 teaspoon ground ginger
1/2 teaspoon ground cinnamon
1 teaspoon baking powder
1/2 teaspoon baking soda
1/4 teaspoon salt
8 tablespoons cold, unsalted butter, cut into pieces
1/3-1/2 cup butterscotch chips
1/2 cup buttermilk
1/2 cup pumpkin puree
1 teaspoon vanilla extract
For the glaze:
1 cup powdered sugar
1/4 teaspoon ground cinnamon
Dash of ground nutmeg
Dash of ground ginger
Dash of ground cloves
2 tablespoons milk
Directions:
Preheat the oven to 400° F. Line a baking sheet with parchment paper or a baking mat.
1. In a medium mixing bowl, combine the flour, brown sugar, spices, baking powder, baking soda and salt; whisk to combine.
2. Add the cold butter chunks to the bowl and stir with a fork to combine. Cut the butter into the dry ingredients using two forks or a pastry blender until the mixture resembles coarse crumbs and the largest butter pieces are no bigger than peas. Mix in the butterscotch chips.
3. In a small bowl or measuring cup, combine the buttermilk, pumpkin puree, and vanilla extract.
3. In a small bowl or measuring cup, combine the buttermilk, pumpkin puree, and vanilla extract.
4. Add the wet ingredients to the bowl with the dry ingredients and stir together gently just until the dough comes together. If necessary, knead a bit with your hands, but be careful not to overwork the dough or you will end up with tough scones.
5. Transfer the sticky mass of dough to the prepared baking sheet. Pat the dough into a 8 or 9-inch round. I sprayed my hands with non-stick cooking spray to make this process easier and prevent the dough from sticking too much to my hands. It also helps to smooth out the surface a bit.
5. Transfer the sticky mass of dough to the prepared baking sheet. Pat the dough into a 8 or 9-inch round. I sprayed my hands with non-stick cooking spray to make this process easier and prevent the dough from sticking too much to my hands. It also helps to smooth out the surface a bit.
6. Bake the round until a toothpick inserted in the center comes out clean, about 17-25 minutes. (The original recipe stated 22 - 25 minutes, but mine cooked in closer to 17 minutes.) Allow to cool to room temperature. Slice the dough round into 8 wedges.
7. To make the glaze, combine the powdered sugar and spices in a small bowl. Add the milk and whisk to combine, until a thick glaze is formed. (If necessary, add a bit more milk to achieve a consistency good for drizzling the glaze.)
7. To make the glaze, combine the powdered sugar and spices in a small bowl. Add the milk and whisk to combine, until a thick glaze is formed. (If necessary, add a bit more milk to achieve a consistency good for drizzling the glaze.)
8. Use a whisk or a plastic bag with the tip cut off to drizzle the glaze over the finished scones. Allow the glaze to set before serving.
Source: Annie's Eats, originally adapted from Joy of Baking
Source: Annie's Eats, originally adapted from Joy of Baking
Sunday, October 2, 2011
Chocolate-Pumpkin Cheesecake Bars
Does anyone else feel like they have so many fall recipes that they want to try, but there simply isn't enough time?! I have felt this way for several years, and have an ongoing list that I just roll-over to the next year. I am really trying to make an effort to enjoy this fall to the fullest and squeeze in as much baking as I can, especially because I'm told I'll have a lot less free time in a couple months :-)
This recipe is one that I found on MarthaStewart.com, perhaps last year? I had it saved, and it jumped out at me as I was looking through my recipes. I really love the combination of pumpkin and chocolate (most notably in the Pumpkin-Chocolate Tart), and adding in cheesecake (like the mini-pumpkin cheesecakes) just made it sound even more appealing.
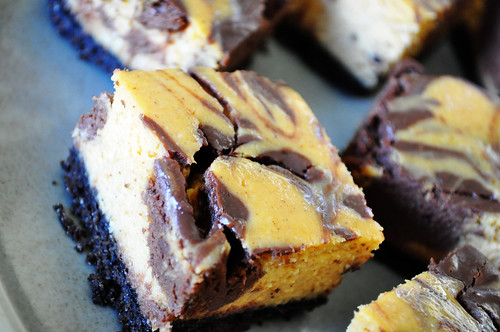
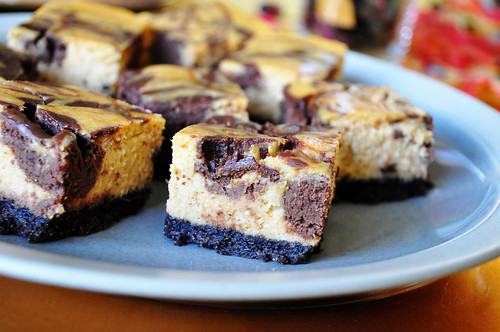
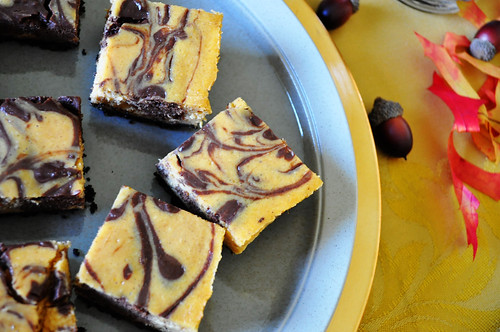
I really cannot gush over these as much as they deserve - they are fantastic! I knew I would like them, but I didn't expect this much. These bars consist of a basic chocolate cookie crust, topped with pumpkin cheesecake, and a portion of the cheesecake mixture is combined with melted chocolate and then swirled in to create pockets of pumpkin-spiced chocolate cheesecake! The cheesecake is perfectly creamy and the chocolate adds a nice touch but isn't overpowering. If you love pumpkin, chocolate, and cheesecake as much as I do, you are sure to love these!
Ingredients:
For The Crust:
20 chocolate wafer cookies (half a 9-ounce package) (I used 4.5 ounces of chocolate animal crackers/cookies)
2 tablespoons sugar
4 tablespoons unsalted butter, melted
For The Filling:
2 8-ounces packages cream cheese (I used light cream cheese)
1 cup sugar
1 cup canned solid-pack pumpkin puree
3 large eggs
3 tablespoons all-purpose flour
1 teaspoon pumpkin-pie spice
1/2 teaspoon salt
4 ounces semisweet chocolate, chopped (I used chocolate chips)
Directions:
1. Preheat oven to 350 degrees. Line bottom and sides of an 8-inch square baking pan with parchment paper or aluminum foil, leaving an overhang on all sides. Set aside.
2. In a food processor, blend cookies with sugar until finely ground (you should have about 1 cup crumbs); add butter, and pulse until moistened.
3. Transfer crumb mixture to prepared pan, and press gently into bottom. Bake until fragrant and slightly firm, 12 to 15 minutes. Set aside to cool.
4. Place cream cheese in food processor or the bowl of a stand mixer fitted with the paddle attachment; blend until smooth. Add sugar, pumpkin puree, eggs, flour, pumpkin-pie spice, and salt; process until combined. Set aside.
5. Place chocolate in a microwave-safe bowl; microwave in 30-second increments, stirring between each, until melted. Add 1 cup pumpkin mixture; stir to combine. Set aside.
6. Pour remaining pumpkin mixture into prepared pan. Drop dollops of chocolate mixture onto pumpkin mixture; swirl by dragging paring knife through the chocolate and pumpkin several times to create marbled pattern. Bake until cheesecake is set but jiggles slightly when gently shaken, 40 to 50 minutes.
7. Cool in pan. Cover; chill until firm, at least 2 hours (and up to 2 days). Using overhang, transfer cake to work surface. With a knife dipped in water, cut into 16 squares. Serve.
Source: Adapted from MarthaStewart.com
Sunday, January 3, 2010
Welcome 2010!
Happy New Year! I have been dreaming about 2010 for a LONG time. I started graduate school in Chicago in 2004 knowing that I would not be done until close to 2010, at which point I planned to move back to St. Louis where my entire family lives. Meanwhile, Bob decided to go back to school, knowing he would graduate in the spring of 2010. We both feel that our lives have sort of been on hold during this time - waiting to have more time (and space) for our hobbies and interests. So, 2010 is a big year for Bob and I:
His graduation and my hooding ceremony:

A big move to St. Louis:

New jobs: (Bob will be working as a PT and I'll be working with fruit flies!)


House shopping:

And one of my favorite parts is that my cousin Chris, who joined the Navy just as I was starting graduate school, will have completed his service and is moving back to St. Louis too.

I am beyond excited to be near my parents and extended family again!
Since it's the beginning of a brand new year, I'd like to reflect back on 2009. I feel like I have grown so much in my cooking since starting this blog last March - it has really pushed me beyond my comfort zone and forced me to try new things. I have now worked with mock marzipan, royal icing, and yeast breads, just to name a few. I am so thankful to each and every one of you who read my blog and who comment on the recipes I post!
To celebrate the occasion, I've decided to go through the things I made in 2009 and choose my favorites. I realized I couldn't pick just one favorite of each category of food, so I decided to just pick my top recipes and list them here. This is hard because I typically only post something if I really like it, so I usually recommend it all. To be featured in this list, the recipe must meet my standards - most importantly, taste amazing - when I read the title of these recipes my mouth actually starts watering - that's how good they are. As a cooking blogger, it's difficult for me to repeat recipes because there are SO MANY fabulous ones out there to try (I have about a million starred in Google reader to prove it!) To be honest, it's really only the super special recipes that I actually make a second time. These are recipes that I plan to make again and again. Sometimes it's not even my choice - it's that Bob requests them over and over. Funnily enough, a lot of my top recipes are from Giada De Laurentiis! Not on purpose, it's just how it turned out.
In no particular order, this is my list of "must makes" from 2009:
Blueberry Ricotta Pancakes - This is a simple recipe from Giada because it uses store bought pancake mix, but it's a semi-homemade approach that tastes incredible. The ricotta cheese really elevates the pancakes to a new level. I am a pancake snob and only like them super light and fluffy, and these pancakes deliver!
Panzanella - I absolutely LOVE this classic tomato and bread salad recipe of Giada's. Perfect for summer when tomatoes are at their peak, but still great the rest of the year.
Chicken Tortilla Soup - I have made many chicken tortilla soups before and never quite found the right one . . . until this one. I love it's simplicity - no corn, no beans, just a super tasty broth with a few veggies, and some chicken of course. The toppings are exceptional. I think each of them adds another flavor dimension. I recently made this for my family and they loved it!
Ribollita - I would have to say this was one of my most surprising recipes (it's Giada's). The whole time making it I was convinced I would hate it - it didn't look appetizing and I really planned on having to eat crackers for dinner. Not only did I eat the soup, I had a second bowl. It was that good. And now here it is on my top recipes lists for 2009. Go figure!
Chicken Gyros - I have made these at least 5 times in the last 5 months! They are SOOO good. The most recent time I made an amazingly delicious flat bread, which I will post soon. It took these from awesome to indescribable :)
Garlic Chicken - Serve with rice, serve with rice noodles, just serve!
Triple T Deluxe Pizza - One of the only recipe on this list that is my own, and it's not even a recipe! The crust is from Cook's Illustrated and truly makes the pizza. The toppings are a great combination, I think. This was the first time I made pizza at home and thought, "hey, this is better than I can get delivered" - no joke.
Rigatoni with Sausage, Pepper, and Onions - Just thinking about this dish makes my mouth water (another Giada recipe). The sweet onions and peppers, the tangy tomato sauce, the comforting pasta, and one of my favorite flavors - marsala wine. This is one of my favorite dishes of all time!
Chicken with Dijon Mascarpone Sauce - Love this recipe! Yet another one from Giada - what can I say, she's knows good Italian food! Get your mascarpone cheese at Trader Joe's if you can - so much cheaper. This recipe is so indulgent. I save it for special occasions and company.
Fresh Salsa - The first time I made this, I was skeptical. How could I like it more than the great salsas you get in Mexican restaurants? I was mistaken - this salsa is right up there with the best of them. It's fantastic served with quesadillas, enchiladas, or tacos, or by itself with tortilla chips. I served this as an appetizer when my cousin and her boyfriend were over one night. He kept saying how good it was, then kept apologizing for repeating himself - it was cute :)
Spinach and Chicken Quesadillas - My favorite quesadilla recipe so far! In my opinion it's the fajita seasoning that makes it special (I credit Annie for that addition!) It was through this recipe that I realized my love of Monterey Jack cheese - it's perfect for Mexican food!
Tres Leches Coconut Cupcakes with Dulce de Leche Buttercream - Wow. Seriously that word sums it up. These were incredible. I still have people at work say to me "you know, you can make those anytime, you don't have to dress them up as Easter Chicks." I take a LOT of desserts into work, and for this one to stand out as much as it did really shows it's a great recipe. I can't wait to make these for my dad because I know he will LOVE them!
Pumpkin-Chocolate Tart - Not only is this one of my favorite desserts in terms of decoration, but this tart is fantastic. The combination of the sour cream and pumpkin makes a super tasty filling. The gingerbread-tasting crust is spicy and delicious, and it's coated in solid chocolate! I plan to make this again next fall for sure.
Chocolate and Toasted Coconut Covered Homemade Marshmallows - Homemade marshmallows are fabulous on their own, but as soon as I dipped them in chocolate and rolled them in toasted coconut, I had a hit! These are just like candy. My only mistake was not making more of them! Next year, I will be prepared with plenty of chocolate and coconut on hand to make a bunch of these.
Triple Chocolate Biscotti - I'm certainly not a biscotti expert, since these were the first I've ever tasted, but what a great little cookie! I loved the combination of white and bittersweet chocolates. These are great on their own or dipped in your favorite coffee, tea, or even milk.
Chicken Marbella - This is such a famous recipe and probably needs no introduction, but if you've never tried it, you must. Great for a crowd or a small group with yummy leftovers, the flavors in this dish are truly wonderful.
Double Chocolate Layer Cake - Decadent and rich - this dessert is perfect for chocolate lovers like yours truly. I'm not surprised it's the most accessed recipe on Epicurious.com!
Spicy Roasted Chicken - Pam has several great looking chicken recipes - all of which I'd love to try. This one is so delicious. I love the spices and the chicken turned out very juicy.
Chicken Pesto Pizza - I loved this pizza! It's a blend of sweet peppers, zucchini, and chicken, flavored with Italian seasoning. The ingredients magically combine to make one fantastic dish.
Bailey's Irish Cream Cheesecake - Of all the cheesecakes I've made, this is my favorite. Such a creamy filling covered in ganache - yum!
And just for fun, these are the top posts that have received the most hits according to Google Analytics:
10. Layered Taco Dip
1. Bacon Stuffed Cherry Tomato Appetizers (Thanks for the recipe Kat!!!)
Wednesday, November 25, 2009
Black Bottom Caramel Pumpkin Cheesecake Bites
I've been wanting to make these ever since the day Jenny posted them - they were just so cute! They're actually one of the reasons I finally got the mini cheesecake pan. These were really fantastic! The Oreo crust, the creamy cheesecake, the caramel topping - a winning combination! I asked Bob to compare these to the Pumpkin Spice Magic Bar Mini's; he said he actually liked these better, but said if these were topped with coconut, they'd be over the top! :)
Instead of topping them with Pumpkin Spice Kisses, I decided to make chocolate pumpkins. I used the technique that Annie posted, where you pipe chocolate onto waxed paper and then simply peel it off. It's so much fun, and I can't wait to make all of the other fun shapes I've though of. I highly recommend these cheesecake bites!!!
I should be in St. Louis for the holiday weekend by the time this posts, and I probably won't be near a computer for the next few days. Everyone please have a safe and wonderful Thanksgiving!!! See you soon with my first annual "12 Days of Christmas" installment! :)
This really is a pumpkin shape, although Bob said "What is this? A moose?" Figures!

Black Bottom Caramel Pumpkin Cheesecake Bites
Ingredients:
8 whole Oreos, finely ground in food processor
1 1/2 Tablespoons melted butter
8 ounces softened cream cheese (I used light)
1/2 cup granulated sugar
1/2 cup pumpkin puree
1 large egg
1 teaspoon vanilla
1/2 teaspoon cinnamon
1/4 teaspoon ground nutmeg
sprinkling of pumpkin pie spice
Caramel dip or fat free caramel sundae topping
1 ounce semi-sweet chocolate
Directions:
Preheat oven to 350F.
1. Combine the ground Oreos and melted butter into a bowl until well combined. Spoon into 12 mini cheesecake cups that have been sprayed with cooking spray (I didn't spray them and had no problem getting them out). Press into the bottom of each cup so the crust is flat. (If you have a cup or container small enough that works well.) Partially bake for 10 minutes then remove from oven.
2. With a handheld or stand mixer, beat the cream cheese, sugar, and pumpkin until smooth. Beat in egg, vanilla, and spices until combined.
3. Pour batter evenly into the 12 cups filling about 3/4 way full. (I found it was easiest to pour the batter into a pourable measuring cup and then pour into the cups). Carefully put about a teaspoon of caramel on the top of each filled cup and gently swirl with a toothpick.

4. Bake for 25-28 minutes until cheesecake is cooked through. At this point I used a plastic knife to loosen the edges of each cheesecake.

5. After the cheesecakes have cooled, remove them from the pan and top them with more caramel. Refrigerate.

6. Make the chocolate decorations: Draw desired shape(s) on a piece of paper and trace it onto waxed paper 12 times using a sharpie or pen. Flip waxed paper over and place on a flat surface.

7. Melt 1 ounce of semi-sweet chocolate in a bowl in the microwave until just melted. Add to a small sandwich bag and cut off very tip.
8. Pipe chocolate onto waxed paper, tracing the shapes made by the sharpie. Slip the sheet of waxed paper into the fridge. When set, carefully remove the shapes from the waxed paper and decorate the cheesecakes.
Source: Adapted from Picky Palate
Wednesday, November 11, 2009
Pumpkin Seed Brittle
There are a lot of things I've never had before because of my peanut/tree nut allergy. Peanut brittle is one of them. Luckily, these days it seems like people are coming up with alternative ideas to traditional recipes, many of which use sunflower or pumpkin seeds instead of nuts. When I saw Martha Stewart on the Today show a while back, she featured Pumpkin Seed Brittle, which I found very exciting. I've since seen in around a lot - even at Williams-Sonoma! I thought this recipe was really good, although I can't compare/contrast it to peanut brittle obviously. I took this to a party and people seemed to like it. The one comparison I heard was that it's not quite as hard as traditional peanut brittle (maybe because of the honey). This recipe was so simple to prepare, especially since I had already roasted pumpkin seeds the week before (using THIS method).

Pumpkin Seed Brittle
Ingredients:
1/4 cup (1/2 stick) unsalted butter, plus more for baking sheet or dish
1/2 cup packed light-brown sugar
1/4 cup honey
1 cup fresh pumpkin seeds, toasted as desired
Directions:
1. Butter an 11 x 17-inch rimmed baking sheet or Pyrex dish. Set aside.
2. Melt butter in a small saucepan over medium heat. Stir in sugar and honey. Bring to a boil. Cook, without stirring, until mixture is medium amber and a candy thermometer registers 280F, about 6 minutes.

3. Stir in the pumpkin seeds. Cook until mixture reaches 300F, about 2 minutes.
4. Pour into prepared pan. Let cool completely. Break into pieces.
Source: Adapted from Martha Stewart
Friday, November 6, 2009
Pumpkin Latte
One of my favorite things about fall is the Pumpkin Spice Latte. I first noticed them at Starbuck's years ago, and now it seems like every major coffee place carries a version of this delicious drink. As good as they are, I find it hard to shell out almost $5 for a drink, so last year I found this Pumpkin Latte recipe. I really enjoyed! Bob has a bit of a problem with the texture of the drink (it has pure pumpkin puree in it so it's not quite as smooth as the more artificial drinks out there). What I like is that you can make this recipe any way you want (kind of like at Starbuck's!) - decaf, half caf, lower sugar, etc. It's a nice alternative that allows you to stay in your warm cozy home and save a little money for the upcoming holiday season! :)


Pumpkin Latte
Serves 2 (8-ounce servings)
Ingredients:
1 cup strong coffee
2/3 cup (5-ounce can) evaporated fat free milk
1/4 cup pure pumpkin puree
1 to 2 teaspoons granulated sugar (or sweetener of your choice)
1/8 teaspoon pumpkin pie spice or ground cinnamon
Optional toppings:
whipped cream
sprinkling of pumpkin pie spice or ground cinnamon
Directions:
1. Combine coffee, evaporated milk, pumpkin, sugar, and pumpkin pie spice in a 2-cup microwave-safe glass measure or small saucepan. Heat until very hot. If using stove, use medium-low heat and stir occasionally.
2. Carefully pour into mugs. Top as desired.
Tip: To make a foamy top to your latte, prepare as above and carefully transfer the mixture to a blender. Cover with lid, hold lid down with folded towel or potholder. Blend for 1 minute, then serve.
Source: Adapted from CooksRecipes.com
Wednesday, November 4, 2009
Fluffy Pumpkin Dip with Cinnamon Tortilla Cutouts
Here is another recipe I had made for Thanksgiving brunch last year. I just thought it was so adorable when I saw it on Leslie's blog, The Hungry Housewife. I'm really into using food as serving dishes, so this was right up my ally. Plus, the Cinnamon Tortilla Cutouts are so ridiculously cute! I have a bunch of fall-themed cookie cutters that I knew would be perfect for this sort of thing. My family really liked the dip, and especially liked the Cinnamon Tortillas. I may just make this again at our Thanksgiving Day brunch this year. I recommend this recipe for any fall-themed party!


(Pictures taken by my Dad last year!)


Fluffy Pumpkin Dip
Ingredients:
1 16-ounce container of cool whip, thawed
1 5-ounce packet of instant vanilla pudding
1 15-ounce can pure pumpkin puree
1 1/2 teaspoons pumpkin pie spice
1/2 teaspoon vanilla extract
1 pie pumpkin, hollowed, for serving (if desired)
Directions:
1. In a large bowl, mix together the pudding, pumpkin, pumpkin pie spice, and vanilla. Gently stir in the cool whip. This will take about 5 minutes to get a smooth texture.
2. Add dip to the hollowed pumpkin and serve with fruit and Cinnamon Sugar Tortillas (see below).
Cinnamon Sugar Tortilla Cutouts
Ingredients:
Flour tortillas
Cinnamon sugar
Butter flavored cooking spray
Directions:
Preheat oven to 350F.
1. Use cookie cutters or cut tortillas into desired shapes. Place them on a lined baking sheet.
2. Spray tortillas with butter flavored spray and sprinkle with cinnamon sugar as desired. Spray again to make sure the cinnamon sugar adheres.
3. Bake for 10 minutes or until lightly browned.
Source: The Hungry Housewife
Monday, November 2, 2009
Pumpkin Spice Magic Bar Mini's!
Happy November!!! Thanksgiving month is here! The pumpkin recipes will continue throughout the month :)
Mini-cheesecakes are so popular in the food blogging world (especially on Jenny's blog Picky Palate), and I've been wanting a mini-cheesecake pan for a long time. For my birthday, I decided to buy myself two pans.
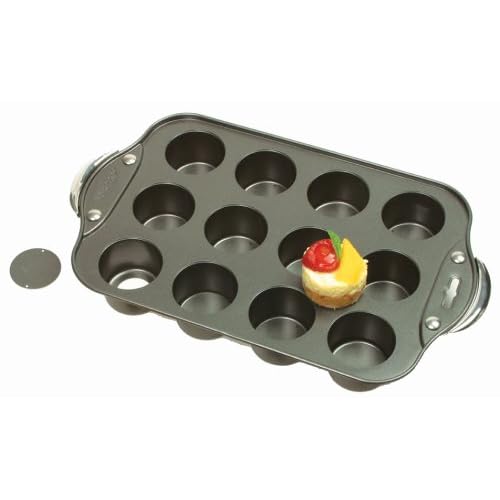
I added them to my Amazon shopping cart but waited until the next day to purchase, and wouldn't you know it - the price went up $3 per pan! Shows me not to hesitate!
I'm so excited for all the possibilities! These pans are great for not just cheesecakes but any little dessert. Mini-sizes are so convenient for parties, the workplace, and even just to have at home. I made these Pumpkin Spice Magic Bar Mini's for Bob to take in to the hospital, and he said they were a big success! We think they taste better cold, so I suggest you store them in the fridge. 


Pumpkin Spice Magic Bar Mini's
I doubled the recipe for 24 mini's, so please see the original source for the 12-portion recipe.
Ingredients:
1/2 cup melted butter
1 1/2 cups graham cracker crumbs
4 ounces cream cheese, softened
1 1/2 cups pumpkin puree
6 Tablespoons sugar
1/2 teaspoon cinnamon
1 cup chocolate chips
1 cup cashews, coarsely chopped (I omitted)
1 1/2 cups sweetened shredded coconut
1 cup sweetened condensed milk
Caramel ice cream topping to drizzle
Directions:
Preheat oven to 350F.
1. Place melted butter and graham cracker crumbs in a large bowl, then mix to combine. Press into the bottom of mini-cheesecake cups. Bake for 8 minutes then remove from oven.
2. In another large bowl, beat the pumpkin, cream cheese, sugar, and cinnamon until smooth. Spoon evenly over each graham cracker crust, about 2 small spoonfuls. Next layer the chocolate chips evenly over the pumpkin layer, followed by the cashews (if using), coconut, and condensed milk.
3. Bake for 22-25 minutes or until the top is golden brown. Remove and let cool. **Before bars cool completely, use a plastic knife to run around the edges to loosen.
4. Once cooled, carefully remove the bars from the cups and arrange on a serving tray. Drizzle with warm caramel and serve. Alternatively, chill until ready to serve.
Source: Picky Palate
Wednesday, October 28, 2009
Harvest Tarts
This is another appetizer I served for Game Night several weeks ago. I've had this recipe marked for 5 years! It's from the Quick Short Chicken Recipes cookbook my aunt gave me when I started graduate school. I always turn to it when I'm flipping through the book, but never felt I had the right occasion to try it out. The original name of this dish is "Chicken Tarts with Pumpkin, Spinach, and Haloumi." This name was way too long, so my friend Kathleen suggested we call them "Harvest Tarts," and the name stuck.
In order to prep these in time for the party, I cut up and roasted the pie pumpkins the night before. I used two pumpkins and had a ton left over, so I've adjusted the recipe for 1. I couldn't find haloumi cheese, but a quick Google search revealed that it's simply a high melting point cheese similar to frying cheese, which Trader Joe's carries. Have you ever seen the cheeses at Trader Joe's??? SOOOO much cheaper than our local grocery store. Even cream cheese and mascarpone are much, much cheaper, which surprised me!
The party guests really liked these tarts. Bob and I thought they were tasty but needed a little something else - maybe a sauce? I'm not quite sure, but if you serve them with a sauce it's probably best on the side, otherwise it might soften the pastry.

Harvest Tarts
Ingredients:
1 sheet puff pastry, defrosted
3 Tablespoons olive oil
3 Tablespoons olive oil
2 small chicken breasts, sliced
15 ounces pumpkin, sliced into 1-in x 1-in thin squares
1 1/4 ounces baby spinach leaves
4 1/2 ounces haloumi or frying cheese
Salt and pepper
Directions:
Preheat oven to 400F.
1. To roast the pumpkin, put the slices on a baking sheet and brush with 1 tablespoon oil. Season with salt and pepper. Bake for 15-20 minutes, or until the pumpkin is soft.
2. Heat 1 tablespoon oil in a frying a pan and cook the chicken, seasoned with salt and pepper, until cooked through.
3. Unfold puff pastry into a large square. The original recipe says to cut the pastry into 4 equal squares (roughly 5 x 5-inch). I wanted smaller tarts since it was one of many appetizers, so I cut the pastry into 9 equal squares.
4. Top pastry with slices of pumpkin, spinach leaves, chicken, and a slice of the cheese. Brush the entire thing (including the pastry dough) with remaining olive oil and season with salt and pepper, if desired.

3. Bake for 25 minutes or until pastry has puffed and slightly browned.
Source: Adapted from the Quick Short Chicken Recipes cookbook
Tuesday, October 27, 2009
Pumpkin Spice Kiss Brownies
I found these brownies when looking for recipes with the Hershey's Pumpkin Spice Kisses. This recipe was created by taking Dorie Greenspan's French Chocolate Brownies and swirling melted Pumpkin Spice Kisses through the batter. Let me first say that these brownies are delicious! Although, they are more cakey than I prefer in a brownie (I like them super chewy and fudgy!) After some searching, I discovered that Dorie initially intended these to be a cake, but her French guests thought they were brownies. Knowing that, I definitely think these are more like brownies than a cake. I did have some problems with the baking time (see below), so that might have made them a bit more cakey. I took these to lab meeting, and everyone loved them. The cinnamon added an extra special touch.

Pumpkin Spice Kiss Brownies
Ingredients:
1/2 cup all-purpose flour
1/8 teaspoon salt
1/8 teaspoon ground cinnamon
1 teaspoon pumpkin pie spice
6 ounces bittersweet chocolate, finely chopped
1 1/2 sticks (12 Tablespoons) unsalted butter, cut into 12 pieces, at room temperature
3 large eggs
1 cup sugar
45 Hershey's Pumpkin Spice Kisses, unwrapped
1/8 teaspoon salt
1/8 teaspoon ground cinnamon
1 teaspoon pumpkin pie spice
6 ounces bittersweet chocolate, finely chopped
1 1/2 sticks (12 Tablespoons) unsalted butter, cut into 12 pieces, at room temperature
3 large eggs
1 cup sugar
45 Hershey's Pumpkin Spice Kisses, unwrapped
Directions:
Preheat oven to 300F.
1. Center rack in the oven. Line an 8-inch square baking pan with foil, butter the pan and place it on a baking sheet.
2. Whisk the flour, salt, pumpkin pie spice, and cinnamon together. Put the chocolate in a heatproof bowl, and set the bowl over a saucepan of simmering water. Stir occasionally until the chocolate melts. Remove the bowl from the saucepan and add the butter, stirring until it melts. It's important that the chocolate and butter not get very hot. However, if the butter is not melting, you can put the bowl back over the still-hot water for a minute. If you've got a couple of little bits of unmelted butter, leave them - it's better to have a few bits than to overheat the whole.
3. Working with a stand mixer fitted with the whisk attachment, or with a hand mixer in a large bowl, beat the eggs and sugar until thick and pale, about 2 minutes. Reduce the mixer speed and pour in the chocolate-butter mixture, mixing only until it is incorporated- you'll have a thick, creamy batter.
4. Add the dry ingredients and mix at low speed for about 30 seconds - the dry ingredients won't be completely incorporated. Then finish folding in the dry ingredients by hand with a rubber spatula. Scrape the batter into the pan.
5. Place the unwrapped kisses in a microwave-safe bowl and microwave on HIGH for 1 minute. Stir until smooth, and then drop by spoonfuls into the brownie batter. Using a knife, swirl the batter to create a marbled effect.
6. Bake for 50 to 60 minutes, or until the top is dry and crackled and a thin knife inserted into the center comes out clean (Note: it took MUCH longer in my oven - I stopped keeping track but my oven is a piece-o-junk so it might have just been that). Transfer the pan to a rack and cool to warm or room temperature.
7. Carefully lift the brownies out of the pan using the foil edges as handles and transfer to a cutting board. (At this point I just removed the foil - it was really easy to remove). Cut into 16 squares.
Source: Dinner & Dessert
Thursday, October 8, 2009
Pumpkin-Chocolate Tart
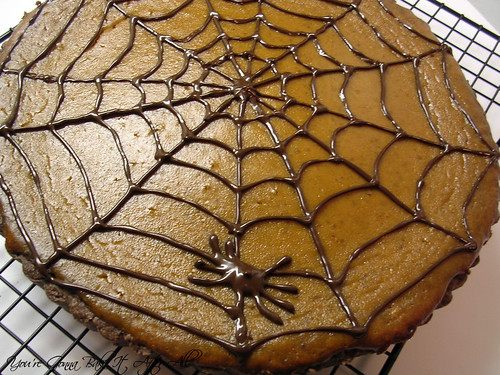
This tart was pretty simple to make, and even the design was fairly easy. I guess I didn't use enough flour when rolling out the crust dough because it was a bit sticky, so it started to fall apart when I transferred it to the tart pan. I simply just pressed it together like you might do for crumb type crusts, and it was fine.
Now for the taste: The crust has some nice spiciness to it because of the cinnamon and cloves. I thought the spices paired nicely with the chocolate; it almost tasted like gingerbread. One thing I loved about the crust was the layer of chocolate on top - seriously good. One member of my lab even commented that the crust can be used for a number of recipes. The pumpkin filling was really delicious - with all of the 'moistness' and spiciness you expect from a pumpkin pie. I really, really like this dessert. I think the combination of chocolate and pumpkin is fantastic. It was simple to put together, and everyone loved it - especially the design!


Pumpkin-Chocolate Tart
Ingredients:
1 15-ounce can pumpkin puree
3/4 cup firmly packed light-brown sugar
8 ounces creme fraiche (I used sour cream)
3 large eggs
1 teaspoon ground cinnamon
1 teaspoon ground ginger
1/4 teaspoon ground nutmeg
1/4 teaspoon salt
1/8 teaspoon ground cloves
Chocolate crust (see below)
2 ounces best-quality semisweet chocolate (I just used Baker's)
Directions:
1. Preheat oven to 350F. In a medium bowl, whisk together pumpkin puree, brown sugar, creme fraiche, eggs, cinnamon, ginger, nutmeg, salt, and cloves until smooth. Pass mixture through a fine sieve set over a clean bowl; discard solids (I am realizing as I type this that I totally forgot to do this!!! Oh well - one less thing to clean!) Pour filling into prepared crust.
2. Bake until filling is set, about 40 minutes. Transfer to a wire rack, and let cool at least 30 minutes.
3. Set a heatproof bowl, or the top of a double boiler, over a pan of barely simmering water. Melt chocolate in bowl, stirring occasionally; remove from heat.
4. To decorate: dip a spoon in melted chocolate, then drizzle chocolate over tart, forming decorative stripes. Alternatively, to achieve a spider web design: Make a cone out of parchment paper. I just Googled how to do this and followed some unclear instructions, so I'm linking a video (which I have not watched yet) because I'm sure it's easier to understand than what I read. Once the cone is made, fill it with the melted chocolate and pipe onto tart. I drew the long lines across the entire tart - like you would slice a pizza - then drew in the curved lines to connect the long lines. Make sure to be careful that the chocolate doesn't come out the top of the cone. You may also want to let the chocolate cool off a little bit before doing this, or wear gloves, because the cone gets hot! :)
5. Refrigerate until well set, at least 1 hour and up to 1 day.
Source: Martha Stewart.com
Chocolate crust
Ingredients:
1 cup all-purpose flour, plus more for work surface
1/4 cup plus 1 Tablespoon sugar
1/4 cup unsweetened cocoa powder
1/2 teaspoon salt
1/2 teaspoon ground cinnamon
1/4 teaspoon ground cloves
1/2 cup (1 stick) cold unsalted butter, cut into small pieces
1 large egg
4 ounces best-quality semisweet chocolate, finely chopped (I used Ghiradelli chips)
Directions:
1. In the bowl of an electric mixer fitted with the paddle attachment, combine flour, sugar, cocoa, salt, cinnamon, and cloves. Add butter; mix on low speed until butter is the size of small peas, about 5 minutes. Add egg; mix until ingredients come together to form a dough. For those of you without a stand mixer, since I was in your situation just a week ago and appreciate alternate directions, I'm sure this would work in a food processor or using a pastry blender/cutter by hand.
2. Preheat oven to 350F. On a lightly floured working surface, roll out dough to just thicker than 1/8 inch. Brush off excess flour; transfer dough to a 10-inch tart pan with a removable bottom. Press dough into bottom and up sides of pan; trim excess to make flush with edge. Lightly prick bottom of dough all over with a fork. Chill until firm, about 30 minutes.
3. Bake shell until firm, about 15 minutes. Immediately sprinkle chocolate over bottom of shell; smooth with a spatula.

Source: Martha Stewart.com
Subscribe to:
Posts (Atom)

