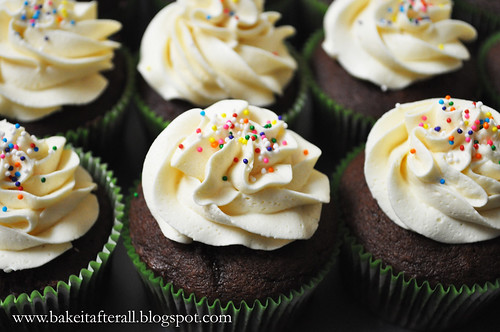
I have so many recipes saved in files or on Pinterest, but it always seems like I am pressed for time and end up making the same things over and over. For Mother's Day, I had some extra time the week before and decided I would pick an involved dessert. I browsed my Pinterest boards and stumbled upon this
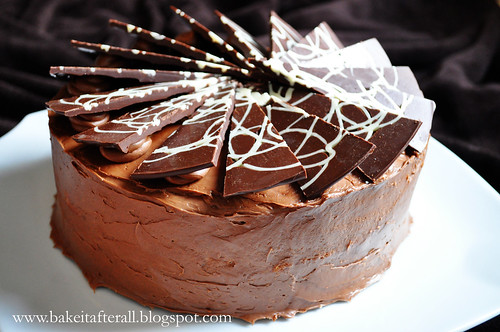
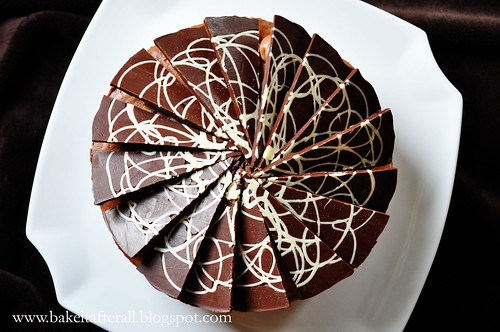
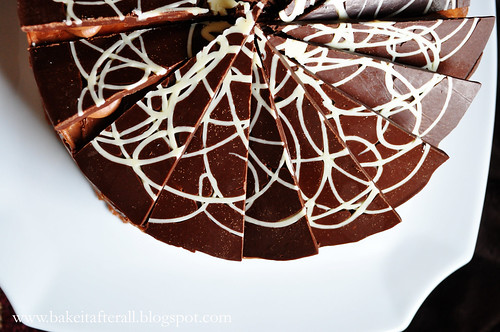
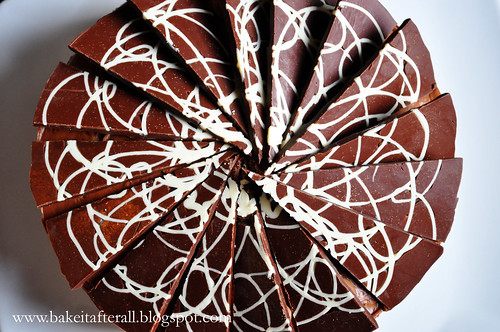
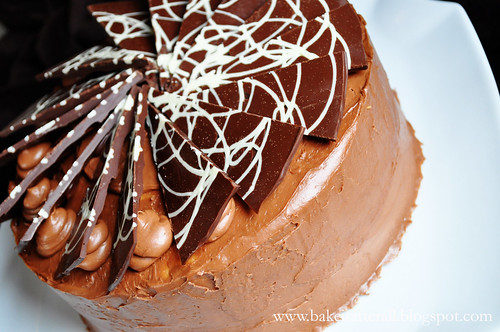
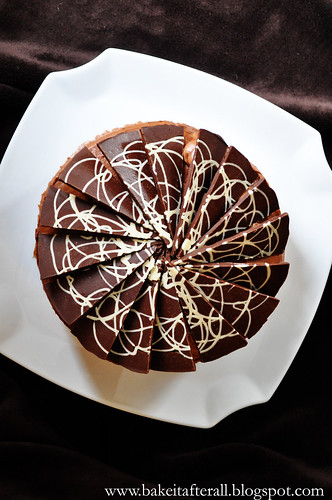
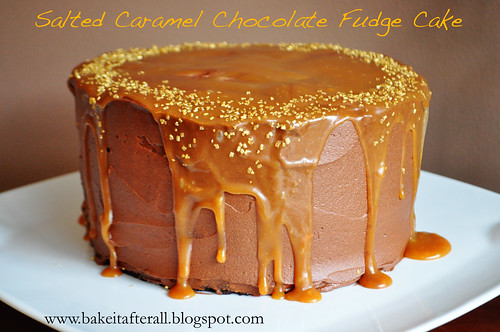
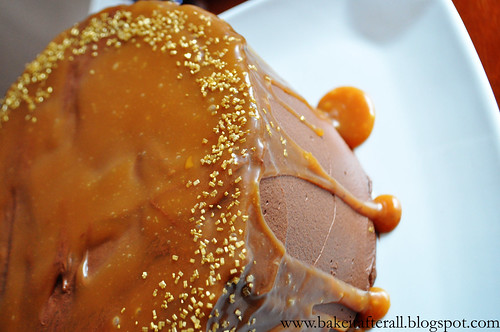
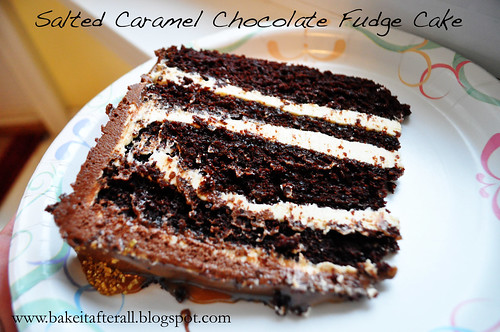
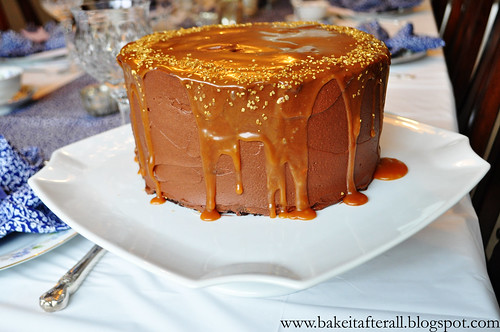
Salted Caramel Chocolate Fudge Cake. Just listen to this description- rich chocolate cake, layered with salted caramel Swiss meringue buttercream and extra salted caramel, covered in whipped ganache and drizzled with salted caramel. !!! This cake truly was as good as it sounds. My brother-in-law, a dessert connoisseur, said it was one of his favorite cakes he's ever had- that says a lot!
I did a lot of research for this cake, which sounds funny, but I wanted to make sure I was prepared and understood all the recipes before getting started. The inspiration for this cake comes from
Domestic Gothess, but I also pulled recipes from other sources for my cake because her recipes had a lot of European measurements/conversions and I wanted to make sure I was getting it right. I realized that the cake recipe she uses is almost exactly the same as Ina Garten's Beatty's Chocolate Cake (which, as I discovered, is essentially the Hershey's Black Magic Cake recipe).
I also discovered a simpler way to make Swiss meringue buttercream using pasteurized eggs - it actually took less time and was easier than the traditional method! See details below.
This cake looks and sounds like a lot of work, but if you prepare the components individually ahead of time, it's not bad at all. I made the salted caramel one night, the cakes the next night, and then the final night made the buttercream, ganache, and assembled the cake.
Here's a sample timeline if you are making the cake for a Saturday event:
Wednesday: make salted caramel, store in refrigerator in airtight container or glass measuring cup covered in plastic wrap
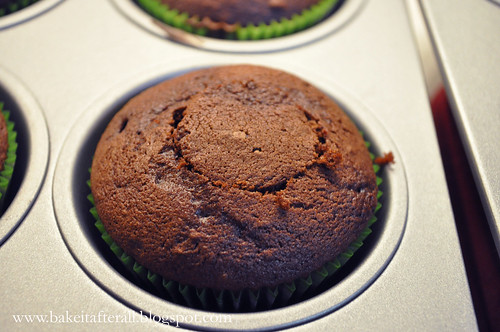
Thursday: make chocolate cakes, wrap each in plastic wrap and put each in resealable plastic bag in refrigerator
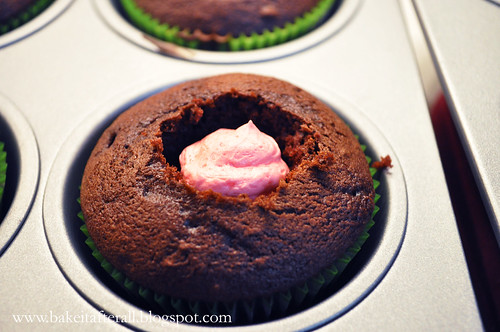
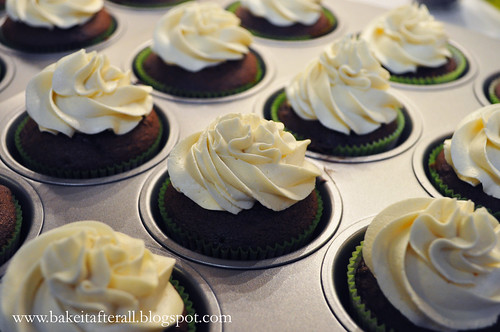
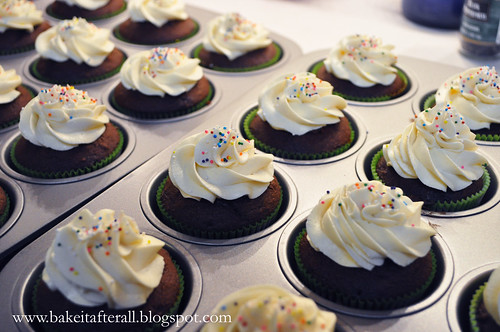
Friday: make salted caramel Swiss meringue buttercream, make whipped ganache, assemble cake, store in fridge
Saturday: place cake at room temperature a few hours before event
I highly, highly recommend this cake if you are a lover of chocolate and salted caramel and if you are in the market for a show-stopping dessert!
Salted Caramel Sauce
Ingredients:
2 cups granulated sugar
12 tablespoons unsalted butter, at room temperature, cut into pieces
1 cup heavy cream, at room temperature
1 tablespoon fleur de sel (or other flaky sea salt)
Directions:
1. Add the sugar in an even layer over the bottom of a heavy, 2-3 quart saucepan.
2. Heat the sugar over medium-high heat, whisking it as it begins to melt. The sugar will form clumps, just keep whisking and they will melt. Stop whisking once all of the sugar has melted, swirl the pan occasionally while the sugar cooks.
3. Continue cooking until the sugar has reached a deep amber color. At this point caramel can burn in a matter of seconds, so keep a close eye. If you have an instant read thermometer, cook until the sugar reaches 350F.
4. As soon as the sugar reaches 350F, add the butter all at once. Be careful as the caramel will bubble when the butter is added. Whisk the butter into the carmel until it is completely melted.
5. Remove the pan from the heat and slowly pour in the cream. Again, be careful as the mixture will bubble.
6. Whisk until all of the cream is incorporated and the sauce is smooth. Add the fleur de del and whisk to incorporate.
7. Set the sauce aside for 10 to 15 minutes to cool, then pour into a glass container and cool to room temperature. Sauce can be store in refrigerator for up to 2 weeks. Warm sauce before using.
Beatty’s Chocolate Cake
Ingredients:
Butter for greasing the pans (or Pam for Baking)
1 ¾ cups all-purpose flour, plus more for pans
2 cups sugar
¾ cups good cocoa powder (such as Hershey's)
2 teaspoons baking soda
1 teaspoon baking powder
1 teaspoon kosher salt
1 cup buttermilk, shaken
½ cup vegetable oil
2 extra-large eggs, at room temperature
1 teaspoon pure vanilla extract
1 cup freshly brewed hot coffee
Directions:
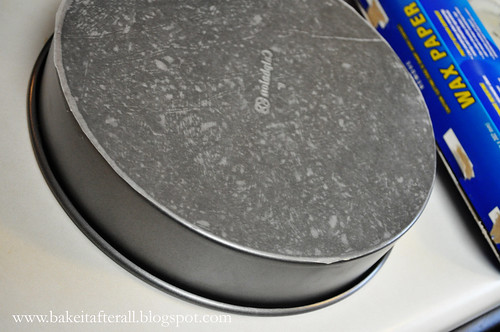
1. Preheat the oven to 350 degrees. Butter two 8-inch round cake
pans. Line with parchment paper, then butter and flour the pans (I use Pam for Baking cooking spray and also use Evenbake Cake Strips around the pans to ensure even baking).
2. Sift the flour, sugar, cocoa, baking soda, baking powder, and
salt into the bowl of an electric mixer fitted with a paddle attachment and mix
on low speed until combined.
3. In another bowl, combine the buttermilk, oil,
eggs, and vanilla.
4. With the mixer on low speed, slowly add the wet ingredients
to the dry. With mixer still on low, add the coffee and stir just to combine,
scraping the bottom of the bowl with a rubber spatula.
5. Pour the batter into the
prepared pans and bake for 35 to 40 minutes, until a cake tester comes out
clean. Cool in the pans for 30 minutes, then turn them out onto a cooling rack
and cool completely.
6. If not frosting immediately, wrapped cooled cakes in plastic wrap then place each in a large resealable plastic bag and in the refrigerator until ready to use.
Caramel Swiss Meringue
Buttercream
Note: Swiss Meringue Buttercream relies on dissolving sugar into egg whites over low heat, at least in part to kill bacteria, and then whipping the sugar/egg mixture into meringue before adding the butter. I buy pasteurized eggs (
Davidson's Safest Choice) and was told by my brother-in-law that they don't form a proper meringue. I did some searching and found a method by Rose Levy Beranbaum that adds extra cream of tarter and a longer whipping time to achieve a meringue from pasteurized egg whites. My buttercream turned out perfectly, and I actually thought this method was much simpler because it eliminates the cooking step, which can be a little tricky in that you have to make sure you don't cook the eggs. I think using the superfine sugar was beneficial since I didn't have the heat to help dissolve the sugar. I am so glad I tried this method because I think it will be my go-to buttercream when I have a bit more time (my quick go-to is this
Easy Vanilla Buttercream).
1
cup superfine sugar
1 teaspoon cream of tartar
1
cup + 1 tablespoon (17 tablespoons) unsalted butter, softened
1
teaspoon vanilla extract
6
tablespoons (or more to taste) salted caramel
*If you do not have pasteurized eggs, follow
this method to make the buttercream.
Directions:
1. In the bowl of a stand mixer with the whisk attachment, beat the egg whites on medium-low for 1 minutes, or until they foam.
2. Add the cream of tartar. Beat and eventually raise speed to high. When the egg whites become thicker, gradually add the sugar. Beat for 5 to 10 minutes until a thick meringue forms.
3. Turn the mixer to low speed and add the butter one tablespoon at a time, making sure that the butter is fully incorporated before adding more. At this point, the meringue will deflate and look curdled- this is normal. Keep mixing. Once the butter has all been added, mix until the buttercream is smooth and silky. If it looks curdled, keep mixing, it will come together.
4. Whisk in the vanilla extract and salted caramel to taste.
Assembling the cake:
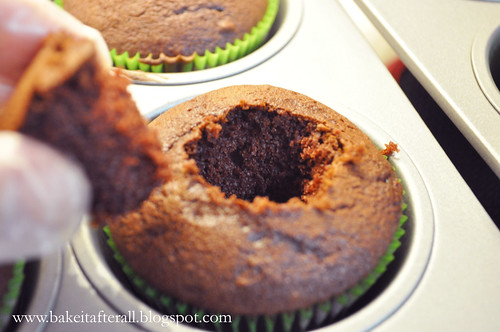
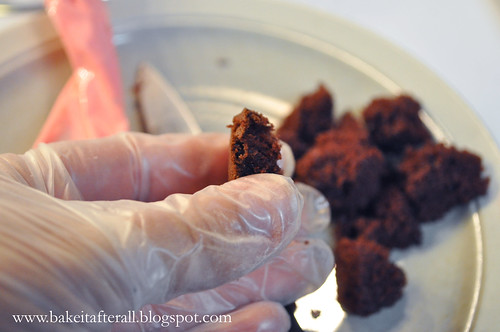
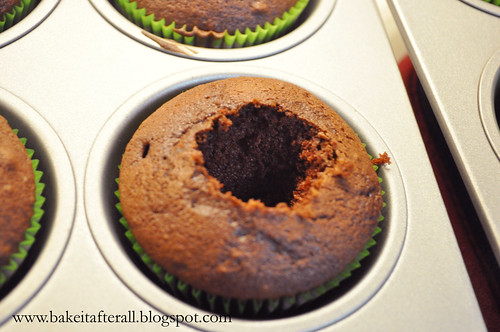
1. Remove
the cakes from the refrigerator and slice each one in half carefully using a
long, serrated knife to create 4 layers.
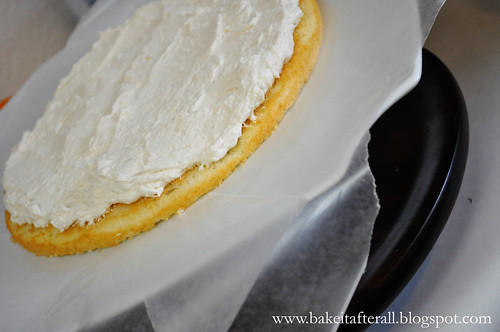
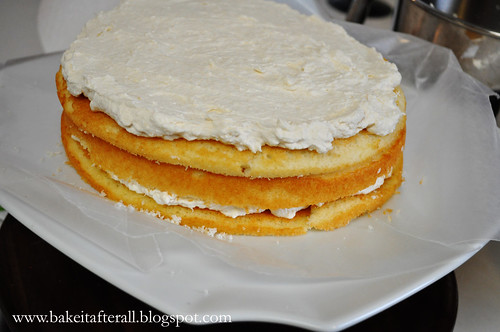
2. Place one layer on a serving plate or cake stand and spread ~1/4 of the
buttercream over the cake.
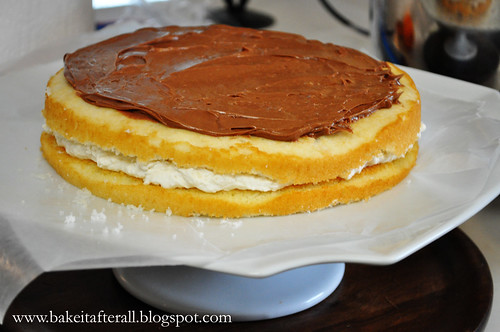
3. Drizzle 1-2 tablespoons
salted caramel over the top of the buttercream. If the caramel is too thick, you may microwave it for a few seconds. Be careful not to pour hot caramel onto the buttercream.
4. Add another layer onto the cake and repeat with buttercream and caramel layers until you have the final cake layer on top.
5. Spread the remaining buttercream thinly over the cake to create a crumb layer. Refrigerate cake for at least 15 minutes while you prepare the whipped ganache (see below).
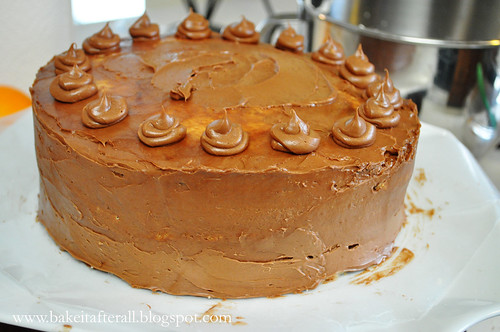
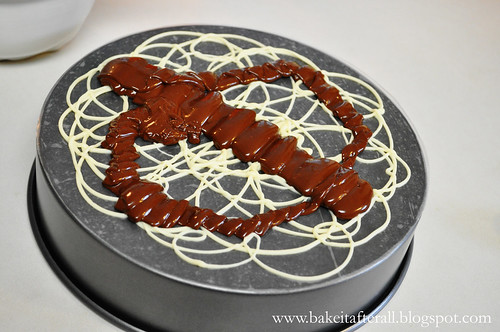
6. Spread ganache onto cake and drizzle remaining caramel over cake.
Whipped Ganache
Makes about 2 cups whipped ganache.
Ingredients:
1
cup heavy cream
1/8
teaspoon coarse sea salt
Directions:
1. Chop
the chocolate (if necessary) and place in a heatproof bowl.
2. Bring the cream just to a boil over medium-high heat.
3. Pour the hot cream over the chocolate making sure that it is all covered,
then add salt. Do not stir, otherwise the ganache will cool too quickly and become grainy. Let stand
for 10 minutes.
4. Stir with a whisk until smooth and shiny.
5. Allow the ganache to cool to room temperature,
stirring often, 45 minutes to 1 hour. Beat with a stand mixer using the whisk
attachment until the mixture is paler and fluffy, 2 to 4 minutes.


