Showing posts with label Main dish. Show all posts
Showing posts with label Main dish. Show all posts
Sunday, December 13, 2015
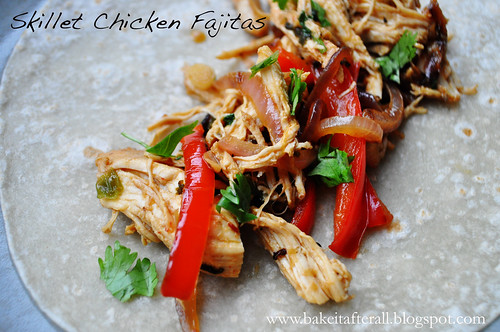
Skillet Chicken Fajitas
When I received my America's Test Kitchen Healthy Family Cookbook several years ago, I came across this recipe for Skillet Chicken Fajitas. I was hesitant to try them at first because I already have a favorite fajita recipe (Grilled Chicken Fajitas), but during the winter the last thing we want to be doing is grilling in the dark and in the cold, so I was hoping to have a good stove-top fajita recipe for the winter months. We love this recipe and welcome the different flavors not present in our go-to fajitas. The orange juice and chipotles in adobo make a great sauce that flavors the chicken, and I love the addition of the tomatoes and green onions at the end for some freshness.
Skillet Chicken Fajitas
Ingredients:
2 teaspoons canola oil
2 red bell peppers, stemmed, seeded and sliced thin
1 red onion, halved and sliced thin
salt and pepper
3 - 4 chicken breasts
salt and pepper to taste
1/2 cup orange juice
3/4 cup cilantro, minced (divided)
2 teaspoons chopped chipotles in adobo sauce
1 tablespoon Worcestershire sauce
4 cloves garlic, minced or grated
*** 1 - 2 cups chicken broth (optional)
1 teaspoon yellow mustard
1 tomato, cored, seeded, and chopped
3 green onions, sliced thin
tortillas (I prefer Tortillaland brand)
Optional toppings:
sour cream
cheese
salsa
Directions:
1. Heat the oil in a 12-inch skillet. Add the sliced peppers and onions and season with salt and pepper. Cook, stirring occasionally, until softened and well-browned, about 5 to 7 minutes. Transfer the mixture to a bowl or plate and cover with foil, store in warm place.
2. Combine the orange juice, 1/2 cup of the of the cilantro, the chipotles, Worcestershire, and garlic in a measuring cup, then add to the skillet. Season the chicken with salt and pepper and add to the skillet. Bring the liquid to a simmer over medium-low heat, about 5 minutes. Flip the chicken over, cover, and cook until the chicken registers at least 165F on an instant-read thermometer. This may take 10 - 12 minutes, or longer depending on the thickness of your chicken. You will need to keep an eye on the liquid during this step. Often, mine evaporates and starts to burn in areas, so I add chicken broth to the pan when this begins to happen. This is not in the original recipe, but I have this issue every time - perhaps my pan is too large or the heat is too high, I'm not sure. Regardless, keep an eye on it because you don't want the sauce to burn on the bottom of the pan because of the sugar content.
3. Transfer the chicken a plate and shred. If necessary, simmer the sauce until reduced to 1/4 cup (I never have to do this step as my sauce is naturally reduced while the chicken cooks). Return chicken to pan. Off heat, stir in mustard, tomatoes, green onions, and remaining 1/4 cup cilantro. Season with salt and pepper to taste.
4. Serve the chicken mixture with the peppers/onions and warm tortillas (and toppings if desired).
Source: America's Test Kitchen Healthy Family Cookbook
Sunday, December 6, 2015
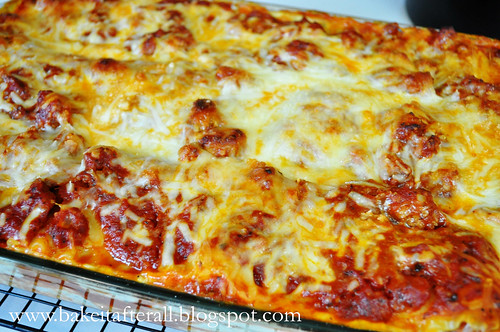
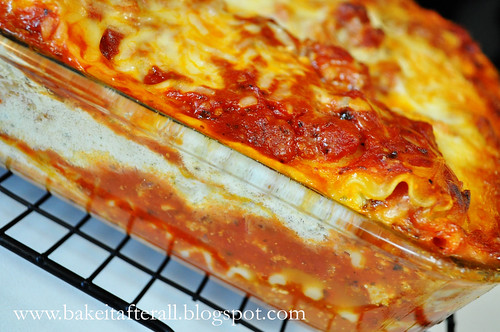
Lasagne / Lasagna
Obviously from my posts, I like a variety of different types of food - Mexican, Asian, American, and of course Italian. My grandmother was 100% Sicilian, and I have always identified strongly with my Italian heritage. Surprisingly, she didn't cook much Italian food, but her influence on our family has inspired many recipes. My aunt originally developed this lasagna years and years ago, and my mom then took it on - whether she tweaked anything, I'm not quite sure, but I do know that I put a major wrench in it by substituting ground turkey for the beef! To be honest, most of the people who have tried this recipe don't even realize it's turkey. The only thing that tips them off is this: I'm eating it!
My aunt and mom also make a homemade sauce with it, which I've made and really enjoy, but for me, as I've mentioned before, Prego Traditional is so good that it's not worth my time to make the homemade sauce. My new favorite sauce is Trader Joe's Tomato Basil Marinara. I only go to Trader Joe's about 4 times a year so I make sure to stock up on this sauce. I buy so much that the checker once asked me if I was buying it for an Italian restaurant. He actually had a customer who did this before!
The ricotta-type layer actually uses cottage cheese. I always thought this was a little strange, but it's delicious so I ever complained. Then I saw Cook's Illustrated substitute cottage cheese for ricotta in some recipes! Guess it's not that strange!
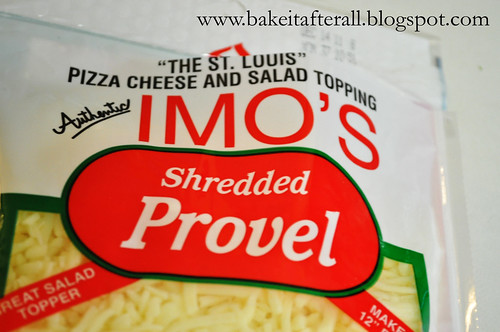
One thing this lasagna does contain is a classic St. Louis ingredient - Provel cheese. If you do not live in the area, you probably won't be able to find this cheese (and may not even like it if you didn't grow up with it), so you may substitute mozzarella or Provolone.
One thing this lasagna does contain is a classic St. Louis ingredient - Provel cheese. If you do not live in the area, you probably won't be able to find this cheese (and may not even like it if you didn't grow up with it), so you may substitute mozzarella or Provolone.
Ingredients:
For the sauce:
1 - 2 pounds ground meat (I use lean - not extra lean - ground turkey. 2 pounds if you like it a bit heartier)
homemade or store bought marinara sauce - I like a lot of sauce so I use about 40 ounces, but you may use less if desired
For the lasagna:
12 lasagna noodles
24 ounces small curd cottage cheese
2 eggs
1 teaspoon salt
1/2 teaspoon ground black pepper
chopped parsley (fresh or dried)
Parmesan cheese
2 - 2 1/2 cups shredded mozzarella cheese
2 cups shredded Provel cheese (if available - if not, you may substitute mozzarella or Provolone)
Directions:
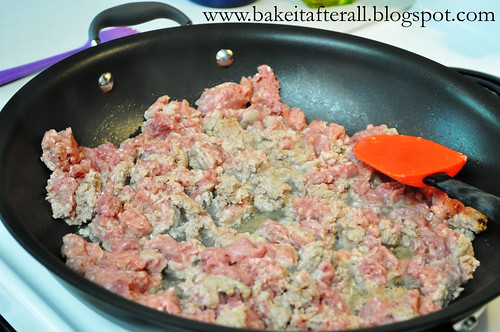
1. Brown the meat in a skillet. If using ground turkey, you may want to add a teaspoon or two of olive oil.
2. Drain the meat if necessary. Sometimes with ground turkey there isn't much liquid left to drain, and the small amount that is there may lend flavor to the sauce.
3. Add the homemade or prepared sauce of your choice to the meat and simmer for at least 30 minutes, ideally an hour or more. I find that ground turkey starts to break down if cooked too long, so I wouldn't do an all-day simmer.
4. Cook the lasagna noodles as directed on the package to al dente (use the lower time or even a minute less). When the noodles are done, I like to lay them in a single layer on pieces of waxed paper to cool until I'm ready to assemble the lasagna.
5. Place the cottage cheese, eggs, salt, pepper and parsley (to taste) in a food processor and blend until smooth.
6. To assemble the lasagna: spread about 1 cup of sauce over the bottom of a 9x13" pan then beginning layering: 3 noodles, sauce to cover, 1/3 of the cottage cheese mixture, 1/2 cup mozzarella cheese, 1/2 cup Provel cheese, and a little Parmesan cheese. Repeat layers. If your pan is not deep enough for 4 layers, 3 will suffice. For the final layer, I top with lasagna noodles, sauce, and then an extra 1/c cup mozzarella and some Parmesan.
7. If the pan is full, place it on a baking sheet lined with foil because it may spill over the sides. Bake uncovered at 350F for 45 minutes. (To make ahead, assemble but do not bake, then refrigerate or freeze. If you make ahead and refrigerate, then bake for 1 hour. If make ahead and freeze, it may take up to 90 minutes or more).
8. Remove dish from oven and let rest at least 15 minutes before cutting.
Source: My Aunt Sue and my Mom :)
Sunday, November 8, 2015
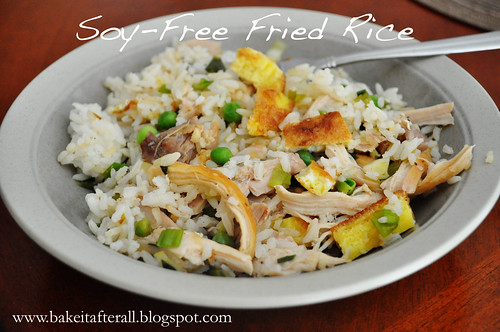
Soy-Free Chicken Fried Rice (MSPI)
As I've mentioned here and here, when I was eating dairy/soy-free (MSPI diet), I had to completely revamp our meals. Several of the dairy/soy-free dinners were so good that they have stuck around as staples in our rotation. This Chicken Fried Rice is one of them. You can serve it with soy sauce on the side if you don't have a sensitivity to soy, or if there are members of the family that can tolerate it. Bob usually puts soy sauce and sriracha sauce on it.
Authentic fried rice is made from day-old rice. Since I usually serve the Spicy Honey-Brushed Chicken Thighs with rice, I make a double batch so I have leftover rice for this recipe the next night.
I prefer chicken thighs for this recipe but have used chicken breasts before and they work too; it's just a matter of personal preference.
Soy-Free Chicken Fried Rice (MSPI Friendly)
Ingredients:
2 tablespoons Canola oil, plus extra for cooking chicken
1 pound boneless, skinless chicken thighs
salt and pepper to taste
coarse salt
3 large eggs
2 teaspoons water
4 green onions, thinly sliced
1 garlic clove, minced
3 tablespoons rice vinegar
1 1/2 cups frozen peas, thawed
4 cups cooked rice (day-old leftover rice is best)
Directions:
1. Drizzle Canola oil in a large nonstick skillet and heat over medium-high heat. Season chicken thighs with salt and pepper and place in pan "pretty" side down. Cook until starting to brown and then flip to finish cooking completely. Remove chicken to a plate until cool enough to handle, shred, and set aside in a warm place. Set pan aside for use in step 3.
2. In a smaller (medium-sized) nonstick skillet, heat 1 tablespoon oil over medium-low heat; swirl to coat pan. In a small bowl, lightly beat together eggs, 2 teaspoons water, and 1/4 teaspoon salt. Pour into pan; cook, pulling in egg from edge of pan, until set, about 2 minutes. If desired, carefully flip over for a few seconds. Transfer to a plate; when cool enough to handle, cut into strips.
3. In large skillet, heat remaining tablespoon oil over medium heat. Add scallions and garlic; cook until fragrant, about 1 minute. Add rice; season with salt to taste. Cook, stirring often, until very hot, about 5 minutes. Add vinegar, peas, eggs, and shredded chicken; cook until very hot, about 2 minutes.
Source: Adapted from Martha Stewart
Wednesday, November 4, 2015
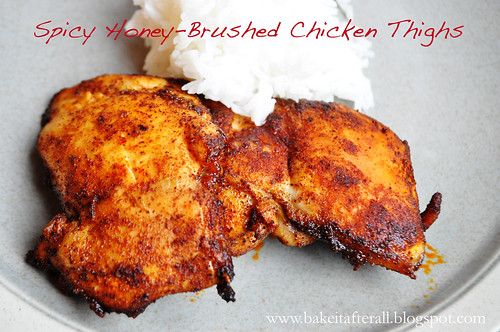
Spicy Honey-Brushed Chicken Thighs (MSPI)
I mentioned in this post that I had to be dairy-free soy-free for several months when Ella was a new baby. One of our favorite dinners that I found when searching for MSPI Friendly recipes is this recipe for Spicy Honey-Brushed Chicken Thighs. We all love these, and I continue to make them despite no longer having to be dairy/soy-free. I usually serve them with plain, steamed rice and sautéed sugar snap peas. I will soon post my favorite MSPI Friendly Fried Rice recipe that I make using the leftover rice from this dinner!
Spicy Honey-Brushed Chicken Thighs
Ingredients:
2 teaspoons garlic powder
2 teaspoons chili powder
1 teaspoon salt
1 teaspoon ground cumin
1 teaspoon paprika (I used smoked paprika)
1/4 teaspoon ground red pepper (cayenne - can reduce if sensitive to spice)
~ 1 pound skinless, boneless chicken thighs
Canola cooking spray (that does not contain soy) or Canola oil
6 tablespoons honey
2 teaspoons cider vinegar
Directions:
1. Preheat broiler. Cover a baking sheet with foil and spray with Canola cooking spray or brush with Canola oil.
2. Combine first six ingredients in a large bowl. Add chicken to bowl; toss to coat. Place chicken on pan.
3. Broil chicken 5 minutes on each side.
4. Meanwhile, combine honey and vinegar in a small bowl, stirring well.
5. Remove chicken from oven; brush half of the honey mixture on chicken. Broil 1 minute.
6. Remove chicken from oven and turn over. Brush chicken with remaining honey mixture. Broil 1 additional minute or until chicken is done.
Source: MSPI Mama, adapted from Cooking Light
Sunday, October 18, 2015
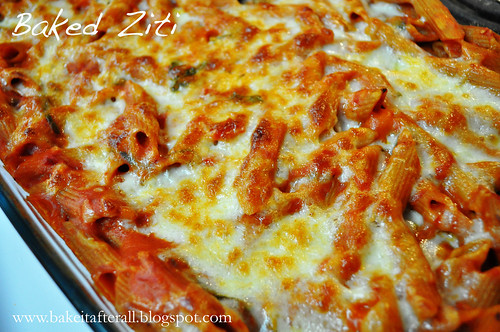
Baked Ziti
I started making this Baked Ziti when Bob and I were on a Sopranos kick many, many years ago. We had rented the last season from mail-order Netflix and watched multiple episodes a night. It was the influence of the Sopranos that led Bob to start referring to this recipe as "Meghan's Effing Ziti." Anyone who has seen this show will understand why. This makes a big pan of ziti - enough for the two of us for dinner and leftovers for lunch the rest of the week, so I like to make it on Sundays or Mondays. It's a great "Meatless Monday" meal!
Baked Ziti
Ingredients:
1 tablespoon olive oil
6 garlic cloves, minced
1/4 teaspoon red pepper flakes
Salt and ground black pepper
1 28-ounce can crushed tomatoes
3 cups water
12 ounces ziti (3 3/4 cups)
1/2 cup heavy cream (I usually use milk or fat-free half-and-half)
1/2 cup grated Parmesan cheese
1/4 cup minced fresh basil (or 1 tablespoon + 1 teaspoon dried)
1 cup shredded mozzarella cheese
Directions:
1. Adjust oven rack to middle position and heat oven to 475F.
2. Combine oil, garlic, pepper flakes, and 1/2 teaspoon salt in 12-inch ovensafe nonstick skillet and saute over medium-high heat until fragrant, about 1 minute. Add crushed tomatoes, water, ziti, and 1/2 teaspoon salt. Cover and cook, stirring often and adjusting heat as needed to maintain vigorous simmer, until ziti is almost tender, 15 to 18 minutes.
3. Stir in cream, Parmesan, and basil. Season with salt and pepper to taste. (At this point, I transfer the pasta to a 13x9-inch Pyrex dish). Sprinkle mozzarella evenly over pan. Transfer skillet to oven and bake until cheese has melted and browned, about 10 minutes. Serve.
Source: Adapted from The Best 30 Minute Recipe cookbook
Wednesday, October 7, 2015
Cauliflower Crust Pizza
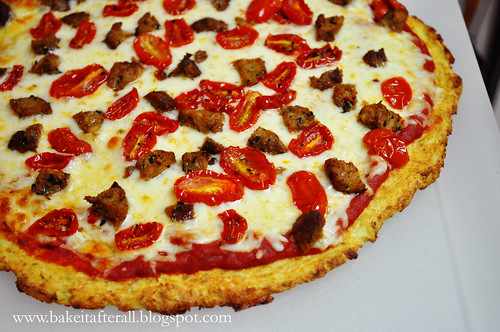
Cauliflower Pizza Crust is all over Pinterest and has piqued my interest on multiple occasions. I actually made this over two years ago and found the image file when hunting through some old files. This crust turned out really well. I find making cauliflower rice and squeezing out the water to be bit labor intensive, but it actually isn't that bad. Make sure you immediately rinse the towel you use to squeeze the moisture out of the cauliflower. I set mine aside and forgot about it and it smelled awful the next morning! I topped my Cauliflower Pizza Crust with pizza sauce, mozzarella, turkey sausage, and Oven-Dried Tomatoes. Delish!
Cauliflower Pizza Crust
Ingredients:
2 pounds cauliflower florets, riced
1 egg, beaten
1/3 cup shredded mozzarella
1 teaspoon dried oregano
pinch of salt
Directions:
Preheat oven to 400F.
1. To make the cauliflower rice, pulse batches of raw cauliflower florets in a food processor, until a rice-like texture is achieved.
2. Fill a large pot with about an inch of water, and bring to a boil. Add the "rice" and cover; let cook for about about 4 - 5 minutes. Drain into a fine-mesh strainer.
3. This is the secret: Once you've strained the rice, transfer it to a clean, thin dishtowel. Wrap up the steamed rice in the dishtowel, twist it up, then squeeze all the excess moisture out.
4. In a large bowl, mix up your strained rice, beaten egg, mozzarella cheese, and spices. It will not be the consistency of typical pizza dough.
5. Press the dough out onto a baking sheet lined with parchment paper. (It's important that it's lined with parchment paper, or it will stick.) Keep the dough about 1/3-inch thick, and make the edges a little higher for the crust. Bake for 35 - 40 minutes. The crust should be firm and golden brown when finished.
6. Top crust as desired. Return the pizza to the oven, and bake an additional 5 - 10 minutes, until the cheese is hot and bubbly. Slice and serve immediately.
Time-Saving Tip: make a double-batch of cauliflower pizza crusts and save one for later. After baking the crusts, wrap up the extra pizza crust in foil, and freeze it for later use. Simply add toppings and bake at 400F, until the cheese is hot and bubbly.
Source: Adapted from Detoxinista
Sunday, October 4, 2015
Garlic-Braised Chicken Thighs with Roasted Carrots
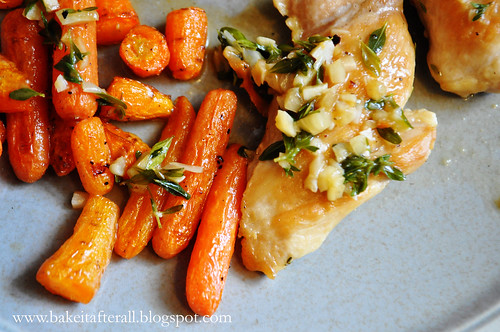
I found this recipe on Pinterest when searching for ways to use the carrots in our garden. This recipe was actually a meal from a Whole30 plan. While a Whole30 is not exactly my style, I do appreciate some of the Whole30-friendly recipes. The whole family eats this dinner every time I make it. The girls LOVE these carrots! They typically will not eat carrots, but they can't get enough of these. We did compare the grocery store baby carrots to those we grew in our garden, and the ones from our garden do taste better, but any carrot will do. The garlic thyme pan sauce here really elevates the dish, so don't skip that part!
Braised Chicken Thighs with Garlic Pan Sauce and Roasted Carrots
Ingredients:
olive oil
1 - 1 1/2 pounds boneless, skinless chicken thighs
salt and pepper to taste
bunch of fresh thyme, leaves removed and coarsely chopped
3 cloves of garlic, chopped fine
1 1/2 cups chicken stock/broth, divided
1 pound baby carrots or 5 whole carrots, peeled and cut into small pieces
olive oil
salt and pepper to taste
Directions:
Preheat oven to 350F.
1. Heat olive oil in a large saucepan or skillet that has a lid (set the lid aside for now).
2. Line a baking sheet with foil and place carrots on the foil. Toss with olive oil and season with salt and pepper. Bake the carrots for 20 - 25 minutes, turning and mixing them every 5 - 10 minutes so they brown evenly.
3. Meanwhile, place chicken “pretty side” down in hot skillet, sprinkle with salt and pepper, and sauté for 5 - 8 minutes, until browned on one side. Flip chicken and cook until brown on the other side, then add 1 cup of the chicken stock/broth to the pan. Reduce the heat to medium-low and place the lid on the pan to allow the chicken to cook through. The stock will begin to reduce.
4. When chicken is cooked thoroughly (registers at least 165F with an instant-read thermometer/Thermapen), remove to a plate and set in a warm place (I put mine in the microwave NOT turned on!).
5. Add thyme, garlic, and remaining 1/2 cup chicken stock/broth to pan sauce, turning heat to high. Cook uncovered for about 5 minutes, or until the liquid thickens into a gravy.
6. Add the cooked chicken thighs back to the pan with the sauce. Spoon sauce over the chicken.
7. To serve, pour sauce over both chicken and carrots. Sprinkle extra fresh thyme if desired.
Source: Adapted from Eat the cookie!
Sunday, September 27, 2015
Sonoma Chicken Stew
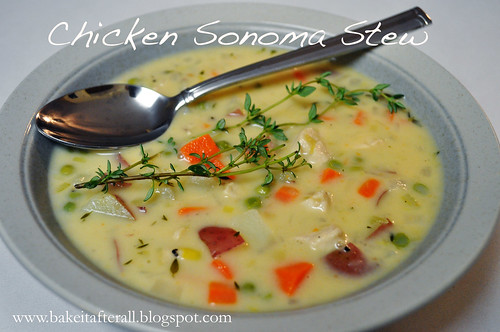
In the fall of 2011, Panera Bread featured a Sonoma Chicken Stew. It was pricier than their typical soups, but it was served with Dry Jack Cheese Biscuits on top. This stew was very similar to their cream of chicken and wild rice soup, which has been one of my favorites since I was in high school. It is a creamy base with chicken and vegetables, but perhaps my favorite part was these small round carrots. I was completely baffled by them. They were so tasty and has a perfect texture. Each had a marking where a stem would be, so it wasn't just small pieces of carrot that were rolled around to form balls. I did some research and found that they are actually called thumbelina carrots and are sometimes grown in Sonoma, California.
I loved this stew so much that Bob and I often went to Panera while I was pregnant with Ava just to get this stew. Sadly, in the fall of 2012, the stew did not return to the fall menu! I was crushed and knew I had to come up with a way to recreate this stew. My sister Lisa and I set out to do just that. We pulled components from recipes for Chicken & Dumplings, and added in what I remembered being in the Sonoma Chicken Stew. Of course, I couldn't find thumbelina carrots anywhere, so we made do with regular carrots. The stew turned out amazing! Funny thing, shortly after we made the stew, I found "Parisian Carrots" in the freezer section of Trader Joe's- and they are the same little round carrot balls! I stocked up!
Sonoma Chicken Stew
Serves 4-6 dinner-sized portions
Ingredients:
2 tablespoons unsalted butter
1.25 - 1.5 lbs chicken breast, cut into small pieces
3 carrots, peeled and chopped (or thumbelina or Parisian carrots if you can find them!)
1 leek, quartered and sliced thin
1 yellow onion, chopped
2 tablespoons all-purpose flour
4 cups chicken broth
1 pound red potatoes, skin-on, diced small
1/2 cup baby peas (or more)
Fresh thyme, several sprigs
1/2 - 2/3 cup heavy cream
Directions:
1. Melt butter over medium high heat in a large Dutch oven. Season chicken with salt and pepper. Add chicken and cook until browned or opaque and cooked through, about 4-6 minutes. Remove chicken and keep warm.
2. Add carrots, onion, and leek to the Dutch oven. Season with salt and pepper and cook until vegetables begin to soften, 4 - 5 minutes. Add flour and cook for 2 minutes.
3. Add chicken broth slowly and bring to a boil.
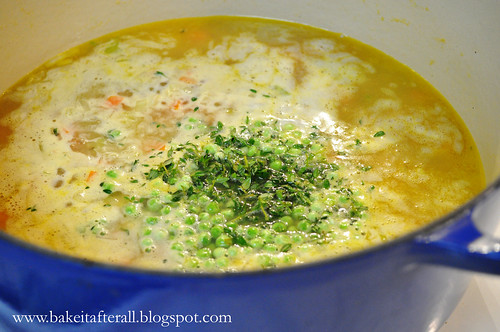
4. Add potatoes, peas, and thyme, reduce heat and simmer uncovered until cooked through. If stew is getting too thick, cover while continuing to simmer. Add cooked chicken back to the Dutch oven and cook just until warmed.
5. Add heavy cream. Season with salt and pepper to taste, if necessary.
Source: Lisa & Meghan Original Recipe :-)
Thursday, September 10, 2015
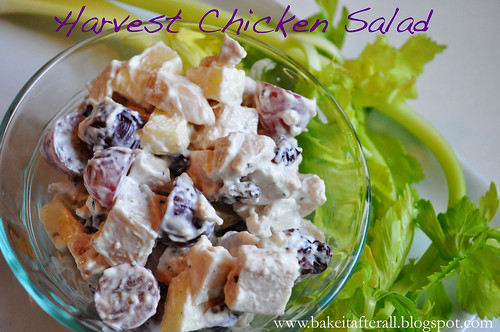
Harvest Chicken Salad
Several years ago, Subway introduced a chicken salad that had grapes, apples, raisins, and dried cranberries. I really liked the idea of this salad, although I felt like a homemade version would be much better. I love the sweet and savory balance of this chicken salad. I've served it on bread or in a dish. It's the perfect lunch or light dinner in early fall!
Ingredients:
1 1/2 pounds boneless, skinless chicken breasts
Kosher salt and pepper
1/2 cup mayonnaise
1/2 cup sour cream
1 cup grapes, cut in half
1 apple, diced (I like Fuji)
1/4 cup raisins
1/4 cup craisins/dried cranberries
Directions:
Preheat oven to 350F.
1. Rub chicken with olive oil and place on a foil lined baking sheet. Sprinkle with kosher salt and pepper and bake until cooked through. Set aside to cool.
2. Cube cooled chicken. In a large bowl, combine mayonnaise, sour cream, grapes, apple, raisins, and craisins. Add chicken and stir to combine. Adjust seasoning with salt and pepper to taste. Chill until ready to serve.
Source: Inspired by the Orchard Chicken Salad from Subway, portions of chicken salad recipe from Barefoot Contessa
Thursday, August 20, 2015
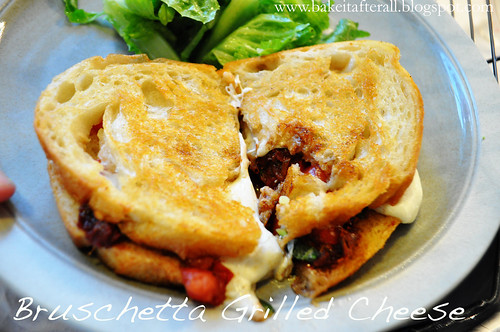
Bruschetta Grilled Cheese Sandwiches
There are many versions of Caprese Grilled Cheese out there, where you sandwich fresh mozzarella, tomato, and basil between 2 slices of bread, but I decided to use my favorite bruschetta mixture instead. This sandwich reminded me of the Tomato & Mozzarella Panini that Panera used to serve (although it is no longer on the menu!!) I loved that sandwich and was thrilled to make a version at home.
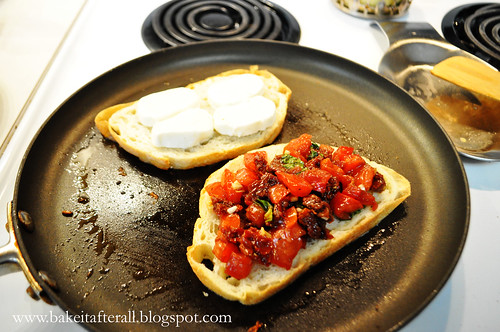
Initially I used butter for the bread like a typical grilled cheese, but Bob and I agreed that olive oil works better in fitting with the bruschetta aspect. This sandwich was a little tricky to flip so I troubleshooted it and came up with a way to avoid flipping the sandwich - grilling each piece of bread separately and only flipping the cheese side when the cheese has started to melt and adhere to the bread. The result is one of our new favorite dinners!
Bruschetta Grilled Cheese Sandwiches
Makes at least 4 large sandwiches, likely more
Ingredients:
6 Roma (plum) tomatoes (or 2 large tomatoes), chopped
1/2 cup sun-dried tomatoes, packed in oil
2 cloves minced garlic
1 tablespoon olive oil
2 tablespoons balsamic vinegar
1/4 cup fresh basil, stems removed
1/4 teaspoon salt
1/4 teaspoon ground black pepper
1/2 loaf good quality bakery bread, sliced
olive oil, for spreading on bread
8 ounces fresh mozzarella, cut into slices
1. Combine fresh and sun-dried tomatoes, garlic, olive oil, vinegar, basil, salt and pepper in a medium bowl and set aside for 10 minutes.
2. Drizzle slices of bread with olive oil on one side and use a pastry brush to distribute evenly.
3. Place one slide of bread, oil side down, in a sauté or pancake pan that has been heated to medium. Add slices of mozzarella to the top of this slice.
4. After the cheese slice has cooked for about a minute, add the second slice of bread to the pan, oil side down. Top with bruschetta mixture (use slotted spoon to avoid transferring too much liquid).
5. Once the cheese has started to melt and that slice of bread is golden, flip this slice over on top of the bread with the bruschetta on it to make a sandwich. Continue to grill until cheese is melty bread is golden and toasty.
6. Serve warm!
Sunday, August 16, 2015
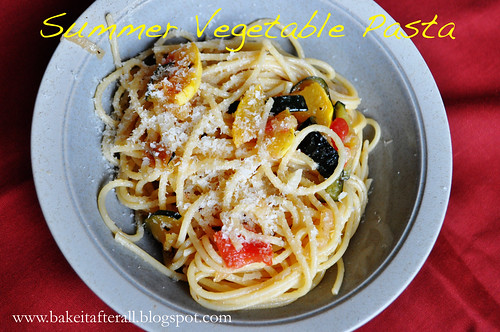
Summer Vegetable Pasta
My mom developed this recipe years ago when she would get fresh Chinese noodles from a client at the office where she worked. My sister and I loved it so much. When she stopped receiving the noodles, she started making the dish with linguine. I haven't had this pasta in years and was reminded of it when a neighbor gave us a HUGE zucchini and yellow squash from her sister's farm. Just to give you an idea of how big this zucchini was, I used 1/3 of it in this pasta, 1/3 to make 2 big loaves of zucchini bread, and the 1/3 for other recipes! Here's a picture- keep in mind those bananas are the scale bar and they are average-sized bananas!
I'm so glad I've rediscovered this recipe. The girls were a little leery of the veggies but actually tried them. Pasta is always a hit with them!
Summer Vegetable Pasta
Ingredients:
1 tablespoon butter
1 tablespoon olive oil
1 clove garlic, minced
1 onion, cut in half and then thinly sliced
1 - 2 large yellow squash, cut in half lengthwise, seeds scooped and discarded, cut into 1/4-inch slices
1 - 2 zucchini, cut in half lengthwise then cut into 1/4-inch slices
Italian or Greek seasoning
Dill weed
Salt and pepper to taste
2 tomatoes, peeled, seeded and chopped
1 pound spaghetti or linguine
lots of Parmesan cheese (1/2 cup to 1 cup or more if you desire), plus extra for serving
Directions:
1. Bring a large pot of water to a boil.
2. Melt the butter in a large saucepan and add the olive oil. Add minced garlic. Sauté for 30 seconds, then add onion, squash and zucchini. Season with Italian or Greek seasoning, dill, salt and pepper.
3. Cook, stirring occasionally, until vegetables soften. May need to put a lid on top of the veggies after a while to allow the steam to help soften.
4. Meanwhile, cook pasta in salted water according to package directions.
5. After vegetables have softened and started to brown, add the chopped tomatoes and cook for 1 minute. Add the hot, drained pasta to the pan and stir to combine. Add the grated Parmesan cheese. Taste to check if salt is needed.
6. Serve with extra Parmesan on top.
Source: my mom :-)
Tuesday, August 11, 2015
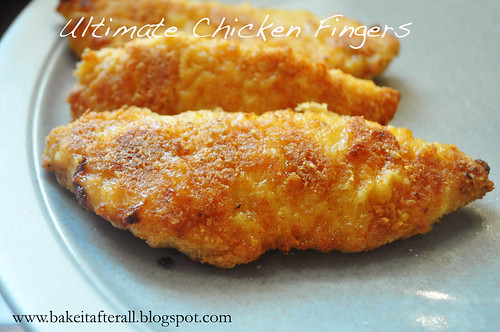
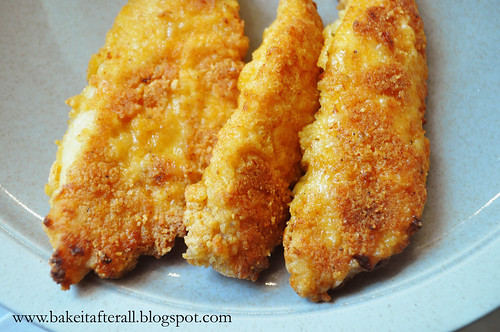
Ultimate Chicken Fingers
I found this recipe on Pinterest and while making it, I realized the recipe was on the back of the Bisquick box! I don't often use mixes like Bisquick, but this sounded too good to pass up. I've seen recipes for homemade Bisquick before that I would like to try.
We really loved these chicken fingers. The girls couldn't get enough, and I started making them almost weekly for a while because it was a sure-fire way to get them to eat some protein! I've even doubled the recipe before and just made sure to use two separate resealable bags, otherwise the dry mix starts to get too sticky from the egg-coated chicken.
Ultimate Chicken Fingers
Serves 4
Ingredients:
3 boneless, skinless chicken breasts (about 1 pound), cut crosswise into 1/2-inch strips
2/3 cup original Bisquick mix (store bought or homemade)
1/2 cup grated Parmesan cheese
1/2 teaspoon salt or garlic salt
1/2 teaspoon paprika (I used Sweet Hungarian Paprika)
1 egg, slightly beaten
3 tablespoons butter, melted
Directions:
Preheat oven to 450F.
1. Line a jelly roll pan with foil, spray with nonstick cooking spray.
2. In a gallon-sized resealable plastic bag, mix Bisquick, cheese, salt, and paprika.
3. Dip half the chicken strips into the egg and place in the bag. Seal bag and shake to coat chicken. Place the chicken on the baking sheet. Repeat with remaining chicken.
4. Drizzle melted butter over chicken.
5. Bake 12 - 14 minutes, turning halfway through bake time, until chicken is thoroughly cooked (I use my Thermapen and make sure they are at least 165F; they usually end up around 170-180 but are still juicy).
Source: Bisquick box
Thursday, May 28, 2015
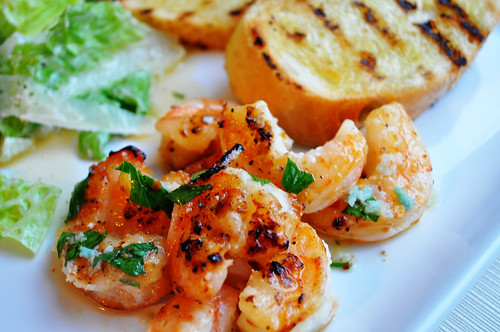
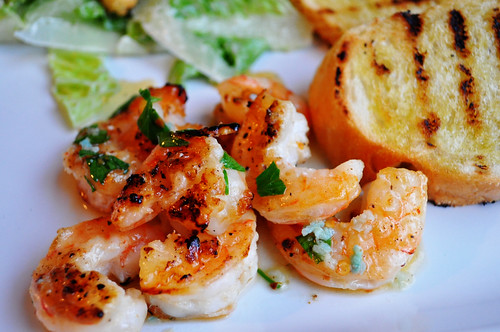
Grilled Shrimp with Spicy Lemon-Garlic Sauce
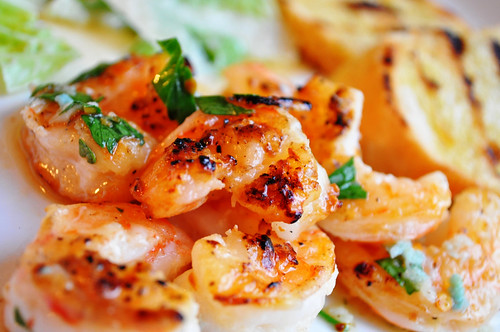
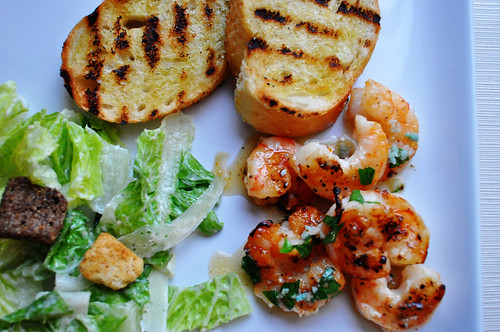
This is probably my favorite way to cook shrimp - grilled and tossed in a garlicky lemon sauce. ATK recommends serving with grilled bread, and I have to agree. We also had a Caesar salad, and this was one of my favorite meals - perfect for spring and summer!
Ingredients:
1 1/2 pounds extra-large shrimp (21 to 25 per pound), peeled and deveined
2 - 3 tablespoon olive oil for brushing the shrimp
table salt and ground black pepper
1/4 teaspoon sugar
vegetable oil for the cooking grates
1 recipe Spicy Lemon-Garlic Sauce (see below)
Lemon wedges, for serving
Directions:
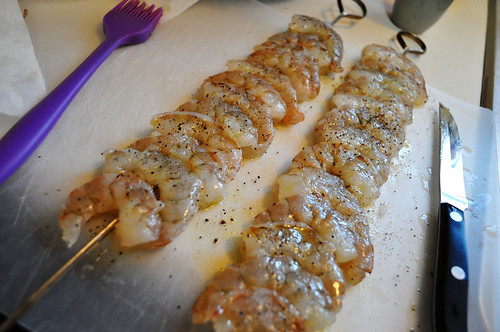
1. Pat the shrimp dry with paper towels. Thread the shrimp onto 3 skewers, alternating direction of heads and tails. Brush both sides of the shrimp with olive oil and season lightly with salt and pepper. Sprinkle one side of each skewer evenly with the sugar.
2. If using a charcoal grill, light a chimney starter filled with charcoal (about 6 quarts) and allow to burn until coals are partially covered with ash, about 20 minutes. Open the bottom vent on the grill. Build a modified two-level fire by arranging coals over half the grill, leaving the other half empty. Set the cooking grate in place, cover grill, and heat until hot, about 5 minutes. If using a gas grill, turn burners to high to heat grill with lid down until very hot, about 15 minutes.
3. Use grill brush to scrape grates clean. Dip wad of paper towels in vegetable oil; holding wad with tongs, oil the grates.
4. Set the disposable pan with the sauce ingredients (see below) on the hot side of the grill and cook, stirring occasionally, until hot, about 1 1/2 minutes; transfer the pan to the cooler side of the grill.
5. Place the shrimp skewers, sugared sides down, on the hot side of the grate and use tongs to push the shrimp together on the skewers if they have separated. Grill the shrimp, uncovered, until lightly charred, 4 to 5 minutes.
6. Using tongs, flip and grill until the second side is pink and slightly translucent, 1 to 2 minutes longer.
7. Using a potholder or oven mitt, carefully lift each skewer from the grill and use tongs to slide the shrimp off the skewers into the pan with the sauce. Toss the shrimp and sauce to combine and transfer the pan to the hot side of the grill; cook, stirring, until the shrimp are opaque and fully cooked, about 30 seconds. Remove from the grill, add the fresh parsley, and toss to combine. Transfer to a serving platter and serve immediately with lemon wedges.
Spicy Lemon-Garlic Sauce
Makes about 1/2 cup
Ingredients:
4 tablespoons unsalted butter, cut into 4 pieces
4 tablespoons lemon juice from 2 lemons
3 medium garlic cloves, minced or pressed (about 1 tablespoon)
1/2 teaspoon red pepper flakes
1/8 teaspoon table salt
1/3 cup minced fresh parsley
Directions:
1. Combine the butter, lemon juice, garlic, pepper flake, and salt in a 10-inch disposable aluminum pan or pie plate.
2. Cook over the hot side of the grill, stirring occasionally, until the butter melt, about 1 1/2 minutes; transfer to the cooler side of the grill (if using a charcoal grill) or off heat (if using a gas grill).
3. Proceed to grill the shrimp (see above), adding the parsley just before serving.
Saturday, May 2, 2015
Grilled Chicken Fajitas
These fajitas have been one of our favorite dinners for years. They are perfect for spring when the warmer weather is the perfect invitation to get outside and grill, but we enjoy them year-round. I have even braved the snow and grilled these outside in January - they are that good! Sometimes we serve the chicken & veggies with tortillas, but most often we make fajita bowls by placing the grilled food in a bowl and topping as desired. Tossing the cooked chicken and veggies in the reserved marinade is the secret to the bright and tangy flavor of these fajitas, so don't skip that step. Every time I make these, I go searching my blog to pull up the recipe, rather than dig out the enormous ATK cookbook, and every time I realize that I have yet again failed to post the recipe. Since I'm making these tonight, I've decided to finally post it! And just in time for Cinco de Mayo :-)
Grilled Chicken
Fajitas
Ingredients:
For the marinade:
4 tablespoons vegetable oil
1/3 c. lime juice from 3 to 4 limes
3 cloves garlic, minced or pressed
1 tablespoon Worcestershire sauce
½ tablespoon brown sugar
1 jalapeño, seeded and minced
1 ½ tablespoons chopped cilantro
1 teaspoon salt
¾ teaspoon pepper
For the chicken:
All but 1/4 cup of marinade
1 teaspoon salt
3 (7 to 8 ounce) boneless, skinless chicken breasts, pounded to 1/2-inch thickness
For the veggies:
2 tablespoons vegetable oil
1 large red onion, peeled and cut into 1/2-inch-thick rounds (do not separate rings)
1 large red bell pepper, seeded and quartered
1 large green bell pepper, seeded and quartered
Salt and pepper
Optional:
Flour tortillas
Shredded cheese
Sour cream
Salsa
Cilantro
Directions:
1. Mix marinade ingredients in a glass measuring cup. Remove and set aside 1/4 cup of marinade.
2. Combine the remainder of the marinade with an additional 1 teaspoon salt and the chicken, cover and refrigerate for 15 minutes.
3. Brush both sides of the onion rounds and bell peppers with vegetable oil and season with salt and pepper.
4. Using a charcoal or gas grill, cook chicken over high heat until well browned and internal temperature reaches at least 165 degrees.
5. Meanwhile, grill the onions and peppers (skin side down first) over lower heat until spottily charred and crisp-tender, 8 to 10 minutes, turning every 3 to 4 minutes.
6. If using tortillas, you may warm them on the grill for about 20 seconds per side.
7. Separate the rings of onion and place in a medium bowl (I like to cut the rings in half). Slice the peppers into strips and add to the bowl. Toss veggies with 2 tablespoons of the reserved (unused) marinade.
8. Slice the chicken into 1/4-inch strips and toss with the remaining 2 tablespoons reserved marinade in a separate bowl. (Alternatively, toss chicken and veggies together with the entire 1/4 cup portion of reserved marinade).
9. Serve with toppings as desired, and enjoy!
Source: The Complete America's Test Kitchen TV Show Cookbook
Sunday, February 5, 2012
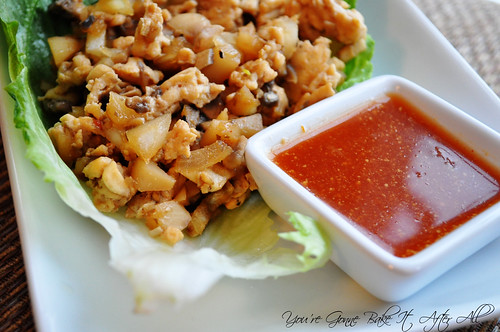
Chicken Lettuce Wraps - Revisited
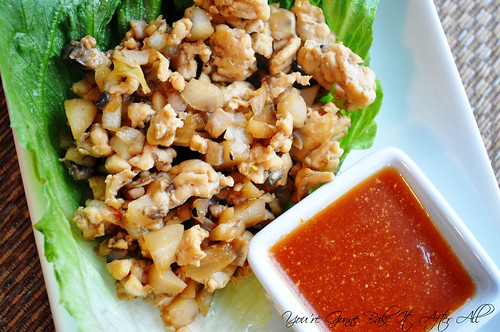
Just over a year ago I posted a P.F. Chang's copycat recipe for Chicken Lettuce Wraps, but I already feel it's time to revisit this recipe. First of all, this has become one of Bob and my favorite dinners, and we've adapted the recipe to suit our tastes and rewritten it in a more logical way. Second of all, I was never happy with the picture I took. I was using a new light box I had made and the coloring was off. Since getting my new camera, I decided to re-photograph these wraps, and I'm much happier with the outcome. These wraps are seriously delicious, and I highly recommend the recipe!
Chicken Lettuce Wraps
Ingredients:
For the wraps:
2 tablespoons Canola oil, divided
1 package (1 pound) ground chicken breast
1 can sliced water chestnuts, minced into the size of peas
2/3 cup mushrooms (I usually use 1 package fresh mushrooms), minced into the size of peas
3 tablespoons chopped onion
1 teaspoon minced garlic
4-6 iceberg or butter lettuce leaves
For the special sauce:
2 tablespoons sugar
1/4 cup water
1 tablespoons soy sauce (we use reduced sodium)
1 tablespoons rice wine vinegar
1 tablespoons ketchup
1/2 tablespoon lemon juice
dash of sesame oil
1/2 tablespoon hot mustard
1 teaspoon hot water
1/2 - 1 teaspoon garlic and red chile paste
For the stir fry sauce:
4 tablespoons soy sauce (we use reduced sodium)
4 tablespoons brown sugar
1 teaspoon rice wine vinegar
Directions:
*Before beginning recipe, have mushrooms and water chestnuts chopped, have stir fry sauce prepared.
1. Make the special sauce by dissolving the sugar in the water in a small bowl. Add the soy sauce, rice wine vinegar, ketchup, lemon juice, and sesame oil. Mix well and set aside until ready to serve. Combine the hot water with the hot mustard and set this aside as well.
2. Bring 1 tablespoon oil to high heat in a wok or large frying pan. Saute ground chicken until cooked through.
3. With the pan still on high heat, add the other tablespoon of oil. Add the garlic, onions, water chestnuts, and mushrooms to the pan. Add the stir fry sauce to the pan and saute the mixture for a couple minutes.
4. To complete the "special sauce," add your desired measurement of the mustard and garlic chili sauce to the special sauce mixture to reach preferred spiciness.
5. Serve the chicken mixture in the lettuce cups and top with "special sauce" as desired.
Wednesday, February 1, 2012
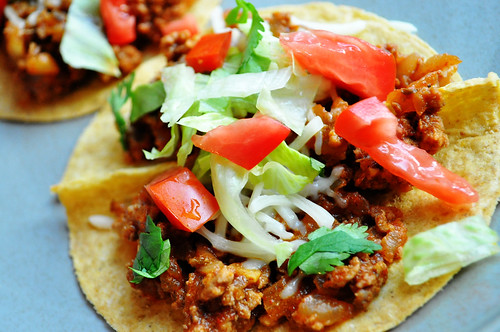
Turkey Tacos
I found this recipe for ground beef tacos in my America's Test Kitchen Cookbook and decided to try substituting ground turkey for the beef. The only kind of ground turkey tacos I've made in the past have been with a store bought taco seasoning packet; in fact, I don't know that it ever occurred to me to make the filling from scratch! I am so glad we tried these because they are soooo good! The spices are perfect, and the mixture is so flavorful. Bob and I have made these probably 6 times in the last few months. They are one of the few dinners that I actually made while I was pregnant to keep in the freezer and have after the baby arrived - we were sure glad to have this dinner twice in those first weeks home with Ava, when simply taking a shower is an accomplishment for the day!
I typically use lean ground turkey exclusively (not the extra-lean) because I find it has more flavor and isn't as dry. I had Bob grocery shop for the ingredients for this recipe once, and he got the extra-lean by accident. We used it anyway, and these were still phenomenal! It ended up being serendipitous because now we know that we can use the healthier turkey and not compromise on the flavor!
Turkey Tacos
Ingredients:
For the filling:
2 teaspoons vegetable oil or corn oil
1 small onion, chopped small (about 2/3 cup)
3 medium cloves garlic, minced or pressed through garlic press (about 1 tablespoon)
2 tablespoons chili powder
1 teaspoon ground cumin
1 teaspoon ground coriander
1/2 teaspoon dried oregano
1/4 teaspoon cayenne pepper
Salt
1 pound ground turkey (lean or extra-lean)
1/2 cup tomato sauce
1/2 cup low-sodium chicken broth
1 teaspoon brown sugar
2 teaspoons vinegar (preferably cider vinegar)
Ground black pepper
Optional extras:
Hard or soft taco shells
Hard or soft taco shells
Shredded cheese
Shredded iceberg or romaine lettuce
Small tomatoes , chopped small
Sour cream
Minced fresh cilantro leaves
Hot sauce or bottled taco sauce
Shredded iceberg or romaine lettuce
Small tomatoes , chopped small
Sour cream
Minced fresh cilantro leaves
Hot sauce or bottled taco sauce
Directions:
1. Heat oil in a medium skillet over medium heat until hot and shimmering but not smoking, about 2 minutes. Add onion and cook, stirring occasionally, until softened, about 4 minutes.
1. Heat oil in a medium skillet over medium heat until hot and shimmering but not smoking, about 2 minutes. Add onion and cook, stirring occasionally, until softened, about 4 minutes.
2. Add garlic, spices, and 1/2 teaspoon salt; cook, stirring constantly, until fragrant, about 1 minute. Add ground turkey and cook, breaking meat up with a spoon and scraping pan bottom to prevent scorching, until turkey is no longer pink, about 5 minutes.
3. Add the tomato sauce, chicken broth, brown sugar, and vinegar; bring to simmer. Reduce heat to medium-low and simmer, uncovered, stirring frequently and breaking meat up so that no chunks remain, until liquid has reduced and thickened (mixture should not be completely dry), about 10 minutes.
4. Adjust seasonings with salt and pepper. Serve immediately, passing toppings separately.
Source: America's Test Kitchen Complete TV Show Cookbook
Sunday, November 13, 2011
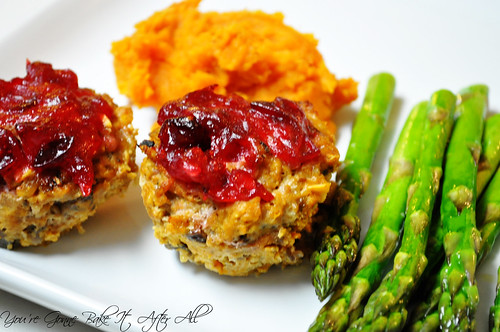
Turkey-Pumpkin Meatloaf Muffins with Cranberry Glaze
This is the ultimate November recipe if you ask me - turkey, pumpkin, and cranberries?! I spoke before about my desire to incorporate more pumpkin into heathy dishes, and this recipe does just that. The ground turkey is combined with chopped and sauteed mushrooms and onions, and then with rolled oats, egg whites, and of course pumpkin. Just like the Turkey-Pumpkin Chili, the pumpkin flavor isn't prominent here, if you can distinguish it at all, but rather it adds some moisture. The simple cranberry glaze is a nice addition - a bit of sweet and sour baked on top. I may try playing around with the herbs next time. This time I added thyme and rosemary and may swap the rosemary for sage or another seasoning commonly used with turkey.
I love meatloaf muffins because they are already divided into individual portions, and it's super easy to pack up a couple for lunches. Bob and I were both excited that there was enough leftover for both of us to have a lunch the next day, and then some. I served these with Smashed Sweet Potatoes and roasted asparagus. With how busy we've been lately, I haven't had much time to focus on make truly balanced dinners, so it felt really good to get back to it. This dinner really got us pumped for Thanksgiving!
Turkey-Pumpkin Meatloaf Muffins with Cranberry Glaze
Servings: 12 muffins
Ingredients:
For the muffins:
2 teaspoons extra-virgin olive oil
1 cup finely chopped onion
1 8-ounce package mushrooms, chopped finely
2 cloves minced garlic (or pressed through a garlic press)
1 pound 93% lean ground turkey
1 cup pumpkin puree
1 egg white
1/3 cup rolled oats
1 8-ounce package mushrooms, chopped finely
2 cloves minced garlic (or pressed through a garlic press)
1 pound 93% lean ground turkey
1 cup pumpkin puree
1 egg white
1/3 cup rolled oats
1 tablespoon Worcestershire sauce
1/4 teaspoon dried thyme, broken into smaller pieces (or sage)
1/4 teaspoon dried thyme, broken into smaller pieces (or sage)
1/4 teaspoon dried rosemary
1/2 teaspoon kosher salt (I just guessed an amount and thought it could use more salt, so you may want to up this to 3/4 teaspoon)
1/2 teaspoon kosher salt (I just guessed an amount and thought it could use more salt, so you may want to up this to 3/4 teaspoon)
freshly ground black pepper
For the glaze:
1 cup fresh cranberries
1/4 cup sugar
1/4 cup water
Directions:
For the glaze:
1 cup fresh cranberries
1/4 cup sugar
1/4 cup water
Directions:
Preheat oven to 400F. Spray a standard 12-cup muffin tin with nonstick cooking spray.
1. Heat the oil in a nonstick skillet over medium heat. Cook the onions until softened, about 8 minutes. Add the mushrooms and garlic and cook for about 5 minutes more, or until vegetables are tender.
1. Heat the oil in a nonstick skillet over medium heat. Cook the onions until softened, about 8 minutes. Add the mushrooms and garlic and cook for about 5 minutes more, or until vegetables are tender.
2. Add veggies to a bowl with the turkey, pumpkin, egg white, oats, Worcestershire, herbs, salt, and pepper. Toss gently to combine. Divide the mixture evenly among the muffin tin. Place in the oven, bake for 20 minutes.
3. Meanwhile, combine cranberries, sugar, and water in a small saucepan. Bring to a boil and then simmer for 10 - 15 minutes. Spoon onto the meatloaf muffins, and bake for another 15 minutes. Make sure to test the internal temperature of the meatloaves to make sure it registers at a safe temperature for poultry (165F being the absolute lowest, although mine were considerably above and still very moist). Remove from the oven and let rest for 5 minutes before serving.
3. Meanwhile, combine cranberries, sugar, and water in a small saucepan. Bring to a boil and then simmer for 10 - 15 minutes. Spoon onto the meatloaf muffins, and bake for another 15 minutes. Make sure to test the internal temperature of the meatloaves to make sure it registers at a safe temperature for poultry (165F being the absolute lowest, although mine were considerably above and still very moist). Remove from the oven and let rest for 5 minutes before serving.
Source: Adapted from Cara's Cravings
Sunday, October 23, 2011
Crescent Mummy Dogs
After seeing these adorable Mummy Dogs on Picky Palate, I made them for a little pre-Halloween get together last year. I didn't get a chance to post them before Halloween, so I saved the post for this year. I used light crescent rolls and turkey hot dogs to make them a bit healthier. You can even use breadstick dough if you prefer. These were delicious and so festive! They are perfect for a Halloween party - whether as a main dish or as a snack. I think kids would love these as well.
Crescent Mummy Dogs
Ingredients:
1 can of crescent rolls (I used light); you may use breadstick dough if you prefer
1 package hot dogs (I used turkey hot dogs)
mustard
nonstick cooking spray
Directions:
Preheat oven to 375F.
1. Separate crescent roll dough at perforations. Cut into thin strips of dough.
2. Wrap strips of dough around each hot dog to resemble mummy wrappings (as shown in photo), pressing loose edges together so they stick and stay in place.
3. Place wrapped hot dogs on a baking sheet and spray dough lightly with cooking spray.
4. Bake for 13 - 17 minutes, or until dough is light golden brown and hot dogs are heated through.
5. Use mustard to dot eyes onto mummy faces, and serve with your favorite condiments.
Source: Inspiration from Picky Palate, recipe from Pillsbury
Sunday, October 16, 2011
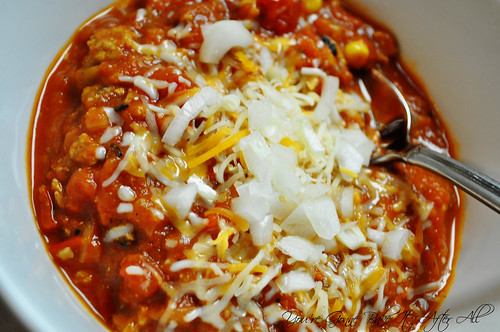
Turkey Pumpkin Chili
As if it isn't already apparent, I love cooking and baking with pumpkin. Pumpkin is actually very healthy; it's high in vitamin A and fiber. The problem is that most pumpkin recipes are desserts or sweets where the health benefits are often overshadowed by sugar, butter, oil, etc. Don't get me wrong, I certainly enjoy those recipes, but I love to find healthy recipes that incorporate pumpkin as well.
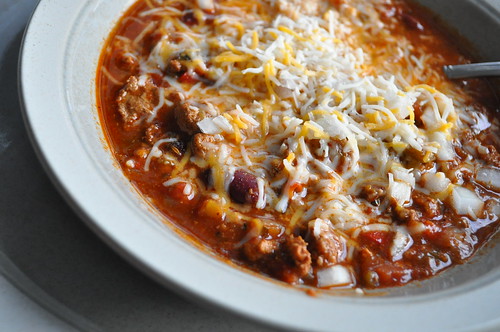
Cara posted this Turkey Pumpkin Chili last year and I immediately bookmarked it. After making the very spicy Turkey Chili last month, I decided to try another variety. This chili is no where near as spicy as the Turkey Chili I posted last month; it actually has a nice amount of spice for my taste. While you may not even taste the pumpkin itself, it nicely thickens the chili and adds an almost creamy element. The labs on our floor are having a Pumpkin and Chili potluck next month, and I plan to bring this chili - it covers both categories!
Turkey Pumpkin Chili
Ingredients:
1 cup chopped onion
3 cloves of garlic, minced
2 medium sized green peppers (or 1 red; 1 green), diced
3 cloves of garlic, minced
2 medium sized green peppers (or 1 red; 1 green), diced
1 pound ground turkey
1 tablespoon chili powder
2 teaspoon cumin
1 teaspoon cinnamon
1 teaspoon Mexican oregano (I used regular oregano)
1 small can (4-ounce) diced green chili peppers
15 ounce can beans of choice, drained and rinsed
1/2 cup frozen corn kernels
28-ounce can crushed tomatoes
14-ounce can diced tomatoes
15-ounce can pumpkin puree, or 2 cups homemade
Pumpkin beer, optional
Directions:
1. Spray a large pot with nonstick cooking spray and place over medium heat. Add the onions and cook for about 5 minutes, until just softened. Add the garlic and bell peppers, and cook about 5 minutes more until tender. Add the ground turkey and cook until browned, breaking it up into bite-sized pieces. Season with salt, pepper, chili powder, cumin, cinnamon, and oregano.
2. Add pumpkin beer if using. Cook until mostly reduced, then continue.
3. Stir in remaining ingredients, bring to a boil, then reduce heat and simmer for 20-30 minutes to blend flavors.
Alternatively, just brown the turkey with the seasonings and combine with remaining ingredients in a crockpot. Cook on low for 6-8 hours.
4. Serve with your favorite chili toppings - ours are shredded cheese and chopped onions.
Source: Cara's Cravings
Tuesday, September 20, 2011
Turkey Chili
Wow, it's been a long time since I've posted! Getting ready for a baby is a lot of work! I have still been cooking and photographing, so I have lots of posts to share. Plus, now that it's fall (soooo exciting), I have so many recipes planned!
I made this turkey chili on one of the first chilly Saturdays of the season. Bob and my dad were working hard all day on some home improvement projects we were trying to squeeze in, so this was a nice dinner to have for when they took a football break.
I didn't really read the description for the chili or I would have noticed that this is a VERY spicy chili. They weren't kidding - this was insane! I would definitely adjust the heat next time, as it was almost difficult to eat without a big glass of milk. It was very, very good though! One ingredient I found interesting was the packet of hot chocolate mix! I didn't notice it at all so I'm sure it just blends with the tomato and spice flavors...sort of similar to the concept of a mole sauce.
I made this chili in the morning and put it in the crockpot on low all day - it turned out great. I've included the original directions, as well as what I did using the crockpot. This is definitely going to be one of the freezer meals I make to have on hand for after our baby girl is born!
Hope you're all enjoying the cooler weather as much as I am - perfect for baking!!! :-)
Turkey Chili
Ingredients:
2 tablespoons olive oil1 onion, chopped
5 cloves garlic, minced
2 small green bell peppers, seeded and chopped (I also added a red and yellow pepper since I had them on hand)
1 habanero pepper, seeded and chopped (optional - may omit if worried about spiciness)
1 1/2 pounds lean ground turkey
2 tablespoons chili powder
2 teaspoons red pepper flakes (may use less and adjust later for desired spiciness)
1 tablespoon paprika
1 tablespoon ground cumin
2 teaspoons dried oregano
1 teaspoon ground black pepper
1 1-ounce envelope instant hot chocolate mix
1 - 2 teaspoons salt (may want to start with 1 and add more to your taste)
1 tablespoon Worcestershire sauce
2 14.5-ounce cans diced tomatoes with green chile peppers (or 3 10-ounce cans Rotel), drained
1 8-ounce can tomato sauce
1 15-ounce can kidney beans, drained
1/2 cup cheap beer
Directions:
1. Heat the olive oil in a large saucepan over medium heat. Add the onion, garlic, green peppers and habanero pepper, if using; cook and stir until the onion is transparent.
2. Add in the ground turkey and cook until turkey is no longer pink, stirring occasionally to break up turkey into smaller pieces. (At this point, I transfered the turkey and veggies to the crockpot and added the rest of the ingredients directly to it).
3. Season with chili powder, red pepper flakes, paprika, cumin, oregano, pepper, hot cocoa mix, and salt. Stir in Worcestershire sauce, diced tomatoes with green chilies, tomato sauce, and kidney beans. Add the beer, and stir to mix.
4. Partially cover the pan, and simmer over medium heat for about 50 minutes, stirring occasionally. (Or cook in crockpot on low for several hours or more until ready to serve).
5. Serve chili with your favorite chili toppings (like chopped onion and shredded cheese!).
Source: Adapted from Allrecipes.com
Subscribe to:
Posts (Atom)

