Showing posts with label Brownies. Show all posts
Thursday, October 22, 2015
Dairy-Free Soy-Free Brownies (MSPI)
When Ella was a month old, she had a very scary vomiting incident that resulted in us taking her to the pediatric ER. Thankfully, she just had severe acid reflux. Medicine helped a little, but the most dramatic change happened after I removed dairy and soy proteins from my diet. I was happy to do what I could to help her while still nursing, but it was so difficult! Try finding prepared food that does not contain soybean oil or soy lecithin***(see note below). Even my favorite pasta sauce from Trader Joe's was off limits. My saving grace was stumbling across the blog called MSPI Mama.
MSPI stands for Milk Soy Protein Intolerance. This is not lactose intolerance, which is the inability to break down milk sugar, but rather an intolerance/allergy to milk proteins, which are closely mimicked by those in soy. It's actually pretty common in young babies and they usually grow out of it and are able to tolerate dairy proteins just fine. I had to be dairy/soy-free for about 4 months before being able to introduce them in small quantities. For what it's worth, Ella is now completely tolerant of dairy and soy - one of her favorite foods is cheese!
During those months, I had to completely overhaul how I cooked. Most of my recipes were off limits or had to be majorly revised. I never thought of myself as heavily dependent on dairy, but I guess I am. I felt very overwhelmed at the beginning and finding MSPI Mama was the biggest help. She has so many recipes that are MSPI friendly - even desserts! Once I identified a core group of recipes, I felt more in control and things became easier. Eating at restaurants, however, did not become easier and is one of the biggest challenges of MSPI. So many restaurants use soybean oil or butter (dairy) in things you wouldn't suspect.
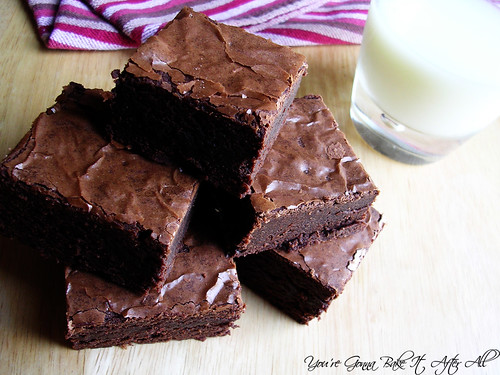
This brownie recipes is one that I made quite often while eating the MSPI diet. The sugar cravings while nursing are no joke and still being able to enjoy desserts was a must. I figured I needed to "pay it forward" to other moms out there, frantically Google-ing for MSPI-safe recipes (likely while their new babies scream in their arms). I will be posting a handful of my favorite recipes - ones that are so good that they continue to be in our meal rotation despite the restrictions no longer being in place. These brownie are one of those recipes. They are so chocolatey and fudgey and have a nice crisp top on them. You certainly won't feel deprived eating these!
***Note: many people with a soy sensitivity can still eat soybean oil and soy lecithin but at the beginning I had to eliminate everything and then add things back.
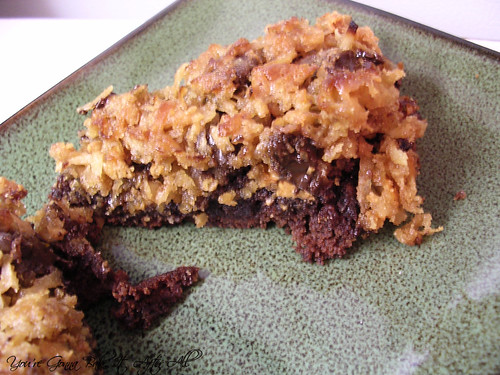
Dairy-Free Soy Free Brownies (MSPI Friendly)
Ingredients:
1/2 cup Canola oil
1 cup white sugar
1 teaspoons vanilla extract
2 eggs
1/2 cup all-purpose flour
1/3 cup unsweetened cocoa powder
1/4 teaspoon baking powder
1/4 teaspoon salt
Directions:
1. Preheat oven to 350F. Grease a 9 x 9-inch baking pan.
2. In a medium bowl, mix together the oil, sugar and vanilla. Beat in the eggs.
3. In a separate bowl, combine flour, cocoa, baking powder and salt; gradually stir into the egg mixture until well blended.
4. Spread the batter evenly into the prepared pan. Bake for 20 - 25 minutes, or until the brownies begin to pull away from the edges of the pan.
5. Let cool completely on a wire rack then place in refrigerator to cool down even more. The brownies are best when they've had time to cool and develop their flavor.
Source: MSPI Mama, adapted from AllRecipes.com
Sunday, August 23, 2015
Brownie Sundaes with Cherry-Port Sauce
Bob and my dad both LOVE cherries, so for Father's Day several years ago, I made these Roasted Cherry Brownie Sundaes with a Cherry-Port Sauce. We all thought they were great, especially the Cherry-Port Sauce. I didn't save the recipe because I knew the source, but as I went back to the blog to retrieve it (years later at this point) the ingredient list is missing. I hunted around and found a similar recipe that I've included below. The amounts sound familiar so I'm going with it. I'm glad I remembered this recipe because it needs to be made again soon!
Roasted Cherry Brownies
Ingredients:
1/2 pound fresh cherries, stems and pits removed, cut in half or quartered
1/4 cup port wine
Your favorite brownie mix (such as Ghiradelli Dark Chocolate Brownies)
Ingredients to prepare brownie mix according to package directions (oil, eggs, water, etc.)
Directions:
Preheat oven to 425F.
1. Place cherries in a small baking dish with the port. Roast for 30 minutes, until the cherries are very soft and the port has slightly reduced (you'll have 2 - 3 tablespoons of liquid). Set the cherries aside to cool.
2. Meanwhile, prepare brownies according to package directions, reducing oven heat according to your brownie recipe.
3. As the last step in making the brownie batter, stir in the cherries and accumulated juices and then transfer to the baking pan. Bake until a knife inserted in the center of the brownies comes out with moist crumbs attached.
Source: Confections of a Foodie Bride (now called The Brewer and the Baker)
Brownie Sundaes with Cherry-Port Sauce
Ingredients:
1 pound fresh cherries, stems and pits removed, and coarsely chopped
1 cup port wine
3/4 cup sugar
Brownies - from a homemade recipe or boxed mix (such as the Roasted Cherry Brownies above)
Vanilla ice cream - homemade or store bought
Directions:
1. Add the cherries to a small saucepan with the port and sugar, cooking over medium-high until it begins to boil.
2. Reduce heat to medium and simmer for 35-40 minutes, until very thick and syrupy.
3. Serve brownies topped with a scoop of ice cream and a spoonful of warm cherry-port sauce.
Leftover sauce will keep in the fridge for several days, serve rewarmed.
Source: Confections of a Foodie Bride (now called The Brewer and the Baker) and The Gilded Fork
Labels:
Brownies,
Chocolate,
Dessert,
Frozen Treat,
Ice Cream
Tuesday, May 5, 2015
French Brownies
These brownies are a staple in the home of my former thesis advisor, Cara. She brought them to a lab event many years ago, and I immediately asked for the recipe. These brownies are not chewy but rather more fudge-y and, as Cara put it, "wet." They have a nice crispy top and are truly decadent. I love having recipes for different styles of brownies - rarely do I come across a brownie that I don't like! Cara couldn't remember the source of this recipe, but she thought they were called "French Brownies." I've done some internet searching and am unable to locate the original source or title, so for now they will keep that name.
French Brownies
Ingredients:
Mixture 1:
French Brownies
Ingredients:
Mixture 1:
2 sticks unsalted butter
8 ounces unsweetened chocolate
Mixture 2:
2 cups granulated sugar
4 eggs
1 teaspoon of vanilla extract
1/2 cup all purpose flour
Directions:
1. Make Mixture 1: Melt butter and chocolate in a double boiler, whisking until smooth. Cool to room temperature.
2. Make Mixture 2: In a medium bowl, combine sugar, eggs, and vanilla extract.
3. Add mixture 1 to bowl containing mixture 2, stir to combine, then fold in 1/2 cup flour.
4. Pour batter into a pan (I think I used an 8-inch square Pyrex dish or possibly an 8.5 x 11-inch baking dish) and bake for 25 - 35 minutes.
Friday, January 14, 2011
Red Velvet Brownies with Cheesecake Swirl and Giveaway Winner!!!

And the Giveaway winner is . . .


Congratulations Natalie!!! You have won a $75 gift certificate to CSN Stores! Please email me at mtmbakesblog AT gmail.com to claim your prize. Thank you to CSN Stores for sponsoring this giveaway!
For the brownies:
Now I must tell you about these brownies. I made them the night before having our good friends Jenny and Jeff, and their baby Andrew, over for dinner (you may remember them from the Monkey Cookies!) I had these in the oven for about 10 minutes when our power went out!! I was really annoyed thinking they were probably ruined. Not knowing how long it would be before power was restored, I moved the brownies to the very cold garage. After about an hour, the power came back and I put the brownies back in the oven until done. I have no idea how this affected them, but they did turn out very tall! These were really good brownies, definitely more cake-like than fudgey, but I can't say whether that's due to how I baked them. I loved the cheesecake swirl on top. These are definitely festive and would be perfect for Valentine's Day!
After deciding to make these brownies, I saw a similar recipe for Red Velvet Cheesecake Brownies on Baking Bites that looks fantastic as well!
Red Velvet Brownies with Cheesecake Swirl
Ingredients:
4 ounces bittersweet chocolate, chopped
3/4 cup (1 1/2 sticks) butter
2 cups sugar
4 large eggs
1 1/2 cups all-purpose flour
1 (1-ounce) bottle red food coloring (I used about 1/2 container of Wilton icing gel)
1 1/2 teaspoons baking powder
1/8 teaspoon salt
1 teaspoon vanilla extract
1/4 cup buttermilk
1 teaspoon white vinegar
3/4 cup (1 1/2 sticks) butter
2 cups sugar
4 large eggs
1 1/2 cups all-purpose flour
1 (1-ounce) bottle red food coloring (I used about 1/2 container of Wilton icing gel)
1 1/2 teaspoons baking powder
1/8 teaspoon salt
1 teaspoon vanilla extract
1/4 cup buttermilk
1 teaspoon white vinegar
For the cream cheese swirl:
4 ounces cream cheese, at room temperature
2 tablespoons sugar
2 tablespoons sour cream
1/4 teaspoon vanilla extract
1/2 large egg yolk
4 ounces cream cheese, at room temperature
2 tablespoons sugar
2 tablespoons sour cream
1/4 teaspoon vanilla extract
1/2 large egg yolk
Directions:
Preheat the oven to 350F.
1. Line a 9 x 9-inch square baking dish with two pieces of aluminum foil, folding ends over the edges. Spray with cooking spray.
2. Combine the chocolate and butter in a large, microwave safe bowl. Cook 30 seconds at a time until melted, stirring well after each time. Whisk in the sugar.
3. One at a time, add the eggs, whisking well between each addition. Stir in the flour, food coloring, baking powder, salt, buttermilk, vanilla, and vinegar. Combine well, then pour into the prepared baking dish.
4. In the bowl of a stand mixer fitted with a paddle attachment, beat the cream cheese, sugar, vanilla, and egg yolk. Drop spoonfuls over the brownie batter, then use a table knife to swirl into the batter.
5. Bake 40-50 minutes, or until a toothpick inserted into the center comes out with just a few crumbs attached. Allow to cool completely before slicing.
Source: Adapted from Pink Parsley
Friday, July 9, 2010
Chewy, Fudgy Brownies
Bob and I recently started the house hunting process, and it has unexpectedly taken up what little free time I have! It's exciting but also so overwhelming. I've been trying to fit in some baking too, but it's been hard! I've wanted to make these brownies from my America's Test Kitchen Cookbook for a long time. I'm constantly on the hunt for the perfect brownie recipe!
I am very particular about my brownies. I like them chewy, not cakey. Given that these are called "chewy, fudgy brownies," I thought these would be it. Although these were very good brownies, they were not my idea of "chewy" . . . not as much "cakey" as I've had in the past though. All of the chewy brownies I've had are much thinner than these, so perhaps using a larger pan would have made them more chewy? I'm not about to try to revamp a Test Kitchen recipe - I'll just continue my hunt. If chewy isn't your thing, these really are delicious. Plus, these brownies slice very beautifully - so the presentation is great for company!
Chewy, Fudgy Brownies
Ingredients:
5 ounces semisweet or bittersweet chocolate, chopped
2 ounces unsweetened chocolate, chopped
8 tablespoons (1 stick) unsalted butter, cut into quarters
3 tablespoons cocoa powder (natural or Dutch-processed)
3 large eggs
1 1/4 cups (8 3/4 ounces) sugar
2 teaspoons vanilla extract
1/2 teaspoon table salt
1 cup (5 ounces) unbleached all-purpose flour
Directions:
1. Adjust an oven rack to the lower-middle position and heat the oven to 350F. Line an 8-inch square baking pan with two pieces of foil that extend beyond the edges of the pan (to serve as handles to lift the cooled brownies out of the pan). Spray the foil with vegetable oil spray.
2. Melt the chocolates and butter in a medium heatproof bowl set over a saucepan of barely simmering water, stirring occasionally, until smooth. Whisk in the cocoa powder until smooth. Set aside to cool slightly.
3. Whisk the eggs, sugar, vanilla, and salt together in a medium bowl until combined, about 15 seconds.
4. Whisk the warm chocolate mixture into the egg mixture. Using a wooden spoon, stir in the flour until just combined.
5. Transfer the batter to the prepared pan. Using a spatula, spread the batter into the corners and smooth the surface. Bake until slightly puffed and a toothpick o wooden skewer inserted into the center of the brownies comes out with a few moist crumbs attached, 35 to 40 minutes.
6. Cool the brownies on a wire rack to room temperature, about 2 hours.
7. Loosen the edges with a paring knife and lift the brownies from the pan using the foil extensions. CI recommends cutting the brownies into 64 1-inch pieces. I cut them into 16! The cut brownies can be wrapped in plastic wrap and refrigerated for up to 5 days.
Source: Adapted from The Complete America's Test Kitchen TV Show Cookbook
Sunday, January 3, 2010
Welcome 2010!
Happy New Year! I have been dreaming about 2010 for a LONG time. I started graduate school in Chicago in 2004 knowing that I would not be done until close to 2010, at which point I planned to move back to St. Louis where my entire family lives. Meanwhile, Bob decided to go back to school, knowing he would graduate in the spring of 2010. We both feel that our lives have sort of been on hold during this time - waiting to have more time (and space) for our hobbies and interests. So, 2010 is a big year for Bob and I:
His graduation and my hooding ceremony:

A big move to St. Louis:

New jobs: (Bob will be working as a PT and I'll be working with fruit flies!)


House shopping:

And one of my favorite parts is that my cousin Chris, who joined the Navy just as I was starting graduate school, will have completed his service and is moving back to St. Louis too.

I am beyond excited to be near my parents and extended family again!
Since it's the beginning of a brand new year, I'd like to reflect back on 2009. I feel like I have grown so much in my cooking since starting this blog last March - it has really pushed me beyond my comfort zone and forced me to try new things. I have now worked with mock marzipan, royal icing, and yeast breads, just to name a few. I am so thankful to each and every one of you who read my blog and who comment on the recipes I post!
To celebrate the occasion, I've decided to go through the things I made in 2009 and choose my favorites. I realized I couldn't pick just one favorite of each category of food, so I decided to just pick my top recipes and list them here. This is hard because I typically only post something if I really like it, so I usually recommend it all. To be featured in this list, the recipe must meet my standards - most importantly, taste amazing - when I read the title of these recipes my mouth actually starts watering - that's how good they are. As a cooking blogger, it's difficult for me to repeat recipes because there are SO MANY fabulous ones out there to try (I have about a million starred in Google reader to prove it!) To be honest, it's really only the super special recipes that I actually make a second time. These are recipes that I plan to make again and again. Sometimes it's not even my choice - it's that Bob requests them over and over. Funnily enough, a lot of my top recipes are from Giada De Laurentiis! Not on purpose, it's just how it turned out.
In no particular order, this is my list of "must makes" from 2009:
Blueberry Ricotta Pancakes - This is a simple recipe from Giada because it uses store bought pancake mix, but it's a semi-homemade approach that tastes incredible. The ricotta cheese really elevates the pancakes to a new level. I am a pancake snob and only like them super light and fluffy, and these pancakes deliver!
Panzanella - I absolutely LOVE this classic tomato and bread salad recipe of Giada's. Perfect for summer when tomatoes are at their peak, but still great the rest of the year.
Chicken Tortilla Soup - I have made many chicken tortilla soups before and never quite found the right one . . . until this one. I love it's simplicity - no corn, no beans, just a super tasty broth with a few veggies, and some chicken of course. The toppings are exceptional. I think each of them adds another flavor dimension. I recently made this for my family and they loved it!
Ribollita - I would have to say this was one of my most surprising recipes (it's Giada's). The whole time making it I was convinced I would hate it - it didn't look appetizing and I really planned on having to eat crackers for dinner. Not only did I eat the soup, I had a second bowl. It was that good. And now here it is on my top recipes lists for 2009. Go figure!
Chicken Gyros - I have made these at least 5 times in the last 5 months! They are SOOO good. The most recent time I made an amazingly delicious flat bread, which I will post soon. It took these from awesome to indescribable :)
Garlic Chicken - Serve with rice, serve with rice noodles, just serve!
Triple T Deluxe Pizza - One of the only recipe on this list that is my own, and it's not even a recipe! The crust is from Cook's Illustrated and truly makes the pizza. The toppings are a great combination, I think. This was the first time I made pizza at home and thought, "hey, this is better than I can get delivered" - no joke.
Rigatoni with Sausage, Pepper, and Onions - Just thinking about this dish makes my mouth water (another Giada recipe). The sweet onions and peppers, the tangy tomato sauce, the comforting pasta, and one of my favorite flavors - marsala wine. This is one of my favorite dishes of all time!
Chicken with Dijon Mascarpone Sauce - Love this recipe! Yet another one from Giada - what can I say, she's knows good Italian food! Get your mascarpone cheese at Trader Joe's if you can - so much cheaper. This recipe is so indulgent. I save it for special occasions and company.
Fresh Salsa - The first time I made this, I was skeptical. How could I like it more than the great salsas you get in Mexican restaurants? I was mistaken - this salsa is right up there with the best of them. It's fantastic served with quesadillas, enchiladas, or tacos, or by itself with tortilla chips. I served this as an appetizer when my cousin and her boyfriend were over one night. He kept saying how good it was, then kept apologizing for repeating himself - it was cute :)
Spinach and Chicken Quesadillas - My favorite quesadilla recipe so far! In my opinion it's the fajita seasoning that makes it special (I credit Annie for that addition!) It was through this recipe that I realized my love of Monterey Jack cheese - it's perfect for Mexican food!
Tres Leches Coconut Cupcakes with Dulce de Leche Buttercream - Wow. Seriously that word sums it up. These were incredible. I still have people at work say to me "you know, you can make those anytime, you don't have to dress them up as Easter Chicks." I take a LOT of desserts into work, and for this one to stand out as much as it did really shows it's a great recipe. I can't wait to make these for my dad because I know he will LOVE them!
Pumpkin-Chocolate Tart - Not only is this one of my favorite desserts in terms of decoration, but this tart is fantastic. The combination of the sour cream and pumpkin makes a super tasty filling. The gingerbread-tasting crust is spicy and delicious, and it's coated in solid chocolate! I plan to make this again next fall for sure.
Chocolate and Toasted Coconut Covered Homemade Marshmallows - Homemade marshmallows are fabulous on their own, but as soon as I dipped them in chocolate and rolled them in toasted coconut, I had a hit! These are just like candy. My only mistake was not making more of them! Next year, I will be prepared with plenty of chocolate and coconut on hand to make a bunch of these.
Triple Chocolate Biscotti - I'm certainly not a biscotti expert, since these were the first I've ever tasted, but what a great little cookie! I loved the combination of white and bittersweet chocolates. These are great on their own or dipped in your favorite coffee, tea, or even milk.
Chicken Marbella - This is such a famous recipe and probably needs no introduction, but if you've never tried it, you must. Great for a crowd or a small group with yummy leftovers, the flavors in this dish are truly wonderful.
Double Chocolate Layer Cake - Decadent and rich - this dessert is perfect for chocolate lovers like yours truly. I'm not surprised it's the most accessed recipe on Epicurious.com!
Spicy Roasted Chicken - Pam has several great looking chicken recipes - all of which I'd love to try. This one is so delicious. I love the spices and the chicken turned out very juicy.
Chicken Pesto Pizza - I loved this pizza! It's a blend of sweet peppers, zucchini, and chicken, flavored with Italian seasoning. The ingredients magically combine to make one fantastic dish.
Bailey's Irish Cream Cheesecake - Of all the cheesecakes I've made, this is my favorite. Such a creamy filling covered in ganache - yum!
And just for fun, these are the top posts that have received the most hits according to Google Analytics:
10. Layered Taco Dip
1. Bacon Stuffed Cherry Tomato Appetizers (Thanks for the recipe Kat!!!)
Tuesday, October 27, 2009
Pumpkin Spice Kiss Brownies
I found these brownies when looking for recipes with the Hershey's Pumpkin Spice Kisses. This recipe was created by taking Dorie Greenspan's French Chocolate Brownies and swirling melted Pumpkin Spice Kisses through the batter. Let me first say that these brownies are delicious! Although, they are more cakey than I prefer in a brownie (I like them super chewy and fudgy!) After some searching, I discovered that Dorie initially intended these to be a cake, but her French guests thought they were brownies. Knowing that, I definitely think these are more like brownies than a cake. I did have some problems with the baking time (see below), so that might have made them a bit more cakey. I took these to lab meeting, and everyone loved them. The cinnamon added an extra special touch.

Pumpkin Spice Kiss Brownies
Ingredients:
1/2 cup all-purpose flour
1/8 teaspoon salt
1/8 teaspoon ground cinnamon
1 teaspoon pumpkin pie spice
6 ounces bittersweet chocolate, finely chopped
1 1/2 sticks (12 Tablespoons) unsalted butter, cut into 12 pieces, at room temperature
3 large eggs
1 cup sugar
45 Hershey's Pumpkin Spice Kisses, unwrapped
1/8 teaspoon salt
1/8 teaspoon ground cinnamon
1 teaspoon pumpkin pie spice
6 ounces bittersweet chocolate, finely chopped
1 1/2 sticks (12 Tablespoons) unsalted butter, cut into 12 pieces, at room temperature
3 large eggs
1 cup sugar
45 Hershey's Pumpkin Spice Kisses, unwrapped
Directions:
Preheat oven to 300F.
1. Center rack in the oven. Line an 8-inch square baking pan with foil, butter the pan and place it on a baking sheet.
2. Whisk the flour, salt, pumpkin pie spice, and cinnamon together. Put the chocolate in a heatproof bowl, and set the bowl over a saucepan of simmering water. Stir occasionally until the chocolate melts. Remove the bowl from the saucepan and add the butter, stirring until it melts. It's important that the chocolate and butter not get very hot. However, if the butter is not melting, you can put the bowl back over the still-hot water for a minute. If you've got a couple of little bits of unmelted butter, leave them - it's better to have a few bits than to overheat the whole.
3. Working with a stand mixer fitted with the whisk attachment, or with a hand mixer in a large bowl, beat the eggs and sugar until thick and pale, about 2 minutes. Reduce the mixer speed and pour in the chocolate-butter mixture, mixing only until it is incorporated- you'll have a thick, creamy batter.
4. Add the dry ingredients and mix at low speed for about 30 seconds - the dry ingredients won't be completely incorporated. Then finish folding in the dry ingredients by hand with a rubber spatula. Scrape the batter into the pan.
5. Place the unwrapped kisses in a microwave-safe bowl and microwave on HIGH for 1 minute. Stir until smooth, and then drop by spoonfuls into the brownie batter. Using a knife, swirl the batter to create a marbled effect.
6. Bake for 50 to 60 minutes, or until the top is dry and crackled and a thin knife inserted into the center comes out clean (Note: it took MUCH longer in my oven - I stopped keeping track but my oven is a piece-o-junk so it might have just been that). Transfer the pan to a rack and cool to warm or room temperature.
7. Carefully lift the brownies out of the pan using the foil edges as handles and transfer to a cutting board. (At this point I just removed the foil - it was really easy to remove). Cut into 16 squares.
Source: Dinner & Dessert
Wednesday, August 19, 2009
Dark Chocolate Mascarpone Brownies with Blueberry Ganache
I feel like such a blog slacker lately! Between all of the traveling we have been doing and writing my dissertation, things have been so busy this month! Luckily I have been able to make a few things in the meantime.
Sometimes I like going through the archives of my favorite cooking blogs to discover recipes that may have been posted before I became a reader. Several months ago, I was doing this for Jenny's blog, Picky Palate. I came across this recipe for Dark Chocolate Mascarpone Brownies with Blueberry Ganache - don't they just sound decadent?!? I saved the recipe to my desktop and waited for an excuse to make them. Each time I opened my laptop, there the recipe sat taunting me. I finally made the decision that I would make these for a lunch our lab was having to say goodbye to our summer undergraduate student before she returned to college.
These brownies were delicious! Although I prefer a more chewy brownie, these are more cake-like, so I just pretended it was a very moist cake. My favorite part is the ganache - seriously brilliant idea of Jenny's to add the blueberry sauce/syrup - it gives the best flavor. I think many other versions of this would be great too - add a little raspberry or strawberry syrup, or even some Framboise! In summary, the brownies were good, but the ganache was amazing!!!
One question to toss out there - why do people pronounce it "maRSCapone" when it's spelled "maSCARpone"??? I think in Italian the proper way to say it "mas-car-pon-AY," but what do we say in America without sounding like don't know the word? This always bugs me!


Dark Chocolate Mascarpone Brownies with Blueberry Ganache
Ingredients:
1 cup unsalted butter
2/4 cup best-quality semisweet chocolate chips (such as Ghirardelli)
1 cup sugar
1/2 cup Hershey's Dark cocoa powder
8 ounces mascarpone cheese, softened
6 eggs
2 teaspoons vanilla extract
1 cup all-purpose flour
1/2 teaspoon fine salt
Ganache, recipe below
Directions:
Preheat oven to 325F.
1. Butter a 13 x 9-inch pan or 2 9-inch round pans and set aside.
2. In a small saucepan, melt the butter and bring it to just below a boil. Place the chocolate chips in a large bowl. Pour the hot butter over the chips and let stand for 30 seconds. Stir until completely melted.
3. Sift in the sugar and cocoa powder. Beat in the mascarpone, eggs, and vanilla. Mix until smooth. Gently fold the flour and salt into the batter.
4. Pour the batter into the prepared baking pan(s) and spread evenly. Bake for 45 - 50 minutes for the 13 x 9 pan (I used 2 9-inch round pans and it only took 20 minutes!)
5. Cool for 10 - 15 minutes. Spread the warm ganache over the brownies. Allow the ganache to set completely before cutting into squares.

Blueberry Ganache
Ingredients:
1 12-ounce bag best-quality semisweet chocolate chips
2 cups frozen blueberries
1/2 cup sugar
1/2 cup heavy cream
4 Tablespoons unsalted butter
Directions:
1. Place the chocolate chips in a large mixing bowl and set aside.
2. Place the blueberries and sugar in a small saucepan over medium heat. Cook and stir until the mixture becomes sauce-like and bubbly. Pour into a sieve or strainer that is placed over the bowl containing the chocolate chips to catch the blueberry liquid. Discard the remaining blueberries.
3. Bring the cream and butter to just below boiling in a small saucepan over medium heat. Pour the hot mixture over the chocolate and let stand for 30 seconds. Stir the mixture until smooth. The ganache should be warm when used for spreading.
Source: Picky Palate
Wednesday, June 24, 2009
Magic Brownies - Two ways
What did you think I meant? No not that! When I lived in the sorority house my sophomore year of college, our house mom made the most amazing brownies EVER! They were topped with coconut, chocolate chips, and butterscotch chips....sooooo good. I never got the recipe because I didn't really bake back then, but have since searched high and low for something similar. About the closest I could come was the recipes for Magic Cookie Bars - which are apparently pretty popular . . . popular enough that Eagle Brand even sells a boxed kit for them. Well, I decided to try making my own version of the brownies using the Magic Cookie Bar recipe as a template. I also found a recipe that called for a butter-brown sugar-coconut mixture, so I decided to try both and see which was closest to what I remember. When my mom and sister came to visit, I served both brownies and labeled them A and B, then we voted. Results below!


Magic Brownies - A

Ingredients:
1 package brownie mix (plus ingredients to make them)
1 14-ounce can sweetened condensed milk
1 cup shredded coconut
1 cup butterscotch chips
1 cup chocolate chips
Directions:
1. Preheat oven to 350F. Grease two 9-inch round cake pans or a 13x9 pan.
2. Prepare brownies according to package directions, and pour into 13x9 pan or evenly divided between the two 9-inch round pans.
3. In a large bowl, mix together the sweetened condensed milk, coconut, butterscotch chips, and chocolate chips. Drop in spoonfuls onto the brownie mix and spread out as much as possible to cover brownie mix.
4. Bake 35-45 minutes or until a toothpick inserted comes out clean.
Source: Inspired by Eagle's Magic Cookie Bar recipe
Magic Brownies - B

Ingredients:
1 package brownie mix (plus ingredients to make them)
1 cup brown sugar, firmly packed
1/2 cup butter, melted
1 cup shredded coconut
1 cup butterscotch chips
1 cup chocolate chips
Directions:
1. Grease two 9-inch round cake pans or a 13x9 pan. Prepare brownie mix, and bake according to package directions.
2. Meanwhile, in a large bowl stir together the melted butter, brown sugar, coconut, butterscotch chips, and chocolate chips.
3. Remove brownies from oven when a toothpick comes out clean. Preheat broiler. Top brownies with spoonfuls of coconut mixture, spreading as evenly as possible to cover brownies.
4. Broil for 2-3 minutes or until top is crispy and melted.
Source: Adapted from Cooks.com
AND NOW FOR THE RESULTS YOU'VE ALL BEEN WAITING FOR:
My mom and I voted for Magic Brownies A, while Bob and my sister voted for Magic Brownies B. However, after taste testing more extensively, my sister changed her vote to A. Although Bob still maintains his vote for B, but has moved more to the middle. I'm convinced he voted for B because it's his first initial.
In my opinion, the topping of B is too sweet. The sweetness of A is perfect, and the brownies were more fudgey because everything cooks together. While too sweet, the topping of B was nice because it had a crispness from broiling. You really can't go wrong with either one, but I think I will stick to recipe A from now on.
If you'd like to have a bake off of your own, you can simply prepare 1 brownie mix and use half for A and half for B using 1 9-inch round pan for each, which is what I did for this contest. In that case, reduce the amount of 'topping' listed above by half for each recipe.
Thursday, March 5, 2009
Baker's Edge Brownie Pan and Ina's Outrageous Brownies
I have to share this cool brownie pan that my sister and I gave to my mom for her birthday - the Baker's Edge Brownie Pan. For those who love the edges and corners of brownies, this pan is perfect - practically every brownie is an edge or corner!

My dad took a picture of the first brownies they made in the pan:
This picture is just of a boxed brownie mix, but I thought I'd post the recipe for Ina Garten's Outrageous Brownies. These brownies are so delicious. Very rich and chocolately. I don't know that they'd be my 'everyday brownie' - not that I even have brownies everyday :) - but they are definitely worthy of special occasions. I found the recipe on the Food Network website, and the reviews were overwhelmingly positive. I've made these for my family multiples times. The original recipe is scaled for a 13 x 18-in sheet pan, which I don't own, so I cut it in half for a 13 x 9 pan. I don't have a picture of these to post, but they look like your typical fudgy brownie; they just taste much better!
Outrageous Brownies
Ingredients:
1/2 pound (2 sticks) unsalted butter (I usually just use salted)
1/2 pound (8 ounces) plus 6 ounces semisweet chocolate chips, divided
3 ounces unsweetened chocolate
3 extra-large eggs (I just used large, but Ina always recommends extra-large)
1 1/2 Tablespoons instant coffee powder
1 Tablespoon real vanilla extract
1 cup + 2 Tablespoons sugar
1/2 cup + 2 Tablespoons all-purpose flour, divided
1/2 Tablespoon baking powder
1/2 teaspoon kosher salt
1 1/2 cups diced walnut pieces (I'm allergic to nuts, so I omit these)
Instructions:
1. Preheat oven to 350F. Grease and flour a 13 x 9 x 1 1/2-inch sheet pan.
2. Melt together the butter, 1/2 pound of chocolate chips, and unsweetened chocolate on top of a double boiler. Cool slightly.
3. Stir together the eggs, instant coffee, vanilla and sugar. Stir in the warm chocolate mixture and cool to room temperature.
4. Stir together 1/2 cup of the flour, baking powder and salt. Add to cooled chocolate mixture.
5. Toss the walnuts and the 6 ounces of chocolate chips with 2 Tablespoons flour to coat (Note: Because I omit the walnuts, there is excess flour after coating the chocolate chips. The purpose of the flour is to allow the chips to remain suspended in the batter, rather than sink to the bottom, so I just remove the excess flour by placing the chips in a wire strainer and sifting it off.) Then add the walnuts/chocolate chips to the batter. Pour into prepared pan.
6. Bake for about 30 minutes, or until tester just comes out clean. Halfway through the baking, rap the pan against the oven shelf to allow air to escape from between the pan and the brownie dough. Do not over-bake!
7. Cool thoroughly, refrigerate well and cut into squares.
Final note: Some people prefer these cold, some at room temperature, and some heated up with vanilla ice cream - it's up to you!
Source: Adapted from Food Network, originally from Ina Garten's The Barefoot Contessa Cookbook
Subscribe to:
Posts (Atom)