Search This Blog

Showing posts with label Breakfast. Show all posts

Thursday, September 17, 2015

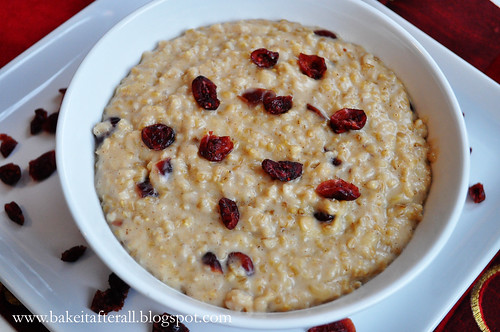
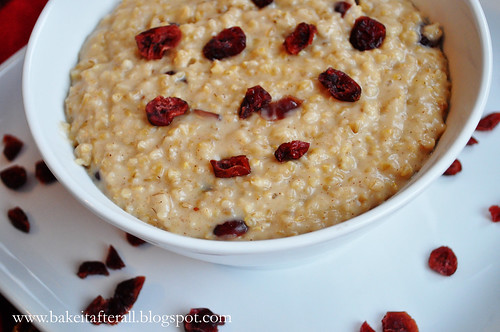
Ultimate Steel-Cut Oatmeal

DSC_0952_ed

My sister and brother-in-law share my love for cooking and recipes. They have made several recipes from the America's Test Kitchen Healthy Family Cookbook, and it's something I had been wanting for a while. My mom and dad got it for me for Christmas several years ago, so I was so excited to find new recipes inside.

First off, I LOVE that it's a metal-ring binder style cookbook. My Mom's 1970's Betty Crocker Cookbook is in this format, and I always wanted a cookbook like this. Browsing through this book makes me want to cook non-stop for a month - there are so many recipes I would like to try! One that caught my eye right away was this recipe for Steel-Cut Oats. I had a container of them in my pantry and had every other ingredient on hand, (which never happens!).

I am not a traditional oatmeal lover. In fact, I had a very bad experience with oatmeal as a child. I begged my mom to let me have an oatmeal with red gummy bears (gag) for dinner one night instead of tuna casserole (double gag). Why we even had this in the house I will never know. It turned into a slimy, soggy, pink slop and I did not want to eat it. I remember trying to bribe my dad to eat it (he quickly shot me down). This was the last time I ate oatmeal until college, when my roommate Kathleen showed me how to make it in a way that is not soggy or slimy - she uses about 1/4 the amount of water recommended. I continued to enjoy my oatmeal this way, and even made a similarly-textured baked oatmeal.

This dish takes some time to make, but the result is a creamy, but not soggy, oatmeal that can be tailored to your specific tastes. I decided to add in grated apple, dried cranberries, cinnamon, and some brown sugar, but ATK suggests a number of different variations, including maple syrup, honey, figs, walnuts, and/or bananas. The second time I made this, I doubled the recipe and we reheated the leftovers each morning. 

Ultimate Steel-Cut Oats

Ingredients:
3 cups water
1 cup 1% lowfat milk*
1 tablespoon unsalted butter
1 cup steel-cut oats
1/4 teaspoon salt

Optional add-ins:
1/2 large, peeled and grated sweet apple (such as Fuji)
1/3 cup dried cranberries
3 tablespoons brown sugar
1/4 teaspoon ground cinnamon

*ATK advises against using skim milk. I actually only had skim and whole milk, so I used whole. Not as healthy, but it was gooood!

Directions:
1. Bring the water and milk to a simmer in a large saucepan over medium heat.

2. Meanwhile, melt the butter in a skillet over medium heat, then add the oats and toast, stirring constantly, until golden and fragrant, 1 1/2 to 2 minutes.

3. Stir the oats into the simmering liquid, reduce the heat,to medium-low, and simmer gently until the mixture is very thick, about 20 minutes.

4. Stir in the salt and the optional add-ins and continue to simmer, stirring occasionally, until almost all of the liquid has been absorbed and the oatmeal is creamy, about 10 minutes (if doubling the recipe, increase this to 15 minutes). Let stand for 5 minutes before serving.

DSC_0943_ed


Source: Adapted from the America's Test Kitchen Healthy Family Cookbook

Tuesday, August 18, 2015

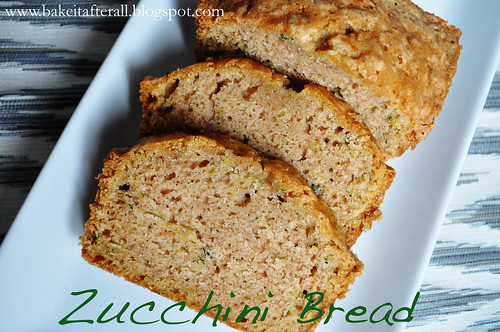
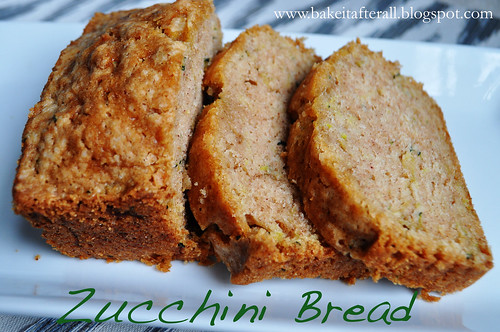
Zucchini Bread


DSC_0140_ZucchiniBread

This recipe has been in our family for years.  I am sure it is the typical recipe for Zucchini Bread that you can find in cookbooks and around the internet.  It's a simple quick-bread recipe without any bells or whistles - just shredded zucchini and the usual suspects of a quick-bread - sugar, flour, oil, eggs, etc. My favorite part of these types of bread is the crispy top that forms on the top of the loaf- it's the best!  My girls absolutely loved this bread - no surprise since it's essentially a cake!

Zucchini Bread

Makes 2 large loaves

Ingredients:
3 eggs, beaten
1 cup vegetable or Canola oil
2 cups sugar
2 cups grated zucchini (skin on, not squeezed of moisture)
2 teaspoons vanilla extract
3 cups flour
1 teaspoon baking soda
1/2 teaspoon baking powder
1 teaspoon salt
1 teaspoon cinnamon
1/2 cup chopped nuts (pecans) - I omit due to allergy

Directions:
Preheat oven to 325F.

1. Grease and flour 2 loaf pans (I use Pam for Baking spray). 

2. Combine beaten eggs, oil, sugar, zucchini and vanilla.

3. Into a large bowl, sift together the flour, baking soda, baking powder, cinnamon, and salt. 

4. Blend dry ingredients into the batter. Add nuts if using. 

5. Divide batter between 2 loaf pans and bake 50 - 60 minutes (I use the toothpick trick).

Note: For chocolate zucchini bread, add 1/2 cup cocoa powder to dry ingredients.

Source: my mom's recipe card :-)

DSC_0143_ZucchiniBread

Tuesday, May 26, 2015

Blueberry Boy Bait


DSC_0101_ed

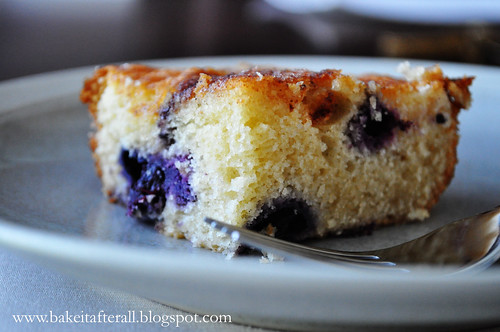
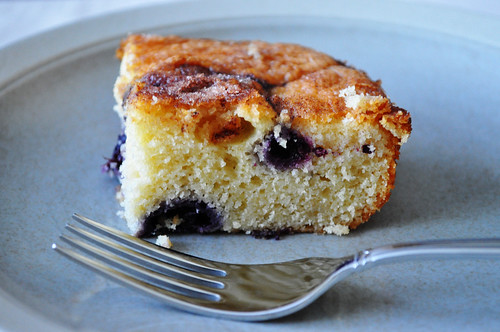
Another gem from my America's Test Kitchen Cookbook. The story goes that the girl who created this recipe for the Pillsbury Grand National Baking Contest said that teenage boys found this cake irresistible.  I don't make a habit of entertaining teenage boys (ha!), but Bob loved this cake and I still consider him a boy.  Of course, ATK improved upon the original recipe by swapping out shortening and subbing some of the granulated sugar with brown sugar. The result is a moist, simple cake perfect for brunch or an afternoon treat.

Blueberry Boy Bait

Note: if using frozen blueberries, do not let them thaw or they will discolor the batter.

Ingredients:
For the cake:
2 cups (10 ounces) plus 1 teaspoon unbleached all-purpose flour
1 tablespoon baking powder
1 teaspoon table salt
16 tablespoons (2 sticks) unsalted butter, softened
3/4 cup packed (5 1/4 ounces) light brown sugar
1/2 cup (3 1/2 ounces) granulated sugar
3 large eggs
1 cup whole milk
1/2 cup blueberries, fresh or frozen (see note)

For the topping:
1/2 cup blueberries, fresh or frozen (see note)
1/4 cup (1 3/4 ounces) granulated sugar
1/2 teaspoon ground cinnamon

Directions:
1. Adjust an oven rack to the middle position and heat to 350F.  Grease and flour a 13 x 9-inch baking pan.

2. Whisk 2 cups of the flour, the baking powder, and salt together in a medium bowl. With an electric mixer, beat the butter and sugars on medium-high speed until fluffy, about 2 minutes.

3. Add the eggs, one at a time, beating until just incorporated. Reduce the speed to medium and beat in one-third of the flour mixture until incorporated; beat in 1/2 cup of the milk. Beat in half of the remaining flour mixture, then the remaining 1/2 cup milk and finally the remaining flour mixture.

4. Toss the blueberries in a small bowl with the remaining 1 teaspoon flour. Using a rubber spatula, gently fold the blueberries into the batter. Spread the batter into the prepared pan.

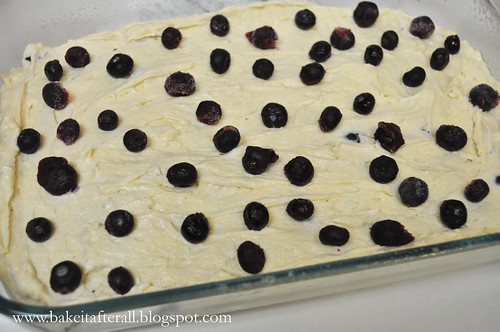
5. For the topping, scatter the blueberries over the top of the batter.

DSC_0070_ed


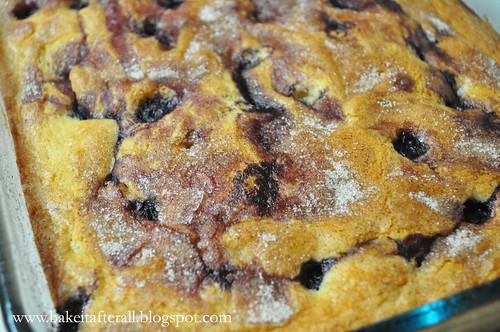
6. Stir the sugar and cinnamon together in a small bowl and sprinkle over the batter. Bake until a toothpick inserted in the center of the cake comes out clean, 45 to 50 minutes. Cool in the pan for 20 minutes, then turn out and place on a serving platter (topping side up). Serve warm or at room temperature.  The cake can be stored in an airtight container at room temperature for up to 3 days.

DSC_0078_ed


DSC_0096_ed

Tuesday, November 12, 2013

French Apple Cake

DSC_0941_label

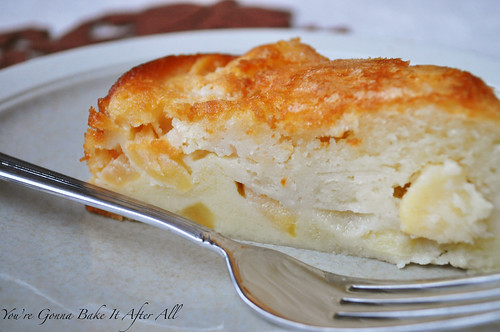
I last posted on this blog in January.  It is now November.  Rather than go on about how busy we've been, how quickly time goes by, or list off excuses for my absence, I figured I would just dive right into a recipe.  We got rid of cable quite some time ago, and since then I have had to be creative to still get my fill of the types of shows I used to watch. America's Test Kitchen is great because it's on PBS and is similar in nature to the Food Network shows I love.  I saw this French Apple Cake featured on an episode this fall and almost immediately was in the kitchen making it.  We had leftover apples from the orchard that needed to be used, and I just wasn't in the mood to make a pie.  We really loved this cake.  Because it's made with oil instead of butter, it's more moist than other homemade cakes.  The bottom layer has a custard quality and contains the apples, and the top layer is more cake-like.  The cake is topped with sugar before baking to give it a nice crispy topping, although once you wrap it up the moisture in the cake takes away this crispiness.  I love that this cake is essentially one batter that is separated and then treated differently to create a custard layer and a cake layer.  It just seems simpler than having two batters from the start.  This cake cooks low and slow (1 1/4 hours!) so plan accordingly.

I will say that I have loved having this blog as a way to document not only our favorite recipes but also momentous occasions in our family, and I have missed not having a record of these events in time-stamped format.  Our daughter Ava is turning 2 next month !!! and I really cannot believe it.  Also, we are expecting her baby sister in February and are so excited to see what life as a family of 4 brings!

DSC_0952_label

 
French Apple Cake

Ingredients:
1 1/2 pounds apples, peeled, cored, cut into 8 wedges then sliced 1/8 inch thick crosswise (ATK recommends Granny Smith; I used Golden Delicious)
1 tablespoon Calvados (this is a French apple brandy; you can substitute another apple brandy or white rum. I used regular brandy, and it was fine.)
1 teaspoon lemon juice
1 cup (5 ounces) plus 2 tablespoons all-purpose flour
1 cup (7 ounces) plus 1 tablespoon granulated sugar
2 teaspoons baking powder
1/2 teaspoon salt
1 large egg plus 2 large yolks
1 cup vegetable oil
1 cup whole milk
1 teaspoon vanilla extract
Confectioners' sugar, optional

Directions:
1. Adjust an oven rack to the lower-middle position and heat the oven to 325F.  Spray a 9-inch springform pan with non-stick spray.  Place prepared pan on a rimmed baking sheet lined with aluminum foil.  
2. Place apple slices into a microwave-safe pie plate, cover, and microwave until apples are pliable and slightly translucent, about 3 minutes.*  Toss apple slices with Calvados and lemon juice and let cool for 15 minutes. 
3. Whisk 1 cup flour, 1 cup granulated sugar, baking powder, and salt together in a bowl. Whisk egg, oil, milk, and vanilla together in a second bowl until smooth. Add dry ingredients to wet ingredients and whisk until just combined. Transfer 1 cup batter to a separate bowl and set aside (this will become the cake layer).
4. Add the egg yolks to the remaining batter (to create the custard layer) and whisk until just combined. Using spatula, gently fold in cooled apples. 
5. Transfer custard/apple batter to prepared pan and, using an offset spatula, spread the batter evenly to the pan edges, gently pressing on the apples to create an even, compact layer, and smooth surface.
6. Whisk the remaining 2 tablespoons flour into the reserved batter. Carefully and evenly pour this batter in the pan on top of the custard/apple layer.  Spread the batter evenly to the pan edges and smooth the surface. Sprinkle the remaining 1 tablespoon granulated sugar evenly over the cake.
7. Bake until the center of the cake is set, a toothpick inserted in the center comes out clean, and the top is golden brown, about 1 1/4 hours.
8. Transfer pan to a wire rack; let cool for 5 minutes. Run a paring knife around the sides of the pan to dislodge the cake and then let cool completely, 2 to 3 hours. Dust lightly with confectioners' sugar if desired, cut into wedges, and serve.  For a nice crisp top, serve the same day without covering the cake. I loosely covered the remaining cake with foil overnight, and the crispness was lost due to the moisture of the cake (it's still good though!)

Source: America's Test Kitchen

*I prefer not to microwave plastic wrap as I'm unsure what chemicals leach into the food during the heating process, so I covered my pie plate with waxed paper then topped it with plastic wrap to get a good seal so no moisture would escape.  I suppose chemical could pass through the wax paper, especially if had gotten wet (it didn't), but it made me feel better to do it this way!


Wednesday, August 29, 2012

Skinny Chocolate Chip Scones

DSC_0178_ed

DSC_0182_ed 

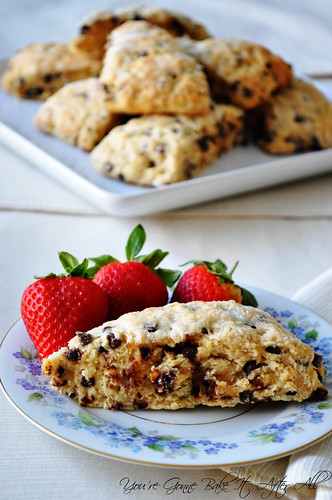
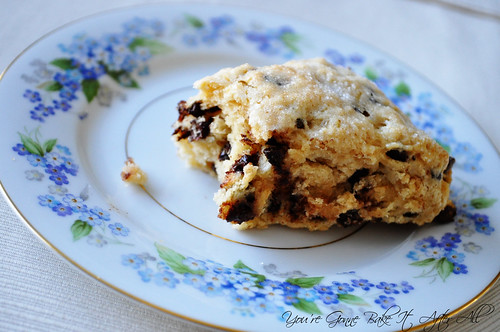
I think I came across this scone recipe on Pinterest and couldn't get it out of my mind.  I had to make them immediately.  I've made Chocolate Chip Scones before and loved them, but I liked the idea of making them a tad healthier by using part whole wheat flour and a few other substitutes. Don't get me wrong, it's hard to beat a classic scones, but if you're in the mood for scones and not feeling overly indulgent, these are a great alternative.  Plus, it's always nice to sneak chocolate into breakfast! We really enjoyed these scones, and I'm happy to have this recipe on hand.

Skinny Chocolate Chip Scones

Ingredients:
3/4 cup cold buttermilk
1/4 cup sugar
2 teaspoons vanilla extract
1 large egg
1 cup all-purpose flour
1 cup white whole wheat flour
1 tablespoon baking powder
1/2 teaspoon salt
3 tablespoons cold butter, but into small pieces
3/4 cup chocolate chips
cooking spray
1 large egg white, lightly beaten
1 1/2 tablespoons sugar

Directions:
1. Preheat oven to 375F. Spray a baking sheet with cooking spray or line with a piece of parchment paper.

2. Combine the first four ingredients in a medium bowl, stirring with a wire whisk.

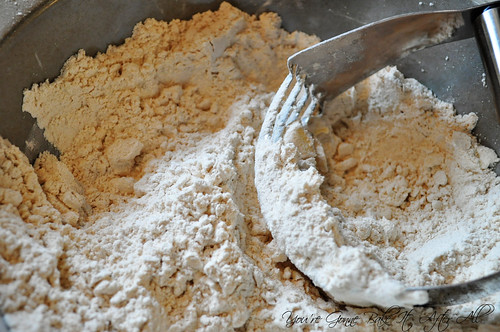
3. Combine flour, baking powder, and salt in a large bowl, whisking to combine.  Cut in the chilled butter with a pastry blender (or 2 knives) until the mixture resembles coarse meal.

  DSC_0157_ed  

Gently fold in chocolate chips.

4. Add buttermilk mixture to dry mixture, stirring just until moist.

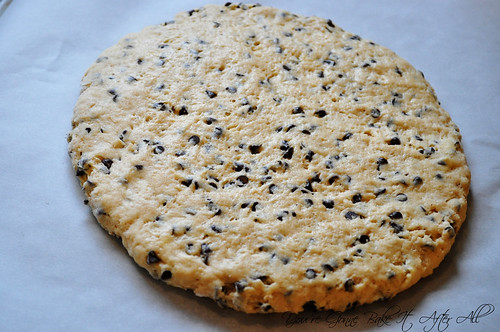
5. Place dough onto a floured surface and knead lightly four times with floured hands. Form dough into a 9-inch circle onto the baking sheet, about 3/4-inch thick.

  DSC_0159_ed 

Using a knife, cut dough into 12 wedges all the way through.

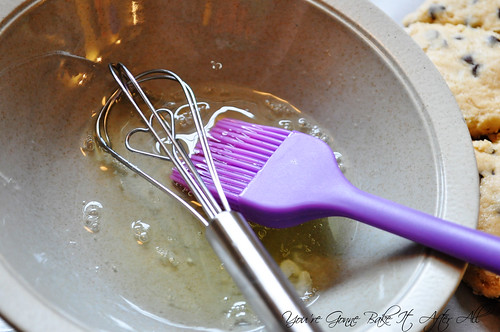
6. Brush egg white over dough and sprinkle evenly with sugar.

  DSC_0164_ed 

Bake until golden, about 18 - 20 minutes, depending on your oven.  Serve warm.

Source: SkinnyTaste.com

Monday, October 31, 2011

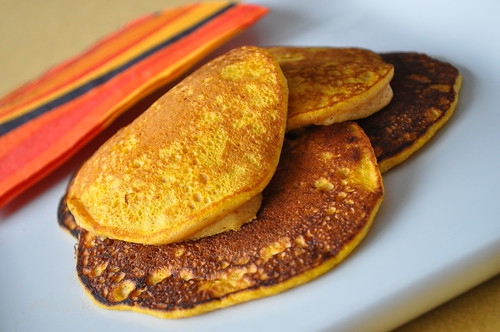
Happy Halloween with Pumpkin Pancakes!!!

DSC_0625

DSC_0627

DSC_0652

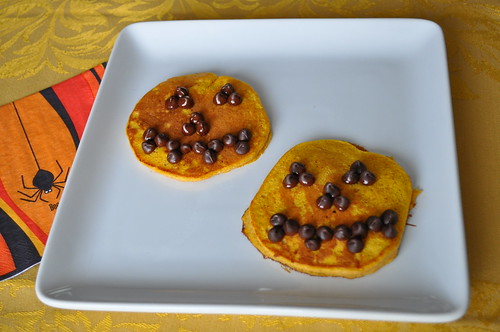
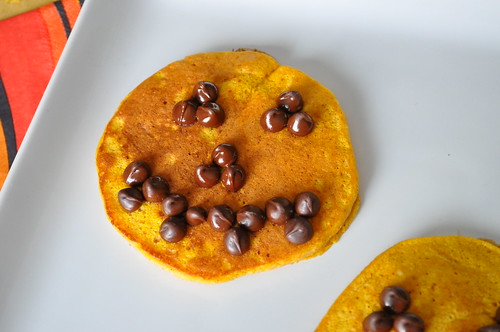
Happy Halloween! Just a last minute recipe with an idea that turns ordinary pancakes into a festive treat. I have wanted to try pumpkin pancakes for a while now, and I started thinking about how to make them more Halloween-oriented - why not use chocolate chips to make them into jack-o-lanterns? My mom used to make pancakes in Mickey Mouse shapes and used chocolate chips for the face, so this concept is virtually the same.

In my opinion, pancakes should be light and fluffy, but too often the pancakes I order in restaurants are heavy and dense. Like the pumpkin waffles, this recipe uses the technique of whipping up egg whites to fold into the batter; I think this creates a super fluffy pancake. We really loved these pancakes, although they could use more pumpkin spice flavor. Next time I'll probably double the pumpkin pie spice.

Have a spooktacular day!

Pumpkin Pancakes

Servings: 2 - 3

Ingredients:
1/2 cup all-purpose flour
1 tablespoon sugar
1 teaspoon baking powder
1/2 teaspoon pumpkin pie spice (double this to bump up pumpkin spice flavor)
1/4 teaspoon salt
1/2 cup skim milk
1/2 cup pumpkin puree
2 large eggs, separated
2 tablespoon unsalted butter, melted
1/2 teaspoon vanilla extract

Directions:
1. In a large bowl, whisk together the flour, sugar, baking powder, pumpkin pie spice, and salt.

2. In a separate bowl, combine the milk, pumpkin puree, egg yolks, melted butter, and vanilla extract together, whisking to blend until smooth.

3. Add the wet ingredients to the dry ingredients, mixing with a spatula until just combined.

4. In the bowl of an electric mixer, beat the egg whites until thick and stiff.

5. Gently fold the egg whites into the pancake batter until fully incorporated.

6. Meanwhile, heat a frying pan over medium heat.

7. Lightly spray the pan with cooking spray or use butter or butter substitute (we like Brummel & Brown). Pour batter onto pan in 1/4-cup increments (I like scooping it with a 1/4 cup measuring cup and using the bottom of the cup to smooth out the thick batter).

8. Cook each pancake until lightly browned on each side, about 1 minute per side. Air bubbles will start to reach the surface of the pancake and escape, indicating that it may be time to flip.

9. Transfer each cooked pancake to a warm plate (or one in the microwave to prevent cooling) and repeat with the remaining batter.

10. Serve with your favorite pancake toppings.

Source: Adapted from The Curvy Carrot, originally from Bon Appetit via Epicurious


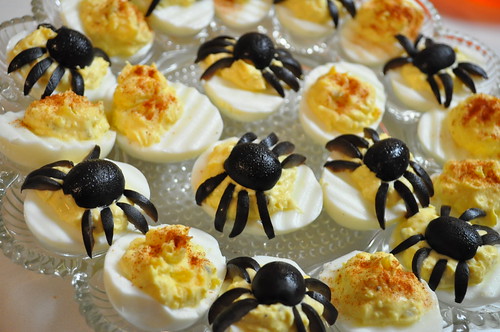
Some deviled eggs my mom made with black olive spiders on top! :)

DSC_0623

HAPPY HALLOWEEN!!!

Thursday, October 13, 2011

Pumpkin Waffles

DSC_0370_ed

DSC_0372_ed

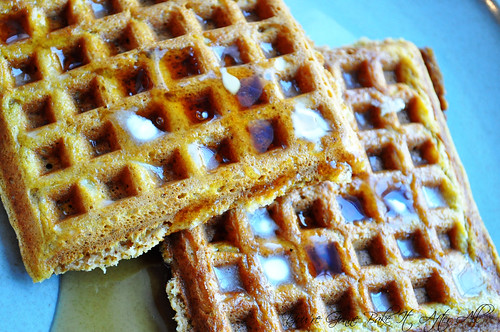
I had a recipe for pumpkin waffles that required the batter sit in the fridge overnight, intending to make the batter on a Saturday night so we could have them for breakfast on Sunday. Time got away from me and it was too late to start making waffle batter, so I decided to search for a recipe in the morning that didn't require an overnight incubation. Thankfully I found this one on Smitten Kitchen.

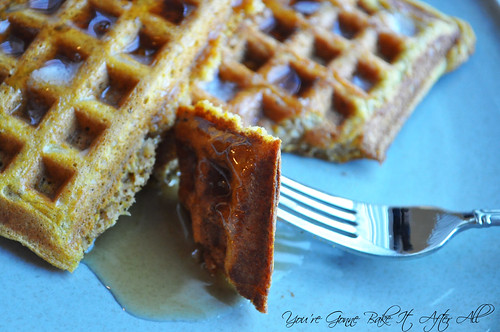
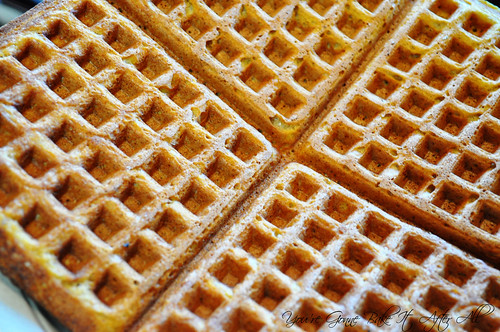
We loved these waffles! The whipped egg whites make for a fluffy interior, and the outside is still nice and crispy like a waffle should be in my opinion. These sort of taste like pumpkin bread! This recipes makes a lot of waffles, so we have the leftovers in our freezer. I look forward to being able to pop one in the toaster for a quick weekday breakfast!

Pumpkin Waffles


Makes 5 full traditional (not Belgian) waffles (20 squares)

Ingredients:
2 1/2 cups all-purpose flour

1/3 cup packed light brown sugar

2 1/4 teaspoons baking powder

1 teaspoon baking soda

1/2 teaspoon salt

2 teaspoons ground cinnamon

1 teaspoon ground ginger

1/4 teaspoon ground cloves

4 large eggs, separated

2 cups well-shaken buttermilk*

1 cup canned solid-pack pumpkin

3/4 stick (6 tablespoons) unsalted butter, melted

Vegetable oil for brushing waffle iron or cooking spray

*Or use 2 cups milk with 2 tablespoons vinegar and allow to curdle for 10 minutes.

Directions:
Preheat oven to 250°F and preheat waffle iron.

1. Sift together flour, brown sugar, baking powder, baking soda, salt, and spices.

2. Whisk egg yolks in a large bowl with buttermilk, pumpkin, and butter until smooth. Whisk in dry ingredients just until combined.

3. In a mixing bowl with a whisk attachment, whisk the egg whites until they hold soft peaks. Fold them gently into the waffle batter until just combined.

4. Brush waffle iron lightly with oil or spray with cooking spray (I like to use Pam for Grilling because it's a high temperature formula and holds up better to heat of my waffle iron). Pour or spoon batter into waffle iron, spreading quickly. Cook according to manufacturer’s instructions. (When I make waffles, I like to transfer the batter to a pourable measuring cup and pour it onto the waffle iron. I don't even bother spreading the batter because the weight of my waffle iron's lid spreads it nicely).

5. If serving many people, transfer waffles to rack in oven to keep warm and crisp. Repeat with remaining batter. I just cool my extra waffles on a cooling rack, break up the squares, wrap them in waxed paper, and pack them up in freezer bags. Then they are ready to pop in the toaster from frozen.

DSC_0359_ed

Source: Adapted from Smitten Kitchen

Sunday, October 9, 2011

Pumpkin Scones

DSC_0290_ed

DSC_0295_ed

I've only made scones one other time (Chocolate Chip Scones), and I really loved them. When Annie posted these pumpkin scones almost two years ago, I immediately planned to make them. I mentioned before that sometimes I never get around to making a recipe and it gets pushed to the next year . . . that is exactly what happened with these scones, although twice. I've even bought the buttermilk twice before!

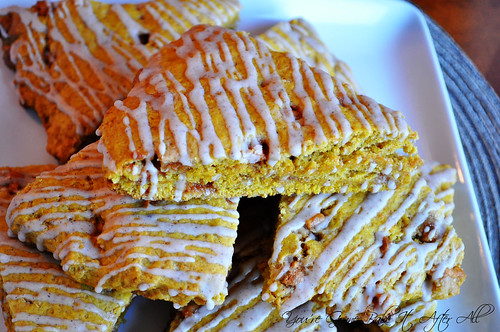
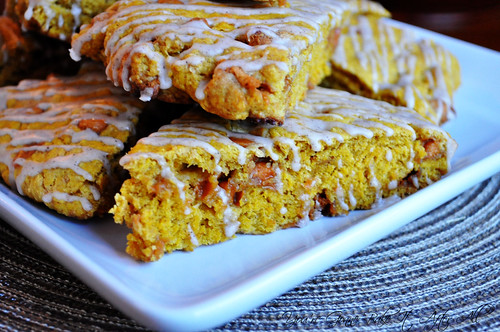
I was determined this fall to finally make these scones! We had planned a girls shopping day so I decided to bring the scones to have before we started our day. These scones are not what I think of as typical scones; they are more like a cake. My mom didn't even want to try one because she's not a big scone fan, but she thought these were more like a coffee cake, and she loved them! In fact, everyone loved these, including Bob who is a self-proclaimed pumpkin-hater! (We have since discovered his dislike of pumpkin is really a dislike of the texture of pumpkin pie!) The butterscotch chips really do add a great flavor to the scones, and the spicy glaze is nice as well. Bob has already asked me, several times, to make these again - that's a winner in my book!

Pumpkin Scones

Ingredients:

For the scones:

2 cups all-purpose flour

1/3 cup packed brown sugar

1/2 teaspoon ground ginger

1/2 teaspoon ground cinnamon

1 teaspoon baking powder

1/2 teaspoon baking soda

1/4 teaspoon salt

8 tablespoons cold, unsalted butter, cut into pieces

1/3-1/2 cup butterscotch chips

1/2 cup buttermilk

1/2 cup pumpkin puree

1 teaspoon vanilla extract

For the glaze:

1 cup powdered sugar

1/4 teaspoon ground cinnamon

Dash of ground nutmeg

Dash of ground ginger

Dash of ground cloves

2 tablespoons milk

Directions:

Preheat the oven to 400° F. Line a baking sheet with parchment paper or a baking mat.

1. In a medium mixing bowl, combine the flour, brown sugar, spices, baking powder, baking soda and salt; whisk to combine.

2. Add the cold butter chunks to the bowl and stir with a fork to combine. Cut the butter into the dry ingredients using two forks or a pastry blender until the mixture resembles coarse crumbs and the largest butter pieces are no bigger than peas. Mix in the butterscotch chips.

3. In a small bowl or measuring cup, combine the buttermilk, pumpkin puree, and vanilla extract.

4. Add the wet ingredients to the bowl with the dry ingredients and stir together gently just until the dough comes together. If necessary, knead a bit with your hands, but be careful not to overwork the dough or you will end up with tough scones.

5. Transfer the sticky mass of dough to the prepared baking sheet. Pat the dough into a 8 or 9-inch round. I sprayed my hands with non-stick cooking spray to make this process easier and prevent the dough from sticking too much to my hands. It also helps to smooth out the surface a bit.

6. Bake the round until a toothpick inserted in the center comes out clean, about 17-25 minutes. (The original recipe stated 22 - 25 minutes, but mine cooked in closer to 17 minutes.) Allow to cool to room temperature. Slice the dough round into 8 wedges.

7. To make the glaze, combine the powdered sugar and spices in a small bowl. Add the milk and whisk to combine, until a thick glaze is formed. (If necessary, add a bit more milk to achieve a consistency good for drizzling the glaze.)

8. Use a whisk or a plastic bag with the tip cut off to drizzle the glaze over the finished scones. Allow the glaze to set before serving.

Source: Annie's Eats, originally adapted from Joy of Baking

Tuesday, September 27, 2011

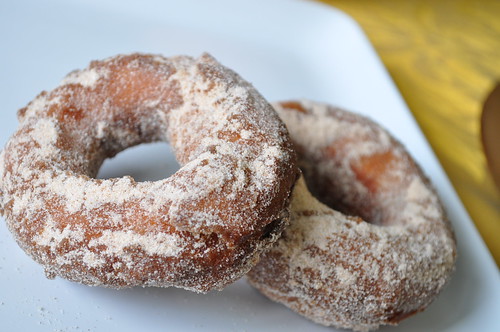
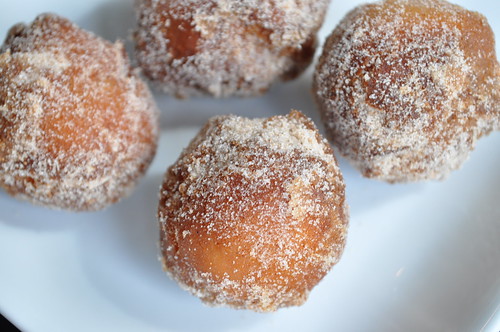
Apple Cider Doughnuts

DSC_0174

DSC_0136

DSC_0152

DSC_0167

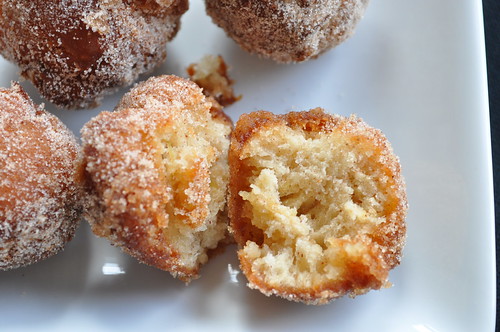
Apple picking is one of my favorite fall activities. My mom and aunt used to take my sister and I apple picking when we were kids. When I lived in Chicago, my friend Kathleen and I decided to carry on the tradition. We found this awesome orchard County Line and looked forward to our yearly visits. One of our favorite parts was the apple spiced donuts! They were best fresh - warm and slightly crispy on the outside, perfect spiced apple cake-doughnut texture on the inside, covered in loads of cinnamon sugar! We would even stop at a gas station on the way in or out and get some milk to have with the doughnuts!

When we made the big move to St. Louis last year, I knew that I would be missing out on the apple doughnuts. We still pick apples here, but to my knowledge the local orchards don't serve these doughnuts...in fact, a lot of people around here have never heard of them.

Last fall, when I saw Megan post this Apple Cider Doughnut recipe, I got really excited that it might closely mimic my favorite orchard doughnuts! We had a very busy fall last year - moving into our house, still settling into our new jobs, getting our home ready to host our first Thanksgiving - things were a little hectic. The thought of making homemade doughnuts wasn't an option. Plus, I didn't have a proper vessel to use for deep frying... Then this spring, Kathleen used her amazing discount for the kitchen store she works for to help me purchase something I've been dreaming about for years - a Le Creuset French Oven!

The Le Creuset is perfect for deep frying, so I made these doughnuts a priority this year. I have to admit, I was a bit nervous to deep fry. I've never done it before, but I had a candy/fry thermometer and some baking soda/fire extinguisher on hand, so I went for it. I got fresh apples and apple cider from a local orchard on a Saturday, made the dough on Saturday night, and on Sunday morning we enjoyed these babies. And I have to say, they were better than the ones at County Line! Bob said they are probably his favorite thing I've ever made! Wow - that is huge. He's surprisingly picky. I invited my sister and brother-in-law over since they've actually made homemade doughnuts before, and they loved these as well. Everyone commented on how the real flavor of the apples and the cider comes through. I love that! I'm thinking the doughnuts sold at orchards are probably from a mix, not from fresh apples and cider!

This recipe isn't difficult, but it does take some patience. Fresh apples are simmered in apple cider until soft, then pureed into a fresh apple sauce, which is reduced and incorporated into a cake doughnut dough. The dough chills for at least 2 hours (preferably overnight). Once chilled, the dough can be shaped however you'd like - traditional doughnuts or doughnut holes - and then fried, dipped in a reduced cider glaze, and rolled in cinnamon-sugar. YUM!

I found that I ran out of the cider glaze, likely because instead of following the original recipe and only dipping one side of the doughnuts in glaze and cinnamon sugar, we preferred to coat the entire thing (that's how County Line does it!). Because of this, I've doubled the amount in the recipe below. I also bumped up the cinnamon sugar because I used most of it and didn't make the full batch of doughnuts...some of the dough is in the freezer for another time!

I think we've decided to make these doughnuts a yearly tradition in our house. I hope our daughter will love apple picking as much as I do, and I'm sure she'll love these doughnuts! :-)

The Best Apple Cider Doughnuts

Ingredients:
For the doughnuts:
2 apples (they suggest red such as Cortland or McIntosh, I used my favorite Golden Delicious)
1 1/2 cups apple cider
3 1/2 cups all-purpose flour, plus more for dusting
4 teaspoons baking powder
1/4 teaspoon baking soda
1 1/2 teaspoons ground cinnamon
1 teaspoon salt
1/4 teaspoon nutmeg
2/3 cup granulated sugar
3 tablespoons vegetable shortening
1 egg plus 1 egg yolk
1/4 cup buttermilk
1 teaspoon vanilla extract

Vegetable oil, for frying (I needed about 2 1/2 quarts)

For the glaze:
2 cups apple cider
1/2 cup confectioners' sugar

For the topping:
1 1/2 cup sugar
1 tablespoon ground cinnamon (feel free to add more if you prefer a higher cinnamon to sugar ratio)

Directions:
1. To make the doughnuts: core and coarsely chop the apples (do not peel). Combine the apples with 1 1/2 cups cider in a medium saucepan over medium heat; cover and cook until softened, about 8 minutes. Uncover and continue cooking until the apples are tender and the cider is almost completely reduced, about 5 minutes.

2. Pour the mixture into a food processor, and puree until smooth (or use an immersion blender). Pour the applesauce into a measuring cup. If you have more than 1 cup, return the applesauce to the saucepan, and boil until reduced to 1 cup. (I had to do this step). Let cool slightly.

3. While the apples are cooking, whisk the flour, baking powder, baking soda, 1 1/2 teaspoons cinnamon, salt, and nutmeg in a medium bowl.

4. In bowl of electric mixer fitted with the paddle attachment, combine 2/3 cup granulated sugar and the shortening, and beat on medium speed until sandy.

5. Beat in the egg and yolk, and then gradually mix in the applesauce, scraping the bowl. Mix in half of the flour mixture, then the buttermilk and vanilla, and then the remaining flour mixture. Mix to make a sticky dough; do not overmix.

6. Scrape the dough onto a lightly floured sheet of parchment paper laid on a sheet pan turned upside down. Roll dough in the flour to lightly coat (I added this step, as the dough stuck to the parchment so perhaps this will help). Pat dough into a 7-by-11-inch rectangle, about 1/2 inch thick. Cover with plastic wrap and refrigerate for at least 2 hours or overnight. (Overnight is recommended because the colder the dough is, the easier it is to work with. It's a very sticky dough.)

7. When you're ready to make the doughnuts, heat 2 inches of vegetable oil in a large heavy-bottomed pot over medium-high heat until a deep-fry thermometer registers 350 degrees.

8. While the oil is heating, make the glaze: simmer 2 cups cider in a small saucepan over medium heat until reduced to 1/2 cup. Whisk in the confectioners' sugar, and set the glaze aside.

9. Then make the topping: Mix 1 1/2 cups granulated sugar and 1 tablespoon (or more) cinnamon in a shallow bowl or pie plate; set aside.

10. Line a baking sheet with paper towels, and set it near the stove.

11. Cut the chilled dough into rounds, using a floured-dipped 3-inch biscuit cutter. Cut out the centers of the doughnuts, using a 1- or 1.5-inch biscuit cutter. Or simply use the small biscuit cutter to cut all doughnut holes. (The dough expands when it hits the oil, so I ended up halving the doughnut holes made with a 1.5-inch biscuit cutter). At this point, I found it useful to lightly dust/roll the doughnuts in flour so they weren't so sticky. This really helped and didn't affect the frying process or the resulting taste of the doughnuts.

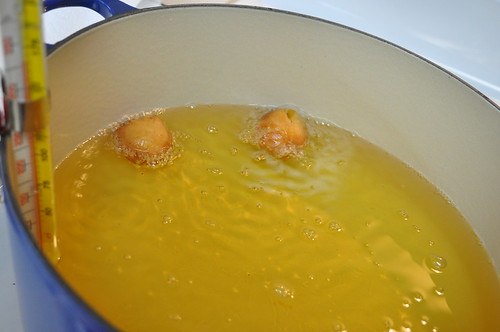
12. Using a skimmer, tongs, or your hands (be very careful!!!), slip 2 or 3 doughnuts or 4 or 5 doughnut holes at a time into the hot oil and fry until golden brown, 1 to 2 minutes per side for regular doughnuts, approximately 3 1/2 - 5 minutes for doughnut holes (this will depend on the temperature of the oil. I had a hard time regulating it with my electric range...perhaps gas is better for this?) I suggest starting out with one doughnut hole and seeing how long it takes to get the center totally cooked. This will give you a good idea of the outside color when the inside is cooked. Our first doughnut hole was gooey on the inside, but every other doughnut after that was perfectly cooked.
DSC_0111

13. Transfer to the paper towels to drain. If you prefer to eat the doughnuts hot and fresh (like we did!), only allow the doughnuts to drain for a minute or so, then drop a doughnut into the cider glaze, roll around using tongs, and then transfer to cinnamon-sugar mixture and roll around to coat entirely. The original recipe suggests to just dip one side of each doughnut, but we like them totally coated in cinnamon-sugar!

14. Repeat with remaining dough. Check the oil temperature periodically, and adjust the heat as needed.

Note: You may want to return the remaining dough to the fridge in between fry batches so it doesn't get too warm and sticky. I found it helpful to keep plenty of flour on hand if the dough is sticking too much.

Source: Adapted from Delicious Dishings, originally from Food Network Magazine

Friday, October 1, 2010

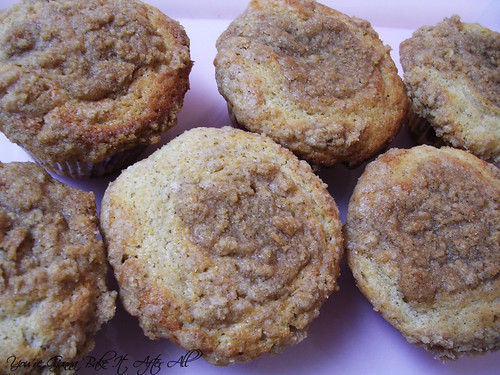
Allspice Crumb Muffins

DSCN7008_labeled

DSCN7014_labeled

Happy Fall! It seems like the weather in my area has changed from summer to fall since my last post! Can you believe it's already October???

I've been MIA lately but for good reason - we closed on our new house and moved in! We are still working on getting settled, but my first priority was establishing a functional kitchen. I'm really looking forward to getting back into a routine that involves more cooking, baking, and blogging!
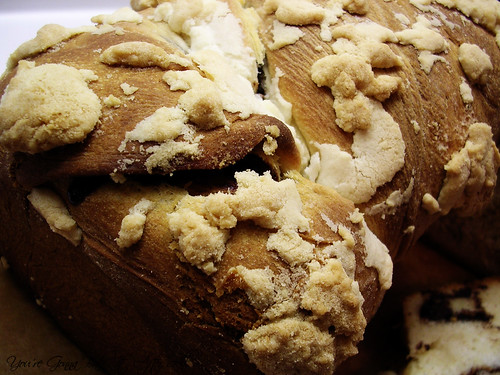
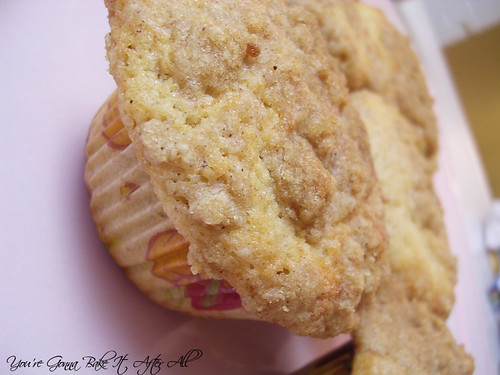
I've had my eye on these Allspice Crumb Muffins for quite some time, and I decided that they would be the perfect breakfast for my wonderful family members who graciously gave up their Saturday morning to help us on moving day. These muffins were great - incorporating the delicious spices of fall.

Stay tuned for some great fall recipes coming soon! :)

Allspice Crumb Muffins

Ingredients:
For the streusel:
1/2 cup all-purpose flour
1/2 cup light brown sugar, packed
1/2 teaspoon ground allspice*
5 tablespoons cold unsalted butter, cut into small pieces

For the muffins:
2 cups all-purpose flour
1/2 cup sugar
1 tablespoon baking powder
1/2 teaspoon ground allspice*
1/4 teaspoon salt
1/4 cup light brown sugar, packed
8 tablespoons unsalted butter, melted and cooled
2 large eggs
3/4 cup whole milk
1/4 teaspoon vanilla extract
zest of 1 lemon, optional

*When I'm out of allspice and can't get to the store, I make a similar-tasting substitute by mixing 2 parts ground cinnamon, 1 part ground nutmeg, and 1 part ground cloves.

Directions:
Center a rack in the oven and preheat to 375F.
1. Line a 12-cup muffin tin with paper liners or spray with cooking spray. Place the muffin pan on a baking sheet.
2. For the streusel, put the flour, brown sugar, and allspice in a small bowl and sift ingredients through your fingers to blend. Add the cold pieces of butter and toss to get irregularly shaped crumbs. Set aside in refrigerator.

3. In a large bowl, whisk together the flour, sugar, baking powder, allspice, and salt. Stir in the brown sugar, making certain there are no lumps.

4. In a large glass measuring cup or another bowl, whisk the melted butter, eggs, milk, and vanilla extract together until well combined.

5. Pour the liquid ingredients over the dry ingredients and, with a whisk or rubber spatula, gently but quickly stir to blend. The batter should be lumpy. Stir in lemon zest if using.

6. Divide the batter evenly among the muffin cups. Sprinkle some streusel over each muffin, then use your fingertips to gently press the crumbs into the batter.

7. Bake for about 20 minutes or until the tops are golden and a thin knife inserted into the center of the muffins comes out clean. Transfer the pan to a rack and cool for 5 minutes before carefully removing each muffin to the cooling rack.

Source: Baking from My Home to Yours by Dorie Greenspan, as featured on Meet Me in the Kitchen

Thursday, May 6, 2010

Chocolate Babka

DSCN6271_labeled

DSCN6257_labeled

DSCN6263_labeled

DSCN6268_labeled

DSCN6264_labeled

I like to have TV on in the background when I'm cleaning, blogging, or lately, packing. Luckily I found an "I Love Lucy" marathon the other day! One of my favorite episodes came on - where Lucy and Ethel take on the roles of Pioneer Women and make their own bread and butter. Lucy mistakenly uses 13 cakes of yeast in her bread; the recipe called for 3. What ensues is kind of ridiculous, but pretty funny, and got me in the mood to make a yeast bread!

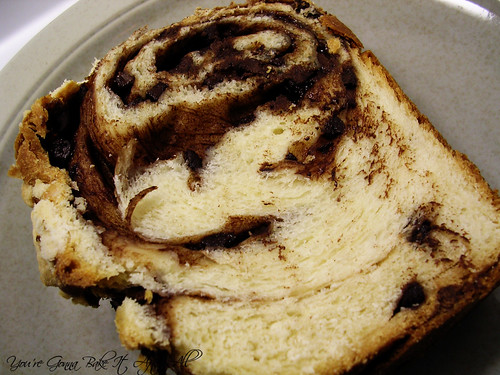
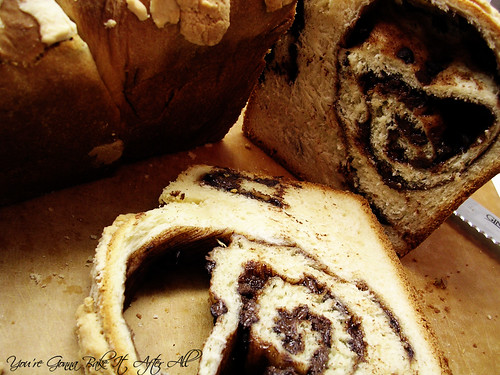
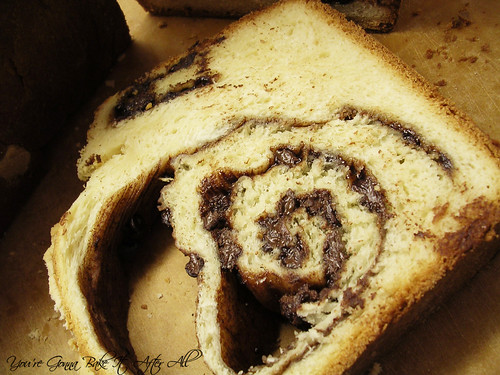
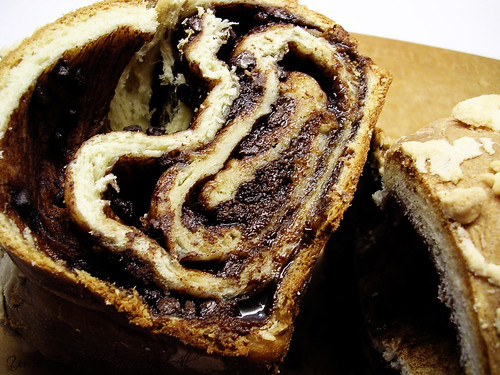
I've been saving this recipe since January when I saw it on Sugar Plum and finally decided to make it. My Polish relatives used to bring homemade babka to family functions. I've never made any sort of babka before, so I thought I'd practice with this one before attempting my family recipe. Plus, a Cooking Light recipe that involves chocolate and cinnamon? Sign me up!

A quick Wikipedia search turned up that this version of babka is a spin on the Eastern European Jewish tradition. Different from the Polish version I've had in the past, but certainly delicious sounding!

I really should have read the recipe reviews first, because although they are overwhelmingly positive, they would have alerted me to a mistake in the recipe. The streusel topping calls for softened butter, rather than cold. This goes against everything I've ever read about streusel, but I went with it. The mixture turned into a paste rather than crumbs. I decided to just use it anyway and it looks, well...interesting :)

One other problem with my bread is that the top layer seems to have separated from the others on one end of the loaf, maybe because the other layers didn't rise as well during baking? Or maybe I just didn't roll it up tight enough. Like I said, I need practice with this before I try to make our family recipe! Regardless, the bread was still delicious. Love the cinnamon and chocolate flavors together! I'm happy to report that this bread certainly doesn't taste "light." Bob was really surprised by how much he liked it. He took out the butter and a knife prepared to slather his slice, but soon realized he didn't need it. His words: "I usually don't like dessert breads that much, but this is great" and "I would pay for this stuff!" I'd say this recipe is a keeper!

Chocolate Babka

Ingredients:
For the dough:
1 teaspoon granulated sugar
1 package active dry yeast (about 2 1/4 teaspoons)
3/4 cup warm 1% low-fat milk (105 - 110F)*
6 Tablespoons granulated sugar
1/2 teaspoon vanilla extract
1/4 teaspoon salt
1 large egg yolk, lightly beaten
7.5 ounces all purpose flour (about 1 2/3 cups), divided
5.85 ounces bread flour (about 1 1/4 cups)
5 Tablespoons butter, cut into pieces and softened
Cooking spray

For the filling:
1/2 cup granulated sugar
3 Tablespoons unsweetened cocoa
1/2 teaspoon ground cinnamon
1/4 teaspoon salt
4 ounces semisweet chocolate, finely chopped (I used mini-chocolate chips)

For the streusel:
2 Tablespoons powdered sugar
1 Tablespoon all-purpose flour
1 Tablespoon butter, cold

*I used what I had on hand - 3/4 cup skim milk with 1/2 Tablespoon heavy cream. I guessed that the heavy cream was approximately 30% fat (it's probably more), and calculated how much to add to make 1% milkfat in the final solution.

Directions:
1. Dissolve 1 teaspoon granulated sugar and yeast in warm milk in the bowl of a stand mixer; let stand 5 minutes.

2. Stir in 6 Tablespoons granulated sugar, vanilla extract, 1/4 teaspoon salt, and egg yolk. Add 6 ounces (about 1 1/3 cups) all-purpose flour and the bread flour to milk mixture; beat with dough hook attachment at medium speed until well blended (about 2 minutes).

3. Add 5 Tablespoons butter, beating until well blended. Scrape dough out onto a floured surface (dough will be very sticky). Knead until smooth and elastic (about 10 minutes); add 1.5 ounces (about 1/3 cup) all-purpose flour, 1 tablespoon at a time, to prevent dough from sticking to hands (dough will be very soft). **I used my mixer to knead the dough. I just set it to medium speed and used the dough hook to knead for 10 minutes. I added the 1.5 ounces of flour, 1 tablespoon at a time, to the dough every minute or so, until it was completely incorporated.

4. Place dough in a large bowl coated with cooking spray, turning to coat top. Cover and let rise in a warm place (85°), free from drafts, 1 1/2 hours or until doubled in size. (Gently press two fingers into dough. If indentation remains, dough has risen enough.) Punch dough down; cover and let dough rest 5 minutes.

5. Line the bottom of a 9 x 5–inch loaf pan with parchment paper; coat sides of pan with cooking spray.

6. To prepare filling, combine 1/2 cup granulated sugar, cocoa, cinnamon, salt, and chocolate in a medium bowl; set aside.

7. Place dough on a generously floured surface; roll dough out into a 16-inch square. Sprinkle filling over dough, leaving a 1/4-inch border around edges. Roll up dough tightly, jelly-roll fashion; pinch seam and ends to seal. Holding dough by ends, twist dough 4 times as if wringing out a towel. Fit dough into prepared pan. Cover and let rise 45 minutes or until doubled in size.

8. Meanwhile, preheat oven to 350F and prepare streusel: combine powdered sugar, 1 tablespoon all-purpose flour, and 1 tablespoon cold butter, stirring with a fork until mixture is crumbly.

9. Sprinkle streusel evenly over dough. Bake for 40 minutes or until loaf is browned on bottom and sounds hollow when tapped.

10. Cool bread in pan 10 minutes on a wire rack; remove from pan. Cool bread completely on wire rack before slicing.

Source: Adapted from Cooking Light

Thursday, April 15, 2010

Blueberry Buttermilk pancakes

DSCN5406_labeled

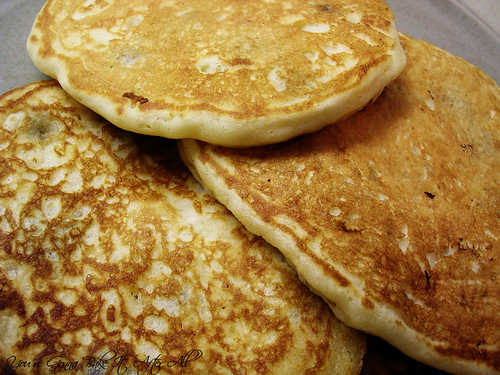
To be honest, I don't usually care for homemade pancakes, and I certainly don't like pancakes from restaurants. My favorite pancakes are actually Aunt Jemima's Complete Buttermilk Pancakes, but not made the way the box recommends. I like them with more water, so the batter is very pourable, making for a very fluffy, light pancake. This may sound like breakfast blasphemy to some, but like I said, I'm just being honest :)

Several weeks ago I had some leftover buttermilk from another recipe, and I decided to search for a buttermilk pancake recipe. Because I had an abundance of Michigan blueberries in my freezer, I went with Blueberry Buttermilk Pancakes. These pancakes were great! They were light and fluffy and had a delicious buttery flavor. As much as I love blueberry pancakes, I'd love to make these without the blueberries too. These just might have been better than my beloved Aunt Jemima Pancakes!

In the mood for some unique pancakes? Check out these Ricotta Pancakes or Blue Cornmeal Pancakes!

Blueberry Buttermilk Pancakes

Yields 2 to 3 servings

Ingredients:
1 cup all-purpose flour
2 Tablespoons sugar
1 1/8 teaspoon baking powder
1/4 teaspoon baking soda
1/4 teaspoon salt
1 egg
1 cup buttermilk
2 Tablespoons melted unsalted butter, plus some for frying
1/2 cup blueberries, fresh or frozen

Directions:
1. In a large bowl, sift together the flour, sugar, baking powder, baking soda, and salt.

2. Beat the eggs with the buttermilk and melted butter. Combine the dry and wet ingredients into a lumpy batter, being careful not to overmix (Overmixing results in flat, heavy pancakes!).

3. Heat some butter in a skillet over medium heat. Spoon 1/3 cup batter into the skillet and sprinkle the top with some of the blueberries. Cook for 2 - 3 minutes on each side.

4. Serve with maple syrup or topping(s) of choice.

Source: Adapted from Food Network

Tuesday, April 6, 2010

Breakfast Chicken Sausage Patties

DSCN5471_labeled

I received the KitchenAid mixer food grinder attachment for Christmas and finally tried it out to make these chicken sausages. It was great to be able to grind my own chicken. I am very suspect of what's actually in the ground chicken from the grocery store, not to mention it is so expensive (more than ground turkey at my store!) That being said, you can certainly make these using pre-ground chicken!

These chicken sausage patties were fantastic! Bob and I had them with waffles for breakfast one Saturday, and we loved them. They are so flavorful and have a great blend of spices. I didn't have allspice for some reason, so I added a dash of cinnamon, nutmeg, and cloves. I might omit these next time to give it a more savory flavor, or I'll get some allspice and try that. I used only chicken breasts, but you can certainly use dark meat or a combination of the two. I halved the recipe but will post the full - I wished I had made more! :)

Breakfast Chicken Sausage Patties

Ingredients:
1 pound ground chicken
1/2 teaspoon dried sage
1/2 teaspoon dried marjoram
1/2 to 3/4 teaspoon dried thyme
1/4 teaspoon ground cayenne pepper
heaping 1/4 teaspoon ground allspice, optional
1/4 teaspoon freshly ground black pepper
about 3/4 teaspoon kosher salt
1 garlic clove, finely minces or pressed
1/2 Tablespoon real maple syrup
2 - 3 teaspoon olive oil

Directions:
1. Lightly mix all ingredients together until the herbs and spices are well-incorporated. Do not overmix.

2. Divide the mixture into 4 equal parts, then make 4 patties out of each portion for a total of 16 1-ounce patties.

3. Heat a nonstick pan over medium heat and add 1 teaspoon oil. Fill the pan with as many patties as will fit, and cook about 2 minutes per side or until browned and cooked through. Repeat with remaining batches, adding an additional teaspoon of olive oil per batch.

Source: Adapted from Elly Says Opa!

Wednesday, January 27, 2010

Blue Cornmeal Pancakes

My sister and her boyfriend Steve spent New Year's with us in Chicago. They have been talking about these blue cornmeal pancakes for a while, so I convinced Steve to make them for us. It was a big pain actually finding the blue cornmeal - I actually wasn't able to find it in Chicago at all. Luckily a grocery store back home carries it so I picked up a bag over Christmas. The brand we used is Bob's Red Mill.
Apparently the blue cornmeal is manufactured separately from all the other Bob's Red Mill products, so just because your store carries the products doesn't necessarily mean they will have the blue cornmeal. I've heard it's easier to find in the southwestern U.S...

If you do find it, these pancakes are fantastic! And really you could make them with regular cornmeal and I'm sure they'd taste practically the same. The texture reminded me of the blueberry ricotta pancakes in that it was very soft and light, but you still get the firm pieces of cornmeal. For a new twist on pancakes (and a pretty blue color) these were great!

If you're wondering what to do with your leftover blue cornmeal, I just discovered that the Bob's Red Mill website has other recipes too!


Blue Cornmeal Pancakes

Ingredients:
3/4 cup blue cornmeal (medium grind) OR traditional cornmeal
1 teaspoon salt
1 Tablespoon sugar
1 cup boiling water
1 egg, beaten
1/2 cup milk
2 Tablespoons butter, melted
3/4 cup unbleached white flour
2 teaspoons baking powder

Directions:
1. In a medium bowl, mix together the blue cornmeal, salt, and sugar. Stir in the boiling water until all of the ingredients are wet. Cover, and let stand for a few minutes.

2. In a measuring cup, combine the milk, egg, and melted butter. Stir the milk mixture into the cornmeal mixture. Combine the the flour and baking powder in a small bowl. Stir this into the cornmeal mixture until just mixed. If the batter is stiff, add a little more milk until the batter flows off of the spoon thickly, but smoothly.

3. Heat a large skillet over medium heat, and grease with a dab of oil or butter. Use about 2 Tablespoons of batter for each pancake. When the entire surfaces of the pancakes are covered with bubbles, flip them over and cook until golden.

4. Serve immediately with maple syrup or fruit preserves.

Serves 4 (we had a few leftover so it may actually serve 5)

Wednesday, January 20, 2010

Perfect Crispy Potatoes and Anytime Skillet

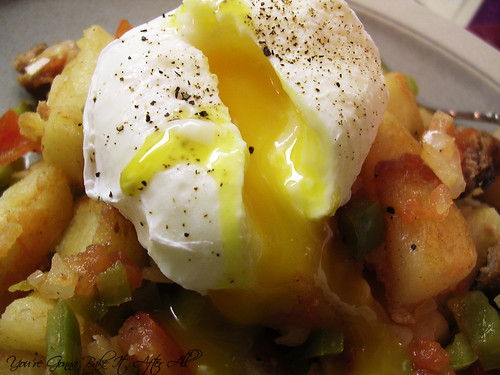
When Kerstin and I met for breakfast at Yolk, I got a "Skillet Your Way," which consists of diced red potatoes sauteed with 3 ingredients of your choice, sprinkled with cheddar cheese, and topped with two eggs cooked your way. My ingredients were turkey sausage, onion, and green pepper. I wanted to add tomato as well, but didn't want pay extra! My choice for the eggs was poached, with the idea that I could break the yolk over the rest of the skillet components. It was fantastic! I knew I had to recreate this one at home because it's such a simple concept. As the holidays approached, this fell to the bottom of my to do list, but thankfully was not forgotten.

My first order of business was to find a good potato recipe. My mom was raving about Melissa d'Arabian's Perfect Crispy Potatoes, and I decided those would be a great fit for the skillet. Once this recipe was chosen, the rest fell into place.

I served this as a dinner for Bob and I and we both LOVED it! First of all, Melissa's potatoes are, as their name suggests, PERFECT! So crispy and actually pretty quick. They are a great stand-alone side dish for any dinner - and the possibilities for seasoning are endless - add some chili powder, some Italian herbs, etc.. I definitely plan to make them again as a side dish and in skillet form.

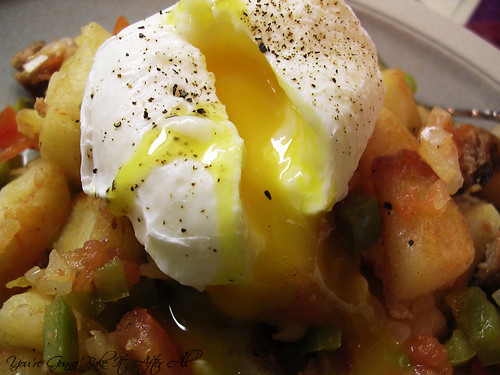
I really just love this skillet. I think the combination of ingredients works so well together. I had intended to add shredded cheddar cheese on top but ended up forgetting and it was delicious regardless. I hesitate to call it a breakfast skillet because it's good for any meal, hence the "anytime skillet" title. One of my favorite parts is breaking the egg yolk and watching it run over the potatoes. If this is your type of thing, you'll love this recipe!

Anytime Skillet

Ingredients:
1 batch Perfect Crispy Potatoes (recipe below)
6 links turkey breakfast sausage, casing removed if desired (I used Jennie-O)
2 vine-ripened tomatoes
1/2 yellow onion, diced
1/2 green bell pepper, diced
grated cheddar cheese, optional
salt and pepper to taste
1 - 2 eggs per person

Directions:
1. Prepare the Perfect Crispy Potatoes as directed below. While they are baking and using the same pan in which the potatoes were sauteed and steamed, heat onion and green pepper over medium-low heat until softened. Lightly season with salt and pepper. The residual butter and oil from the potatoes should be enough for the veggies; if not add a little more oil. Add tomatoes and stir. Cook for a few minutes until heated through. Remove from heat and set aside.

2. Prepare poaching liquid: Fill a straight-sided pan with 2 inches of water and 1 Tablespoon white vinegar. The white vinegar helps keep the egg from spreading in the water. Heat to a boil and then reduce to simmer.

3. Meanwhile, cook the turkey sausage in a small skillet until cooked through. Transfer to a plate lined with paper towels to drain. When cool, slice.

4. Poach the eggs: Break each egg individually into a small bowl. Swirl simmering water with a spoon to create a little whirlpool. Hold bowl containing raw egg close to the simmering water and, using a quick motion, dump each egg into the water. Cook approximately 3 1/2 minutes. Remove each egg from water using a slotted spoon and carefully place on a plate covered with paper towels to drain.

5. Assemble the skillet: Toss the crispy potatoes in the pan with the onion, peppers, and tomatoes. Add turkey sausage, and toss to combine. Add cheddar cheese, if desired, and allow to melt. Plate the mixture and top with the poached eggs.

Serves: 2 - 3

Source: Inspired by a skillet I created at Yolk


Perfect Crispy Potatoes

Ingredients:
2 Tablespoons vegetable/Canola oil
2 large russet potatoes, washed, peeled, and diced into equal 1/2-inch cubes
Kosher salt and freshly ground pepper, to taste
2 Tablespoons water
1/2 Tablespoon unsalted butter

Directions:
Preheat oven to 375F.
1. In a large saute pan, heat the oil over medium-high heat. Add the potato cubes, and season with salt and pepper, to taste. Saute, stirring frequently, for 5 minutes.

2. Turn the heat up to high. Add the water, stir, and cover pan with a lid. Steam the potatoes until the water evaporates, about 3 or 4 more minutes. Every 1 to 2 minutes, open the lid long enough to stir the potatoes so they don't stick.

3. Lower the heat to medium, and saute another 1 to 2 minutes until all traces of water are gone. (I did this without the lid). Toss in the butter and stir to coat the potatoes.

4. Spread the potatoes out on a baking sheet. Bake in the oven until the potatoes are crisp and browned to your liking, about 15 to 25 minutes.

Source: Adapted from Melissa d'Arabian

Monday, September 28, 2009

The Great Pumpkin Bread-Off!

My friend Kathleen and I like everything pumpkin. Our favorite season is fall, and as soon as September rolls around, we break out our Sweet Cinnamon Pumpkin lotion and look forward to the pumpkin-filled treats to come. We both love this chocolate chip pumpkin bread we found years ago at Breadsmith, but this year I found out that the location near us had closed. I had one recipe for pumpkin bread that I've made a few times, and another one saved to make, so we decided to have a Bread-Off (rather than a Bake-Off) with the two recipes. We held the contest on our way to the apple orchard - which has the best cinnamon apple donuts ever by the way! It was a sugary day to say the least...

I'm mixed on my feelings about having chocolate chips in pumpkin bread - on one hand the combination of chocolate and pumpkin is a great; on the other, I think the chocolate distracts from the purity of the pumpkin. In the end, I decided to include chocolate chips in both breads, so the experiment was controlled. I should also mention that only I knew which bread was which and what components went into the breads; my two tasters (Kathleen and Bob) knew nothing going into it :)

Each original recipe makes 2 large loaves, so I just cut the recipes in half and made 1 loaf of each. The first time I made pumpkin bread, I used applesauce instead of the oil - to be honest, it wasn't nearly as good. I'd rather use the oil and just eat less!

I cannot even tell you how hard it was for me to find the pumpkin puree!!! So hard that this bread-off almost didn't happen. I went to two of the big chain grocery stores with no luck, and finally found some organic pumpkin puree at Whole Foods (for $3 a can - what the?!) Dominick's had canned pumpkin pie mix, but no thank you - I prefer to spice my pumpkin myself!

One of the recipes recommends making the bread a day ahead for best flavor. I've tried this before and happen to agree, so that's what I did with both loaves. As I was making the breads, I realized that these recipes are veeerrrry similar, and that made the tasting a little difficult. However, I think we were able to declare a winner. See below for the results!

Downeast Maine Pumpkin Bread (Bread A)

Recipe for 1 loaf.

Ingredients:
1/2 a 15-ounce can pumpkin puree
2 eggs
1/2 cup vegetable oil
1/3 cup water
1 1/2 cups white sugar
1 3/4 cups all-purpose flour
1 teaspoon baking soda
3/4 teaspoon salt
1/2 teaspoon ground cinnamon
1/2 teaspoon ground nutmeg
1/4 teaspoon ground cloves
1/8 teaspoon ground ginger
1/2 cup semi-sweet chocolate chips, optional

Directions:
1. Preheat oven to 350F. Grease and flour one 9 x 5-inch loaf pan.

2. In a large bowl, mix together pumpkin puree, eggs, oil, water, and sugar until well blended.

3. In a separate bowl, whisk together the flour, baking soda, salt, and spices, and then stir in the chocolate chips if using.

4. Stir the dry ingredients into the pumpkin mixture until just blended. Pour into the prepared pan.

5. Bake for about 50 minutes. Loaf is done when toothpick inserted in center comes out clean.

Source: Adapted from Allrecipes.com

RESULT: Both tasters liked this bread. They both noted that it has good spice and was very moist.


Pumpkin Pie Bread (Bread B)
Recipe for 1 loaf.

Ingredients:
1 3/4 cups all-purpose flour
1 teaspoon baking soda
1/2 teaspoon baking powder
1 1/2 teaspoons pumpkin pie spice
1/2 teaspoon salt
1 1/2 cups white sugar
1/2 cup vegetable oil
2 eggs
1/2 a 15-ounce can pumpkin puree
1/4 cup water
1/2 cup semi-sweet chocolate chips, optional

Directions:
1. Preheat oven to 350F. Grease and flour one 9 x 5-inch loaf pan.

2. Sift together the flour, baking soda, baking powder, salt, and pumpkin pie spice, then stir in chocolate chips, if using. Set aside.

3. In a large bowl, beat together sugar, oil, eggs, and pumpkin. Stir in flour mixture alternately with water. Add batter to prepared pan.

4. Bake in oven for 50-60 minutes, or until toothpick inserted into center comes out clean. For best flavor, store wrapped in plastic wrap at room temperature for a full day before serving.

Source: Adapted from Allrecipes.com

RESULT: Both tasters again agreed that this is a moist bread. Kathleen thought it had more of a "pumpkin" taste, perhaps because it didn't have the same 'spiciness' as the other bread.


OVERALL RESULTS: Although these breads are almost too similar to compare, the winner is Bread A - the Downeast Pumpkin Bread. Overall, the tasters felt it had more of the "spice" one looks for in a pumpkin bread. I think that's because this bread has the spices added individually, rather than the premade pumpkin pie spice blend. Maybe that's why it has 5/5 stars from over 2,721 reviewers on Allrecipes!!!

Friday, July 24, 2009

Quiche Lorrentine

If you haven't noticed by now, my posts do not follow a linear format. I sometimes have a method to the order of my posts, but sometimes not. And there are things I've made and keep forgetting to post, or when I think to sit down and type out the recipe, I forget what I did. I'm a little embarrassed that I've waited this long to post this quiche, which I made for Easter breakfast, along with the Monkey Bread Muffins, back in April! (yeah I know it's July) I kept putting off posting this because I had so many Easter posts, then I lost the paper where I wrote down what I had done, and by now it's just a faint memory. But, I really wanted to share this recipe because we thought it was really good. 

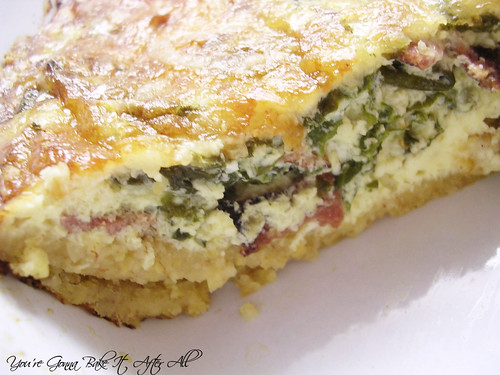
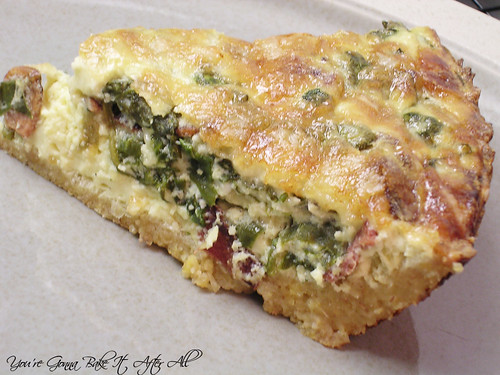
This was Bob and my first Easter alone, so I wanted to make the day special by making a great Easter breakfast and dinner. My family always has quiche on Christmas morning, so I figured there's no reason it wouldn't work for Easter as well. I saw this quiche recipe on Kerstin's blog and decided I could change a few things to make it a little less healthy (haha). This quiche is a hybrid of Quiche Lorraine and Quiche Florentine, in that it has (turkey) bacon and Swiss cheese combined with spinach. For this reason, I decided to call it Quiche Lorrentine. Lame, I know, I feel like Rachael Ray! I can't believe I've never made a quiche from scratch before, because this was so simple to assemble and so delicious! Turkey Bacon and Spinach Quiche AKA Quiche Lorrentine :)

Ingredients:
1 pie crust of choice (such as Kerstin's chickpea crust)
4 eggs
2 cups skim milk
6 strips turkey bacon, cooked and broken into dime-sized pieces
10-ounce package of frozen spinach, thawed and all water squeezed out
1/2 cup shredded Swiss cheese, plus more for topping
Salt and pepper to taste

Directions:
1. Prepare crust accordingly. Then, preheat oven to 350F. 

2. In a large bowl, whisk together eggs and milk. Stir in other ingredients and pour into prepared crust. 

3. Top quiche with shredded Swiss cheese, as desired. 

4. Bake at 350F for ~40 minutes, or until slightly browned on top.

Source: Adapted from Cake, Batter, and Bowl

Thursday, July 16, 2009

Chocolate Banana Bread Muffins

A quick note: I haven't been blogging as much lately because I've been so busy with school. Earlier this week, I got permission to begin writing my PhD dissertation, so I think things will get even more hectic. I'm trying to post things I've made in the past few months since I'm not doing as much cooking lately, at least not new recipes. Hopefully I'll get back to my regular posting soon!!!

This Chocolate Banana Bread recipe looked so chocolately and delicious that I wanted to make it for our weekly lab meeting. It's a semi-healthy recipe from Rancho La Puerta fitness spa. I decided to make this into muffins since they are easier to pass out than cutting a loaf of bread - big mistake. While the bread takes 40-50 minutes to bake, the muffins cooked in only 15!!! This meant that the banana chips didn't have time to rehydrate, so they were still a little hard. Other than that, the muffins were really good, so I would love to try this recipe as a loaf. If you'd like to try the muffins, I'd just suggest skipping the banana chips! By the way, I didn't make a mistake typing the ingredients - there's no actual sugar in this recipe other than the 'natural' sweetness from the prunes, bananas, and banana chips (and chocolate chips, haha)!
Chocolate Banana Bread Muffins

Ingredients:
9- or 10-ounce package pitted dried prunes*
3/4 cup mashed ripe bananas (about 2 medium)
1 cup whole-wheat pastry flour**
1/2 cup unsweetened cocoa powder
2 teaspoons baking powder
2 teaspoons ground cinnamon
1 1/2 teaspoons baking soda
1/2 cup banana chips, chopped coarsely
1 cup semi-sweet chocolate chips

*Note: you may substitute 10 ounces (1 1/4 cups) unsweetened prune baby food for the pitted prunes, and omit the water and cooking in Step 1 below.
**I used 1 cup of regular pastry flour: 1 cup = 130 grams pastry flour, which can be made by mixing 87 grams all-purpose flour + 43 grams cake flour (it's a 2/3 to 1/3 ratio by weight).

Directions:
1. In a small saucepan, bring prunes and 2 cups of water to a boil over high heat. Reduce heat and simmer, uncovered, until prunes are very soft, about 20 minutes. Drain.

2. Meanwhile, preheat oven to 350F. Lightly butter a 5x9-inch loaf pan and line bottom with a piece of parchment paper, cut to fit. Alternatively, place paper liners in a muffin pan.

3. In a food processor, whirl prunes and bananas until very smooth. Add eggs and whirl to combine.

4. In a large bowl, sift together flour, cocoa, baking powder, cinnamon, and baking soda. Stir in banana mixture until evenly moistened. Stir in banana chips and chocolate chips. Scrape the thick batter into pan and spread level.

5. Bake bread until a toothpick inserted in the center comes out a little chocolately but not gooey, 40 to 50 minutes. Loosen bread from pan with knife and invert onto a rack. Remove parchment. Turn bread right-side-up and let cool at least 1 hour before slicing. The muffins baked for 15 minutes and were completely done!

Servings: 16 slices or muffins

Source: Adapted from Recipe Girl

Friday, July 10, 2009

Easy Cheese Danish

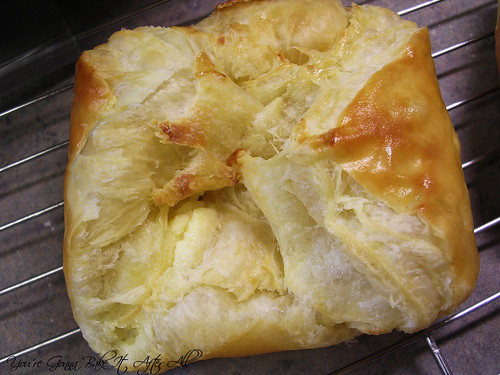
My dad saw Ina Garten make these Cheese Danish when I was home back in March. He kept asking when I was going to make them for him :) I went home the weekend before Father's Day and thought that was the perfect time to try this recipe. I had made Blueberry Ricotta Pancakes for breakfast (which by the way are even better with my favorite pancake mix, Aunt Jemima!) so we had some blueberries left over. My sister suggested I stick a few in some of the danish, and it was a great idea! The ones with blueberries were a hit! The combination of lemon and blueberry went really well together, otherwise the lemon is a bit overpowering. I might suggest backing off on the lemon zest if you don't use blueberries, unless you really like lemon.

This was my first time working with puff pastry. I have to say, it's amazing! I really couldn't believe how wonderfully it puffed up in the oven. This is such a quick, simple recipe that would be great for a brunch or even as dessert!

With blueberries:
Without blueberries:


Easy Cheese Danish

Ingredients:
8 ounces cream cheese (I used light)
1/3 cup sugar
2 large or extra-large egg yolks, at room temperature
2 Tablespoons ricotta cheese (I used part-skim)
1 teaspoon pure vanilla extract
1/4 teaspoon kosher salt
1 Tablespoon grated lemon zest, or less to taste (~2 lemons)
2 sheets (1 box) frozen puff pastry, thawed
1 egg, beaten with 1 Tablespoon water (for egg wash)
fresh blueberries, optional

Directions:
1. Preheat oven to 400F. Line a sheet pan with parchment paper.

2. Place the cream cheese and sugar in the bowl of an electric mixer and cream together on low until smooth. With mixer still on low, add the egg yolks, ricotta, vanilla, salt, and lemon zest and mix until just combined. Don't whip!

3. Unfold 1 sheet puff pastry onto a lightly floured board and roll it slightly with a floured rolling pin until it's a 10 by 10-inch square. Cut the sheets into quarters with a sharp knife.
 
4. Place a heaping tablespoon of cheese filling into the middle of each of the 4 squares. Brush the border of each pastry with egg wash and fold 2 opposite corners to the center, brushing and overlapping the corners of each pastry so they firmly stick together. Brush the top of the pastries with egg wash. Place the pastries on the prepared sheet pan. Repeat with the second sheet of puff pastry and refrigerate the filled Danish for 15 minutes.

5. Bake the pastries for about 20 minutes, rotating the pan once during baking, until puffed and brown. Serve warm.

  © Blogger template Brownium by Ourblogtemplates.com 2009

Back to TOP