Showing posts with label Chocolate. Show all posts
Showing posts with label Chocolate. Show all posts
Tuesday, December 22, 2015
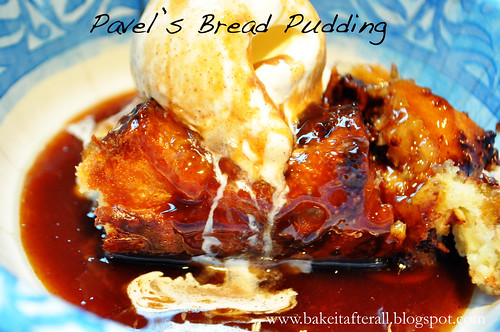
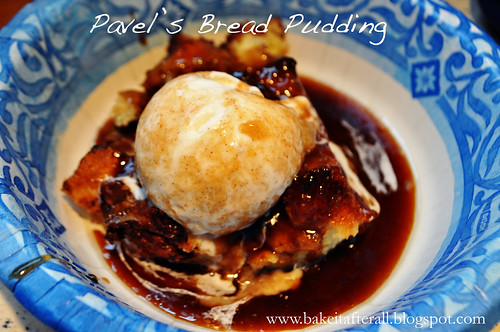
Pavel's Bread Pudding
My Uncle Paul used to belong to a social club that occassionally held multi course dinners. One of these dinners was covered by a local newspaper and included his recipe for Bread Pudding. My uncle was quite proud of his Polish heritage and sometimes called himself Pavel, so the recipe was printed as "Pavel's Bread Pudding." I have had a clipping of the newspaper for years and always intended to make it for my mom, my aunt, and my sister. It is a very rich and decadent dessert, so it had to be the right occasion. Finally this summer, I decided to make it for my aunt's hot tub party, even though the occasion did not at all call for a rich and decadent dessert! We really enjoyed this dessert, especially the sauce, and it would be a perfect dessert for the holidays.
Pavel's Bread Pudding
Makes at least 12 servings
Ingredients:
For the pudding:
Butter, to prepare the pan
1 pound brioche or Italian bread, cut into 1-inch pieces
10 tablespoons unsalted butter, melted, divided
1 cup semisweet chocolate chips
1 cup chopped walnuts, optional
1 cup half-and-half
1/2 cup whole milk
1 cup granulated sugar
6 eggs
4 egg yolks
2 tablespoons vanilla extract
1/8 teaspoon salt
2 tablespoons dark brown sugar
For the sauce:
1 cup (2 sticks) unsalted butter
1 cup packed dark brown sugar
1 teaspoon ground cinnamon
1/4 teaspoon salt
1/4 cup dark rum or bourbon
1 tablespoon vanilla extract
Directions:
To prepare the pudding:
1. Butter a 13x9-inch pan. In a bowl, mix the bread, 8 tablespoons melted butter, chocolate chips, and nuts if using. Spoon into the pan.
2. In a bowl, whisk together half-and-half, milk, sugar, eggs, yolks, vanilla, and salt. Pour over bread. Let sit at least 30 minutes. Meanwhile, preheat the oven to 350F.
3. Drizzle the bread pudding with the remaining 2 tablespoons of melted butter; sprinkle with the brown sugar. Bake until set, about 1 hour.
To prepare the sauce:
1. Melt the butter in a small saucepan. Add the sugar, cinnamon, and salt. Stir until dissolved and bully. Remove from heat. Stir in rum and vanilla. Serve warm over pudding.
Source: my Uncle Paul
Sunday, December 20, 2015
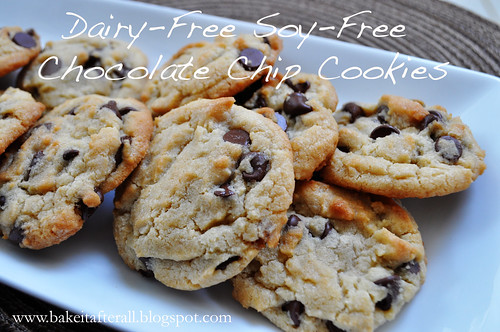
Dairy-Free Soy-Free Chocolate Chip Cookies (MSPI)
Here is another recipe from my days of following the MSPI (Milk Soy Protein Intolerance) diet while nursing my second baby. Normally I am not a fan of cooking with Crisco, but when you absolutely cannot have butter, these types of priorities often take a back seat. One nice thing about working with Crisco is that you don't have to wait for it to soften like butter since it's stored at room temperature.
My mom and sister really loved these cookies and actually preferred them to the typical all-butter chocolate chip cookie.
During my MSPI days, I relied on dairy-free soy-free chocolate chips. "Enjoy Life!" Brand is my favorite and thankfully my local grocery store carries them in the health/organic food aisle. These chocolate chips were so good - you would never know they were dairy-free!
This recipe is actually adapted from the Nestle Toll House Cookie recipe, so you know it won't dissapoint!
Dairy-Free Soy-Free Chocolate Chip Cookies (MSPI Friendly)
Ingredients:
2 1/4 cup all-purpose flour
1 teaspoon baking soda
1 teaspoon salt
1 cup traditional or butter-flavored Crisco
3/4 cup granulated sugar
3/4 cup light brown sugar, packed
1 teaspoon pure vanilla extract
2 large eggs
2 cups chocolate chips (I used Enjoy Life brand- they are dairy-free and soy-free)
Directions:
Preheat oven to 375F.
1. Combine flour, baking soda, and salt in a small bowl. Set aside.
2. Beat Crisco, sugars, and vanilla extract in a large mixer bowl until creamy. Add the eggs, one at a time, beating well after each addition. Gradually beat in the flour mixture. Stir in the chocolate chips.
3. Drop by rounded tablespoon onto ungreased cookie sheets.
4. Bake for 8 - 9 minutes or until edges begin to turn golden. Cool for one minute on the cookie sheet and remove to a wire rack to cool completely.
Source: One Ordinary Day
Tuesday, December 1, 2015
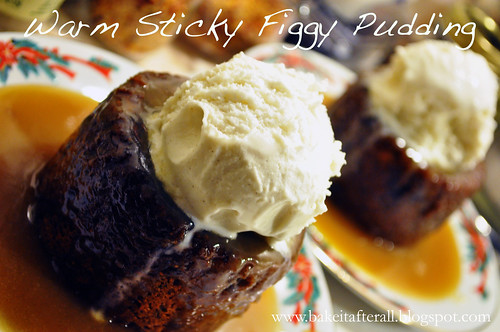
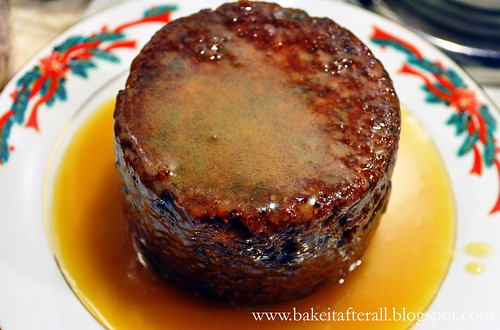
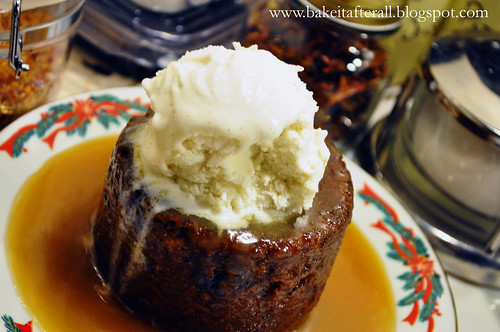
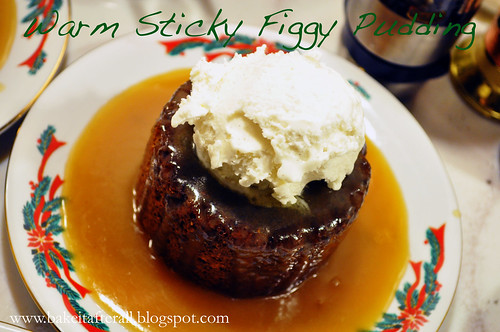
Warm Sticky Figgy Pudding Revisited
I posted this amazing recipe for Warm Sticky Figgy Pudding two years ago and promised better pictures. I was able to capture some last year so I'm revisiting the recipe today. I make this "pudding" each year for our annual "Dickens Dinner." It quickly became a hit the first year and will remain a staple on the menu.
This is a very rich dessert, and I only make it once a year, but it is SO worth it. The caramel sauce is an absolute must, and really, so is the ice cream.
Ina Garten had a chef friend on her show once who showed her how to make Date Toffee Pudding - the recipe I use is different because it has figs and also flecks of chocolate - to use Ina's own words against her, "how bad can that be?"
Warm Sticky Figgy Pudding
Serves 4
Ingredients:
For the pudding:
¾ c. dried pitted dates, chopped
¼ c dried figs, chopped
1 c. water
½ tsp baking soda
3 ½ tablespoons butter, softened
½ c superfine sugar
1 egg
1 ¼ c. self-rising flour
1 ¼ oz. dark chocolate, grated (I use Ghiradelli bittersweet chips)
Butter for the ramekins
For the sauce:
1 c. brown sugar
1 c. heavy cream
7 tablespoons butter
For serving:
Vanilla ice cream or whipped heavy cream (optional)
Directions:
1. Add the dates, dried figs, and water to medium saucepan and bring to boil over medium heat. Remove the pan from heat and stir in the baking soda. Let cool for 5 minutes, then add to a blender to puree.
2. Using a hand or stand mixer, cream the butter and sugar in a large bowl. Add the eggs and beat well. Fold in the flour, the pureed date mixture, and the chocolate.
3. Pour the batter into buttered ramekins filling halfway. I divided the batter equally into 4 ramekins. (At this point, I wrap the ramekins in plastic wrap and take them to my sister's house, refrigerate them during dinner, then bake them. They turn out perfect! You may bake them immediately if that works with your schedule.)
4. Bake at 350F for 20 – 25 minutes.
5. To prepare the sauce, stir the sugar and cream in a medium saucepan over low heat. Simmer until the sugar dissolves. Raise the heat to a boil, then reduce and simmer 5 minutes. Add the butter and stir until incorporated. (I make this at home and take it to my sister's. Then I reheat the sauce prior to spooning it over the cakes).
6. Remove the ramekins from the oven and let stand for 10 minutes. Serve in the ramekin or unmold each cake onto a serving plate. With a paring knife, cut a cross in the center of each cake. Pour the sauce over the pudding and allow it to soak in slightly, then top with more sauce as desired.
7. Serve warm topped with ice cream or whipped cream and enjoy! I highly recommend vanilla ice cream :-)
Source: Adapted from FoodNework.com – Ultimate Recipe Showdown
Note: The original recipe said it serves 4, but the reviews said it made much more so I cut the recipe in half and it was just right for 4 servings (meaning the recipe on FoodNetwork probably makes 8 servings rather than 4!)
Thursday, October 22, 2015
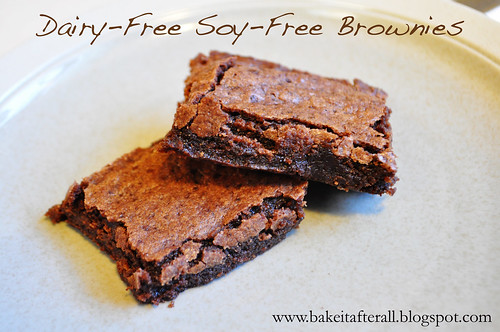
Dairy-Free Soy-Free Brownies (MSPI)
When Ella was a month old, she had a very scary vomiting incident that resulted in us taking her to the pediatric ER. Thankfully, she just had severe acid reflux. Medicine helped a little, but the most dramatic change happened after I removed dairy and soy proteins from my diet. I was happy to do what I could to help her while still nursing, but it was so difficult! Try finding prepared food that does not contain soybean oil or soy lecithin***(see note below). Even my favorite pasta sauce from Trader Joe's was off limits. My saving grace was stumbling across the blog called MSPI Mama.
MSPI stands for Milk Soy Protein Intolerance. This is not lactose intolerance, which is the inability to break down milk sugar, but rather an intolerance/allergy to milk proteins, which are closely mimicked by those in soy. It's actually pretty common in young babies and they usually grow out of it and are able to tolerate dairy proteins just fine. I had to be dairy/soy-free for about 4 months before being able to introduce them in small quantities. For what it's worth, Ella is now completely tolerant of dairy and soy - one of her favorite foods is cheese!
During those months, I had to completely overhaul how I cooked. Most of my recipes were off limits or had to be majorly revised. I never thought of myself as heavily dependent on dairy, but I guess I am. I felt very overwhelmed at the beginning and finding MSPI Mama was the biggest help. She has so many recipes that are MSPI friendly - even desserts! Once I identified a core group of recipes, I felt more in control and things became easier. Eating at restaurants, however, did not become easier and is one of the biggest challenges of MSPI. So many restaurants use soybean oil or butter (dairy) in things you wouldn't suspect.
This brownie recipes is one that I made quite often while eating the MSPI diet. The sugar cravings while nursing are no joke and still being able to enjoy desserts was a must. I figured I needed to "pay it forward" to other moms out there, frantically Google-ing for MSPI-safe recipes (likely while their new babies scream in their arms). I will be posting a handful of my favorite recipes - ones that are so good that they continue to be in our meal rotation despite the restrictions no longer being in place. These brownie are one of those recipes. They are so chocolatey and fudgey and have a nice crisp top on them. You certainly won't feel deprived eating these!
***Note: many people with a soy sensitivity can still eat soybean oil and soy lecithin but at the beginning I had to eliminate everything and then add things back.
Dairy-Free Soy Free Brownies (MSPI Friendly)
Ingredients:
1/2 cup Canola oil
1 cup white sugar
1 teaspoons vanilla extract
2 eggs
1/2 cup all-purpose flour
1/3 cup unsweetened cocoa powder
1/4 teaspoon baking powder
1/4 teaspoon salt
Directions:
1. Preheat oven to 350F. Grease a 9 x 9-inch baking pan.
2. In a medium bowl, mix together the oil, sugar and vanilla. Beat in the eggs.
3. In a separate bowl, combine flour, cocoa, baking powder and salt; gradually stir into the egg mixture until well blended.
4. Spread the batter evenly into the prepared pan. Bake for 20 - 25 minutes, or until the brownies begin to pull away from the edges of the pan.
5. Let cool completely on a wire rack then place in refrigerator to cool down even more. The brownies are best when they've had time to cool and develop their flavor.
Source: MSPI Mama, adapted from AllRecipes.com
Wednesday, October 14, 2015
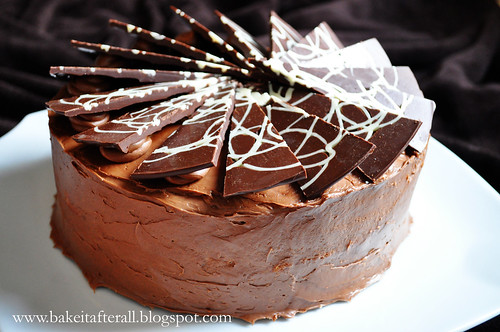
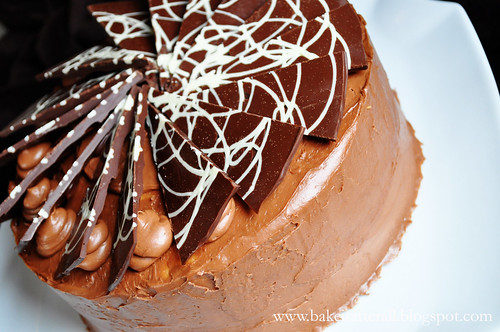
Mocha Cream Cake
I almost always prefer chocolate cake over white or yellow, so if I were to make this again, I would use a chocolate cake as the base. The cream filling was really good, as was the ganache, so I would keep the rest of the recipe as is.
Mocha Cream Cake
Makes 16 servings
Ingredients:
1 package (18.25 ounces) white cake mix
Filling:
1 teaspoon unflavored gelatin
1 tablespoon cold water
1 1/4 cups heavy whipping cream
1/4 cup powdered sugar
2 tablespoons kahlua or other coffee-flavored liqueur
1/2 teaspoon vanilla extract
Ganche:
2 cups (11.5 ounces) milk chocolate chips
3/4 cup heavy whipping cream
1/4 cup butter
2 tablespoons kahlua or other coffee-flavored liqueur
Chocolate Triangles (see recipe below)
Directions:
1. Prepare cake batter according to package directions; bake in two 9-inch round pans as directed. Cool completely on wire racks.
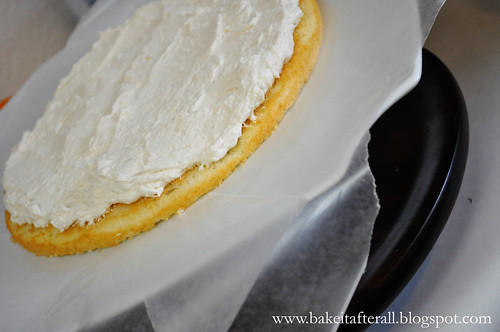
2. For the filling: In a small bowl, combine gelatin and water; let stand for 2 minutes. Microwave on high for 10 seconds. Stir until gelatin is dissolved; set aside. In a large mixer bowl, combine the 1 1/4 cups cream, powdered sugar, kahlua, and vanilla. Beat at medium speed while slowly drizzling in gelatin mixture. Beat util stiff peaks form. Chill for several hours or overnight until ready to assemble.
3. For the ganache: In a small bowl, combine the milk chocolate chips, the 3/4 cup cream, and butter. Microwave for 3 minutes on medium-high (~70% power), stirring halfway through cooking time. Stir in kahlua. Chill for 45 to 60 minutes until thickened but still pourable. Beat with an electric mixer until spreadable, about 1 to 2 minutes.
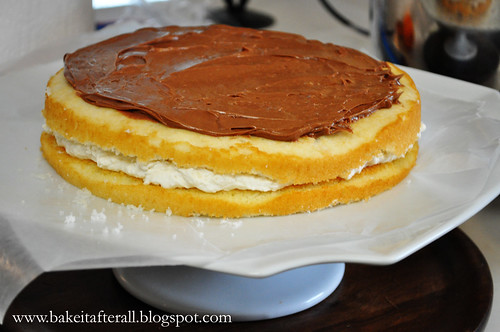
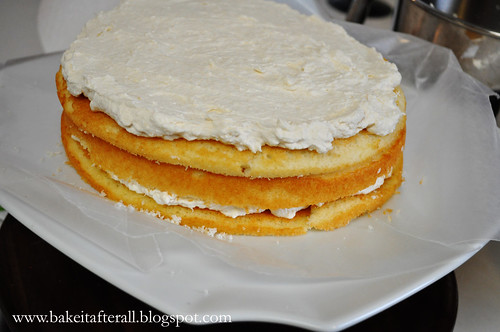
4. To assemble the cake: Split cooled cakes horizontally. Place one layer on serving plate. Spread half of the filling over the top.
Top with the second cake layer. Spread about 1/2 cup of the ganache over the second layer.
Top with the third cake layer and spread remaining filling over top.
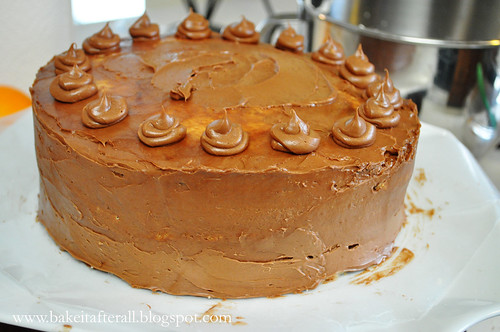
Reserve about 1/2 cup of the ganache. Spread remaining ganache over top and sides of cake. Use reserved ganache to make 16 evenly spaced dollops around top outer edge of cake.
Chocolate Triangles
Makes 16 triangles
Ingredients:
1 cup (6 ounces) semi-sweet chocolate chips
2 tablespoons solid shortening
1 1/2 squares (1 1/2 ounces) white chocolate
Directions:
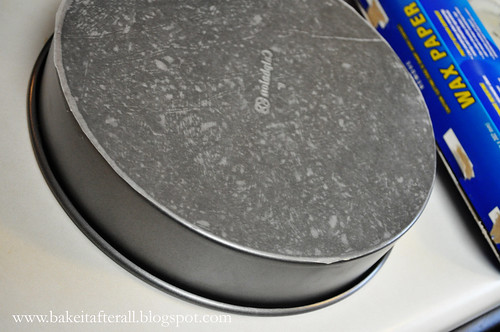
1. Cut a circle of waxed paper to fit the bottom of a 9-inch round cake pan. Lightly coat the outside bottom of the pan with butter (to keep the paper from moving); place waxed paper circle on bottom of pan.
2. Place semi-sweet chocolate and shortening in microwave-safe bowl. Microwave for 30 seconds on medium-high (~70% power); stir. Continue to microwave and stir in 30-second intervals until chocolate can be stirred smooth. Set aside to cool to room temperature.
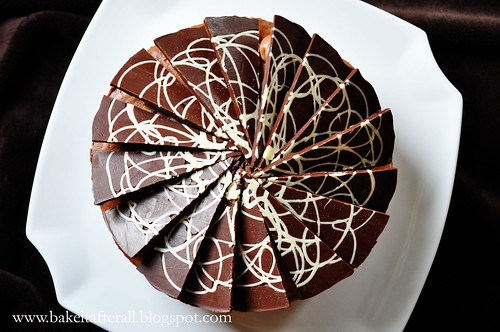
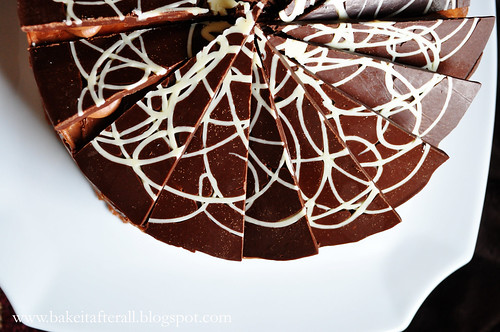
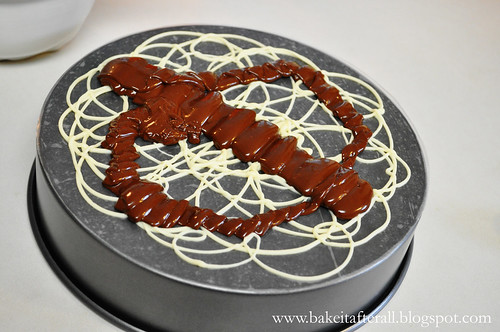
3. Melt white chocolate in a similar manner to the chocolate in step 2. Transfer to a piping bag with a small tip or a resealable plastic bag with a corner cut off. Make a squiggly design of white chocolate over the surface of the waxed paper. Chill on the pan until firm, about 5 minutes.
4. Spread the cooled chocolate in a smooth, even layer over the white chocolate squiggles. Chill for 15 to 25 minutes.
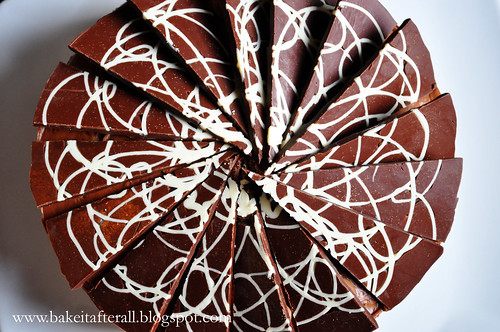
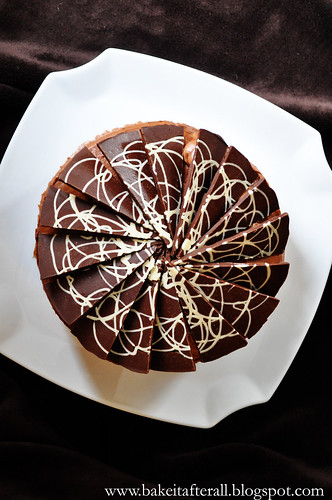
5. Transfer the chocolate disc to a cutting board. Using a large sharp knife, cut the chocolate into 16 wedges. Chill until ready to assemble cake. Remove waxed paper before arranging triangles with squiggle side up on cake.
Source: Dierberg's Markets "Everybody Cooks" Magazine
Monday, September 14, 2015
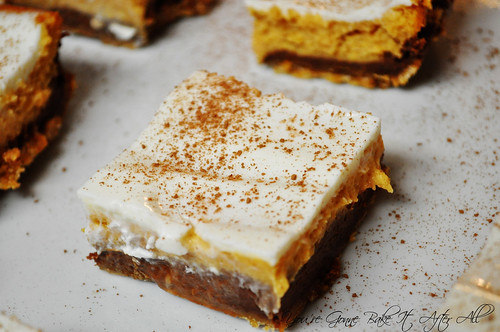
Pumpkin-Chocolate Cheesecake Bars
Although I didn't always think so, pumpkin and chocolate is such a great combination. Years ago in the fall, one of my labmates brought these Pumpkin-Chocolate Cheesecake Bars to a lab meeting. They are similar in theory to the Chocolate-Pumpkin Cheesecake Bars, but in these bars the chocolate and the pumpkin are layered rather than swirled, and the crust is graham cracker rather than chocolate cookies. These bars also have a delicious sour cream topping, and if I remember correctly, the cheesecake layers in these bars are slightly less firm than the Chocolate-Pumpkin Cheesecake Bars. I am happy to have both bar recipes to make during my favorite time of year!
Pumpkin-Chocolate Cheesecake Bars
Makes 24 to 36 bars
Ingredients:
1 1/4 cups graham cracker crumbs
1/4 cup sugar
1/3 cup butter, melted
2 8-ounce packages cream cheese, softened
1 3/4 cups sugar
3 eggs
1 cup canned pumpkin
1/2 teaspoon pumpkin pie spice
1/2 teaspoon ground cinnamon
1/2 teaspoon vanilla
1/4 teaspoon salt
6 ounces semisweet chocolate, cut up (or 3 ounces semi-; 3 ounces bittersweet)
1 tablespoon bourbon, optional
2 tablespoons butter
1 1/4 cups sour cream
1/4 cup sugar
Grated fresh nutmeg and/or milk chocolate or semisweet chocolate curls
Directions:
1. Preheat oven to 325F. Lightly grease a 13x9-inch baking pan; set aside.
2. In a medium bowl, combine graham cracker crumbs and 1/4 cup sugar. Stir in the 1/3 cup melted butter. Press mixture evenly into bottom of the prepared baking pan; set aside.
3. In a large bowl, combine cream cheese and the 1 3/4 cups sugar. Beat with an electric mixer on medium speed until smooth. Add eggs, one at a time, beating on low speed after each addition just until combined. Beat in pumpkin, pumpkin pie spice, cinnamon, vanilla, and salt on low speed just until combined. Remove 1-1/4 cups of the mixture and set aside in a separate bowl (this mixture will have the chocolate added to it).
4. In a small heavy saucepan, combine the 6 ounces chocolate, the bourbon if using, and the 2 tablespoons butter. Cook and stir over low heat until melted. Whisk chocolate mixture into the 1 1/4 cups pumpkin mixture. Pour over crust, spreading evenly. Bake for 15 minutes.
5. Carefully pour the remaining pumpkin mixture over baked chocolate layer, spreading evenly. Bake for 40 to 45 minutes more or until filling is puffed and center is set. Cool on a wire rack for 30 minutes.
6. In a small bowl, combine sour cream and 1/4 cup sugar. Gently spread over bars. Cool completely. Cover and chill for at least 3 hours. Cut into bars.
* Before serving, sprinkle with nutmeg and/or chocolate curls.
*To make triangle-shape bars, cut the cookies crosswise into four strips. Then cut each strip into five triangles (you'll end up with two half-triangles from the ends of each strip).
To Make Ahead: Bake and chill as directed; cut into bars. Place in a single layer in an airtight container; cover. Store in the refrigerator for up to 3 days. Do not freeze.
Source: Adapted from Midwest Living
Sunday, August 23, 2015
Brownie Sundaes with Cherry-Port Sauce
Bob and my dad both LOVE cherries, so for Father's Day several years ago, I made these Roasted Cherry Brownie Sundaes with a Cherry-Port Sauce. We all thought they were great, especially the Cherry-Port Sauce. I didn't save the recipe because I knew the source, but as I went back to the blog to retrieve it (years later at this point) the ingredient list is missing. I hunted around and found a similar recipe that I've included below. The amounts sound familiar so I'm going with it. I'm glad I remembered this recipe because it needs to be made again soon!
Roasted Cherry Brownies
Ingredients:
1/2 pound fresh cherries, stems and pits removed, cut in half or quartered
1/4 cup port wine
Your favorite brownie mix (such as Ghiradelli Dark Chocolate Brownies)
Ingredients to prepare brownie mix according to package directions (oil, eggs, water, etc.)
Directions:
Preheat oven to 425F.
1. Place cherries in a small baking dish with the port. Roast for 30 minutes, until the cherries are very soft and the port has slightly reduced (you'll have 2 - 3 tablespoons of liquid). Set the cherries aside to cool.
2. Meanwhile, prepare brownies according to package directions, reducing oven heat according to your brownie recipe.
3. As the last step in making the brownie batter, stir in the cherries and accumulated juices and then transfer to the baking pan. Bake until a knife inserted in the center of the brownies comes out with moist crumbs attached.
Source: Confections of a Foodie Bride (now called The Brewer and the Baker)
Brownie Sundaes with Cherry-Port Sauce
Ingredients:
1 pound fresh cherries, stems and pits removed, and coarsely chopped
1 cup port wine
3/4 cup sugar
Brownies - from a homemade recipe or boxed mix (such as the Roasted Cherry Brownies above)
Vanilla ice cream - homemade or store bought
Directions:
1. Add the cherries to a small saucepan with the port and sugar, cooking over medium-high until it begins to boil.
2. Reduce heat to medium and simmer for 35-40 minutes, until very thick and syrupy.
3. Serve brownies topped with a scoop of ice cream and a spoonful of warm cherry-port sauce.
Leftover sauce will keep in the fridge for several days, serve rewarmed.
Source: Confections of a Foodie Bride (now called The Brewer and the Baker) and The Gilded Fork
Labels:
Brownies,
Chocolate,
Dessert,
Frozen Treat,
Ice Cream
Tuesday, August 4, 2015
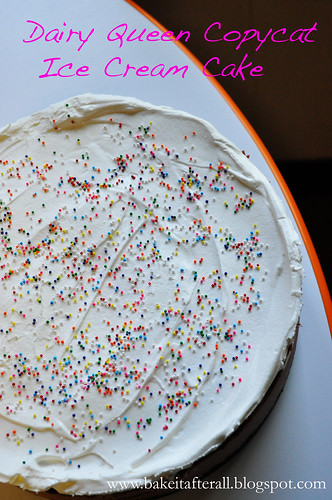
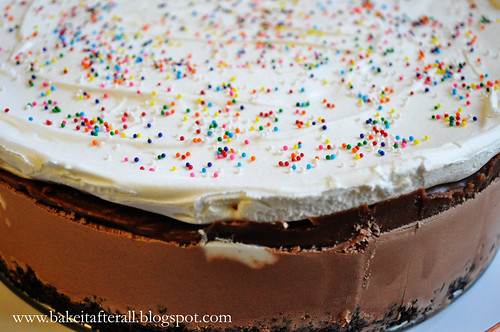
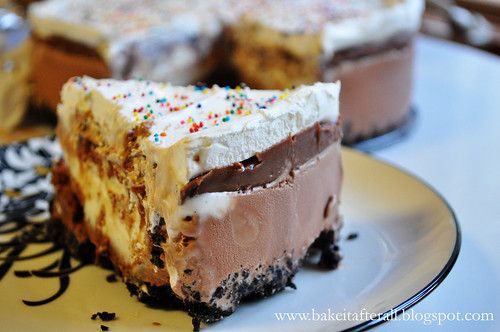
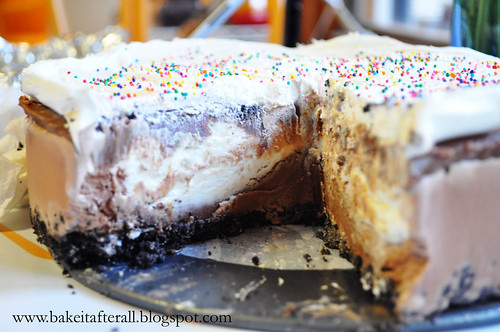
Ice Cream Cake - Dairy Queen Copycat
One of my and my sister's favorite cakes growing up was the Dairy Queen Ice Cream Cake. We often requested it for our birthdays. I thought it would be fun to try this homemade version. You can make this with homemade ice cream if you like, but I chose to go the easy route and use store bought. We really loved this homemade version of the DQ ice cream cake - in fact, we think it's even better than the store bought version!
Ice Cream Cake (Dairy Queen Copycat)
Ingredients:
For the crust:
2 1/2 cups crushed Oreo cookies
1/2 cup (1 stick) melted butter
1/2 cup sugar
1/4 - 1/2 gallon chocolate ice cream, slightly softened (or homemade ice cream)
1/4 - 1/2 gallon vanilla ice cream, slightly softened (or homemade ice cream)
8 ounces Cool Whip
For the Hot Fudge Sauce:
2 cups powdered sugar
2/3 cup semisweet chocolate chips
12 ounce can evaporated milk
1 stick butter
1 teaspoon vanilla
Directions:
1. Combine 2 cups crushed Oreos with melted butter and sugar. Press into a 13x9 pan or two 9-inch round springform pans. Freeze for 15 minutes.
2. Spread a layer of each ice cream on top and freeze for 3 hours.
3. Combine first 4 ingredients of hot fudge sauce in a a saucepan and bring to a boil for 8 minutes. Remove from heat and stir in vanilla. Cool to room temperature.
4. Spoon sauce on ice cream and freeze until firm.
5. Spread Cool Whip on top and sprinkle with Oreo crumbs or colored sprinkles. Freeze for 3 hours.
Source: Adapted from relative taste
Monday, June 22, 2015
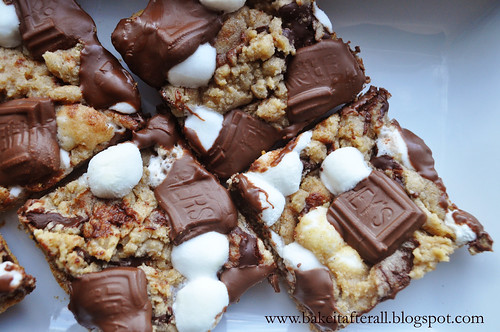
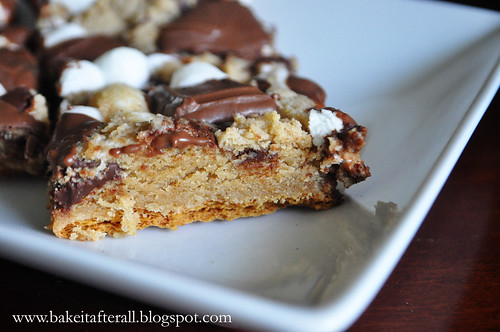
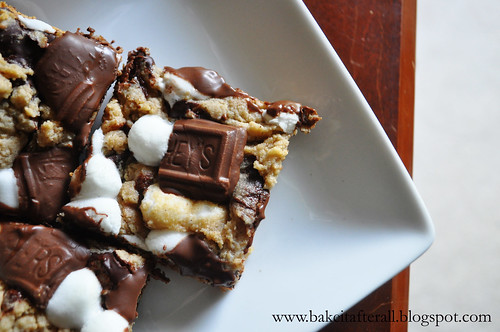
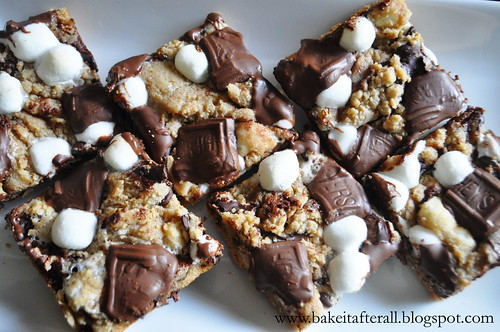
Graham Cracker S'mores Cookies
My sister made these S'mores Cookies at my house sometime last year. For some reason when she described them to me, they didn't sound all that exciting. Then, I tasted one and was addicted! They combine all the components of S'mores into a less messy cookie-form without the need for a campfire. The graham cracker base adds a nice crunch and helps hold the cookies intact. The cookie dough has a touch of cinnamon, which adds another flavor dimension. I made these for a Memorial Day BBQ we had with my sister and her family, and they were the perfect summer dessert! They are best served the day of or 1 day after, as the graham crackers start to lose some of their crispness after that- at least they did for me.
Graham Cracker S'mores Cookies
Note: The "Hershey" name is supposed to show on the finished cookies. I had Bob pick up some Hershey bars for me and he got the giant ones, so my pieces were bigger. The bars were a bit too soft when I pressed the chocolate into the tops of the cookies so mine melted more than they should. To be safe, it may be best to chill your Hershey bars prior to placing on the warm cookies.
Ingredients:
2/3 cup butter, at room temperature
1 cup brown sugar
1 cup granulated sugar
2 eggs
1 teaspoon vanilla extract
1 teaspoon baking soda
1/2 teaspoon salt
1/2 teaspoon cinnamon
2 1/2 cups all-purpose flour
1 cup semi-sweet or bittersweet chocolate chips (I used Ghiradelli bittersweet chips)
1 cup mini marshmallows, plus 1/4 cup for adding on top (as directed below)
2 regular sized Hershey bars (milk or dark chocolate), each piece with "Hershey" cut in half (chilled if the chocolate has started to soften or it's a warm day)
2 sleeves graham crackers (from a standard sized box) – broken into squares (1/2 of a full graham cracker sheet)
Directions:
1. Preheat oven to 375F. Line a jelly roll pan or rimmed baking sheet with aluminum foil, if desired. Break graham crackers in half so they are squares. Lay crackers next to each other, in a single layer on a baking sheet (the size of your baking sheet will determine exactly how many crackers you need).
2. Bake graham crackers in pre-heated oven for 4 minutes. Remove from oven and set aside to cool.
3. Cream the butter, brown sugar, and granulated sugar together in the bowl of an electric mixer. Add eggs, one at a time, and vanilla and mix until combined.
4. In a separate bowl, combine flour, baking soda, salt, and cinnamon. Add the dry ingredients to the butter mixture and mix until just combined. Fold in chocolate chips and 1 cup marshmallows.
5. Use a medium cookie scoop to scoop dough onto graham crackers (on baking sheet). Bake for 5 minutes. Then remove pan from oven. If your dough is not spreading, carefully use the back of a spoon to spread the dough evenly over the graham crackers. (I added this step. My scoops of dough may have been too large and spread out to form a single layer of cookie). Press about 2 pieces of chocolate and 2-3 marshmallows (or more!) into each cookie.
6. Bake for 5-7 minutes more. Cool completely, then cut cookies into squares (where the graham crackers meet).
Source: Adapted from Glorious Treats
Monday, June 15, 2015
Thick and Chewy Chocolate Chip Cookies
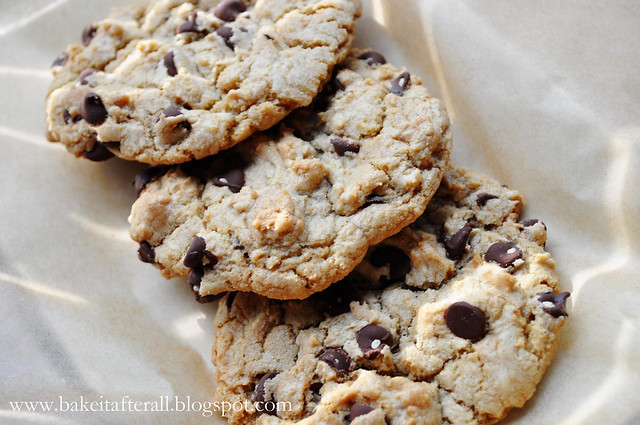
These cookies were just as the name describes - thick and chewy - just like from a bakery. The dough freezes well so you can make up a batch of batter and bake them as needed. Having a batch of cookie dough ready to bake at a moment's notice sounds like something a Super Hostess would do. Friends stopping by unannounced? You can have warm cookies in a matter of minutes. I'd like to think that we could always have these cookies on-hand in our freezer, but in all honesty we would probably just eat them! :-)
Thick and Chewy Chocolate Chip Cookies
Makes about 18 large cookies
Ingredients:
2 cups plus 2 tablespoons (10 5/8 ounces) unbleached all-purpose flour
1/2 teaspoon baking soda
1/2 teaspoon salt
12 tablespoons unsalted butter, melted and cooled until warm
1 cup packed (7 ounces) light or dark brown sugar
1/2 cup (3 1/2 onces) granulated sugar
1 large egg plus 1 egg yolk
2 teaspoons vanilla extract
1 - 1 1/2 cups semisweet chocolate chips
Directions:
1. Adjust oven racks to upper- and lower-middle positions. Head oven to 325F.
2. Line 2 large (or oversized) baking sheets with parchment paper or spray with nonstick cooking spray.
3. Whisk the flour, baking soda, and salt together in a medium bowl and set aside.
4. Using an electric mixer, mix the butter and sugars until blended thoroughly. Beat in the egg and yolk and the vanilla until combined.
5. Add the dry ingredients and beat at low speed until just combined. Stir in the chips to taste.
6. Roll a scant 1/4 cup of dough into a ball. (At this point, you may freeze the balls of dough if you desire). Hold the dough ball with the fingertips of both hands and pull into 2 equal halves. Rotate the halves 90 degrees and, with the jagged surfaces facing up, join the halves together at their base, again forming a single ball, being careful not to smooth the dough's uneven surface.
7. Place the formed dough balls on the prepared baking sheets, jagged surface up, spacing them 2 1/2 inches apart. If you have smaller baking sheets, you will need to bake the cookies in batches to ensure they are properly spaced on the sheets.
8. Bake until the cookies are light golden brown and the outer edges start to harden yet the centers are still soft and puffy, 15 to 18 minutes, rotating the baking sheets from front to back and from top to bottom halfway through baking time.
9. Cool the cookies on the baking sheets (this is an important step!)
10. Remove the cooled cookies from the baking sheets with a metal spatula. The cookies are best served warm from the oven but will retain texture when cooled.
Source: Brown Eyed Baker, originally from Baking Illustrated
Monday, June 8, 2015
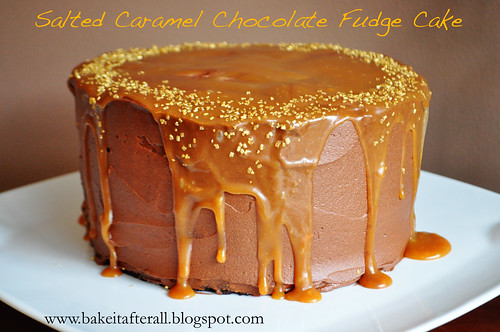
Salted Caramel Chocolate Fudge Cake
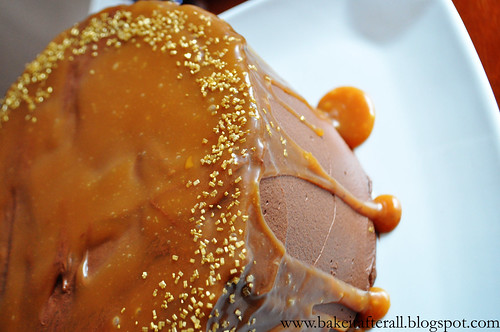
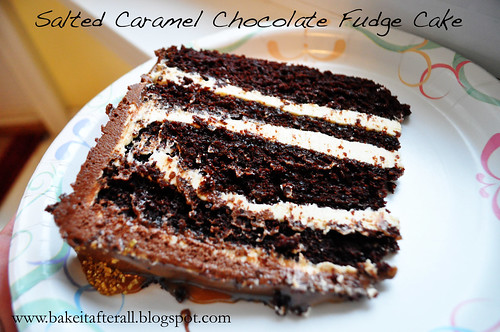
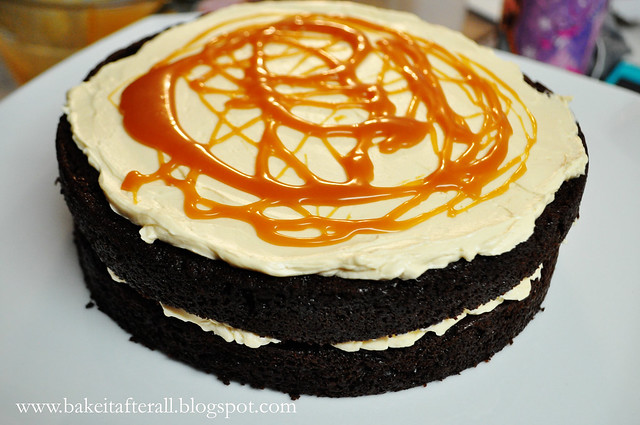
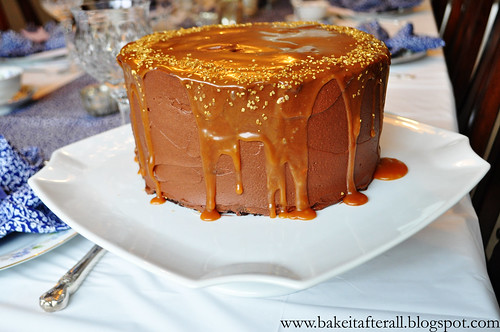
I have so many recipes saved in files or on Pinterest, but it always seems like I am pressed for time and end up making the same things over and over. For Mother's Day, I had some extra time the week before and decided I would pick an involved dessert. I browsed my Pinterest boards and stumbled upon this Salted Caramel Chocolate Fudge Cake. Just listen to this description- rich chocolate cake, layered with salted caramel Swiss meringue buttercream and extra salted caramel, covered in whipped ganache and drizzled with salted caramel. !!! This cake truly was as good as it sounds. My brother-in-law, a dessert connoisseur, said it was one of his favorite cakes he's ever had- that says a lot!
I did a lot of research for this cake, which sounds funny, but I wanted to make sure I was prepared and understood all the recipes before getting started. The inspiration for this cake comes from Domestic Gothess, but I also pulled recipes from other sources for my cake because her recipes had a lot of European measurements/conversions and I wanted to make sure I was getting it right. I realized that the cake recipe she uses is almost exactly the same as Ina Garten's Beatty's Chocolate Cake (which, as I discovered, is essentially the Hershey's Black Magic Cake recipe).
I also discovered a simpler way to make Swiss meringue buttercream using pasteurized eggs - it actually took less time and was easier than the traditional method! See details below.
This cake looks and sounds like a lot of work, but if you prepare the components individually ahead of time, it's not bad at all. I made the salted caramel one night, the cakes the next night, and then the final night made the buttercream, ganache, and assembled the cake.
Here's a sample timeline if you are making the cake for a Saturday event:
Wednesday: make salted caramel, store in refrigerator in airtight container or glass measuring cup covered in plastic wrap
Thursday: make chocolate cakes, wrap each in plastic wrap and put each in resealable plastic bag in refrigerator
Friday: make salted caramel Swiss meringue buttercream, make whipped ganache, assemble cake, store in fridge
Saturday: place cake at room temperature a few hours before event
I highly, highly recommend this cake if you are a lover of chocolate and salted caramel and if you are in the market for a show-stopping dessert!
Salted Caramel Sauce
Ingredients:
2 cups granulated sugar
12 tablespoons unsalted butter, at room temperature, cut into pieces
1 cup heavy cream, at room temperature
1 tablespoon fleur de sel (or other flaky sea salt)
2 cups granulated sugar
12 tablespoons unsalted butter, at room temperature, cut into pieces
1 cup heavy cream, at room temperature
1 tablespoon fleur de sel (or other flaky sea salt)
Directions:
1. Add the sugar in an even layer over the bottom of a heavy, 2-3 quart saucepan.
2. Heat the sugar over medium-high heat, whisking it as it begins to melt. The sugar will form clumps, just keep whisking and they will melt. Stop whisking once all of the sugar has melted, swirl the pan occasionally while the sugar cooks.
3. Continue cooking until the sugar has reached a deep amber color. At this point caramel can burn in a matter of seconds, so keep a close eye. If you have an instant read thermometer, cook until the sugar reaches 350F.
4. As soon as the sugar reaches 350F, add the butter all at once. Be careful as the caramel will bubble when the butter is added. Whisk the butter into the carmel until it is completely melted.
5. Remove the pan from the heat and slowly pour in the cream. Again, be careful as the mixture will bubble.
6. Whisk until all of the cream is incorporated and the sauce is smooth. Add the fleur de del and whisk to incorporate.
7. Set the sauce aside for 10 to 15 minutes to cool, then pour into a glass container and cool to room temperature. Sauce can be store in refrigerator for up to 2 weeks. Warm sauce before using.
Beatty’s Chocolate Cake
Ingredients:
Butter for greasing the pans (or Pam for Baking)
1 ¾ cups all-purpose flour, plus more for pans
2 cups sugar
¾ cups good cocoa powder (such as Hershey's)
2 teaspoons baking soda
1 teaspoon baking powder
1 teaspoon kosher salt
1 cup buttermilk, shaken
½ cup vegetable oil
2 extra-large eggs, at room temperature
1 teaspoon pure vanilla extract
1 cup freshly brewed hot coffee
Directions:
1. Preheat the oven to 350 degrees. Butter two 8-inch round cake
pans. Line with parchment paper, then butter and flour the pans (I use Pam for Baking cooking spray and also use Evenbake Cake Strips around the pans to ensure even baking).
2. Sift the flour, sugar, cocoa, baking soda, baking powder, and
salt into the bowl of an electric mixer fitted with a paddle attachment and mix
on low speed until combined.
3. In another bowl, combine the buttermilk, oil, eggs, and vanilla.
4. With the mixer on low speed, slowly add the wet ingredients to the dry. With mixer still on low, add the coffee and stir just to combine, scraping the bottom of the bowl with a rubber spatula.
5. Pour the batter into the prepared pans and bake for 35 to 40 minutes, until a cake tester comes out clean. Cool in the pans for 30 minutes, then turn them out onto a cooling rack and cool completely.
6. If not frosting immediately, wrapped cooled cakes in plastic wrap then place each in a large resealable plastic bag and in the refrigerator until ready to use.
Source: Ina Garten’s Beatty’s Chocolate Cake (Hershey’s Black
Magic Cake)
Caramel Swiss Meringue
Buttercream
Note: Swiss Meringue Buttercream relies on dissolving sugar into egg whites over low heat, at least in part to kill bacteria, and then whipping the sugar/egg mixture into meringue before adding the butter. I buy pasteurized eggs (Davidson's Safest Choice) and was told by my brother-in-law that they don't form a proper meringue. I did some searching and found a method by Rose Levy Beranbaum that adds extra cream of tarter and a longer whipping time to achieve a meringue from pasteurized egg whites. My buttercream turned out perfectly, and I actually thought this method was much simpler because it eliminates the cooking step, which can be a little tricky in that you have to make sure you don't cook the eggs. I think using the superfine sugar was beneficial since I didn't have the heat to help dissolve the sugar. I am so glad I tried this method because I think it will be my go-to buttercream when I have a bit more time (my quick go-to is this Easy Vanilla Buttercream).
1
cup superfine sugar
1 teaspoon cream of tartar
1
cup + 1 tablespoon (17 tablespoons) unsalted butter, softened
1
teaspoon vanilla extract
6
tablespoons (or more to taste) salted caramel
*If you do not have pasteurized eggs, follow this method to make the buttercream.
*If you do not have pasteurized eggs, follow this method to make the buttercream.
Directions:
1. In the bowl of a stand mixer with the whisk attachment, beat the egg whites on medium-low for 1 minutes, or until they foam.
2. Add the cream of tartar. Beat and eventually raise speed to high. When the egg whites become thicker, gradually add the sugar. Beat for 5 to 10 minutes until a thick meringue forms.
2. Add the cream of tartar. Beat and eventually raise speed to high. When the egg whites become thicker, gradually add the sugar. Beat for 5 to 10 minutes until a thick meringue forms.
3. Turn the mixer to low speed and add the butter one tablespoon at a time, making sure that the butter is fully incorporated before adding more. At this point, the meringue will deflate and look curdled- this is normal. Keep mixing. Once the butter has all been added, mix until the buttercream is smooth and silky. If it looks curdled, keep mixing, it will come together.
4. Whisk in the vanilla extract and salted caramel to taste.
4. Whisk in the vanilla extract and salted caramel to taste.
Source: Adapted from Domestic Gothess and Rose Levy Beranbaum
Assembling the cake:
1. Remove
the cakes from the refrigerator and slice each one in half carefully using a
long, serrated knife to create 4 layers.
2. Place one layer on a serving plate or cake stand and spread ~1/4 of the buttercream over the cake.
3. Drizzle 1-2 tablespoons salted caramel over the top of the buttercream. If the caramel is too thick, you may microwave it for a few seconds. Be careful not to pour hot caramel onto the buttercream.
4. Add another layer onto the cake and repeat with buttercream and caramel layers until you have the final cake layer on top.
5. Spread the remaining buttercream thinly over the cake to create a crumb layer. Refrigerate cake for at least 15 minutes while you prepare the whipped ganache (see below).
6. Spread ganache onto cake and drizzle remaining caramel over cake.
Whipped Ganache
Makes about 2 cups whipped ganache.
Ingredients:
8
ounces dark chocolate (I use Ghiradelli 60% cacao bittersweet chocolate chips)
1
cup heavy cream
1/8
teaspoon coarse sea salt
Directions:
1. Chop
the chocolate (if necessary) and place in a heatproof bowl.
2. Bring the cream just to a boil over medium-high heat.
3. Pour the hot cream over the chocolate making sure that it is all covered, then add salt. Do not stir, otherwise the ganache will cool too quickly and become grainy. Let stand for 10 minutes.
4. Stir with a whisk until smooth and shiny.
5. Allow the ganache to cool to room temperature, stirring often, 45 minutes to 1 hour. Beat with a stand mixer using the whisk attachment until the mixture is paler and fluffy, 2 to 4 minutes.
Source: Martha Stewart
Subscribe to:
Posts (Atom)

