Showing posts with label Cookies. Show all posts
Showing posts with label Cookies. Show all posts
Sunday, December 20, 2015
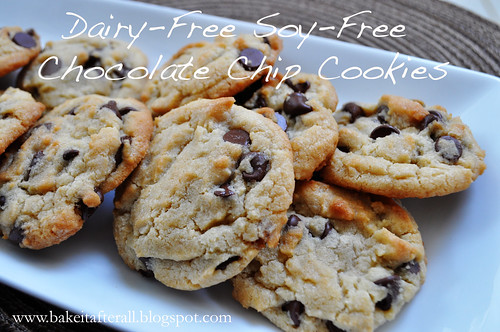
Dairy-Free Soy-Free Chocolate Chip Cookies (MSPI)
Here is another recipe from my days of following the MSPI (Milk Soy Protein Intolerance) diet while nursing my second baby. Normally I am not a fan of cooking with Crisco, but when you absolutely cannot have butter, these types of priorities often take a back seat. One nice thing about working with Crisco is that you don't have to wait for it to soften like butter since it's stored at room temperature.
My mom and sister really loved these cookies and actually preferred them to the typical all-butter chocolate chip cookie.
During my MSPI days, I relied on dairy-free soy-free chocolate chips. "Enjoy Life!" Brand is my favorite and thankfully my local grocery store carries them in the health/organic food aisle. These chocolate chips were so good - you would never know they were dairy-free!
This recipe is actually adapted from the Nestle Toll House Cookie recipe, so you know it won't dissapoint!
Dairy-Free Soy-Free Chocolate Chip Cookies (MSPI Friendly)
Ingredients:
2 1/4 cup all-purpose flour
1 teaspoon baking soda
1 teaspoon salt
1 cup traditional or butter-flavored Crisco
3/4 cup granulated sugar
3/4 cup light brown sugar, packed
1 teaspoon pure vanilla extract
2 large eggs
2 cups chocolate chips (I used Enjoy Life brand- they are dairy-free and soy-free)
Directions:
Preheat oven to 375F.
1. Combine flour, baking soda, and salt in a small bowl. Set aside.
2. Beat Crisco, sugars, and vanilla extract in a large mixer bowl until creamy. Add the eggs, one at a time, beating well after each addition. Gradually beat in the flour mixture. Stir in the chocolate chips.
3. Drop by rounded tablespoon onto ungreased cookie sheets.
4. Bake for 8 - 9 minutes or until edges begin to turn golden. Cool for one minute on the cookie sheet and remove to a wire rack to cool completely.
Source: One Ordinary Day
Monday, September 7, 2015
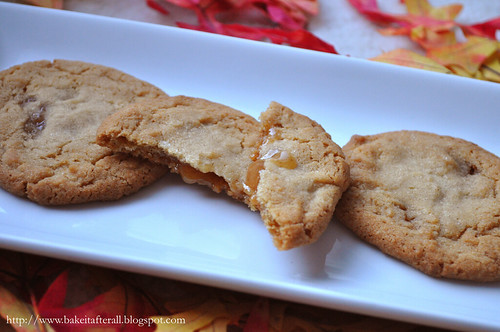
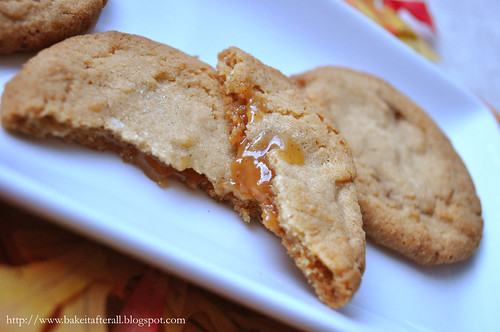
Browned Butter Cookies with Apple Cider Caramel Filling
After making the Apple Cider Caramels, I had to try out this recipe that combines the caramels with Browned Butter Cookies. I wasn't sure how these would turn out, but I was blown away by how good they were. The browned butter cookie base perfectly compliments the apple cider caramels. I know my words can't do these justice, so I will just let the pictures speak for themselves. Caramel oozing from a cookie? Yes please!
Browned Butter Cookies with Apple Cider Caramel Filling
Makes about 20 cookies
Ingredients:
1 cup (2 sticks) unsalted butter
2 1/4 cups all-purpose flour
1 1/4 teaspoon baking soda
1/2 teaspoon coarse sea salt, plus more for sprinkling
1 cup light brown sugar
1/2 cup granulated sugar
1 large egg plus 1 egg yolk
2 1/2 teaspoons vanilla extract
1 tablespoon greek yogurt or sour cream
20 apple cider caramels (about 1-inch squares), unwrapped
Directions:
Preheat oven to 350F.
1. Place the butter in a medium skillet over medium heat. Melt completely. Continue to cook, whisking frequently, until the butter foams, bubbles slightly, and begins to brown. Continue whisking until the butter is evenly brown, being careful not to burn. Remove from heat and allow to cool.
2. Line baking sheets with parchment. In a medium bowl, whisk together the flour, baking soda, and salt. In the bowl of an electric mixer, combine the sugars and brown butter, mixing on medium speed until well blended and smooth.
3. Blend in the egg and yolk, scraping the bowl as needed. Blend in vanilla and yogurt or sour cream. With the mixer on low, blend in the dry ingredients until just incorporated.
4. Use a medium dough scoop to place a ball of dough onto the prepared pan (about 2 tablespoons). Press the center of the dough down to create an indentation. Place a caramel in the indentation and pinch together the edges of the dough over the caramel to completely hide it in the center of the dough. At this point, you may pinch the top of the dough in multiple spots to create a more rustic look. Repeat with remaining dough, spacing cookies at least 2 - 3 inches apart. Chill dough on cookie sheets in refrigerator for 30 minutes.
5. Bake the cookies until golden brown, about 14 minutes, rotating the pans halfway through cooking. Let cool briefly on the cookie sheet, then transfer to a wire rack to cool completely. Sprinkle with sea salt, if desired. Serve slightly warm to achieve gooey caramel texture.
Monday, June 22, 2015
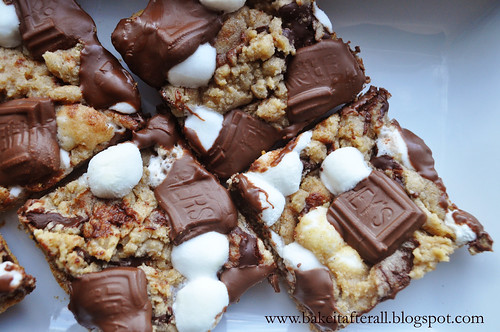
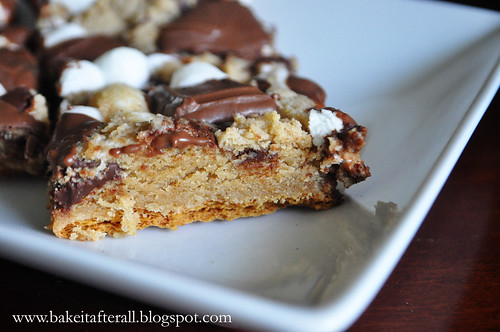
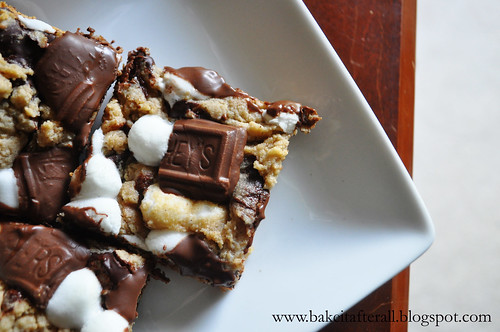
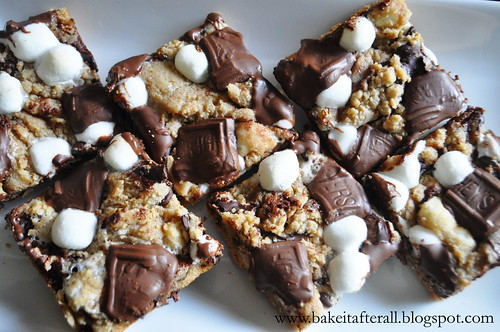
Graham Cracker S'mores Cookies
My sister made these S'mores Cookies at my house sometime last year. For some reason when she described them to me, they didn't sound all that exciting. Then, I tasted one and was addicted! They combine all the components of S'mores into a less messy cookie-form without the need for a campfire. The graham cracker base adds a nice crunch and helps hold the cookies intact. The cookie dough has a touch of cinnamon, which adds another flavor dimension. I made these for a Memorial Day BBQ we had with my sister and her family, and they were the perfect summer dessert! They are best served the day of or 1 day after, as the graham crackers start to lose some of their crispness after that- at least they did for me.
Graham Cracker S'mores Cookies
Note: The "Hershey" name is supposed to show on the finished cookies. I had Bob pick up some Hershey bars for me and he got the giant ones, so my pieces were bigger. The bars were a bit too soft when I pressed the chocolate into the tops of the cookies so mine melted more than they should. To be safe, it may be best to chill your Hershey bars prior to placing on the warm cookies.
Ingredients:
2/3 cup butter, at room temperature
1 cup brown sugar
1 cup granulated sugar
2 eggs
1 teaspoon vanilla extract
1 teaspoon baking soda
1/2 teaspoon salt
1/2 teaspoon cinnamon
2 1/2 cups all-purpose flour
1 cup semi-sweet or bittersweet chocolate chips (I used Ghiradelli bittersweet chips)
1 cup mini marshmallows, plus 1/4 cup for adding on top (as directed below)
2 regular sized Hershey bars (milk or dark chocolate), each piece with "Hershey" cut in half (chilled if the chocolate has started to soften or it's a warm day)
2 sleeves graham crackers (from a standard sized box) – broken into squares (1/2 of a full graham cracker sheet)
Directions:
1. Preheat oven to 375F. Line a jelly roll pan or rimmed baking sheet with aluminum foil, if desired. Break graham crackers in half so they are squares. Lay crackers next to each other, in a single layer on a baking sheet (the size of your baking sheet will determine exactly how many crackers you need).
2. Bake graham crackers in pre-heated oven for 4 minutes. Remove from oven and set aside to cool.
3. Cream the butter, brown sugar, and granulated sugar together in the bowl of an electric mixer. Add eggs, one at a time, and vanilla and mix until combined.
4. In a separate bowl, combine flour, baking soda, salt, and cinnamon. Add the dry ingredients to the butter mixture and mix until just combined. Fold in chocolate chips and 1 cup marshmallows.
5. Use a medium cookie scoop to scoop dough onto graham crackers (on baking sheet). Bake for 5 minutes. Then remove pan from oven. If your dough is not spreading, carefully use the back of a spoon to spread the dough evenly over the graham crackers. (I added this step. My scoops of dough may have been too large and spread out to form a single layer of cookie). Press about 2 pieces of chocolate and 2-3 marshmallows (or more!) into each cookie.
6. Bake for 5-7 minutes more. Cool completely, then cut cookies into squares (where the graham crackers meet).
Source: Adapted from Glorious Treats
Monday, June 15, 2015
Thick and Chewy Chocolate Chip Cookies
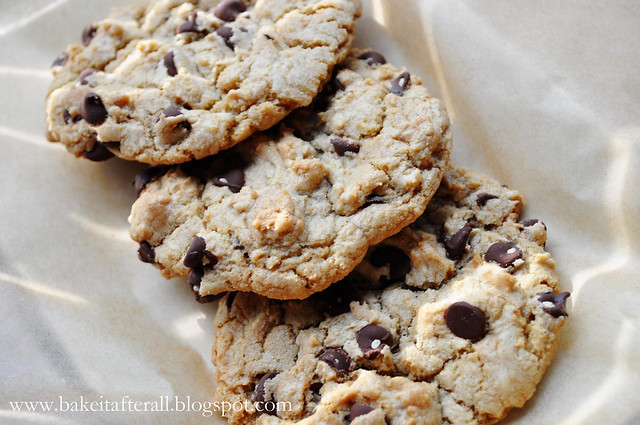
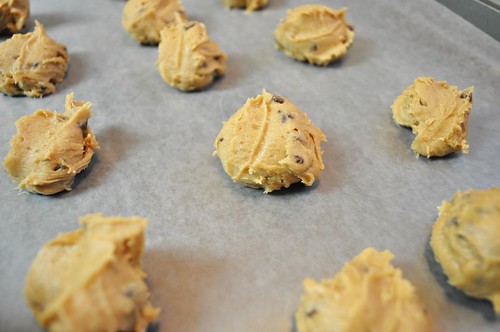
These cookies were just as the name describes - thick and chewy - just like from a bakery. The dough freezes well so you can make up a batch of batter and bake them as needed. Having a batch of cookie dough ready to bake at a moment's notice sounds like something a Super Hostess would do. Friends stopping by unannounced? You can have warm cookies in a matter of minutes. I'd like to think that we could always have these cookies on-hand in our freezer, but in all honesty we would probably just eat them! :-)
Thick and Chewy Chocolate Chip Cookies
Makes about 18 large cookies
Ingredients:
2 cups plus 2 tablespoons (10 5/8 ounces) unbleached all-purpose flour
1/2 teaspoon baking soda
1/2 teaspoon salt
12 tablespoons unsalted butter, melted and cooled until warm
1 cup packed (7 ounces) light or dark brown sugar
1/2 cup (3 1/2 onces) granulated sugar
1 large egg plus 1 egg yolk
2 teaspoons vanilla extract
1 - 1 1/2 cups semisweet chocolate chips
Directions:
1. Adjust oven racks to upper- and lower-middle positions. Head oven to 325F.
2. Line 2 large (or oversized) baking sheets with parchment paper or spray with nonstick cooking spray.
3. Whisk the flour, baking soda, and salt together in a medium bowl and set aside.
4. Using an electric mixer, mix the butter and sugars until blended thoroughly. Beat in the egg and yolk and the vanilla until combined.
5. Add the dry ingredients and beat at low speed until just combined. Stir in the chips to taste.
6. Roll a scant 1/4 cup of dough into a ball. (At this point, you may freeze the balls of dough if you desire). Hold the dough ball with the fingertips of both hands and pull into 2 equal halves. Rotate the halves 90 degrees and, with the jagged surfaces facing up, join the halves together at their base, again forming a single ball, being careful not to smooth the dough's uneven surface.
7. Place the formed dough balls on the prepared baking sheets, jagged surface up, spacing them 2 1/2 inches apart. If you have smaller baking sheets, you will need to bake the cookies in batches to ensure they are properly spaced on the sheets.
8. Bake until the cookies are light golden brown and the outer edges start to harden yet the centers are still soft and puffy, 15 to 18 minutes, rotating the baking sheets from front to back and from top to bottom halfway through baking time.
9. Cool the cookies on the baking sheets (this is an important step!)
10. Remove the cooled cookies from the baking sheets with a metal spatula. The cookies are best served warm from the oven but will retain texture when cooled.
Source: Brown Eyed Baker, originally from Baking Illustrated
Sunday, May 10, 2015
Ava's 1st Birthday Party - Penelope Bird Birthday
I never shared the photos from Ava's 1st Birthday almost 2 1/2 years ago! Her nursery was decorated with Pottery Barn Kids Penelope Birds, so I decided to use that theme for her party. My aunts had made some beautiful table runners and decorations using these birds for my baby shower and let me keep them to use for this party.
Here are the sugar cookies decorated with royal icing:
The cake was a boxed chocolate cake covered with Easy Vanilla Buttercream. I always used boxed cakes when I'm going to be decorating extensively. I love how they taste, and they save me time when I know I will need to focus my energy on decorating.
I used royal icing to make the birds - just pipe the shapes onto waxed paper, let dry overnight, and carefully peel off. Store in an airtight container until ready to use.
Mini-cupcakes made with batter from a boxed cake and topped with Easy Vanilla Buttercream:
The entire dessert table. I love how it turned out with the bright, fun colors!
Although she didn't enjoy us singing to her, Ava loved her smash cake!
Thursday, May 7, 2015
Ella's 1st Birthday Party
Our sweet little girl Ella turned 1 in February, and I wanted to share a few photos from her Winter ONEderland Party. I kept all of the snowflakes up from Ava's Frozen party, so the time spent decorating was considerably less. After going overboard with Ava's birthday party, I wanted to keep this party more simple but still honor our baby's first year.
White chocolate and peppermint-covered pretzel snowflakes (Rold Gold Brand):
Smash cake - a homemade, "healthy" banana cake. I won't link the recipe because it was really dense and awful and Ella wouldn't eat it. She did enjoy the Easy Vanilla Buttercream, which I tinted pink using homemade beet juice.
Chocolate-Covered Strawberry Cake - this cake was my mom's birthday cake since her birthday is also in February. Two 9-inch layers of boxed strawberry cake. Simple ganache on top of the first layer. Sweetened whipped cream on top of the ganache and covering the cake.
Monthly photos I took of Ella throughout her first year:
The snowflake banner is actually made of coffee filters. Some I dyed with pink food coloring, then let dry flat. I mounted her monthly pictures in the center of the snowflakes then strung them on some hemp twine.
Sunday, February 15, 2015
Soft Frosted Sugar Cookies
These Soft Frosted Sugar Cookies are rumored to be even better than the ones you can find in grocery store bakeries. I do not like the fake frosting on those kinds of cookies, so I think these homemade ones with a buttery vanilla frosting are a much better alternative. I've made these many times, and they are quickly becoming one of my favorite cookies!
Soft Frosted Sugar Cookies
Makes 2 dozen large cookies
Ingredients:
For the cookies:
4 1/2 cups all-purpose flour
4 1/2 teaspoons baking powder
3/4 teaspoon salt
3 sticks unsalted butter, at room temperature
1 1/2 cups sugar
3 large eggs
5 teaspoons vanilla extract
For the frosting:
5 cups powdered sugar, sifted
5 1/3 tablespoons unsalted butter, melted
1 tablespoon vanilla extract*
4 - 8 tablespoons milk
Optional:
Food coloring or gel
Sprinkles
*This is a large amount of vanilla extract and will affect the color of the frosting. If you wish to have a lighter, butter-colored frosting, use clear vanilla extract.
Directions:
1. In a medium bowl, whisk together the flour, baking powder, and salt.
2. In the bowl of an electric mixer, combine the butter and sugar. Beat on medium-high speed until soft and fluffy, ~2 - 3 minutes.
3. Beat in the eggs one at a time, mixing well after each addition. Scrape down the bowl as needed. Blend in the vanilla.
4. With the mixer on low, add the dry ingredients. Mix until just incorporated.
5. Cover dough and chill for 1 hour. Meanwhile, preheat the oven to 350F and line baking sheets with parchment paper.
6. When dough is chilled, scoop a scant quarter cup of dough and roll into a ball. I weighed out the whole ball of dough on a kitchen scale and divided it by 24. Each of my cookies was around 2 ounces in weight. Flatten the ball slightly depending on the thickness you desire. The cookies will not spread or flatten much during baking. Repeat this process with the remaining dough and space the cookies ~2 - 3 inches apart on the baking sheet.
7. Bake 10 - 12 minutes or just until set. Do not over bake! The edges should not be brown. Remove from oven and let the cookies cool on the baking sheet for several minutes before transferring to a wire rack to cool completely.
8. To make the frosting, combine the powdered sugar, melted butter, vanilla, and milk in a medium bowl by whisking until smooth. Start with the smaller amount of milk and add more if needed to reach spreadable consistency. If you add too much milk, the frosting will slide off the cookies. You may add more powdered sugar to thicken if it is too thin.
9. Tint frosting with food coloring or gel as desired. Frost the cooled cookies with an offset spatula or spoon. Immediately decorate with sprinkles if desired, otherwise the frosting will crust and the sprinkles will not adhere well. If you need to step away for more than a moment, place a damp paper towel over the frosting to keep it from crusting. If frosting begins to thicken, add a bit more milk.
Store the frosted cookies in an airtight container.
Source: Adapted from Annie's Eats and Hostess with the Mostess
Wednesday, December 12, 2012
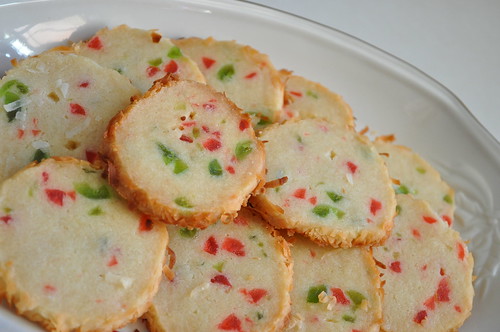
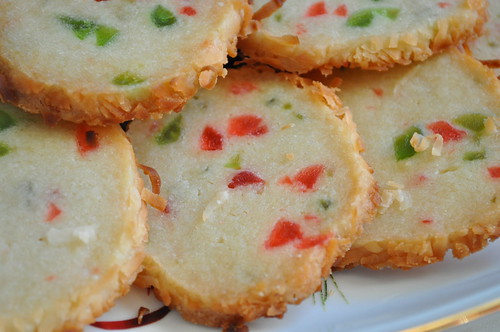
Santa's Whiskers Cookies
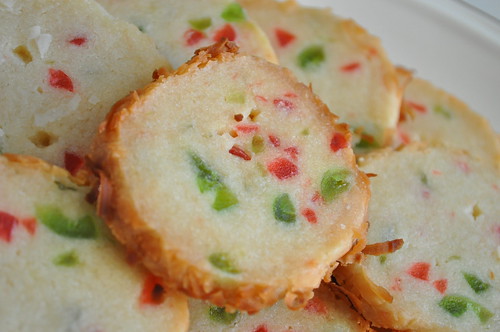
My mom got this recipe from a friend many years ago. She always added the pecans, so I never tried them as a kid due to my allergy. A few years ago I requested that she make some without nuts so I could try them. I had been missing out all these years! These cookies consist of a buttery cookie base, and the chopped candied cherries give them a chewiness, which is nicely complemented by the crunchy coconut exterior. Plus, aren't they so festive?! These cookies have now become a part of my Christmas baking tradition!
Hope you have a wonderful holiday season! Here is a picture of Ava with Santa from this weekend :-)
Santa's Whiskers Cookies
Ingredients:
1 cup butter
1 cup sugar
2 Tbsp. milk
1 tsp. vanilla extract
2 1/2 cups flour
3/4 cup finely chopped red and green candied cherries (about 1/2 of small container of each)
1/2 cup chopped pecans (optional)
3/4 cup coconut
Directions:
1. Cream butter, sugar, milk, and vanilla extract.
2. Add flour, cherries, and pecans (if using).
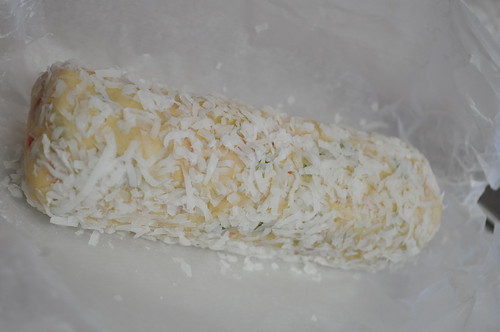
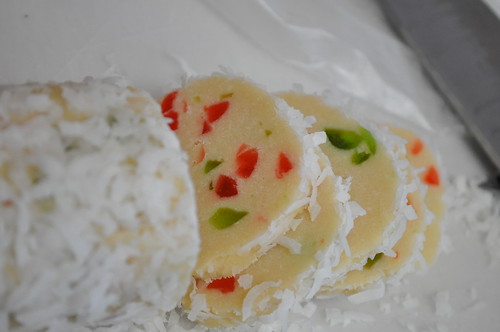
3. Form into 2 rolls each 2 inches in diameter and 8 inches long. Roll in coconut.
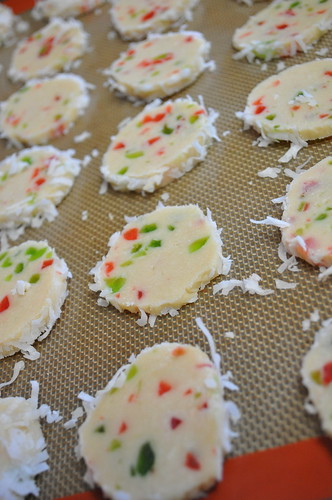
5. Slice 1/4" thick, place on ungreased cookie sheet.
6. Bake at 375F for 10 - 12 minutes.
Makes 5 dozen.
Source: my mom's friend
Thursday, February 16, 2012
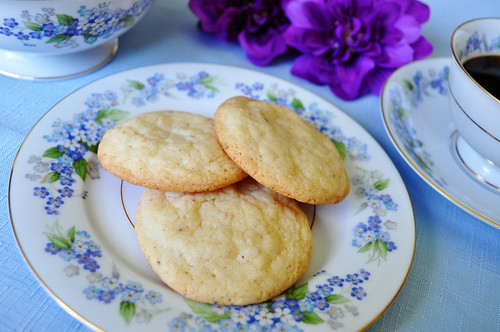
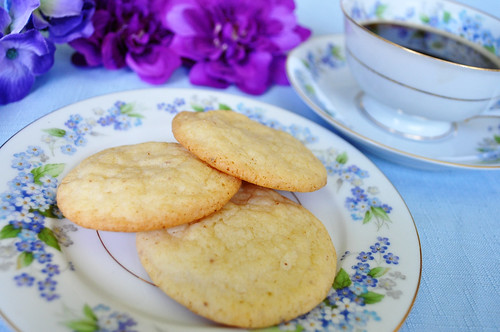
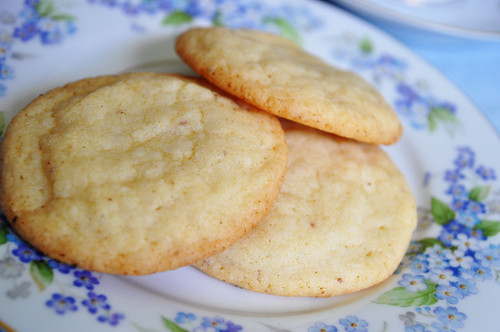
Browned Butter Sugar Cookies
I received the Baking Bites Cookbook in a giveaway about a year ago. I want to make just about every recipe in the book! I decided on these sugar cookies to take to a pool party this past summer. I had never made browned butter before, but I wanted to try it. (Probably the only thing I had ever eaten with browned butter was some lobster potstickers with a browned butter miso sauce from Roy's - so incredibly good.)
My mom said these were one of her favorite cookies! She had a similar positive reaction to Nicole's Mexican Chocolate Black Bottom Cupcakes, so I suspect my mom might love anything from this cookbook!
These cookies were chewy and had great flavor and texture. The original recipe uses half a vanilla bean in the melted butter mixture during the browning process. I don't have vanilla beans on hand and opted to skip it since they are pretty expensive. I'm sure the vanilla flavor would have been fantastic though, so if you have some on hand, try it and let me know! :)
Browned Butter Sugar Cookies
Yield: approximately 2 dozen
Ingredients:
1/2 cup butter, room temperature
1 cup all-purpose flour
1/2 teaspoon baking powder
1/4 teaspoon salt
1 cup sugar
1 large egg
1 teaspoon vanilla extract
Directions:
Preheat oven to 350F.
1. Line a baking sheet with parchment paper.
2. Add butter to a small saucepan and cook over medium-low heat until butter begins to melt. Continue to cook butter until it has turned an amber color and smells toasty but not burnt. The butter will darken quickly once it begins to turn golden, so watch carefully.
3. Pour butter from the saucepan into a small bowl, scraping the browned bits from the bottom of the pan with a spatula. Allow to cool for 10 - 15 minutes.
4. In a medium bowl, whisk together flour, baking powder, and salt.
5. In a large bowl, whisk together the sugar, egg, and vanilla extract. Add the cooled butter. Stir in flour mixture, mixing only until no streaks of flour remain.
6. Drop 1-inch balls onto prepared baking sheet. Bake for 10 - 12 minutes, until the edges are set and just start to brown.
7. Cool cookies on a wire rack.
Source: Adapted from the Baking Bites Cookbook
Thursday, June 23, 2011
Eggless Cookie Dough ;-)
I've mentioned before that I usually ignore the warnings about raw eggs. I've made custard using a raw egg base and I eat cookie dough by the spoonful whenever I bake. In my opinion, raw eggs aren't something to be that concerned about unless you are in a high-risk group: those with suppressed immune systems, the elderly, children, and pregnant women. So, I've never had a reason to worry, until now . . . Yep, I'm pregnant! 16 weeks today, so I'm due in early December.
Bob and I are so excited! This is our first child, and we couldn't be more thrilled. I've felt very lucky to have had a relatively easy first trimester, although the fatigue has been pretty intense, hence the lack of blogging. I rarely cooked and when I did it was more heating up something frozen or making pasta with jarred sauce. My beloved chicken sounded absolutely unappealing for many weeks, and a lot of the new recipes I'd see just did not look good. I had a lot of posts that needed to be written, but the last thing I wanted to do was spend time on my computer when I got home from work when I could be napping. Thankfully my energy is slowly starting to pick up, as is my desire to try new recipes.
I'm not sure about any of you, but when I'm told I can't have something, I want it more. (I won't even go into how much I've been craving a cold sub sandwich from my favorite local deli!) One of the first things I thought when I found out I was pregnant was: Uh oh - no cookie dough! Luckily, I remembered seeing eggless cookie dough recipes specifically for pregnant women, so I relaxed a little.
I decided to make the dough and then scoop it out into small portions to freeze. Now I can have a little ball of cookie dough anytime I want! The dough is definitely not as tasty as real cookie dough, so I may play around with the recipe a bit, but it's a good starting point.
Eggless Cookie Dough
Ingredients:
3/4 cup brown sugar
1/4 cup butter, softened
1/4 teaspoon vanilla
1/4 cup milk
1 cup flour
Pinch salt
1/4 cup mini chocolate chips
Directions:
1/4 cup butter, softened
1/4 teaspoon vanilla
1/4 cup milk
1 cup flour
Pinch salt
1/4 cup mini chocolate chips
Directions:
1. In a medium bowl, mix together the brown sugar and butter until smooth.
2. Stir in vanilla and milk. Mix in the flour, salt, and chocolate chips until well blended.
3. Chill in the refrigerator, or scoop onto waxed paper covered baking sheet and freeze.
Source: Adapted from Fun Foods on a Budget
Have a great weekend!!!!!!!
Wednesday, June 8, 2011
Back with a Cookie Giveaway!!!
Oh my goodness, it has been a very long time since I posted! We have been super busy with my sister's wedding, her and her new husband moving back to St. Louis, among other things. I have SO many posts that I need to get out - including the Dessert Table from my sister's Bridal Shower!!! To make up my slacking around here, I'm hosting a giveaway!
First, some background: Several months ago I was contacted by a representative from Archway Cookies asking if I would be interested in receiving a complimentary package of assorted cookies. Bob immediately jumped at the chance, as he has fond memories of Archway's Molasses cookies. Personally, I don't think I'd ever had Archway cookies before, but free cookies? Why not!
The package arrived with 3 containers of cookies - Triple Chocolate (ok seriously my favorite cookie flavor ever!), Shortbread, and Peanut Butter:


Now, given my experience with packaged cookies, I was expecting them to be good but nothing special. I first ripped open the Triple Chocolate package and was surprised to find that they are big, soft, bakery-style cookies! They were very good! Next, I tried the shortbread. I like shortbread, but it's definitely not my top pick in a cookie. Well, let me tell you, these shortbread cookies are phenomenal! They have such a good flavor, I was really impressed. Because of my nut allergy, I didn't try the Peanut Butter cookies, but Bob happily finished those on his own - he loved them. When I wrote the representative back, I told her my thoughts. She actually said that they have been receiving really positive feedback on the shortbread - I'm glad it's not just me!
Now for this giveaway, 5 - yes 5! - lucky people will win a similar package full of Archway cookies! Eat them by themselves, or come up with some fun recipes with them! I'm thinking crushed shortbread cookies would make an awesome crust! Or how about putting some homemade French vanilla ice cream (or even cinnamon!) between two of the Triple Chocolate cookies to make an ice cream sandwich? Mmmm
I also want to mention that Archway is partnering with First Book from June 1 until July 15 and donating a portion of the proceeds to this organization in order to purchase 10,000 new books for children of low-income families. What a great cause! And lastly, you can also nominate someone to receive a "Goodness Package" full of cookies and a glass platter and pitcher here!
To enter this giveaway, please leave a comment telling me what your favorite cookie is! Announce this giveaway on your blog or on Facebook? Just leave me a separate comment for each and you'll get another entry! Contest ends Tuesday, June 14 at 6pm CST. I apologize in advance, but only residents of the continental U.S. are eligible due to shipping restrictions.
Good Luck!!!! :)
Thursday, January 20, 2011
Dark Chocolate-Covered Cherry Cookies
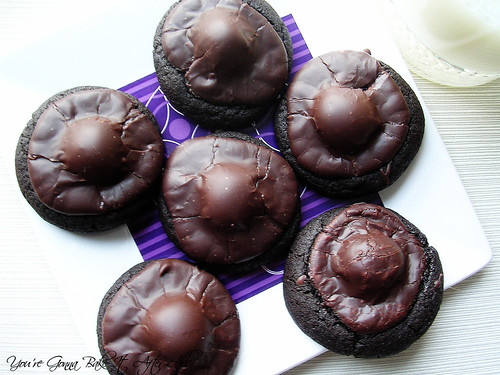
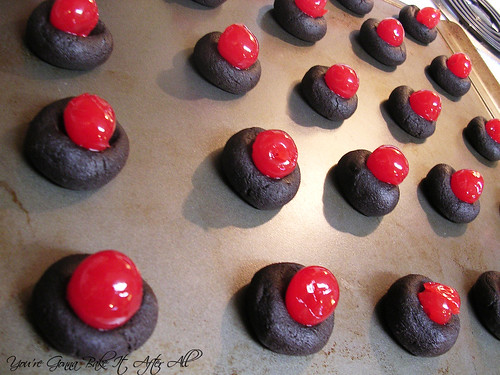
My good friend Melissa told me about these Chocolate-Covered Cherry Cookies she discovered from her coworker. Her description alone was enough - I had to make them. Bob and my dad both love chocolate-covered cherries, so I knew these cookies would go over well with them. I was surprised by how much I liked them - they are fantastic!!! The cookie part itself is so good, I would be happy with those alone, but the cherry-chocolate glaze is amazing, and I actually enjoyed the maraschino cherry (which I typically don't eat).
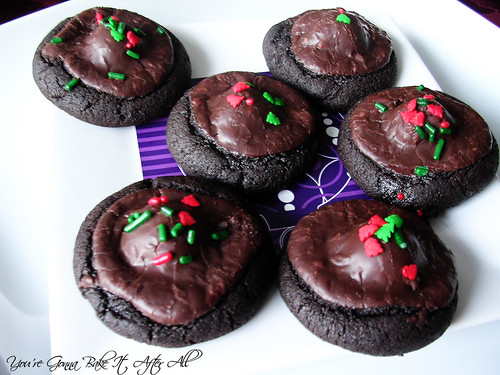
I used dark chocolate cocoa powder and bittersweet chocolate for the glaze to make these Dark Chocolate-Covered Cherry Cookies, but you can certainly use semisweet or even milk chocolate. I made these cookies for Christmas so I decorated half of them with Christmas sprinkles, but these cookies would be great for Valentine's Day. They would look so cute with some heart-shaped sprinkles!
Dark Chocolate-Covered Cherry Cookies
Dark Chocolate-Covered Cherry Cookies
Yield: about 3 dozen cookies
Ingredients:
1 1/2 cups all-purpose flour
1/2 cup unsweetened dark or regular cocoa powder (I used Hershey's Special Dark)
1/4 teaspoon salt
1/4 teaspoon baking soda
1/4 teaspoon baking powder
1/2 cup butter (1 stick), room temperature
1 cup granulated sugar
1 egg
1 1/2 teaspoons vanilla
1 (10-ounce) jar maraschino cherries, drained, reserve juice
6-ounces bittersweet or semisweet chocolate chips (milk chocolate would work too)
1/2 cup sweetened condensed milk
Directions:
Preheat oven to 350F.
1. In a large bowl, combine flour, cocoa powder, salt, baking powder and soda, blending well; set aside.
2. In a mixing bowl, beat together butter and sugar on low speed until fluffy. Add egg and vanilla; beat well. Gradually add dry ingredients to the creamed mixture; beat until smooth and well blended.
3. With hands, shape dough into 1-inch balls; place on ungreased baking sheet. Press down center of dough with thumb. Drain maraschino cherries well, reserving juice. Place a cherry in the center indention of each cookie.

4. In small saucepan, combine chocolate pieces and sweetened condensed milk; heat on low until chocolate is melted. Stir in 1 tablespoon plus 1 teaspoon of the reserved cherry juice. If frosting seems too thick to spoon over cookies, thin with a little more cherry juice.
5. Spoon about 1 teaspoon of the topping over each cherry, spreading to cover cherry.
6. Bake cookies for 10 minutes, or until done. Remove to wire rack to cool. Store in airtight container.
Source: Adapted from About.com
Subscribe to:
Posts (Atom)

