Search This Blog

Showing posts with label Cheesecake. Show all posts

Sunday, October 2, 2011

Chocolate-Pumpkin Cheesecake Bars

DSC_0082_ed

DSC_0074_ed

DSC_0059_ed

Does anyone else feel like they have so many fall recipes that they want to try, but there simply isn't enough time?! I have felt this way for several years, and have an ongoing list that I just roll-over to the next year. I am really trying to make an effort to enjoy this fall to the fullest and squeeze in as much baking as I can, especially because I'm told I'll have a lot less free time in a couple months :-)

This recipe is one that I found on MarthaStewart.com, perhaps last year? I had it saved, and it jumped out at me as I was looking through my recipes. I really love the combination of pumpkin and chocolate (most notably in the Pumpkin-Chocolate Tart), and adding in cheesecake (like the mini-pumpkin cheesecakes) just made it sound even more appealing.

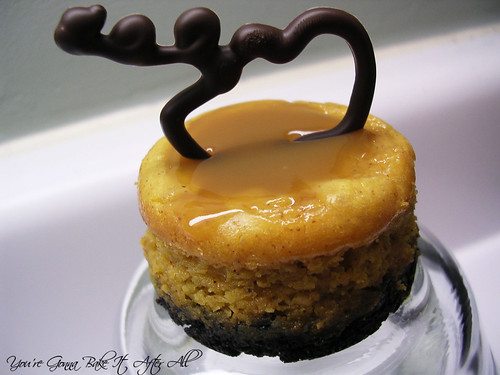
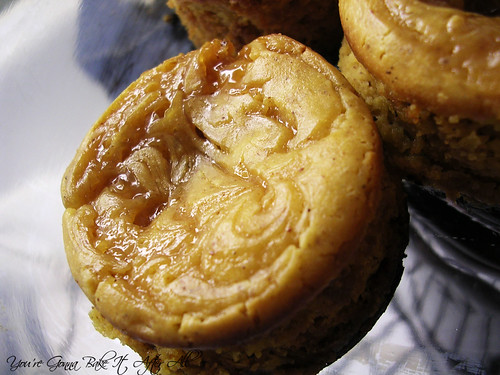
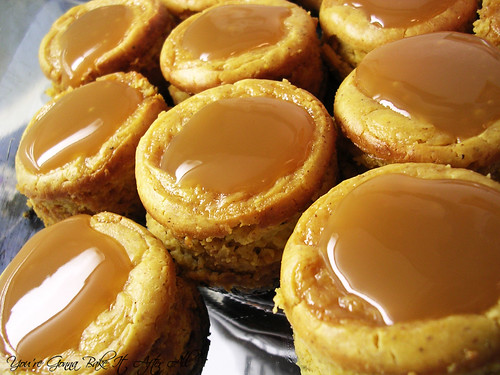
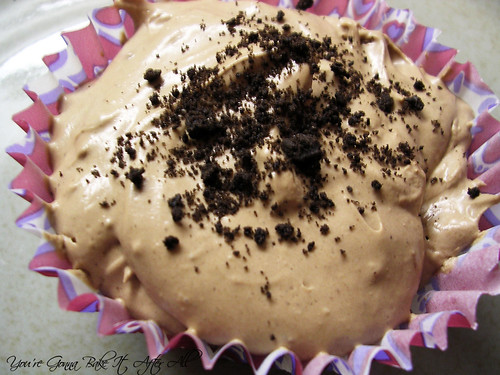
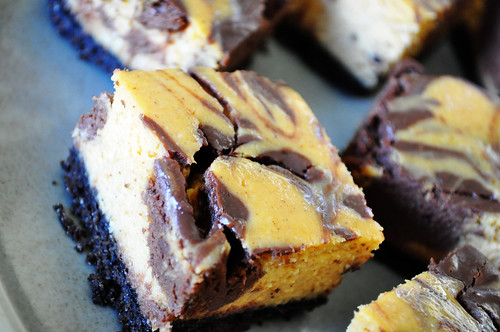
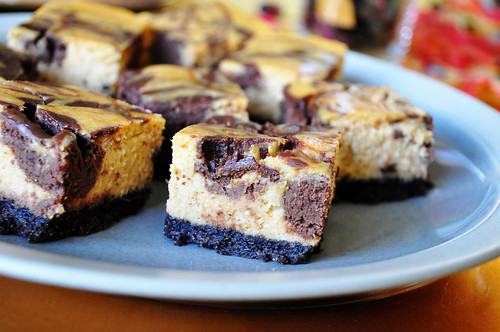
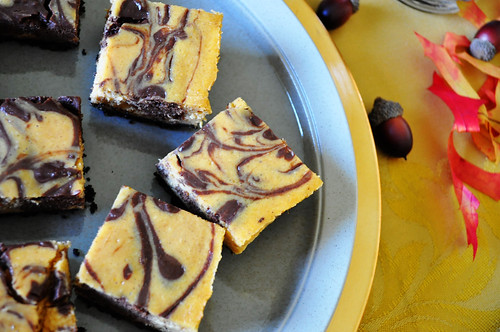
I really cannot gush over these as much as they deserve - they are fantastic! I knew I would like them, but I didn't expect this much. These bars consist of a basic chocolate cookie crust, topped with pumpkin cheesecake, and a portion of the cheesecake mixture is combined with melted chocolate and then swirled in to create pockets of pumpkin-spiced chocolate cheesecake! The cheesecake is perfectly creamy and the chocolate adds a nice touch but isn't overpowering. If you love pumpkin, chocolate, and cheesecake as much as I do, you are sure to love these!

Chocolate-Pumpkin Cheesecake Bars

Ingredients:
For The Crust:
20 chocolate wafer cookies (half a 9-ounce package) (I used 4.5 ounces of chocolate animal crackers/cookies)
2 tablespoons sugar
4 tablespoons unsalted butter, melted

For The Filling:
2 8-ounces packages cream cheese (I used light cream cheese)
1 cup sugar
1 cup canned solid-pack pumpkin puree
3 large eggs
3 tablespoons all-purpose flour
1 teaspoon pumpkin-pie spice
1/2 teaspoon salt
4 ounces semisweet chocolate, chopped (I used chocolate chips)

Directions:
1. Preheat oven to 350 degrees. Line bottom and sides of an 8-inch square baking pan with parchment paper or aluminum foil, leaving an overhang on all sides. Set aside.

2. In a food processor, blend cookies with sugar until finely ground (you should have about 1 cup crumbs); add butter, and pulse until moistened.

3. Transfer crumb mixture to prepared pan, and press gently into bottom. Bake until fragrant and slightly firm, 12 to 15 minutes. Set aside to cool.

4. Place cream cheese in food processor or the bowl of a stand mixer fitted with the paddle attachment; blend until smooth. Add sugar, pumpkin puree, eggs, flour, pumpkin-pie spice, and salt; process until combined. Set aside.

5. Place chocolate in a microwave-safe bowl; microwave in 30-second increments, stirring between each, until melted. Add 1 cup pumpkin mixture; stir to combine. Set aside.

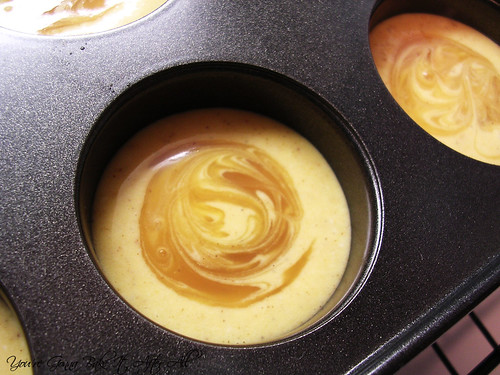
6. Pour remaining pumpkin mixture into prepared pan. Drop dollops of chocolate mixture onto pumpkin mixture; swirl by dragging paring knife through the chocolate and pumpkin several times to create marbled pattern. Bake until cheesecake is set but jiggles slightly when gently shaken, 40 to 50 minutes.

7. Cool in pan. Cover; chill until firm, at least 2 hours (and up to 2 days). Using overhang, transfer cake to work surface. With a knife dipped in water, cut into 16 squares. Serve.

Source: Adapted from MarthaStewart.com

Tuesday, July 19, 2011

Mexican Chocolate Black Bottom Cupcakes

DSC_0554_2

In December I won a giveaway on Nicole's blog Baking Bites. I was so excited to get my package in the mail - 2 bars of Scharffen Berger chocolate and an autographed copy of her Baking Bites cookbook! I immediately wanted to make just about every recipe in the book! One recipe that caught my eye in particular was these Mexican Chocolate Black Bottom Cupcakes. The chocolate batter is mixed with Mexican spices and then a cheesecake/coconut layer is dolloped on top! The recipe makes 24 cupcakes, so I chose to make them for 2 events - lab birthdays and the visit of my two great friends Kathleen and Melissa.

I was really bummed when I finished making these and discovered I had left out the coconut by mistake! In my defense, the recipe in the cookbook said to combine salt with the cream cheese mixture, and there was no mention of coconut. Salt was not listed in the filling ingredients so I just added a pinch and moved forward. It was too late by the time I realized that the coconut was not listed in the directions and I had left it out. Regardless, these cupcakes were fantastic and I can only imagine that they'd be even better with the coconut. I've added it to the directions below.

24 cupcakes is a lot, so I had leftovers after both events and my mom and aunt tried them. My mom said they were the best thing I've ever baked! Wow - did she forget about the dessert table? Just kidding! It's funny how people can have such different tastes because these were not at the top of Bob's list (his all time favorite is the Tres Leches Coconut Cupcakes with Dulce de Leche Buttercream!) I wasn't entirely surprised by Bob's preference though because he's not big on cheesecake (I know - what?!). I thought these cupcakes were super moist and flavorful, and I'm excited to try them again with coconut!

DSC_0560_2

Mexican Chocolate Black Bottom Cupcakes

Yield: 24 cupcakes

Ingredients:
For the cream cheese filling:
16 ounces (2 packages) cream cheese, room temperature
1/2 cup sugar
2 large egg whites, room temperature
2 tablespoons milk
2/3 cup sweetened, shredded coconut, finely chopped

For the cake:
1 1/2 cups all-purpose flour
1/2 cup cocoa powder
1 1/4 cups sugar
1/2 teaspoon salt
1 1/4 teaspoons baking soda
1 1/2 teaspoon ground cinnamon
1/4 teaspoon ground cayenne pepper
3/4 cup buttermilk
1 1/3 cups water
1/2 cup butter, melted and cooled
1 teaspoon vanilla extract
1/4 teaspoon almond extract

Directions:
Preheat oven to 350F. Line two 12-cup muffin pans with paper liners.
1. Make the filling: In a medium bowl, beat together cream cheese and sugar until smooth. Blend in egg whites and milk, mixing until filling is well-blended. Stir in coconut. Set aside.

2. Make the cake: In a large bowl, sift together flour, cocoa powder, sugar, salt, baking soda, and spices.

3. Make a well in the center and add the buttermilk, water, melted butter, vanilla extract, and almond extract. Stir together until just combined and no streaks of flour remain.

4. Divide cake batter evenly among 24 cupcakes. Top each portion of batter with 1 rounded tablespoon cream cheese mixture (there may be some left over).

5. Bake for 20 - 25 minutes. If using two racks, rotate pans halfway through baking. A toothpick inserted into cake only portion should come out with a few moist crumbs on it.

6. Cool in pans for 5 minutes. Filling will sink slightly as the cake cools (I assume this is if you have the coconut in there, as mine did not). Remove cupcakes to wire racks to cool completely.

Source: Adapted from the Baking Bites Cookbook

Friday, January 14, 2011

Red Velvet Brownies with Cheesecake Swirl and Giveaway Winner!!!


DSCN7817_labeled

DSCN7832_labeled

And the Giveaway winner is . . .


Congratulations Natalie!!! You have won a $75 gift certificate to CSN Stores! Please email me at mtmbakesblog AT gmail.com to claim your prize. Thank you to CSN Stores for sponsoring this giveaway!

Now I must tell you about these brownies. I made them the night before having our good friends Jenny and Jeff, and their baby Andrew, over for dinner (you may remember them from the Monkey Cookies!) I had these in the oven for about 10 minutes when our power went out!! I was really annoyed thinking they were probably ruined. Not knowing how long it would be before power was restored, I moved the brownies to the very cold garage. After about an hour, the power came back and I put the brownies back in the oven until done. I have no idea how this affected them, but they did turn out very tall! These were really good brownies, definitely more cake-like than fudgey, but I can't say whether that's due to how I baked them. I loved the cheesecake swirl on top. These are definitely festive and would be perfect for Valentine's Day!

After deciding to make these brownies, I saw a similar recipe for Red Velvet Cheesecake Brownies on Baking Bites that looks fantastic as well!

Red Velvet Brownies with Cheesecake Swirl

Ingredients:
For the brownies:
4 ounces bittersweet chocolate, chopped
3/4 cup (1 1/2 sticks) butter
2 cups sugar
4 large eggs
1 1/2 cups all-purpose flour
1 (1-ounce) bottle red food coloring (I used about 1/2 container of Wilton icing gel)
1 1/2 teaspoons baking powder
1/8 teaspoon salt
1 teaspoon vanilla extract
1/4 cup buttermilk
1 teaspoon white vinegar

For the cream cheese swirl:
4 ounces cream cheese, at room temperature
2 tablespoons sugar
2 tablespoons sour cream
1/4 teaspoon vanilla extract
1/2 large egg yolk

Directions:
Preheat the oven to 350F.

1. Line a 9 x 9-inch square baking dish with two pieces of aluminum foil, folding ends over the edges. Spray with cooking spray.

2. Combine the chocolate and butter in a large, microwave safe bowl. Cook 30 seconds at a time until melted, stirring well after each time. Whisk in the sugar.

3. One at a time, add the eggs, whisking well between each addition. Stir in the flour, food coloring, baking powder, salt, buttermilk, vanilla, and vinegar. Combine well, then pour into the prepared baking dish.

4. In the bowl of a stand mixer fitted with a paddle attachment, beat the cream cheese, sugar, vanilla, and egg yolk. Drop spoonfuls over the brownie batter, then use a table knife to swirl into the batter.

5. Bake 40-50 minutes, or until a toothpick inserted into the center comes out with just a few crumbs attached. Allow to cool completely before slicing.

Source: Adapted from Pink Parsley

Tuesday, December 21, 2010

Bailey's Irish Cream Mini-Cheesecakes

DSCN7545_labeled

DSCN7497_labeled

Bob’s work Holiday Party was earlier this month, and everyone was encouraged to bring a snack or dessert. This party fell on the same weekend as our Holiday Open House, so I was already in full dessert mode – what’s one more?! I thought for a while about what to make, then remembered my mini-cheesecake pans. It’s rare that I get the opportunity to use them, and this seemed like the perfect event for a bite-sized, easy-to-grab dessert. One of my favorite cheesecakes is the Bailey’s Irish Cream Cheesecake, so I decided to adapt the recipe to a mini-version. I wasn’t sure how this would work, but they turned out great! They were a big hit at the party, and I had many requests for the recipe. They are actually pretty simple to make, but certainly don’t look simple.

I realize that very few people actually own a mini-cheesecake pan. A friend of mine tried the Pumpkin Spice Magic Bar Mini’s in a muffin pan and she had a very difficult time getting them out of the pan – in fact they fell apart. I can see why this happened considering the cheesecake pan allows you to push the removable bottom up to remove the cheesecake from the pan without disrupting the crust. If you would like to make this recipe and don’t have a mini-cheesecake pan, go ahead and use a muffin tin, but make sure you use paper liners. You can always remove them before you top with ganache - just make sure you coat them with nonstick cooking spray!

Bailey’s Irish Cream Mini-Cheesecakes

Yield: 24 mini-cakes (make a half recipe if just using 1 mini-cheesecake pan, which yields 12)

Ingredients:
For the crust:
16 whole Oreos, finely ground in food processor
3 tablespoons melted butter

For the filling:
16 ounces (2 8-ounce packages) cream cheese
1/2 cup sugar
2 eggs
1 1/3 cups sour cream
3 Tablespoons Bailey's Irish Cream
1 teaspoon vanilla extract
6 ounces semi-sweet chocolate, melted and cooled slightly

For the ganache glaze:
4 ounces bittersweet chocolate, coarsely chopped
1/2 cup heavy cream
2 teaspoons light corn syrup

Directions:
Preheat oven to 350F.
1. Combine the ground Oreos and melted butter into a bowl until well combined. Spoon into 24 mini cheesecake cups. Press into the bottom of each cup so the crust is flat. If you have a small cup or container small enough, that works well. Partially bake for 10 minutes then remove from oven.

2. In a large bowl with a handheld or stand mixer, beat the cream cheese and sugar until light and fluffy. Beat in eggs, one at a time. Stir in sour cream, Bailey's, and vanilla.

3. Pour or spoon batter into cheesecake pan cups to fill to a little less than half of the cup. Then add the melted chocolate to the rest of the batter. Fill the cups to about 3/4 full.

4. Bake for 25-28 minutes until cheesecake is cooked through. Remove to a wire rack to cool.

5. Once the cheesecakes have cooled, loosen the edges with a plastic knife and remove them from the pan by pushing up on the removable bottoms. Arrange them on a piece of waxed paper and make the glaze.

DSCN7482_labeled

6. To make the ganache glaze, put the chocolate in the top of a double boiler and melt above simmering water (or use microwave to melt). The chocolate should be just melted and only warm, not hot. Meanwhile, bring the cream to a boil in a small saucepan. Pour the hot cream over the chocolate and stir very gently with a rubber spatula until the mixture is smooth and shiny. Stir in the corn syrup.

7. Pour the glaze over the cheesecakes and smooth the top with the back of a spoon or a metal icing spatula. Don't worry if the glaze drips unevenly down the sides of the cheesecakes, it actually makes for a pretty presentation. Alternatively, you could leave the cheesecakes in the pan and pour the glaze on top, let set (best to put in fridge), then run a plastic knife around to loosen, lift the cakes out, and have a nice ganache layer on top with no drips!

8. Refrigerate cheesecakes until ready to serve. If keeping overnight or longer, wait until glaze sets, then cover with foil.

Sources: Adapted recipes - Crust, Cheesecake, Ganache

DSCN7492_labeled

Monday, August 9, 2010

S'mores Cheesecake Bars

This is pretty much all I've been baking lately . . .


One of my labmates told me about this cartoon, and I couldn't resist. If you've ever done lab research before (Kerstin!), you probably enjoyed this cartoon!


DSCN6746_labeled

DSCN6758_labeled

DSCN6739_labeled

DSCN6737_labeled

DSCN6749_labeled

Our lab had a potluck dinner two weeks ago, and I decided to bring dessert. While I have about a million dessert recipes just waiting to be made, this one popped into my head. It just screams summer to me - anything S'mores makes me think of camping, and we've actually made S'mores several times this summer while waiting for our charcoal briquets to burn out. Bars are a great dessert to take to a party because people can just grab them.

These bars were pretty simple to make and definitely worth the effort. I'm convinced that placing the marshmallows on by hand in perfectly aligned rows will fulfill the OCD tendency in anyone! Everyone at the party who tried these really liked them, and they were so impressed with the presentation. This is one of those desserts that looks much harder that it is, which is always a nice surprise. The original recipes makes an 8 x 8-inch pan, but since there we going to be about 20 people at the party, I doubled it and used a 13 x 9-inch pan. The bars slice very cleanly as long as you wipe off the knife (or pizza chopper) between cuts.

I promise another post this week!!! :)


S'mores Cheesecake Bars

Ingredients:
For the crust:
2 cup graham cracker crumbs
2 tablespoons sugar
8 tablespoons unsalted butter, melted

For the cheesecake:
8 ounces bittersweet or semisweet chocolate, finely chopped
16 ounces cream cheese, at room temperature
1/2 cup sour cream
1 cup marshmallow cream
4 teaspoons cocoa powder
1/2 tablespoon vanilla extract
4 large eggs

For the topping:
3 cups mini marshmallows
Milk chocolate chips, melted (optional)

Directions:
1. Preheat the oven to 350F. Line a 13 × 9-inch baking pan with foil; spray lightly with cooking spray.

2. To make the crust, combine the graham cracker crumbs, sugar, and melted butter in a small bowl. Stir together with a fork until well combined. Press the mixture in an even layer into the bottom of the prepared baking pan. Bake 10 minutes; transfer to a wire rack while you prepare the filling. Reduce the oven temperature to 325F.

3. To make the filling, place the chopped chocolate in a heatproof bowl set over a pan of simmering water. Heat until melted and smooth, stirring occasionally. Remove from the heat and let cool slightly.

4. In the bowl of a stand mixer fitted with the paddle attachment, combine the cream cheese, sour cream and marshmallow cream. Beat on medium-high speed until smooth and well combined, 1-2 minutes. Blend in the cocoa powder, vanilla extract and eggs until incorporated. Stir in the melted chocolate until well blended. Pour the filling over the graham cracker crust and smooth the top with a spatula.

5. Bake about 25 - 30 minutes, or until the center is just set (does not jiggle when shaken gently.) Remove from the oven.

6. Evenly top the cheesecake layer with the mini marshmallows. Return to the oven for 2-3 minutes, just long enough so the marshmallows begin to melt into each other. Watch carefully! They brown very quickly. I just parked myself in front of the oven window.

7. Remove the pan from the oven and allow to cool. Once the cheesecake has reached room temperature, drizzle with melted milk chocolate if desired. I simply melted chocolate chips carefully in the microwave, transfered them to a resealable sandwich bag with a tiny bit of the corner cut off, and made diagonal stripes each way on the marshmallows. Very simple technique that looks impressive!

8. Transfer to the refrigerator and chill 2-3 hours before slicing and serving.

Source: Adapted from Annie's Eats and Sugar Plum

Sunday, January 3, 2010

Welcome 2010!

Happy New Year! I have been dreaming about 2010 for a LONG time. I started graduate school in Chicago in 2004 knowing that I would not be done until close to 2010, at which point I planned to move back to St. Louis where my entire family lives. Meanwhile, Bob decided to go back to school, knowing he would graduate in the spring of 2010. We both feel that our lives have sort of been on hold during this time - waiting to have more time (and space) for our hobbies and interests. So, 2010 is a big year for Bob and I:

His graduation and my hooding ceremony:


A big move to St. Louis:

New jobs: (Bob will be working as a PT and I'll be working with fruit flies!)


House shopping:


And one of my favorite parts is that my cousin Chris, who joined the Navy just as I was starting graduate school, will have completed his service and is moving back to St. Louis too.
I am beyond excited to be near my parents and extended family again!

Since it's the beginning of a brand new year, I'd like to reflect back on 2009. I feel like I have grown so much in my cooking since starting this blog last March - it has really pushed me beyond my comfort zone and forced me to try new things. I have now worked with mock marzipan, royal icing, and yeast breads, just to name a few. I am so thankful to each and every one of you who read my blog and who comment on the recipes I post!

To celebrate the occasion, I've decided to go through the things I made in 2009 and choose my favorites. I realized I couldn't pick just one favorite of each category of food, so I decided to just pick my top recipes and list them here. This is hard because I typically only post something if I really like it, so I usually recommend it all. To be featured in this list, the recipe must meet my standards - most importantly, taste amazing - when I read the title of these recipes my mouth actually starts watering - that's how good they are. As a cooking blogger, it's difficult for me to repeat recipes because there are SO MANY fabulous ones out there to try (I have about a million starred in Google reader to prove it!) To be honest, it's really only the super special recipes that I actually make a second time. These are recipes that I plan to make again and again. Sometimes it's not even my choice - it's that Bob requests them over and over. Funnily enough, a lot of my top recipes are from Giada De Laurentiis! Not on purpose, it's just how it turned out.

In no particular order, this is my list of "must makes" from 2009:

Blueberry Ricotta Pancakes - This is a simple recipe from Giada because it uses store bought pancake mix, but it's a semi-homemade approach that tastes incredible. The ricotta cheese really elevates the pancakes to a new level. I am a pancake snob and only like them super light and fluffy, and these pancakes deliver!

Panzanella - I absolutely LOVE this classic tomato and bread salad recipe of Giada's. Perfect for summer when tomatoes are at their peak, but still great the rest of the year.

Chicken Tortilla Soup - I have made many chicken tortilla soups before and never quite found the right one . . . until this one. I love it's simplicity - no corn, no beans, just a super tasty broth with a few veggies, and some chicken of course. The toppings are exceptional. I think each of them adds another flavor dimension. I recently made this for my family and they loved it!

Ribollita - I would have to say this was one of my most surprising recipes (it's Giada's). The whole time making it I was convinced I would hate it - it didn't look appetizing and I really planned on having to eat crackers for dinner. Not only did I eat the soup, I had a second bowl. It was that good. And now here it is on my top recipes lists for 2009. Go figure!

Chicken Gyros - I have made these at least 5 times in the last 5 months! They are SOOO good. The most recent time I made an amazingly delicious flat bread, which I will post soon. It took these from awesome to indescribable :)

Garlic Chicken - Serve with rice, serve with rice noodles, just serve!

Triple T Deluxe Pizza - One of the only recipe on this list that is my own, and it's not even a recipe! The crust is from Cook's Illustrated and truly makes the pizza. The toppings are a great combination, I think. This was the first time I made pizza at home and thought, "hey, this is better than I can get delivered" - no joke.

Rigatoni with Sausage, Pepper, and Onions - Just thinking about this dish makes my mouth water (another Giada recipe). The sweet onions and peppers, the tangy tomato sauce, the comforting pasta, and one of my favorite flavors - marsala wine. This is one of my favorite dishes of all time!

Chicken with Dijon Mascarpone Sauce - Love this recipe! Yet another one from Giada - what can I say, she's knows good Italian food! Get your mascarpone cheese at Trader Joe's if you can - so much cheaper. This recipe is so indulgent. I save it for special occasions and company.

Fresh Salsa - The first time I made this, I was skeptical. How could I like it more than the great salsas you get in Mexican restaurants? I was mistaken - this salsa is right up there with the best of them. It's fantastic served with quesadillas, enchiladas, or tacos, or by itself with tortilla chips. I served this as an appetizer when my cousin and her boyfriend were over one night. He kept saying how good it was, then kept apologizing for repeating himself - it was cute :)

Spinach and Chicken Quesadillas - My favorite quesadilla recipe so far! In my opinion it's the fajita seasoning that makes it special (I credit Annie for that addition!) It was through this recipe that I realized my love of Monterey Jack cheese - it's perfect for Mexican food!

Tres Leches Coconut Cupcakes with Dulce de Leche Buttercream - Wow. Seriously that word sums it up. These were incredible. I still have people at work say to me "you know, you can make those anytime, you don't have to dress them up as Easter Chicks." I take a LOT of desserts into work, and for this one to stand out as much as it did really shows it's a great recipe. I can't wait to make these for my dad because I know he will LOVE them!

Pumpkin-Chocolate Tart - Not only is this one of my favorite desserts in terms of decoration, but this tart is fantastic. The combination of the sour cream and pumpkin makes a super tasty filling. The gingerbread-tasting crust is spicy and delicious, and it's coated in solid chocolate! I plan to make this again next fall for sure.

Chocolate and Toasted Coconut Covered Homemade Marshmallows - Homemade marshmallows are fabulous on their own, but as soon as I dipped them in chocolate and rolled them in toasted coconut, I had a hit! These are just like candy. My only mistake was not making more of them! Next year, I will be prepared with plenty of chocolate and coconut on hand to make a bunch of these.

Triple Chocolate Biscotti - I'm certainly not a biscotti expert, since these were the first I've ever tasted, but what a great little cookie! I loved the combination of white and bittersweet chocolates. These are great on their own or dipped in your favorite coffee, tea, or even milk.

Chicken Marbella - This is such a famous recipe and probably needs no introduction, but if you've never tried it, you must. Great for a crowd or a small group with yummy leftovers, the flavors in this dish are truly wonderful.

Double Chocolate Layer Cake - Decadent and rich - this dessert is perfect for chocolate lovers like yours truly. I'm not surprised it's the most accessed recipe on Epicurious.com!

Spicy Roasted Chicken - Pam has several great looking chicken recipes - all of which I'd love to try. This one is so delicious. I love the spices and the chicken turned out very juicy.

Chicken Pesto Pizza - I loved this pizza! It's a blend of sweet peppers, zucchini, and chicken, flavored with Italian seasoning. The ingredients magically combine to make one fantastic dish.

Bailey's Irish Cream Cheesecake - Of all the cheesecakes I've made, this is my favorite. Such a creamy filling covered in ganache - yum!

And just for fun, these are the top posts that have received the most hits according to Google Analytics:

1. Bacon Stuffed Cherry Tomato Appetizers (Thanks for the recipe Kat!!!)

Wednesday, November 25, 2009

Black Bottom Caramel Pumpkin Cheesecake Bites

I've been wanting to make these ever since the day Jenny posted them - they were just so cute! They're actually one of the reasons I finally got the mini cheesecake pan. These were really fantastic! The Oreo crust, the creamy cheesecake, the caramel topping - a winning combination! I asked Bob to compare these to the Pumpkin Spice Magic Bar Mini's; he said he actually liked these better, but said if these were topped with coconut, they'd be over the top! :)

Instead of topping them with Pumpkin Spice Kisses, I decided to make chocolate pumpkins. I used the technique that Annie posted, where you pipe chocolate onto waxed paper and then simply peel it off. It's so much fun, and I can't wait to make all of the other fun shapes I've though of. I highly recommend these cheesecake bites!!!

I should be in St. Louis for the holiday weekend by the time this posts, and I probably won't be near a computer for the next few days. Everyone please have a safe and wonderful Thanksgiving!!! See you soon with my first annual "12 Days of Christmas" installment! :)


This really is a pumpkin shape, although Bob said "What is this? A moose?" Figures!

Black Bottom Caramel Pumpkin Cheesecake Bites

Ingredients:
8 whole Oreos, finely ground in food processor
1 1/2 Tablespoons melted butter
8 ounces softened cream cheese (I used light)
1/2 cup granulated sugar
1/2 cup pumpkin puree
1 large egg
1 teaspoon vanilla
1/2 teaspoon cinnamon
1/4 teaspoon ground nutmeg
sprinkling of pumpkin pie spice
Caramel dip or fat free caramel sundae topping
1 ounce semi-sweet chocolate

Directions:
Preheat oven to 350F.
1. Combine the ground Oreos and melted butter into a bowl until well combined. Spoon into 12 mini cheesecake cups that have been sprayed with cooking spray (I didn't spray them and had no problem getting them out). Press into the bottom of each cup so the crust is flat. (If you have a cup or container small enough that works well.) Partially bake for 10 minutes then remove from oven.

2. With a handheld or stand mixer, beat the cream cheese, sugar, and pumpkin until smooth. Beat in egg, vanilla, and spices until combined.

3. Pour batter evenly into the 12 cups filling about 3/4 way full. (I found it was easiest to pour the batter into a pourable measuring cup and then pour into the cups). Carefully put about a teaspoon of caramel on the top of each filled cup and gently swirl with a toothpick.
4. Bake for 25-28 minutes until cheesecake is cooked through. At this point I used a plastic knife to loosen the edges of each cheesecake.

5. After the cheesecakes have cooled, remove them from the pan and top them with more caramel. Refrigerate.
6. Make the chocolate decorations: Draw desired shape(s) on a piece of paper and trace it onto waxed paper 12 times using a sharpie or pen. Flip waxed paper over and place on a flat surface.

7. Melt 1 ounce of semi-sweet chocolate in a bowl in the microwave until just melted. Add to a small sandwich bag and cut off very tip.

8. Pipe chocolate onto waxed paper, tracing the shapes made by the sharpie. Slip the sheet of waxed paper into the fridge. When set, carefully remove the shapes from the waxed paper and decorate the cheesecakes.

Source: Adapted from Picky Palate

Friday, October 30, 2009

100th Post and a Cheesecake Factory Reinvention

This is my 100th post!!! I thought I would get here much sooner, but I didn't realize how much my cooking and baking would slow down as I finished up my degree! I wanted to post something special for this occasion, and I think this cheesecake is definitely 'grander' (and more time consuming!) than your run of the mill dessert.

The Godiva Chocolate Cheesecake at Cheesecake Factory is my ultimate favorite indulgence dessert (see below!):
It's a layer of flourless chocolate cake (that's just the crust people!), topped with chocolate cheesecake, then chocolate mousse, and covered in chocolate ganache, which is sprinkled with cocoa powder - WHAT!!!!!!!! Insanely delicious and I'm sure oh-so horrible health-wise. For this reason, I very rarely have this cheesecake (plus it's like $8 a slice!), but for my birthday, which was last week, I decided I wanted to create my own version at home. I've been planning to do this since my birthday last year in fact. I even eluded to it in a previous post!

To do this, I chose recipes that I thought would work together to recreate this dessert. I knew Dorie's ganache would work wonderfully and the cheesecake layer from the Bailey's Irish Cheesecake would be perfect, but I didn't have any recipes for the flourless chocolate cake and chocolate mousse. The flourless chocolate cake had to be thin since it was the crust. I considered making this chocolate mousse, but from the picture the mousse looks like a dark chocolate one, so I thought I should search for another recipe.

In the end, this cheesecake took a long time to put together (I broke it up into multiple weeknights), and unfortunately I can't say it was any better than Cheesecake Factory! (although how can you beat perfection???) For me, I think I would have been just as happy buying an individual slice for my birthday, and I would have had more free time during my birthday week! I served this cheesecake to some friends at a Game Night, and they really loved it. Everyone had a different layer that was their favorite, so that was fun. Like a true married couple, my favorite was the ganache and the cheesecake, and Bob's was the mousse and the crust! If you're looking for a chocolately dessert to impress your friends, this is a great one. If you're just looking to satisfy a chocolate craving for yourself, get to the nearest Cheesecake Factory and order a slice of the Godiva Chocolate Cheesecake!


Ultimate Chocolate Cheesecake

Note: I made the crust and cheesecake on night 1, the mousse and ganache on night 2, and served the cheesecake on nights 3 and 4.

For the crust:
4 1-ounce squares semi-sweet chocolate, chopped
1/2 cup butter
3/4 cup white sugar
1/2 cup cocoa powder (I used dark chocolate cocoa powder)
3 eggs, beaten
1 teaspoon vanilla extract

For the cheesecake:
Original recipe found HERE but I adapted it for the size of this cake:
2 8-ounce packages cream cheese, softened
1/2 cup sugar
2 eggs
1 1/3 cups sour cream
3/4 teaspoon vanilla extract
1/4 cup Bailey's Irish Cream or strong coffee
6 1-ounce squares semi-sweet chocolate, melted

For the dark chocolate mousse:
5 1/4 ounces bittersweet chocolate, coarsely chopped
14 ounces cold heavy cream
3 large egg whites
1 ounce sugar

Ganache ("glaze") recipe HERE

Directions:
Make the crust:
Preheat the oven to 300F.
1. Grease an 8- or 9-inch springform pan and then line with parchment paper (the bottom and sides). Grease the paper as well, then dust with cocoa powder.

2. In the top of a double boiler over lightly simmering water, melt chocolate and butter. Remove from heat, and stir in sugar, cocoa powder, eggs, and vanilla. Pour into prepared pan.

3. Bake for 30 minutes. Let cool to room temperature before adding cheesecake mixture. I used the back of a spoon to sort of smush the cake down to make for a thinner crust.


Make the cheesecake:
Preheat the oven to 325F.
1. In a large mixer bowl, beat cream cheese and sugar until light and fluffy. Add eggs one at a time while beating. Stir in sour cream, vanilla, and Bailey's or coffee. Stir in the melted chocolate.
2. Pour mixture over crust. Bake for about 1 1/2 hours, until the center is raised and set. Let cool to room temperature. Proceed to mousse step or cover cake with aluminum foil and refrigerate until the next day.
Source: Adapted from a recipe by Kerry M.

Make the dark chocolate mousse:
1. Place the chocolate in a large bowl set over low simmering water (or in the top of a double boiler). Stir chocolate until melted. Turn off the heat and let stand (to room temperature).

2. Beat the cream over ice until it forms soft peaks. Set aside and hold at room temperature. With a mixer, whip egg to soft peaks. Gradually add the sugar and continue whipping until firm. (I prechilled my mixer bowl, which may have been a mistake since I think it made my whipped cream and egg whites too cold, which is might explain why the chocolate solidified in step 3 before completely incorporating)

3. Transfer the chocolate to a large bowl. Using a whisk, fold the egg whites into the chocolate. (Note: This is what the recipe from Food Network says, and might be an error. I don't think of "whisk" and "fold" as being compatible, so I used a spatula to fold them together, not a whisk.) When the eggs whites are almost completely incorporated, fold in the whipped cream.

4. Add mousse on top of cheesecake and smooth top. Cover cake with foil and refrigerate until ready to top with ganache.


Make the ganache:
Follow directions outlined HERE (Dorie Greenspan's recipe). Allow to cool briefly - don't let the ganache cool too much or it will start to harden when it hits the cold mousse and be harder to spread. If you'd like the ganache to drip down the sides of the cheesecake, remove the springform pan sides and place cake on a platter lined with wax paper (the wax paper just needs to cover the bottom edges of the cake).
Spread the ganache over mousse layer, allowing to drip down sides if desired. Sprinkle with cocoa powder (optional). Cover cake with aluminum foil and chill.

Monday, June 1, 2009

Chocolate Cheesecakes for Two

I was on the phone with my mom over Mother's Day weekend while she was going through her recipes trying to decide on a dessert to take to my grandma's. My mom is a perpetual recipe clipper - she has a collection of SOO many recipes from magazines and newspapers. Several years ago as a Christmas gift, I gave her a new recipe box and organized all of her recipes by mounting the clipped ones onto index cards. My mom has informed me that she never attempted to keep up with this, so you can imagine the state of her recipes now - some 5 years later. Anyway, she read me the title "Chocolate Cheesecakes for Two," and I immediately requested the recipe. I whipped up a lighter version a few hours later. I love these! Not the same texture but definitely the flavor of chocolate cheesecake (which is one of my all-time favorite desserts). If you love cheesecake but would never make a whole one just for yourself, this is a great, quick alternative!

Chocolate Cheesecake for Two

Ingredients:
2 ounces light cream cheese (1/4 pkg)
1 Tablespoon sugar
1 ounce (1 square) Baker's semi-sweet chocolate, melted
1/2 cup light cool-whip, thawed
2 Oreo cookies or Oreo crumbs
cocoa powder for decoration, optional

Directions:
1. Place two paper muffin liners in a muffin pan. Insert one Oreo cookie in the bottom of each cup, or evenly sprinkle about 1 tablespoon of Oreo crumbs in the bottom.

2. Beat cream cheese, sugar, and melted chocolate in a medium bowl with a wire whisk until blended. Add whipped topping and mix well.

3. Fill muffin liners evenly with cream cheese mixture. Top with Oreo crumbs or cocoa powder, if desired. Refrigerate for 2 hours or overnight.

Source: Adapted from recipe by Kraft/Philadelphia Cream Cheese

Friday, April 17, 2009

Bailey's Irish Cream Cheesecake

Bob's and my friend Jason had us over for a St. Patrick's Day party last year. His girlfriend Kerry made this awesome Bailey's Irish Cream Cheesecake. My dad loves Bailey's and cheesecake, so I knew this would be the perfect dessert for his birthday last month. This cheesecake is soooo delicious. I especially love the chocolate layer - it was super creamy. I have some ideas for a future cheesecake using that portion of the recipe, but I won't be making that for a while. Are you in suspense? :)

The crust for this cake is very thick compared to traditional cheesecake crust (as you can see in the last few pictures). If you prefer a thinner crust, just scale down the crust recipe. While I think it's great as is, this cheesecake could be made with a graham cracker crust, an Oreo crust (shown here), or a different ganache recipe (featured here). This ganache turned white-ish on top after I put the cake in the fridge overnight, uncovered. That didn't happen with the Almost-Fudge Gateau ganache (which I did cover), so the white could be due to the lack of cover or the actual ganache itself . . . I don't really feel like testing it out! Regardless, anything with a ganache topping has my vote! Plus using a topping covers up any cracks or imperfections :) The recipe did not say to take off the springform sides before topping, but I love the look of the ganache dripping over the sides, so I did - either way works well!


Bailey's Irish Cream Cheesecake

Ingredients:
For the crust:
4 Tablespoons unsalted butter, melted
1/4 cup sugar
1/4 cup cocoa
1 package vanilla wafers, ground to crumbs in food processor

For the filling:
3 8-ounce packages cream cheese, softened
3/4 cup sugar
3 eggs
2 cups sour cream
1/4 cup Bailey's Irish Cream liqueur
1 teaspoon vanilla extract
6 1-ounce squares semi-sweet chocolate, melted

For the ganache topping:
5 1-ounce squares semi-sweet chocolate, coarsely chopped
1/2 cup whipping cream
2 Tablespoons butter
1/2 teaspoon vanilla extract

Directions:
Make the crust:
1. Preheat oven to 350F, and grease the bottom of a 9-inch springform pan. I lined the pan with greased waxed paper (can also use parchment) because I always do.

2. Combine butter, sugar, and cocoa powder. Stir in wafer crumbs. Press evenly over bottom of the springform pan and bake at 350 for 10 minutes. Cool pan and grease sides, if desired.

Make the filling:
1. In a large mixer bowl, beat cream cheese and sugar until light and fluffy. Add eggs one at a time while beating. Stir in sour cream, Bailey's, and vanilla. Pour 2/3 of the cheesecake mixture over the crust.

2. To the remaining mixture, stir the melted chocolate. Spoon the chocolate mixture by large spoonfuls over the plain cheesecake mixture. Run a knife through it a few times to create a marbled effect. I thought there was so much filling that making a marbled effect was quite difficult. It was almost as if the chocolate mixture was just another layer - which was fine with me!

3. Bake at 325F for about 1 1/2 hours, until the center is raised and set. Let cool to room temperature. Remove springform pan sides before topping if you prefer the look of ganache drips on the sides of the cheesecake.

Make the topping:
1. Mix chopped chocolate with whipping cream and butter and melt (in a saucepan on the stove or in a bowl in the microwave). Stir in vanilla. At this point, I used a whisk to get the ganache nice and smooth, then let it cool a bit. Hopefully my whisking isn't what made the ganache turn white-ish on top! Spread over top of the cheesecake.

2. Refrigerate at least 6 hours, or overnight.

Source: Adapted from a recipe by Kerry M.

Friday, March 6, 2009

Red Velvet Cheesecake

When I was trying to come up with a dessert to make for my mom's birthday, I asked my aunt to remind me what her favorites are.  It's been almost 9 years since I've lived in the same state as my mom, so I needed a little help :)  She told me that her favorite cake was red velvet, she loves cheesecake, and she had actually seen a recipe in a magazine for Red Velvet Cheesecake. What a coincidence!  I had just been seeing a recipe for Southern Living's Red Velvet Cheesecake floating around the blogs in honor of Valentine's Day.  It was a sign!  I made this cheesecake and took it home with me for the weekend.  It was my first cheesecake ever, but everyone loved it.  I thought the filling was a little too moist (and no, I didn't cook it in a water bath), but I think it's just a different type of texture because of the red velvet.  My aunt thought the cream cheese frosting was going to be too much, but she was pleasantly surprised.  The Oreo crust was also a really nice addition (thanks to Annie's Eats!).  It was nice and crisp on the bottom and just delicious.  


Red Velvet Cheesecake

Ingredients:
For the crust:
1 1/2 cups Oreo cookie crumbs 
1/4 cup butter, melted
1 Tablespoon sugar

For the cheesecake:
3-8 ounce packages cream cheese, softened
1 1/2 cups granulated sugar
4 large eggs, lightly beaten
3 Tablespoons unsweetened cocoa powder, sifted
1 cup sour cream
1/2 cup whole buttermilk (I could only find 1% lowfat in our store that day)
2 teaspoons vanilla extract
1 teaspoon distilled white vinegar
2 - 1 oz. bottles of red food coloring (I used 1 - 1 oz. bottle of Wilton's red no-taste icing color from Michael's)

For the topping:
1-8 ounce package cream cheese, softened
1/4 cup butter, softened
2 cups powdered sugar
1 teaspoon vanilla extract

Directions:
1. Preheat oven to 325F.

2. Line the bottom of a 9-inch springform pan with a round of parchment paper.  To make the crust, combine the Oreo crumbs, melted butter and sugar in a small bowl.  Mix together with a fork until all the crumbs are moistened.  Press the mixture onto the bottom of the prepared pan.  I wasn't really sure if you can buy Oreo crumbs in a package - if that even exists - but our store didn't have any, so I bought regular Oreo's, opened them up and scraped out the cream filling, then crushed the cookies into crumbs by pulsing in my mini food processor.

3. Beat 3-8 ounce packages cream cheese and 1 1/2 cups granulated sugar at medium-low speed with an electric mixer 1 minute.  Add eggs and next 5 ingredients, mixing on low speed just until fully combined.  I mixed all the ingredients with an electric hand mixer until incorporated, then I stirred in the food coloring by hand with a silicone spatula to avoid splattering red droplets all over the counter and myself.  Pour batter into prepared crust.

4. Bake for 10 minutes; then reduce heat to 300F, and bake for 1 hour and 15 minutes or until center is firm.  Turn oven off, and prop the door open slightly.  Let cheesecake stand in oven 30 minutes.  Remove cheesecake from oven; cool in pan on wire rack 30 minutes.  Run knife along out edge of cheesecake.  Cover and chill 8 hours.

5. Beat 1-8 ounce package cream cheese and 1/4 cup butter at medium speed with an electric mixer until smooth; gradually add powdered sugar and vanilla, beating until smooth.  Spread evenly over top of cheesecake.  

For the decoration, I lightly placed heart-shaped cookie cutters on the frosting and then sprinkled mini-chocolate chips inside, pressing them down gently.  I then carefully removed the cookie cutters.  

I didn't remove the sides of the springform pan until after this cake was transported home the next day.  I served the cake, still resting on the bottom of the springform, on a silver platter.

Source:  Recipe adapted from Annie's Eats and Southern Living

One quick side note:  What do you see here?

Supposedly, women are able to spot the word "Lift" easily, while men find this difficult, tending to see black splotches.  I'm not sure if it's related, but my mom, aunt, sister, and I all saw 3 hearts on the cake, while my dad and husband both saw a ghost face  :)  


  © Blogger template Brownium by Ourblogtemplates.com 2009

Back to TOP