Search This Blog

Showing posts with label Italian. Show all posts

Sunday, December 6, 2015

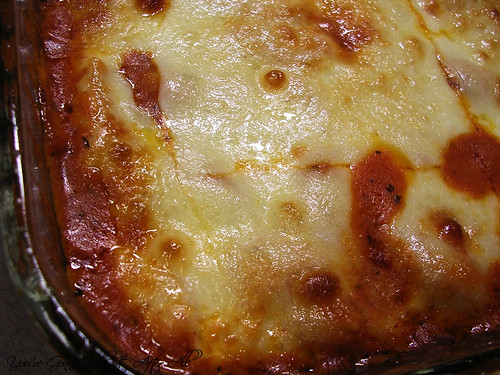
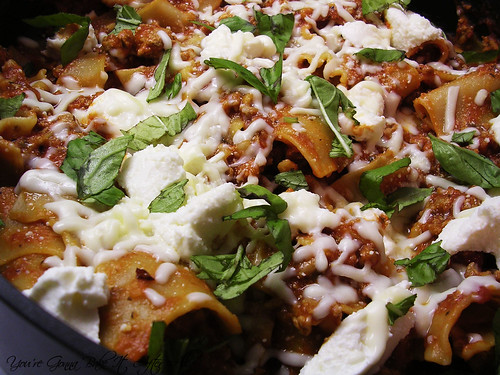
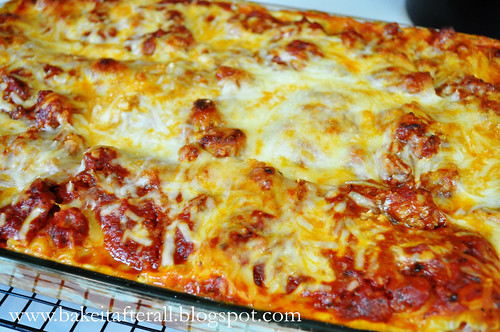
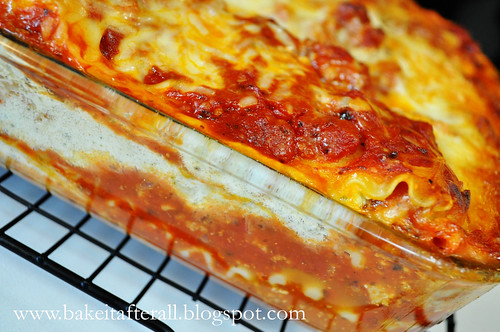
Lasagne / Lasagna

DSC_0457_Lasagna

DSC_0461Lasagna


Obviously from my posts, I like a variety of different types of food - Mexican, Asian, American, and of course Italian. My grandmother was 100% Sicilian, and I have always identified strongly with my Italian heritage. Surprisingly, she didn't cook much Italian food, but her influence on our family has inspired many recipes. My aunt originally developed this lasagna years and years ago, and my mom then took it on - whether she tweaked anything, I'm not quite sure, but I do know that I put a major wrench in it by substituting ground turkey for the beef! To be honest, most of the people who have tried this recipe don't even realize it's turkey. The only thing that tips them off is this: I'm eating it!

My aunt and mom also make a homemade sauce with it, which I've made and really enjoy, but for me, as I've mentioned before, Prego Traditional is so good that it's not worth my time to make the homemade sauce. My new favorite sauce is Trader Joe's Tomato Basil Marinara.  I only go to Trader Joe's about 4 times a year so I make sure to stock up on this sauce. I buy so much that the checker once asked me if I was buying it for an Italian restaurant.  He actually had a customer who did this before! 

The ricotta-type layer actually uses cottage cheese. I always thought this was a little strange, but it's delicious so I ever complained. Then I saw Cook's Illustrated substitute cottage cheese for ricotta in some recipes! Guess it's not that strange!

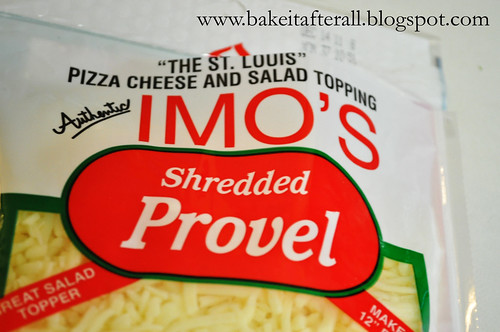
One thing this lasagna does contain is a classic St. Louis ingredient - Provel cheese.  If you do not live in the area, you probably won't be able to find this cheese (and may not even like it if you didn't grow up with it), so you may substitute mozzarella or Provolone.  
DSC_0596_Lasagna

Lasagne / Lasagna

Ingredients:
For the sauce:
1 - 2 pounds ground meat (I use lean - not extra lean - ground turkey. 2 pounds if you like it a bit heartier)
homemade or store bought marinara sauce - I like a lot of sauce so I use about 40 ounces, but you may use less if desired

For the lasagna:
12 lasagna noodles
24 ounces small curd cottage cheese
2 eggs
1 teaspoon salt
1/2 teaspoon ground black pepper
chopped parsley (fresh or dried)
Parmesan cheese
2 - 2 1/2 cups shredded mozzarella cheese
2 cups shredded Provel cheese (if available - if not, you may substitute mozzarella or Provolone)

Directions:
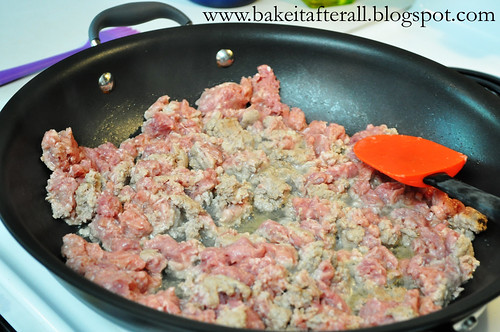
1. Brown the meat in a skillet. If using ground turkey, you may want to add a teaspoon or two of olive oil.
DSC_0418_Lasagna


2. Drain the meat if necessary.  Sometimes with ground turkey there isn't much liquid left to drain, and the small amount that is there may lend flavor to the sauce.

3. Add the homemade or prepared sauce of your choice to the meat and simmer for at least 30 minutes, ideally an hour or more. I find that ground turkey starts to break down if cooked too long, so I wouldn't do an all-day simmer.

4. Cook the lasagna noodles as directed on the package to al dente (use the lower time or even a minute less). When the noodles are done, I like to lay them in a single layer on pieces of waxed paper to cool until I'm ready to assemble the lasagna.

5. Place the cottage cheese, eggs, salt, pepper and parsley (to taste) in a food processor and blend until smooth.

6. To assemble the lasagna: spread about 1 cup of sauce over the bottom of a 9x13" pan then beginning layering: 3 noodles, sauce to cover, 1/3 of the cottage cheese mixture, 1/2 cup mozzarella cheese, 1/2 cup Provel cheese, and a little Parmesan cheese. Repeat layers. If your pan is not deep enough for 4 layers, 3 will suffice. For the final layer, I top with lasagna noodles, sauce, and then an extra 1/c cup mozzarella and some Parmesan.

7. If the pan is full, place it on a baking sheet lined with foil because it may spill over the sides. Bake uncovered at 350F for 45 minutes. (To make ahead, assemble but do not bake, then refrigerate or freeze. If you make ahead and refrigerate, then bake for 1 hour. If make ahead and freeze, it may take up to 90 minutes or more).

8. Remove dish from oven and let rest at least 15 minutes before cutting.
Source: My Aunt Sue and my Mom :)  

Sunday, October 18, 2015

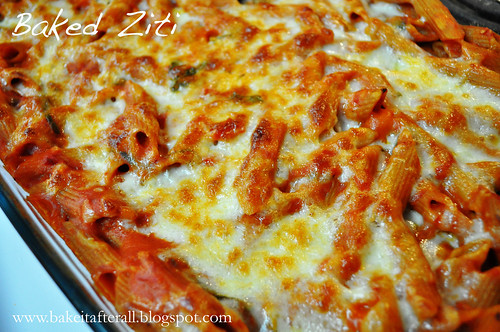
Baked Ziti

DSC_0487_BakedZiti

I started making this Baked Ziti when Bob and I were on a Sopranos kick many, many years ago. We had rented the last season from mail-order Netflix and watched multiple episodes a night. It was the influence of the Sopranos that led Bob to start referring to this recipe as "Meghan's Effing Ziti." Anyone who has seen this show will understand why. This makes a big pan of ziti - enough for the two of us for dinner and leftovers for lunch the rest of the week, so I like to make it on Sundays or Mondays. It's a great "Meatless Monday" meal!

Baked Ziti

Ingredients:
1 tablespoon olive oil
6 garlic cloves, minced
1/4 teaspoon red pepper flakes
Salt and ground black pepper
1 28-ounce can crushed tomatoes
3 cups water
12 ounces ziti (3 3/4 cups)
1/2 cup heavy cream (I usually use milk or fat-free half-and-half)
1/2 cup grated Parmesan cheese
1/4 cup minced fresh basil (or 1 tablespoon + 1 teaspoon dried)
1 cup shredded mozzarella cheese

Directions:
1. Adjust oven rack to middle position and heat oven to 475F.

2. Combine oil, garlic, pepper flakes, and 1/2 teaspoon salt in 12-inch ovensafe nonstick skillet and saute over medium-high heat until fragrant, about 1 minute. Add crushed tomatoes, water, ziti, and 1/2 teaspoon salt. Cover and cook, stirring often and adjusting heat as needed to maintain vigorous simmer, until ziti is almost tender, 15 to 18 minutes.

3. Stir in cream, Parmesan, and basil. Season with salt and pepper to taste. (At this point, I transfer the pasta to a 13x9-inch Pyrex dish). Sprinkle mozzarella evenly over pan. Transfer skillet to oven and bake until cheese has melted and browned, about 10 minutes. Serve.

Source: Adapted from The Best 30 Minute Recipe cookbook

Thursday, August 20, 2015

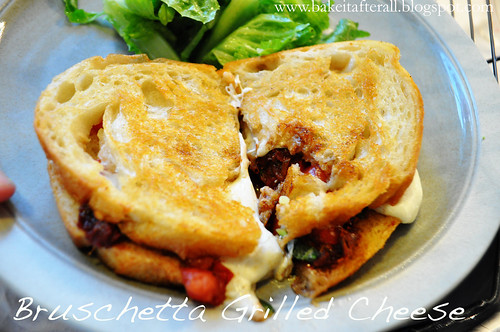
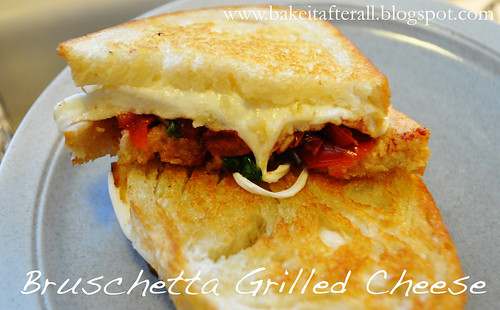
Bruschetta Grilled Cheese Sandwiches

DSC_0061_BruschettaGrilledCheese


There are many versions of Caprese Grilled Cheese out there, where you sandwich fresh mozzarella, tomato, and basil between 2 slices of bread, but I decided to use my favorite bruschetta mixture instead. This sandwich reminded me of the Tomato & Mozzarella Panini that Panera used to serve (although it is no longer on the menu!!)  I loved that sandwich and was thrilled to make a version at home.

Initially I used butter for the bread like a typical grilled cheese, but Bob and I agreed that olive oil works better in fitting with the bruschetta aspect. This sandwich was a little tricky to flip so I troubleshooted it and came up with a way to avoid flipping the sandwich - grilling each piece of bread separately and only flipping the cheese side when the cheese has started to melt and adhere to the bread. The result is one of our new favorite dinners!

Bruschetta Grilled Cheese Sandwiches

Makes at least 4 large sandwiches, likely more

Ingredients:
6 Roma (plum) tomatoes (or 2 large tomatoes), chopped
1/2 cup sun-dried tomatoes, packed in oil
2 cloves minced garlic
1 tablespoon olive oil
2 tablespoons balsamic vinegar
1/4 cup fresh basil, stems removed
1/4 teaspoon salt
1/4 teaspoon ground black pepper
1/2 loaf good quality bakery bread, sliced
olive oil, for spreading on bread
8 ounces fresh mozzarella, cut into slices

Directions:

1. Combine fresh and sun-dried tomatoes, garlic, olive oil, vinegar, basil, salt and pepper in a medium bowl and set aside for 10 minutes.

2. Drizzle slices of bread with olive oil on one side and use a pastry brush to distribute evenly.

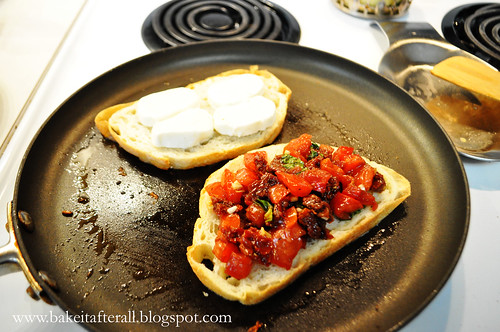
3. Place one slide of bread, oil side down, in a sauté or pancake pan that has been heated to medium. Add slices of mozzarella to the top of this slice.

4. After the cheese slice has cooked for about a minute, add the second slice of bread to the pan, oil side down. Top with bruschetta mixture (use slotted spoon to avoid transferring too much liquid).

DSC_0063_BruschettaGrilledCheese

5. Once the cheese has started to melt and that slice of bread is golden, flip this slice over on top of the bread with the bruschetta on it to make a sandwich.  Continue to grill until cheese is melty bread is golden and toasty.

6. Serve warm!
BruschettaGrilledCheese

Thursday, August 13, 2015

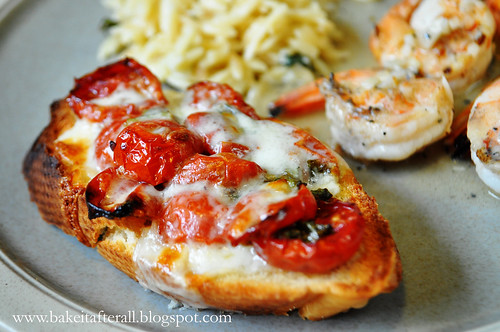
Oven-Dried Tomato Bruschetta


DSC_0072_ed


One of my favorite appetizers is this Double Tomato Bruschetta. It combines fresh and sun-dried tomatoes with the usual bruschetta ingredients and is topped with mozzarella cheese prior to baking. When I had some leftover Oven-Dried Tomatoes in the fridge, I decided to turn them into bruschetta.  The result was amazing!  We served it with Parmesan Basil Orzo and Grilled Shrimp.  Delicious!

Oven-Dried Tomato Bruschetta

Ingredients:
~2 cups Oven-Dried Tomatoes
1 clove minced garlic
1 tablespoon olive oil
2 tablespoons balsamic vinegar
1/4 cup fresh basil, stems removed
Salt and pepper to taste
1 French baguette
shredded mozzarella cheese (depends on the number of bruschetta you make, approx. 2 cups for a full loaf of bread)

 Directions:
Preheat oven on broiler setting.

1. In a large bowl, combine the tomatoes, garlic, olive oil, vinegar, basil, salt, and pepper. Allow the mixture to sit for 10 minutes.

 2. Meanwhile, cut the baguette into 3/4-inch slices. On a jelly roll pan covered in foil, drizzle olive oil and spread evenly with a pastry brush. Place the baguette slices on top, then drizzled them with olive oil and spread evenly with a pastry brush.

3. Broil the bread slices until crispy, turning halfway through (a few minutes on each side- watch closely as things can burn quickly under the broiler).

4. Using a slotted spoon to leave behind excess liquid, divide the tomato mixture evenly over the baguette slices. Top the slices with mozzarella cheese.

5. Broil for 5 minutes, or until the cheese is melted.


Tuesday, October 26, 2010

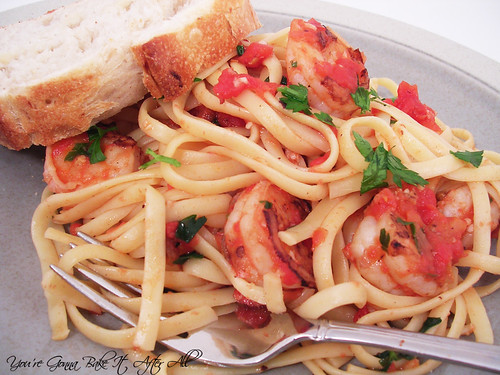
Shrimp Fra Diavolo with Linguine

DSCN7086_labeled

You are witnessing a first on this blog - seafood! You see, I typically stay away from all fish and seafood, but I've been slowly trying to incorporate a few new things into my diet, and shrimp has been one that I can handle if prepared correctly. For me, it's all about the cooking method - if the shrimp is boiled, forget about it. If it's been grilled or seared to get a nice char on the outside, I love it!

My dad loves shrimp, especially shrimp pastas, but my mom hates it and will only cook it for him once in a great while. She was out of town visiting my sister earlier this month, so I thought it would be a good opportunity for me to try my hand at cooking shrimp for the first time. Bob loves shrimp, so I knew I would be making my two men happy even if I didn't like it. I showed Bob 3 shrimp recipes from my America's Test Kitchen cookbook and let him pick; he chose this one.

I purchased "easy peel" shrimp which are deveined but still have the tails. As I was removing the tails from the raw shrimp and breathing in that 'shrimpy' air, I was convinced that I would be making myself a can of soup for dinner. When the shrimp had been cooked in the brandy and were resting on a plate, Bob came over and stole one, offering me a bite. I reluctantly accepted and was amazed to discover that it was delicious! No shrimpy taste, great texture, slightly sweet from the brandy. I then started to think I might actually eat this meal with them . . . and I did . . . and it was fantastic!

Although I had some trouble with the flambe-ing (it was one of my first times using my new range, which is electric and definitely and adjustment), the shrimp ended up perfectly cooked. I suggest, if you have trouble lighting the brandy on fire and it evaporates, just go with it. It's more important to cook the shrimp properly (i.e. not over-cook) than to get the brandy to light, in my opinion.

I highly recommend this recipe, and I hope you look forward to seeing more shrimp recipes here in the future! You'll notice I added a seafood label for this post . . . we'll see how often that gets used :)
Shrimp Fra Diavolo with Linguine

Ingredients:
1 pound medium-large shrimp (preferably 31 to 35 count), peeled and deveined
1 teaspoon crushed red pepper flakes (or more, to taste)
6 tablespoons extra-virgin olive oil
1 1/2 tablespoons table salt
1/4 cup Cognac or brandy
4 tablespoons minced garlic (about 12 medium or 8 large cloves)
1/2 teaspoon granulated sugar
1 28-ounce can diced tomatoes , drained
1 cup medium-dry white wine , such as Sauvignon Blanc
1/4 cup minced fresh parsley leaves
1 pound linguine or spaghetti

Directions:
1. Bring 4 quarts water to rolling boil, covered, in large Dutch oven or stockpot.

2. While water is heating, heat 12-inch heavy-bottomed skillet over high heat for 4 minutes. Meanwhile, toss shrimp, half of red pepper flakes, 2 tablespoons olive oil, and 3/4 teaspoon salt in medium bowl. Add shrimp to skillet and quickly spread in single layer; cook, without stirring, until bottoms of shrimp turn spotty brown, about 30 seconds.

3. Off heat, stir to turn shrimp, and add cognac/brandy; let stand off heat until cognac warms slightly, about 5 seconds, and return pan to high heat. Wave lit match over skillet until cognac ignites; shake skillet until flames subside, transfer shrimp to medium bowl, and set aside. *I had a lot of trouble with this part, mostly because I think my pan was too hot. Never got the brandy to light, but the shrimp were still delicious! If the brandy won't light, keep on eye on the shrimp and cook them as directed, no more.

4. Off heat, cool now-empty skillet 2 minutes; return to burner and reduce heat to low. Add 3 tablespoons olive oil and 3 tablespoons garlic; cook, stirring constantly, until garlic foams and is sticky and straw-colored, 7 to 10 minutes.

5. Add remaining red pepper flakes, 3/4 teaspoon salt, sugar, tomatoes, and wine; increase heat to medium-high, and simmer until thickened and fragrant, about 8 minutes. Stir in reserved shrimp and accumulated juices, remaining 1 tablespoon garlic, and parsley and simmer until shrimp have heated through, about 1 minute longer. Off heat, stir in remaining 1 tablespoon olive oil. *I think I was thrown off by the flambe-ing and forgot to drain my canned tomatoes. This made for a very thin sauce, which I just reduced for longer than 8 minutes. Still turned out great!

6. While sauce simmers, add linguine or spaghetti and remaining 1 tablespoon salt to boiling water, stir to separate pasta, cover, and cook until al dente; reserve 1/3 cup pasta cooking water and drain pasta. Transfer drained pasta back to now-empty Dutch oven or stockpot; add about 1/2 cup sauce (without shrimp) and 2 to 3 tablespoons reserved pasta cooking water; toss to coat. Divide pasta among warm serving bowls, top with a portion of sauce and shrimp, and serve immediately.

Source: America's Test Kitchen TV Show Cookbook

Thursday, July 22, 2010

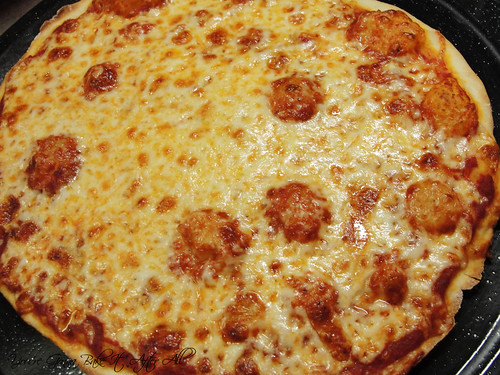
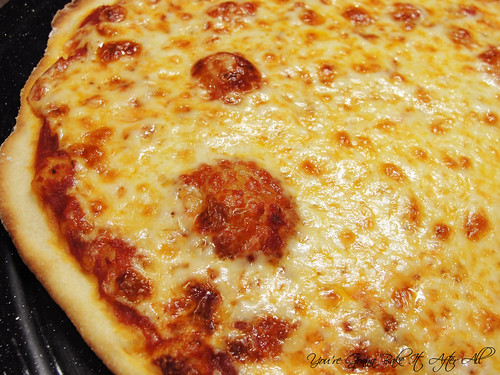
Thin-Crust Pizza

DSC00293_labeled

DSC00291_labeled

Does anyone still read my blog?! I am SO behind on posts it's ridiculous! We are forging full speed ahead in the house hunting process, and it is time-consuming! We had our first "house heart-break" this week - a house we were seriously considering was sold right from under us. We found out the night before we were going to see it and possibly make an offer :-( Very sad, but we've decided not to let time go by wallowing in our sorrow, so we're on to the next. I don't want to rush a purchase by any means, but the thought of being in a home by fall and hosting Thanksgiving is so exciting. I'll keep you posted!

Another reason for my lack of posts is my job. I decided to be brave and take on an area of research VERY foreign to me for my postdoc . . . either I'm brave or stupid because it is SO hard. I feel like I know nothing and I'm starting from scratch. I know that beginning any new job is difficult and there will always be an adjustment period, but I hate that part! I guess I thought that with all my experience I'd be able to pick things up faster - nope!

While I have not been cooking nearly as much as I should, I have managed to make a few things these past few weeks. One of my favorites is this Thin-Crust Pizza. The dough is so simple to put together, and it rises overnight in the fridge so the actual time preparing the pizza the day of is very minimal. The dough rolls out nicely, and the toppings couldn't be easier. We really liked this pizza, and I think it would be great with any of YFT (your favorite toppings).

I will try my hardest not to let this much time go by between posts again! :)

Thin-Crust Pizza

Ingredients:
For the dough:
1 3/4 - 2 cups (8 3/4 to 10 ounces) unbleached all-purpose flour, plus extra for the work surface
1/2 teaspoon instant or rapid-rise yeast
1/2 teaspoon honey
1/2 teaspoon table salt
1/4 cup olive oil
3/4 cup warm water (110 degrees)

For the toppings:
1 cup (or a little more) Quick Tomato Sauce for Pizza (recipe follows)
8 ounces whole milk mozzarella cheese, shredded (about 2 cups; fresh is NOT recommended because of the high moisture content - use shrink-wrapped kind)

Directions:
1. To make the dough, pulse 1 3/4 cups flour, the yeast, honey, and salt in a food processor fitted with a dough blade, if possible. Process until combined, about 5 seconds.

2. With the machine running, pour the oil and then the water through the feed tube and process until the dough forms a ball, about 30 seconds. If after 30 seconds the dough is sticky and clings to the blade, add the remaining 1/4 cup flour 1 tablespoon at a time. Turn the dough out onto a work surface.

3. Divide the dough in half and place each piece in a gallon-sized, heavy-duty zipper-lock bag and seal. Refrigerate overnight or up to 48 hours.

4. One hour before baking the pizza, adjust an oven rack to the lowest position, set a pizza stone on the rack, and heat the oven to 500 degrees.

5. Remove the dough from the plastic bags. Set each piece in the center of a lightly floured large sheet of parchment paper. Cover each with two 18-inch lengths of plastic wrap, overlapping them in the center; let the dough rest for 10 minutes.

6. Setting one piece of dough aside, roll the other into a 14-inch round with an even thickness, using the tackiness of the dough against the parchment to help roll it. If the parchment wrinkles, flip the dough sandwich over and smooth the wrinkles with a metal bench scraper.

7. Peel the plastic wrap off the top of the rolled dough. Spread 1/2 cup of the tomato sauce to the edges of the dough. Sprinkle with 1 cup of the cheese.

8. Slip the dough with the parchment onto a pizza peel or rimless baking sheet. Slide the pizza, parchment and all, on to the hot pizza stone. Bake until a deep golden brown, about 10 minutes. Remove the pizza from the oven with a pizza peel or pull the parchment with the pizza onto a baking sheet. Transfer the pizza to a cutting board, slide the parchment out from under the pizza, and slide it onto a wire rack. Cook 2 minutes until crisp; slide to a cutting board, cut into wedges, and serve.

9. While the first pizza is baking, repeat steps 6 and 7 to roll and top the second pizza; allow the baking stone ot reheat for 15 minutes after baking the first pizza, then repeat step 8 to bake the second pizza.


Quick Tomato Sauce for Pizza

Ingredients:
1 14.5-ounce can crushed tomatoes
1 tablespoon olive oil
1 medium garlic clove, minced or pressed through a garlic press (about 1 teaspoon)
table salt and ground black pepper

Directions:
1. Process the tomatoes in a food processor until smooth, about 5 pulses.

2. Heat the oil and garlic in a medium saucepan over medium heat until the garlic is fragrant, about 30 seconds. Stir in the tomatoes; bring to a simmer and cook, uncovered, until the sauce thickens, about 15 minutes. Season with salt and pepper to taste.

Source: The Complete America's Test Kitchen TV Show Cookbook

Friday, June 25, 2010

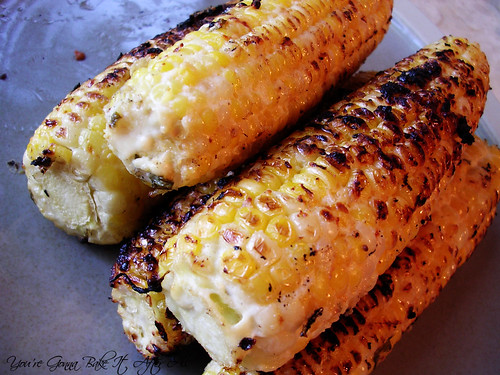
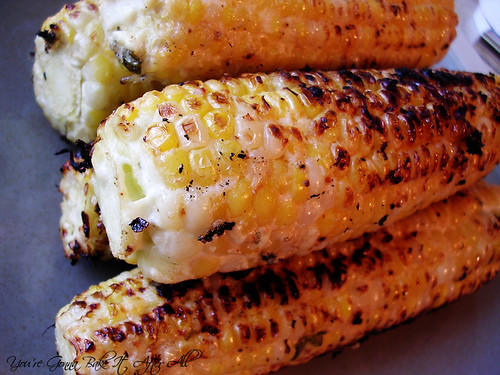
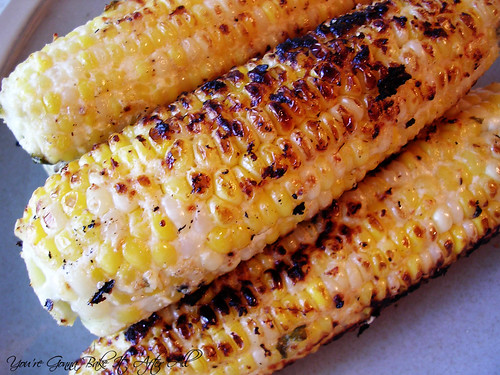
Italian Charcoal-Grilled Corn


DSCN6650_labeled

DSCN6655_labeled

My aunt and uncle recently gave Bob and I a small charcoal grill for a housewarming gift. We have used it several times and love the taste of charcoal-grilled food. My dad bought us a chimney starter, and it's amazing! I highly recommend it to anyone who cooks with charcoal. It seriously makes the entire process go so much faster.

For Father's Day, Bob and I made dinner for my Dad and Mom, and I knew I wanted to use the grill for a portion of the meal. Bob decided to make steak with a special sauce from my Complete America's Test Kitchen TV Show Cookbook, which is actually made on the stovetop and in the oven. I turned to this cookbook for a side dish. Charcoal-grilled corn stood out as something unique, and the Mexican-Style corn looked fantastic. Because we were going for more of an Italian theme (I served antipasti and Double Tomato Bruschetta - my Dad's FAVORITE - as appetizers), I decided to give the corn an Italian twist by using basil instead of cilantro, Parmesan cheese instead of queso fresco, and lemon juice instead of lime. I also decided to grill the corn with the cheese/herb mixture on it, instead of tossing the grilled corn in the mixture.

This corn is simple to whip up and is really delicious. The charcoal gave the corn a nice flavor, as did the coating. The corn is perfectly seasoned with this recipe - no need for extra salt or butter!

Italian Charcoal-Grilled Corn

Ingredients:
4 teaspoons vegetable poil plus extra for the cooking grate
1 1/2 ounces Parmesan cheese, grated (about 1/2 cup)
1/4 cup mayonnaise
3 tablespoons sour cream
3 tablespoons chopped fresh basil leaves
4 teaspoon juice from 1 lemon
1 medium garlic clove, minced or pressed through a garlic press (about 1 tsp)
1/4 teaspoon ground black pepper
1/4 teaspoon table salt
6 large ears corn, husks and silk removed

Directions:
1. Light a lareg chimney started filled with charcoal (about 6 quarts) and allow to burn until the coals are partially covered witha layer of ash, about 20 minutes.

2. Build a modified two-level fire by arranging all the coals over half of the grill, leaving the other half empty. Set the cooking grate in place, cover, and heat the grate until hot, about 5 minutes. Use a grill brush to scrape the cooking grate clean. Dip a wad of paper towels in vegetable oil holding the wad with tongs, oil the cooking grate (we just used Pam for grilling and sprayed it on the grate while it was suspended in the air with tongs - away from the flames!)

3. Meanwhile, combine the cheese, mayonnaise, sour cream, basil, lemon juice, garlic, pepper, and salt in a large bowl. Add corn and toss to coat evenly.

4. Grill the corn until lightly charred on all sides, 7 to 12 minutes total. Serve immediately.

Source: Adapted from the Complete America's Test Kitchen TV Show Cookbook


DSCN6652_labeled

Friday, June 18, 2010

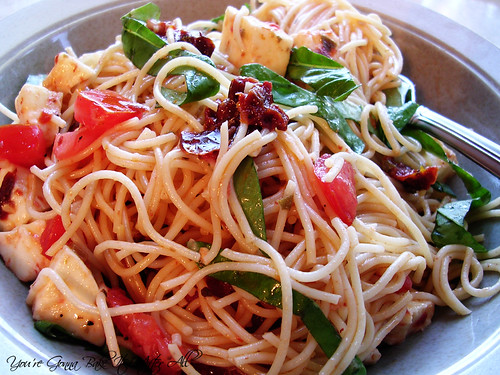
Pasta with Sun-dried Tomatoes

DSCN6596_labeled

This is a great summer pasta! Tomatoes, mozzarella, and basil are some of my favorite flavors, and this dish combines them in perfect balance. Ina has a knack for great pasta dishes, so I knew I would love this one. I served it as our main dish, but it would be a great side as well.

I cut this recipe in half except for the pasta because I wanted to stretch the ingredients; however, I think Ina had it right, so I've posted the original. I also left out the olives because Bob hates them. I had intended to add them to my plate but forgot. This is especially great if you have a ton of fresh basil in your garden like I do - the leaves are gigantic! :)

Pasta with Sun-dried Tomatoes

Ingredients:
1/2 pound fusilli (spirals) pasta, or pasta of choice (I used angel hair)
Kosher salt
Olive oil
1 pound ripe tomatoes, medium-diced
3/4 cup good black olives, such as kalamata, pitted and diced (optional)
1 pound fresh mozzarella, medium-diced
6 sun-dried tomatoes in oil, drained and chopped

For the dressing:
5 sun-dried tomatoes in oil, drained
2 tablespoons red wine vinegar
6 tablespoons good olive oil
1 garlic clove, diced
1 teaspoon capers, drained
2 teaspoons kosher salt
3/4 teaspoon freshly ground black pepper
1 cup freshly grated Parmesan
1 cup packed basil leaves, julienned

Directions:
1. Cook the pasta in a large pot of boiling salted water with a splash of oil to keep it from sticking together. Boil for 12 minutes, or according to the directions on the package. Drain well and allow to cool.

2. Place the pasta in a bowl and add the tomatoes, olives, mozzarella, and chopped sun-dried tomatoes.

3. For the dressing, combine the sun-dried tomatoes, vinegar, olive oil, garlic, capers, salt, and pepper in a food processor until almost smooth.

4. Pour the dressing over the pasta, sprinkle with the Parmesan and basil, and toss well.

Source: Ina Garten's Barefoot Contessa Family Style via Foodnetwork.com

Friday, June 11, 2010

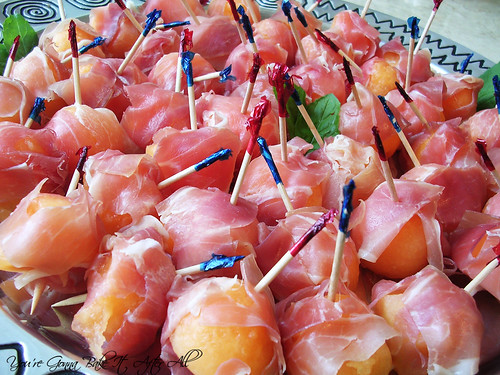
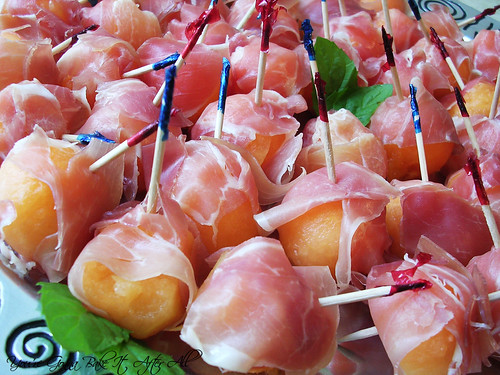
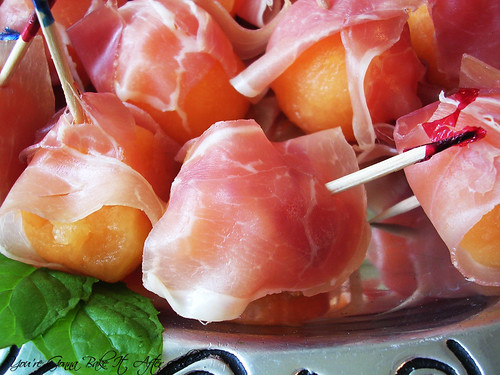
Prosciutto and Melon

DSCN6523_labeled

DSCN6531_labeled

DSCN6534_labeled

I made these little bites for my aunt's pool party on Memorial Day weekend. Bob has loved prosciutto and melon ever since the first time he tried it many years ago. He loves the combination of the sweet melon and the salty prosciutto. Since I won't eat any meat other than poultry, I didn't try them, but Bob was really happy with how they turned out. These are an easy appetizer for outdoor barbecues and picnics!

Prosciutto and Melon

Ingredients:
1 large cantalope
~6 ounces thin-sliced prosciutto
mint or basil leaves, optional

wooden toothpicks

Directions:
1. Cut each slice of prosciutto crosswise into four strips.

2. Trim about 1/2-inch off the top and bottom of the melon to reveal the inner fruit and create a flat surface.

3. Stand the melon on one of the sliced, flat ends. Following the natural round shape of the melon, use a very sharp knife to remove the skin, turning the melon as you make each cut. Make sure your cuts are deep enough to cut beneath the rind and expose the vibrantly colored flesh, but be careful not to cut off too much of the fruit. Do not cut the melon in half.

4. Using a melon baller or small cookie scoop, press firmly into the flesh to create an indentation; twist in an even, clockwise motion to scoop out a round ball. Cutting as closely as possible, continue making balls until all that is left is a large melon "wiffle ball." You will have more melon balls than are needed for the canapes.

5. Take a piece of of sliced prosciutto and wrap it around a melon ball. Secure with a wooden toothpick. Arrange on a platter. Repeat with the remaining melon balls. Garnish platter with mint or basil leaves, if desired.

Source: Adapted from the Viking Range Corporation

Tuesday, May 18, 2010

Guest Post: Mushroom and Mascarpone Ravioli

Since I've been out of the country, packing for our move, and will be losing internet access tonight (yikes!), my sister Lisa and her boyfriend Steve offered to do a guest post for me! They are both fantastic cooks, as I've mentioned before (here, here, and here), and have great palates, so you're in for a treat with this recipe. Hope to see you all soon with a recipe from my NEW kitchen! :)


Since Meghan will be busy packing and moving this week, I thought I would help her out by offering her this recipe to post. Steve and I had some mushrooms in the fridge that we wanted to use, so we decided to make mushroom ravioli. We found a recipe for Mushroom and Mascarpone Ravioli on allrecipes.com and thought it would be perfect since we had a container of the cheese in the fridge as well. It sounded so good and we had never made homemade ravioli before, so I was really excited to try this recipe out!

We had to make a few substitutions and slight changes because we didn’t have a couple of the ingredients, but overall we stayed fairly true to the recipe. One major change, however, was to use homemade pasta instead of the wonton wrappers. Steve got a pasta roller for Christmas, and we’ve wanted to make ravioli with it. The pasta can be topped with any sauce you want, but we topped it with just a little olive oil, chopped cherry tomatoes, black pepper, and Parmesan cheese. The filling of this ravioli is the real star of the recipe, so I would recommend trying to follow the filling recipe as best as you can to get the amazing flavor it adds. Some of the reviewers on allrecipes.com said this was the best ravioli filling they had ever eaten. I would have to agree! It really is that good!

If you use homemade pasta for the ravioli, I recommend making the pasta dough first and then making the filling while the dough is resting. Then you can roll out the pasta and fill it with the mixture. Enjoy!


Homemade Pasta

Ingredients:
In general, use 100 oz (about 1 cup) all-purpose flour for every 1 egg. For this recipe we used:
400 oz (about 1 cup) all-purpose flour
4 eggs
Extra flour for flouring countertop, dough, and pasta machine

Directions:
1. Put flour into a large bowl. In separate bowl, whisk eggs together.

2. Make a large well in the center of the flour and pour the eggs into the well.

3. With a fork, mix the flour into the eggs in the well. Continue mixing until the flour and eggs form a dough.

4. Shape the dough into a ball and knead it by hand on a floured countertop for 5 – 7 minutes. If the dough gets too dry, wet your hands and continue to knead. Alternately, if the dough is too sticky, add a little flour. Note: You want to have a pasta dough that tends on the dry side as it will need to be this way in order to not stick to your pasta maker, roller, etc.

5. Cover the pasta dough with the inverted bowl and let rest for one-half hour.

6. When dough has rested, slice into around 6 equally-sized pieces (to give you a top and bottom to your ravioli). Roll each piece of dough through the floured pasta roller. (Our roller has settings 1-9, and we rolled the dough up to a 6.)

7. Lay pasta sheets separately on a floured surface. (This is very important because we laid ours on top of each other and they stuck together. We had to re-roll the dough.)


Mushroom and Mascarpone Ravioli

4 servings

Ingredients:
1 tablespoon olive oil
2 large shallots, minced (We only had one shallot)
8 ounces fresh mushrooms, chopped (We used white mushrooms and shitakes)
1 tablespoon chopped fresh thyme (We substituted one-quarter tablespoon of finely chopped dried thyme)
2 tablespoons minced garlic
1 tablespoon chopped fresh chives (We substituted 1 green onion)
1 (8 ounce) container mascarpone cheese
salt and pepper to taste
32 (3.5 inch square) wonton wrappers (We made our own pasta instead – See recipe above)
1 egg, beaten
2 tablespoons milk

Directions:
1. Heat the olive oil in a large skillet over medium-high heat. Add the shallots; cook and stir until starting to brown. Reduce the heat to medium and add the mushrooms, thyme, garlic and chives; continue to cook until the liquid from the mushrooms has evaporated, 5 to 10 minutes. Remove from the heat and set aside to cool.

2. In a medium bowl, stir together the mascarpone cheese and mushroom mixture. Season to taste with salt and pepper; set aside.

3. *Lay out 16 wonton wrappers on a clean surface. Whisk together the egg and milk in a small cup. Brush the egg wash onto the wrappers. Place one tablespoon of the cheese mixture onto the center of each square. Place a second wonton wrapper over the top of the filling and press to seal the edges. You may refrigerate the ravioli on a baking tray covered with plastic wrap.

4. Bring a large pot of lightly salted water to a boil. Add the ravioli one at a time and cook until they float to the top, 3 to 4 minutes. (We cooked our ravioli at a simmer for about 10 minutes as recommended by a reviewer to prevent ravioli from opening up.)

5. Top with a little olive oil, pepper, and Parmesan cheese (or any other sauce) and enjoy!

*Step 3, if using homemade pasta: Drop the filling mixture by tablespoons onto one of the pasta sheets, leaving 1-2 inches between each spoonful. Whisk together the egg and milk in a small cup. Brush the egg wash onto the sheet in between and around the filling, wherever dough is exposed. Place another pasta sheet on top of the first, and press the top sheet onto the second, being careful not to press the filling out from the sheets. Press around the filling to form the pockets of filling. Use a biscuit cutter, pasta cutter, or scalloped edge cookie cutter to cut around each pocket of filling, forming the ravioli.

Source: Adapted from Allrecipes.com

Friday, January 15, 2010

Baked Ricotta Cavatelli in a Mascarpone Cheese Sauce

Back in October when Bob's and my families came to Chicago for my thesis seminar, we went to Carmine's restaurant. Carmine's is located on one of the hottest streets in Chicago, Rush Street, very close to what is referred to as "viagra triangle." I don't need to get into that, but basically it's a premium location.

The restaurant has a nice ambiance. The first floor has a bar area that is louder than the table-only upstairs. Our party of 10 was seated upstairs away from the windows, but I can imagine that a table by the windows would give you an incredible view of Rush Street.

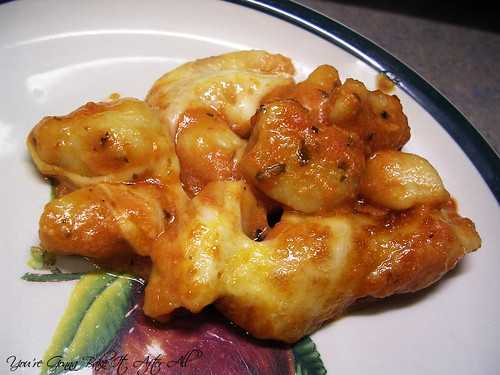
I ordered the most delicious pasta dish called the "Cavatelli al Forno," described as "Homemade ricotta dumplings simmered in marinara with imported cheeses, topped with mozzarella and baked." The cavatelli had a texture almost gnocchi-like; dense but soft. I loved everything about this dish. It was super rich, but unbelievably tasty. Coincidently, I had a recipe for ricotta cavatelli saved on my laptop desktop for quite some time before this visit to Carmine's, and this was just the push I needed to try making it at home. I decided to try to recreate the entire dish, or at least my interpretation of it.

I've never made my own pasta before, and although this is a tad different than most homemade pastas, I really enjoyed the experience! Shaping the cavatelli took quite a bit of time, but it was fun. This was a really delicious dinner! It's very rich, filling, and satisfying. My only problem was that the cavatelli recipe doesn't call for salt. I figured this was not a problem given the ricotta and the fact that the pasta is bathed in cheesy tomato sauce and topped with mozzarella, but I thought that the actual cavatelli themselves were a little bland. A sprinkle of salt into the dough would have made a big difference, so I've added it to the recipe below.

I definitely recommend this dish!


Handmade Italian Ricotta Cavatelli

Ingredients:
3 cups (1 pound) all-purpose flour
1 pound ricotta cheese
2 large eggs, lightly beaten
Salt, if desired (this recipe suggests 1/2 teaspoon)

Directions:
1. Put 2 1/2 cups of the flour into a bowl, make a well in the flour, and add the cheese and eggs (add salt at this point if desired). Gradually work the mixture together, adding more flour if necessary, to make a soft but not sticky dough.

2. On a lightly floured surface, knead the dough until it is smooth. Let the dough rest at room temperature, covered with an inverted bowl or wrapped in plastic, for 30 minutes.

3. Form the dough into a round and cut into quarters. Working with one quarter at a time (cover the remaining dough with an inverted bowl to keep the dough from drying out), on a lightly floured surface, roll the dough into a rope 1/4-inch in diameter (mine was closer to 1/2-inch).

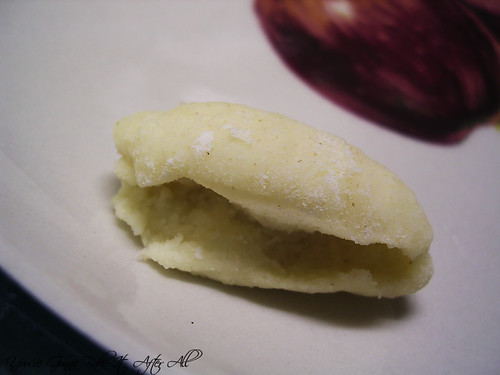
4. With a knife, cut the rope into 1/2-inch pieces (mine were closer to 1-inch). With your index and middle fingers held together, gently press down on each piece, beginning at the top and moving down toward the bottom, dragging your fingers toward you and causing the pasta to roll over on itself.
Will look something like this:


5. Transfer the formed pasta to a lightly floured jelly-roll pan and let dry at room temperature for at least 30 minutes. Meanwhile, bring a saucepan of water to a boil.

6. Salt the water, and add the pasta. Cook until the cavatelli are al dente, 6 to 8 minutes. They are done when they float to the top (mine took closer to 4 minutes or even less!) Drain and proceed with recipe below, add your favorite sauce, or freeze.

Source: Adapted from FoodNetwork

Baked Ricotta Cavatelli in a Mascarpone Cheese Sauce

Ingredients:
1 batch Handmade Italian Ricotta Cavatelli (see above)
~23 ounces of your favorite pasta sauce (I used Prego Traditional)
8-ounces mascarpone cheese
grated Parmesan cheese
8 slices mozzarella cheese, or enough to cover the dish
olive oil for greasing baking dish

Directions:
Preheat oven to 400F.
1. In a large saucepan, melt mascarpone cheese over medium heat. Stir in pasta sauce. Season with a little Parmesan cheese, if desired.

2. Add ricotta cavatelli to sauce and stir to coat. Transfer to a 13 x 9-inch baking dish that has been lightly greased with olive oil. Top with mozzarella slices.

3. Bake until cheese is melted, approximately 20 minutes.

Source: Inspired by the Cavatelli al Forno at Carmine's

Sunday, January 3, 2010

Welcome 2010!

Happy New Year! I have been dreaming about 2010 for a LONG time. I started graduate school in Chicago in 2004 knowing that I would not be done until close to 2010, at which point I planned to move back to St. Louis where my entire family lives. Meanwhile, Bob decided to go back to school, knowing he would graduate in the spring of 2010. We both feel that our lives have sort of been on hold during this time - waiting to have more time (and space) for our hobbies and interests. So, 2010 is a big year for Bob and I:

His graduation and my hooding ceremony:


A big move to St. Louis:

New jobs: (Bob will be working as a PT and I'll be working with fruit flies!)


House shopping:


And one of my favorite parts is that my cousin Chris, who joined the Navy just as I was starting graduate school, will have completed his service and is moving back to St. Louis too.
I am beyond excited to be near my parents and extended family again!

Since it's the beginning of a brand new year, I'd like to reflect back on 2009. I feel like I have grown so much in my cooking since starting this blog last March - it has really pushed me beyond my comfort zone and forced me to try new things. I have now worked with mock marzipan, royal icing, and yeast breads, just to name a few. I am so thankful to each and every one of you who read my blog and who comment on the recipes I post!

To celebrate the occasion, I've decided to go through the things I made in 2009 and choose my favorites. I realized I couldn't pick just one favorite of each category of food, so I decided to just pick my top recipes and list them here. This is hard because I typically only post something if I really like it, so I usually recommend it all. To be featured in this list, the recipe must meet my standards - most importantly, taste amazing - when I read the title of these recipes my mouth actually starts watering - that's how good they are. As a cooking blogger, it's difficult for me to repeat recipes because there are SO MANY fabulous ones out there to try (I have about a million starred in Google reader to prove it!) To be honest, it's really only the super special recipes that I actually make a second time. These are recipes that I plan to make again and again. Sometimes it's not even my choice - it's that Bob requests them over and over. Funnily enough, a lot of my top recipes are from Giada De Laurentiis! Not on purpose, it's just how it turned out.

In no particular order, this is my list of "must makes" from 2009:

Blueberry Ricotta Pancakes - This is a simple recipe from Giada because it uses store bought pancake mix, but it's a semi-homemade approach that tastes incredible. The ricotta cheese really elevates the pancakes to a new level. I am a pancake snob and only like them super light and fluffy, and these pancakes deliver!

Panzanella - I absolutely LOVE this classic tomato and bread salad recipe of Giada's. Perfect for summer when tomatoes are at their peak, but still great the rest of the year.

Chicken Tortilla Soup - I have made many chicken tortilla soups before and never quite found the right one . . . until this one. I love it's simplicity - no corn, no beans, just a super tasty broth with a few veggies, and some chicken of course. The toppings are exceptional. I think each of them adds another flavor dimension. I recently made this for my family and they loved it!

Ribollita - I would have to say this was one of my most surprising recipes (it's Giada's). The whole time making it I was convinced I would hate it - it didn't look appetizing and I really planned on having to eat crackers for dinner. Not only did I eat the soup, I had a second bowl. It was that good. And now here it is on my top recipes lists for 2009. Go figure!

Chicken Gyros - I have made these at least 5 times in the last 5 months! They are SOOO good. The most recent time I made an amazingly delicious flat bread, which I will post soon. It took these from awesome to indescribable :)

Garlic Chicken - Serve with rice, serve with rice noodles, just serve!

Triple T Deluxe Pizza - One of the only recipe on this list that is my own, and it's not even a recipe! The crust is from Cook's Illustrated and truly makes the pizza. The toppings are a great combination, I think. This was the first time I made pizza at home and thought, "hey, this is better than I can get delivered" - no joke.

Rigatoni with Sausage, Pepper, and Onions - Just thinking about this dish makes my mouth water (another Giada recipe). The sweet onions and peppers, the tangy tomato sauce, the comforting pasta, and one of my favorite flavors - marsala wine. This is one of my favorite dishes of all time!

Chicken with Dijon Mascarpone Sauce - Love this recipe! Yet another one from Giada - what can I say, she's knows good Italian food! Get your mascarpone cheese at Trader Joe's if you can - so much cheaper. This recipe is so indulgent. I save it for special occasions and company.

Fresh Salsa - The first time I made this, I was skeptical. How could I like it more than the great salsas you get in Mexican restaurants? I was mistaken - this salsa is right up there with the best of them. It's fantastic served with quesadillas, enchiladas, or tacos, or by itself with tortilla chips. I served this as an appetizer when my cousin and her boyfriend were over one night. He kept saying how good it was, then kept apologizing for repeating himself - it was cute :)

Spinach and Chicken Quesadillas - My favorite quesadilla recipe so far! In my opinion it's the fajita seasoning that makes it special (I credit Annie for that addition!) It was through this recipe that I realized my love of Monterey Jack cheese - it's perfect for Mexican food!

Tres Leches Coconut Cupcakes with Dulce de Leche Buttercream - Wow. Seriously that word sums it up. These were incredible. I still have people at work say to me "you know, you can make those anytime, you don't have to dress them up as Easter Chicks." I take a LOT of desserts into work, and for this one to stand out as much as it did really shows it's a great recipe. I can't wait to make these for my dad because I know he will LOVE them!

Pumpkin-Chocolate Tart - Not only is this one of my favorite desserts in terms of decoration, but this tart is fantastic. The combination of the sour cream and pumpkin makes a super tasty filling. The gingerbread-tasting crust is spicy and delicious, and it's coated in solid chocolate! I plan to make this again next fall for sure.

Chocolate and Toasted Coconut Covered Homemade Marshmallows - Homemade marshmallows are fabulous on their own, but as soon as I dipped them in chocolate and rolled them in toasted coconut, I had a hit! These are just like candy. My only mistake was not making more of them! Next year, I will be prepared with plenty of chocolate and coconut on hand to make a bunch of these.

Triple Chocolate Biscotti - I'm certainly not a biscotti expert, since these were the first I've ever tasted, but what a great little cookie! I loved the combination of white and bittersweet chocolates. These are great on their own or dipped in your favorite coffee, tea, or even milk.

Chicken Marbella - This is such a famous recipe and probably needs no introduction, but if you've never tried it, you must. Great for a crowd or a small group with yummy leftovers, the flavors in this dish are truly wonderful.

Double Chocolate Layer Cake - Decadent and rich - this dessert is perfect for chocolate lovers like yours truly. I'm not surprised it's the most accessed recipe on Epicurious.com!

Spicy Roasted Chicken - Pam has several great looking chicken recipes - all of which I'd love to try. This one is so delicious. I love the spices and the chicken turned out very juicy.

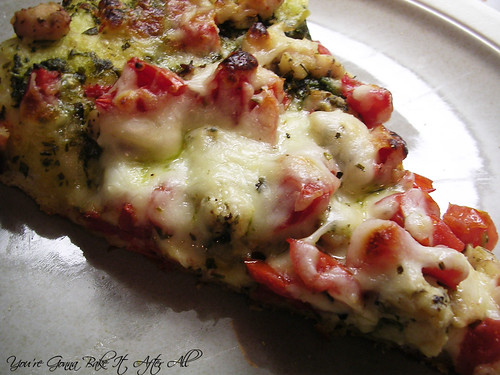
Chicken Pesto Pizza - I loved this pizza! It's a blend of sweet peppers, zucchini, and chicken, flavored with Italian seasoning. The ingredients magically combine to make one fantastic dish.

Bailey's Irish Cream Cheesecake - Of all the cheesecakes I've made, this is my favorite. Such a creamy filling covered in ganache - yum!

And just for fun, these are the top posts that have received the most hits according to Google Analytics:

1. Bacon Stuffed Cherry Tomato Appetizers (Thanks for the recipe Kat!!!)

Wednesday, December 16, 2009

12 Days of Christmas: Day 7

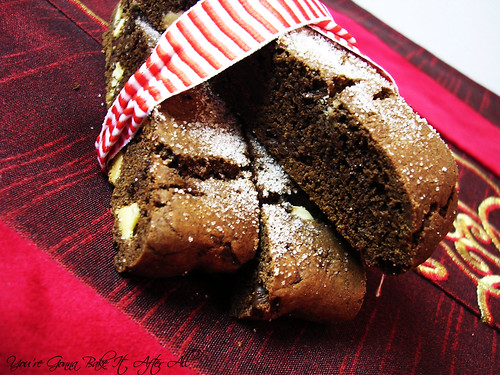
Biscotti is one of those things I've never really had because it usually contains nuts. In fact, the original recipe for this biscotti calls for nuts, but Chelle of Brown Eyed Baker substituted white chocolate - which I happen to think is a fantastic idea! I've been wanting to make these ever since I first saw them on her blog, so I thought they would go great in my holiday gift packages!

I had some trouble with the recipe, as noted below. The dough was so sticky; I thought I had done something wrong. Thankfully, just putting a little cooking spray on my hands made a huge difference, and I say thankfully because these biscotti are AMAZING! They are actually one of my favorite recipes I've made recently (and I've been making a LOT of things!) I love the combination of the bittersweet and white chocolate, and the slight espresso taste - which may not even be noticeable if you don't know it's in there but definitely elevates the chocolate flavor. The only thing I might change next time is to make them larger - they were smaller than the biscotti I've seen in coffee shops and bakeries.

This recipe is really very simple and I'm so glad it turned out so well because there are many more biscotti varieties I would love to try next!


Triple Chocolate Biscotti

Ingredients:
2 cups all-purpose flour
1/2 cup unsweetened cocoa powder
2 Tablespoons instant espresso powder (I used this kind, found in Italian specialty food store)
3/4 teaspoon baking soda
1/2 teaspoon baking powder
1 teaspoon salt
3/4 stick (6 Tablespoons) unsalted butter, at room temperature
1 cup sugar
2 large eggs, lightly beaten
1 teaspoon pure vanilla extract
1 cup white chocolate chips
4 ounces bittersweet chocolate, coarsely chopped
sugar, for dusting

Directions:
1. Center a rack in the oven and preheat to 350F.

2. Line a baking sheet with parchment or a silicone mat.

3. Sift together the flour, cocoa, espresso powder, baking soda, baking powder, and salt.

4. Working with a stand mixer, preferable fitted with a paddle attachment, or with a hand mixer in a large bowl, beat the butter and sugar together on medium speed until pale, about 2 minutes; the mixture may be crumbly.

5. Scrape down the sides of the bowl, add the eggs and vanilla and beat for another 2 minutes; don't worry if the mixture looks curdled.

6. Reduce the mixer speed to low and mix in the dry ingredients in 3 additions, mixing only until a dough forms. Scrape down the sides of the bowl.

7. Mix in the chocolates.

8. Turn the dough onto a work surface. At this point my dough was super sticky - I didn't see how I was going to possibly proceed with the recipe. I sprayed my hands with Crisco spray with flour, and suddenly the dough was very workable!

9. Knead in any dry ingredients that may have escaped mixing. Divide the dough in half. Rather than rolling out the dough in a 12-inch-long log and flattening to 2 inches across and 1/2 to 1 inch high as the original recipe suggests, I put the dough on the silpat and shaped it into 12-inches long, 2-3 inches wide and 1 inch tall. If you feel daring and prefer larger biscotti, try shaping them shorter and wider.

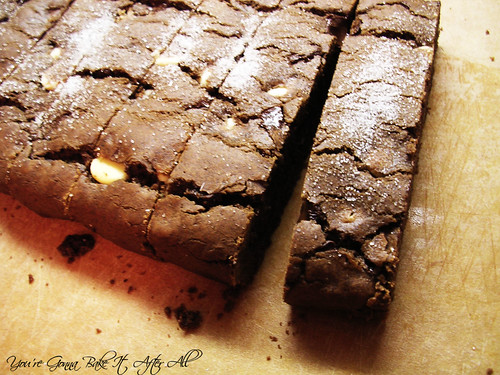
10. Sprinkle each log with a little sugar, and bake about 25 minutes, or until the logs are just slightly firm. The logs will spread and crack - and that's just fine. Remove the baking sheet from the oven, put it on a cooling rack, and allow the logs to cool for about 20 minutes, leaving oven on.

11. Working with one log at a time, using a long serrated knife, cut each log into slices between 1/2- and 3/4-inch thick. Stand the slices up on the baking sheet and bake the cookies again, this time for just 10 minutes.
12. Transfer the biscotti to a rack to cool.

Source: Adapted from Brown Eyed Baker, originally from Dorie Greenspan's Baking: From My Home to Yours

Wednesday, October 21, 2009

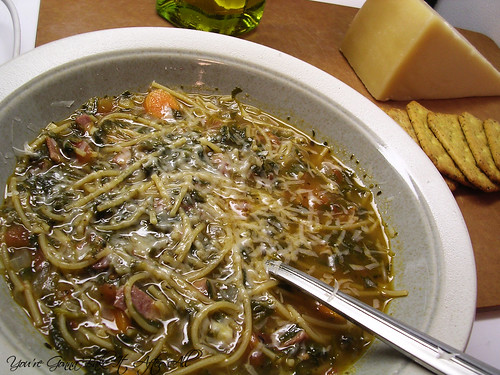
Ribollita

This soup recipe comes from Everyday Pasta by Giada De Laurentiis. The picture in the book looked great, and we love soup, but as I was making it I really didn't think I'd like it. It looked like there was way too much spinach and I didn't see how the flavors were going to blend together. As it turns out, I LOVED this soup!!! I really should have trusted in Giada because I have loved every one of her recipes that I've made. I used turkey bacon instead of pancetta and omitted the cannellini beans. Since I left out the beans, I added a bit more broken spaghetti to bulk it up. I really can't tell you how great this soup is. I will definitely be making it again!!!
Ribollita

Ingredients:
1/4 cup extra-virgin olive oil
1 onion, chopped
1 carrot, peeled and chopped
4 ounces pancetta, chopped (or turkey bacon)
2 garlic cloves, minced
1/2 teaspoon salt
1/2 teaspoon freshly ground black pepper
1 Tablespoon tomato paste
1 14.5-ounce can diced tomatoes, with juice (I used petite cut)
1 1o-ounce package frozen spinach, thawed and squeezed dry
1 15-ounce can cannellini beans, drained and rinsed (I omitted)
2 teaspoons herbes de Provence
6 cups low-sodium chicken broth
1 bay leaf
3-inch piece of Parmesan rind
1 cup spaghetti broken into 1-inch pieces (extra if omitting beans; I used whole wheat thin spaghetti)
Grated Parmesan, for serving

Directions:
1. Heat the oil in a large, heavy pot over medium-heat. Add the onion, carrot, pancetta, garlic, salt, and pepper. Cook until the onion is golden brown and the pancetta is crisp, stirring occasionally, about 7 minutes.

2. Add the tomato paste and stir until dissolved. Add the tomatoes and stir, scraping the bottom of the pan with a wooden spoon to release all of the brown bits.

3. Add the spinach, beans, herbes de Provence, broth, bay leaf, and the Parmesan rind. Bring the soup to a boil, then add the spaghetti, reduce the heat, and simmer for 10 minutes, or until the pasta is al dente.

4. Discard the Parmesan rind and bay leaf, and ladle the soup into bowls. Sprinkle with Parmesan cheese and serve.

Source: Adapted from Everyday Pasta

Monday, October 19, 2009

Skillet Lasagna

This is another recipe from "The Best 30 Minute Recipe" cookbook (from the kitchens of Cook's Illustrated). I have yet to make something from this book that we don't love, and this is no exception!

Lasagna is one of my favorite meals, but it takes a long time to assemble the components, and it makes a TON of food - so much that we end up throwing a lot out, which really bothers me. It's kind of a catch 22, because I feel that it's too much work to just make enough for 2-4 servings, but we can't possibly eat the 12 that a full pan makes. I would love if I could make multiple casseroles and freeze the others, but our tiny freezer is already packed to the brim (our apartment building supplies the fridge/freezer and it's not even a full-sized one!) Maybe someday when I have a big deep freeze . . . Ok, back to reality, so casseroles aren't always the best option for the two of us. This skillet lasagna is the perfect solution for now because it only makes 4 servings. Plus it's a one pot meal! I used ground turkey instead of meatloaf mix and reduced the amount of Ricotta cheese. We really liked this dinner and will make it again!

Skillet Lasagna

Ingredients:
1 pound of ground turkey (recipe calls for meatloaf mix, so you may use that if desired)
2 cloves garlic, grated or minced
1/2 teaspoon salt
1/4 teaspoon red pepper flakes
6 ounces curly-edged lasagna noodles (8 sheets), broken into 2-inch pieces
1 26-ounce jar of your favorite pasta sauce
Salt and pepper to taste
2 cups water
1/2 cup shredded mozzarella cheese
1/4 cup grated Parmesan cheese
3/4 cup whole-milk ricotta cheese (or less as desired)
1/4 cup shredded basil

Directions:
1. Brown meat in 12-inch nonstick skillet over high heat, breaking it into pieces with a wooden spoon, 3 to 5 minutes. Meanwhile, chop garlic and measure out the pasta. Drain meat on paper towels and return it to skillet.

2. Stir in the garlic, pepper flakes, and 1/2 teaspoon salt and cook over medium-high heat until fragrant, about 30 seconds.

3. Sprinkle broken noodles in skillet, then pour in tomato sauce and water over top. Cover and cook, stirring often and adjusting heat as needed to maintain vigorous simmer, until noodles are tender, about 20 minutes. (Mine took a little longer to soften so I had to add a bit more water to maintain the sauciness of the dish).

4. Off heat, stir in half of mozzarella and half of Parmesan. Season with salt and pepper. Dot heaping tablespoons of ricotta over noodles, then sprinkle with remaining mozzarella and Parmesan. Cover and let stand off heat until cheeses melt, 3 to 5 minutes. Sprinkle with basil before serving.

Source: Adapted from The Best 30 Minute Recipe cookbook

Tuesday, September 22, 2009

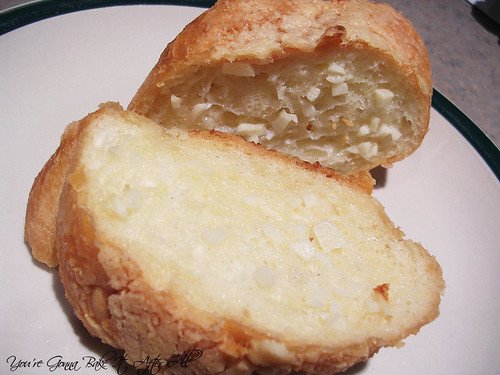
Garlic Bread

First of all, thank you so much for all of your congratulations on the previous post! It seems surreal still, and I'm slowly starting to relax; helped along by a weekend of fun with friends, a trip to Top Chef Masters champ Rick Bayless's new Mexican street food joint XOCO (Rick himself was there!), and apple picking! :)

Now to the recipe. My mom's Garlic Bread is truly a recipe for all seasons. Over Labor Day weekend, she made it with barbecued chicken (my dad's handiwork), oven-roasted Parmesan potatoes, and a salad - seriously the BEST meal I've had in a long time. When the weather is cool, nothing goes better with lasagne or a big plate of spaghetti and (turkey) meatballs than this bread, in my opinion. My mom created this recipe a long time ago, probably before I was born, and I've eaten it ever since I could eat! My dentist (who was also a family friend) always jokes that when he and his wife came over for dinner, he was shocked to see a 2-year old (me) gobble down this garlic bread. As a young child, apparently I said "the crust is good but the filling is best." My mom and aunt still repeat this to me each time we have it. Not to disagree with the me of the past, but I now like the "filling" and crust equally because both are amazing!

This recipe may seem very simple, but my mom says the key is to cook it long enough and at a high heat - that way the crust gets nice and crisp. Although I LOVE this bread, it is definitely reserved for special occasions because of the amount of butter it requires! It does sound like a lot of butter, but I'm sure it's no more than a good Paula or Ina recipe :)

Garlic Bread

Ingredients:
1 loaf of French or Italian bread (about the size of a baguette)
1 stick of butter, softened
2-3 cloves of garlic, chopped
1/8 teaspoon garlic salt
Parmesan cheese, grated

Directions:
Preheat oven to 400F.
1. Mix butter, garlic, and garlic salt together.

2. Slice bread completely through into ~2-inch thick slices (see picture). Spread one side of each slice with about 2 teaspoons of butter mixture. Reassemble the bread on a long sheet of aluminum foil.

3. Spread a very thin layer of butter on top of the loaf. Note: You may have leftover butter mixture. You may use the rest or save it for another recipe. The extra butter on top will just melt and run down to make an extra buttery bottom crust - yum!

4. Sprinkle with lots of Parmesan cheese. Fold foil over to seal tightly. Bake for 20 minutes to achieve a nice, crispy crust.

Source: My mom!

Friday, September 18, 2009

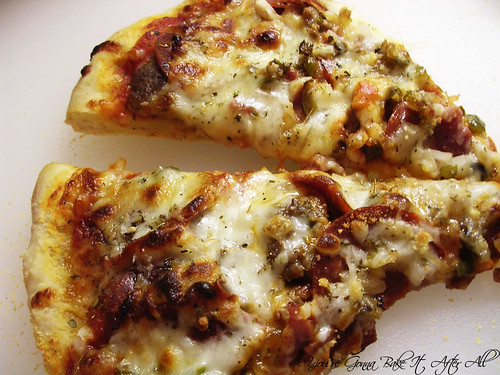
Triple T Deluxe Pizza

Happy Friday!!! I am super excited today because I passed my final thesis defense exam yesterday, so aside from turning in some paper work and uploading my 245 page thesis to the graduate school website, I have finally earned my PhD! It feels good to say that after 5 years of hard work :)

I know I've posted several pizza recipes, but I just had to share this pizza because it was SOOOO good. Bob and I were really surprised how much we liked it - just as good as pizza we could order or get at a restaurant! I've called this pizza "Triple T" because it's made with Turkey pepperoni, Turkey bacon, and Turkey sausage. To make it a deluxe pizza, I added some green pepper and onion, which really put it over the top. You could always throw on some mushrooms or olives, if that's your thing. We absolutely love this crust recipe. I haven't found a pizza sauce recipe I like yet, so I tried jarred Ragu Pizza sauce and was surprised by how good it is, especially since I'm not a big fan of their spaghetti sauce. In the past I have bought canned pizza sauce but am never happy with the taste. As far as the turkey products go, I am pretty particular with which brands I buy, simply based on trial and error taste-wise.

I recommend Hormel turkey pepperoni:

Louis Rich ground turkey sausage (in a tube like regular pork sausage):
and Oscar Mayer turkey bacon:
I have used Jennie-O ground turkey sausage before (both hot and sweet), and it's fine, but for pizza I really prefer the Louis Rich. I completely urge you to try Oscar Mayer turkey bacon if you 1) have never tried turkey bacon, or 2) have tried other brands and don't like them. I really thought turkey bacon was pretty gross before finding Oscar Mayer. By the way, I am not a spokesperson for any of these brands, haha :)

Growing up, Friday nights were always pizza night. Anyone else have a Friday night dinner tradition???
Meghan's Triple T Deluxe Pizza

Ingredients:
1/2 batch pizza dough (enough for a large pizza)
~8 ounces of your favorite homemade or store-bought pizza sauce (Recommended: Ragu)
1/3 package ground turkey sausage, cooked and crumbled (~4 ounces - Recommended: Louis Rich)
Turkey pepperoni (Recommended: Hormel)
4 strips of turkey bacon, cooked but not too crisp, torn into small pieces (Recommended: Oscar Mayer)
2 teaspoons olive oil
1/2 green pepper, finely diced
1/2 yellow onion, finely diced (sweet or regular)
Mozzarella cheese, shredded
Parmesan cheese, grated
Pizza/Italian seasoning, to taste
Cornmeal, ~1/4 to 1/2 cup

Directions:
1. Heat olive oil in a saucepan over medium/high heat. Add the green pepper and saute for 3 minutes, then and half of the onion (equivalent of 1/4 onion) and saute until softened, about 3-5 minutes.

2. Preheat oven (with pizza stone inside) to 500F for at least 30 minutes.

3. Generously apply cornmeal to a large surface (like a cutting board) and roll out dough into a large circle (~14 inches in diameter). Remember that using ample cornmeal is essential to eventually sliding the pizza onto the pizza stone.

4. Top pizza as desired; I did the following, in this order: pepperoni, bacon, sausage, the grilled onions and peppers, the raw onions, the mozzarella cheese, grated Parmesan cheese, then a sprinkle of Pizza/Italian seasoning.

5. Remove hot pizza stone from oven, apply extra cornmeal if needed, and slip pizza onto stone. Bake for 8-12 minutes, or until cheese is melted as desired.

6. Remove pizza from oven, slide onto a large cutting board and slice. Enjoy!

Monday, August 31, 2009

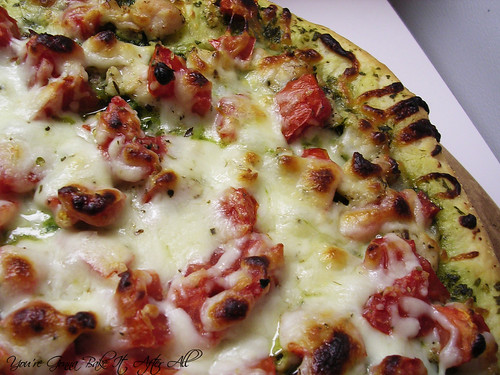
Chicken Pistou Pizza

Earlier this summer, I had a moment of weakness - well really my husband had a moment of weakness. He said that I had been pining over a pizza/baking stone and an immersion blender for so long that I should just get them. (I had thought I could just wait until my birthday in October but I don't think he wanted to listen to me talk about them for the next 2 months!) So, we grabbed two of our trusty blue coupons from the car trunk (you know the store I'm talking about!) and made these purchases. A few days later when I mentioned it to my mom, she told me that she never uses her pizza stone or immersion blender and I could just have hers! Thankfully, mine were still in the store bag with the receipt safely tucked inside! I actually wrote this post before the Roasted Tomato Soup post to announce the immersion blender, but I forgot and posted the soup first, so I spilled the beans - oh well! :)

One of the main reasons I wanted a pizza stone is because this wonderful pizza crust is supposed to be baked on one. While I thought it was completely delicious baked on a regular cookie sheet, I couldn't help but wonder how different it would be if the recipe was followed. Plus, I had the perfect pizza recipe to try. I've made a Chicken Pesto Pizza before, but then I saw this on Annie's Eats and loved her combination of chicken with tomatoes. I had some homegrown tomatoes from my parents' neighbor that were just begging to be used.

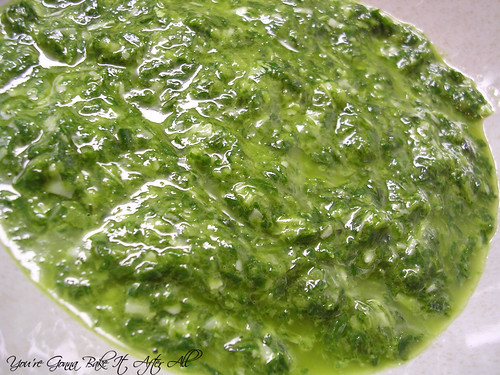
I decided to incorporate the method from this pizza for making the chicken. Because of my nut allergy, I had to make a pinenut-less pesto, and after some googling, I discovered the French Pistou - a combination of olive oil, basil, and garlic (and never pinenuts); hence the Chicken Pistou Pizza was born!

By the way, if you were wondering if the pizza stone improved the crust, the answer is YES! :)


Chicken Pistou Pizza

Ingredients:
1/2 batch pizza crust, or enough crust for 1 large pizza
1 large chicken breast, diced in small pieces
1 Tablespoon olive oil, plus more for cooking chicken
1 Tablespoon Italian or Pizza seasoning, plus extra for sprinkling
2-3 small, vine-ripened tomatoes, juice and seeds removed, diced
Sun-dried tomatoes, optional
Pesto or pistou (see below)
Mozzarella cheese
Parmesan cheese, if desired

Directions:
1. Marinate the chicken: Place diced chicken in a resealable plastic bag filled with 1 Tablespoon Italian seasoning and 1 Tablespoon olive oil. Refrigerate for 30 minutes to 1 hour.

2. Place pizza stone in the oven and preheat to 500F.

3. Cook the chicken in a pan with some olive oil, if necessary, until fully cooked.

4. Coat a surface liberally* with corn meal. Roll dough out into a pizza. Top with Pistou, cooked chicken, fresh and sun-dried tomatoes (if using), and mozzarella cheese. Sprinkle with a dash of Italian or Pizza Seasoning and top with Parmesan cheese, if desired.

5. Remove the baking stone from the oven and carefully transfer the pizza onto it. Place in oven and bake for 12-15 minutes, or until crust is golden and cheese is melted.

*This is very important. I underscored the need for corn meal and suffered the consequences. It took 3 of us to transfer the pizza from to the baking stone! I then did some research about pizza making and read that corn meal is the 'ball bearings of pizza making' - great analogy! My advice - use a LOT!

Source: Adapted from Annie's Eats

French Pistou

Ingredients:
4 cloves of garlic (I think I used 2 to make sure it wasn't too garlicky)
1/2 teaspoon salt *Mine was pretty salty, maybe start out with less!
~1 cup slightly packed basil leaves
olive oil (~4 Tablespoons, give or take)
grated Parmesan cheese to taste, optional

Directions:
1. Crush the garlic using a mortar and pestle. Add the salt and use the pestle to make a garlic paste.

2. Add torn basil leaves and olive oil and continue using the pestle to make the pistou.

3. Transfer mixture to a mini food processor to achieve consistency, if desired.

Friday, June 5, 2009

Double Tomato Bruschetta

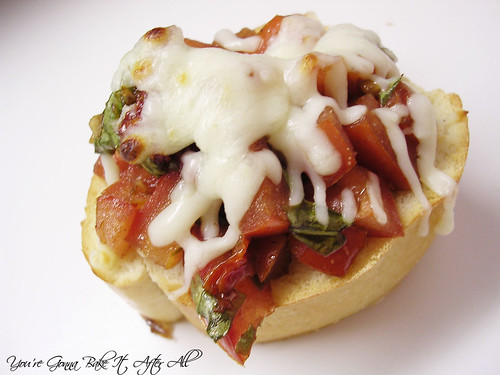
Like I've said before, my sister's boyfriend Steve is a great cook. Once when they were visiting Bob and I in Chicago, he made these Double Tomato Bruschetta appetizers. They are a-mazing! No wonder they have a 5/5 rating on Allrecipes.com! My sister and I made them for my mom and aunt on Mother's Day 2008, and they raved about them, so I made them when my mom and sister recently visited. I really don't think you can go wrong with tomatoes and fresh basil, but the addition of sun-dried tomatoes elevates this bruschetta to a new level of yumminess. This is a must-try recipe!
Double Tomato Bruschetta

Ingredients:
6 Roma (plum) tomatoes, chopped
1/2 cup sun-dried tomatoes, packed in oil
3 cloves minced garlic
1/4 cup olive oil
2 Tablespoons balsamic vinegar
1/4 cup fresh basil, stems removed
1/4 teaspoon salt
1/4 teaspoon ground black pepper
1 French baguette
2 cups shredded mozzarella cheese

Directions:
1. Preheat oven on broiler setting. In a large bowl, combine the roma tomatoes, sun-dried tomatoes, garlic, olive oil, vinegar basil, salt, and pepper. Allow the mixture to sit for 10 minutes.

2. Cut the baguette into 3/4-inch slices. On a baking sheet, arrange the baguette slices in a single layer. Broil for 2 minutes, until slightly brown. UPDATE: On Christmas Eve, I drizzled a jelly roll pan with olive oil, then placed the baguette slices on top, then drizzled them with olive oil and broiled until they were crispy. Then I used half a garlic clove and rubbed over the top of each slice. I let them cool on a cooling rack before topping with the tomato mixture. These were even better than before!!!

3. Divide the tomato mixture evenly over the baguette slices. Top the slices with mozzarella cheese. Broil for 5 minutes, or until the cheese is melted.

Serves 12

Wednesday, May 20, 2009

Panzanella

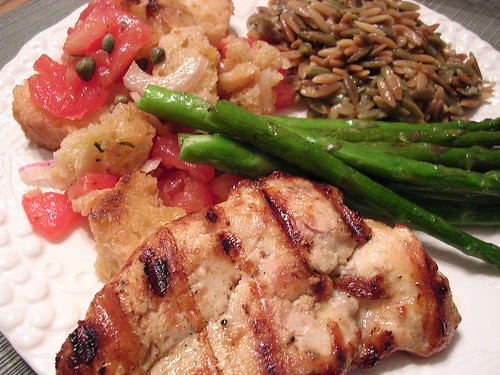
My boss served a wonderful Panzanella at a party several years ago, and I've always wanted to make it. She roughly followed a recipe she saw Giada De Laurentiis make, so I did the same. Giada's recipes are always great! I made this for a family dinner back in March, and it was a huge hit! Everyone LOVED it! We had it with grilled chicken, basil orzo, and grilled asparagus. It was such a delicious dinner and a great way to welcome spring!

Giada's recipe calls for kalamata olives and roasted red bell peppers, both of which I love, but I had to omit due to other family members' pickiness :) I also added some red onion because I thought it sounded good. See the original recipe linked below if the olives and peppers appeal to you!


Panzanella

Ingredients:
1/4 cup drained capers
2 Tablespoons plus 1/4 cup red wine vinegar
12 ounces dense crusty bread
2 1/4 pounds ripe tomatoes, scored on the bottom
2 Tablespoons plus 2/3 cup extra-virgin olive oil
1 garlic clove, grated
Salt and freshly ground black pepper
1/2 cup thinly sliced fresh basil leaves (or basil puree to taste)
1/4 of a red onion, thinly sliced
Fresh basil sprigs, for garnish

Directions:
1. Soak the capers in 2 tablespoons of vinegar in a small bowl for 10 minutes. Drain.

2. Cut the bottom crust off of the bread if it's tough. Cut bread into 2-inch slices, evenly brush the slices with 2 tablespoons olive oil, distributing the oil among the slices and on both sides. Grill both sides of the bread in a grill pan until golden. Transfer bread to plate to cool briefly. Cut bread into 1-inch cubes and set aside.

3. Submerge the tomatoes into a large saucepan of boiling water for 10 seconds. Using a slotted spoon, transfer the tomatoes to a bowl of ice water to cool slightly. Using a small sharp paring knife, peel off the tomato skins. If you have difficulty, place the tomato back in the boiling water briefly, then into ice water, and try again. Cut the tomatoes in half and scoop out the seeds. Cut the tomatoes into 1-inch cubes and set aside.

4. In a large bowl, whisk 2/3 cup of oil, 1/4 cup of vinegar, and garlic. Season with salt and pepper, to taste. Add the bread cubes, tomatoes, basil, capers, and red onion; toss to combine.

5. Cover the salad and let stand at room temperature for flavors to blend, at least 1 hour if possible.

Source: Adapted from a recipe by Giada De Laurentiis

Don't get me wrong, I'm a Giada fan - just thought this was funny!


In case you're looking for an easy dinner idea, we thought the combination of the Panzanella, orzo, chicken, and asparagus was great. For super easy grilled chicken, marinate chicken breasts in fat-free or light Italian dressing for 8 hours in the fridge, then grill. (An article in Cook's Illustrated that I read recently does not recommend marinating in Italian dressing, but we like it!) You can brush on the extra marinade after boiling it for several minutes so it's safe to eat. One of my favorite ways to make asparagus is to lightly coat a grill pan in olive oil, place the cleaned spears in the pan, season with salt and pepper, then grill over medium-high heat for 5-10 minutes, or until asparagus has reached desired doneness.

  © Blogger template Brownium by Ourblogtemplates.com 2009

Back to TOP