
This is not just a recipe but rather a concept developed by my mom several years ago. She has been making these sugar cookies for as long as I can remember - she got the recipe from a coworker (her grandmother's recipe) many, many years ago. The recipe was given to us as "Granny's Sugar Cookies," but I call them "[Not My] Granny's Sugar Cookies" because I like to be accurate :)
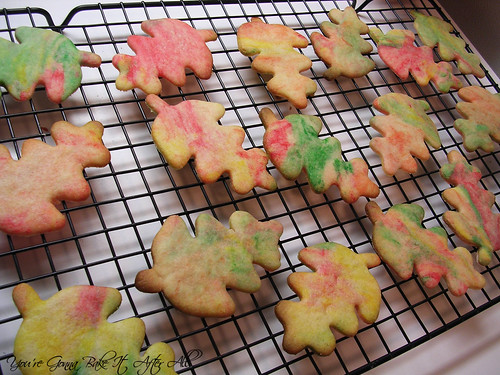
We usually have these cookies at Christmas time and use reindeer, bell, and Christmas tree shapes, but one year she decided to make them in the fall with a leaf cookie cutter, and she came up with this way to dye the dough that I thought was really cool. Personally, I am not the biggest fan of crispy sugar cookies, and these cookies tend to be crispy (as opposed to the softer sugar cookies here), but a lot of people love them. They are very basic - no almond extract or lemon zest here! I realize that most people have their own favorite sugar cookie recipe, so I'm posting this more as an idea that can be adapted to any sugar cookie dough (even store bought!) If you love trying new recipes, go ahead and give this one a try! They are my mom's favorite sugar cookies!
[Not My] Granny's Sugar Cookies
Ingredients:
1/2 cup (1 stick) butter
1 cup sugar
1 egg
2 cups flour
2 teaspoons baking powder
1/2 teaspoon salt
1/2 teaspoon vanilla extract
Directions:
1. Sift flour, baking powder, and salt together in a medium bowl and set aside.
2. Cream together butter and sugar. Blend in 1 egg. Slowly add sifted dry ingredients, then blend in vanilla.
3. Chill dough in refrigerator for around 15-30 minutes or until it reaches a rollable consistency (you may also store it in the refrigerator for a day and bake later; simply let dough warm a bit on the counter if it has been chilled for a long time). Meanwhile preheat oven to 400F.
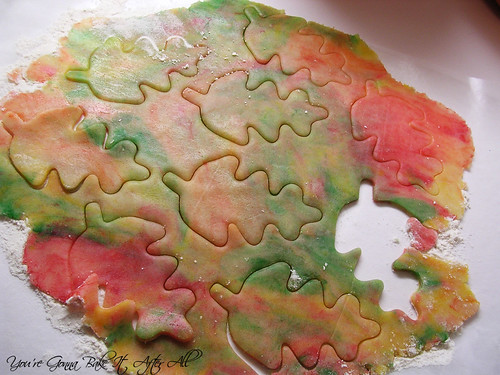
4. Divide dough into 4 equal parts. Add food coloring in drops on top of dough and use a large spoon to disperse food coloring throughout dough in a swirled pattern (see below). I used 4-6 drops of traditional food color (not the food coloring gel) to each ball of dough. For the orange, I used 3 drops of yellow and 3 of red.

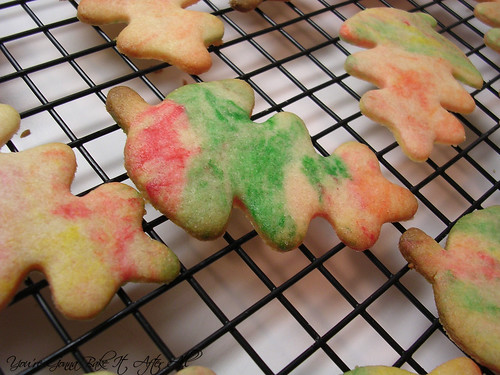
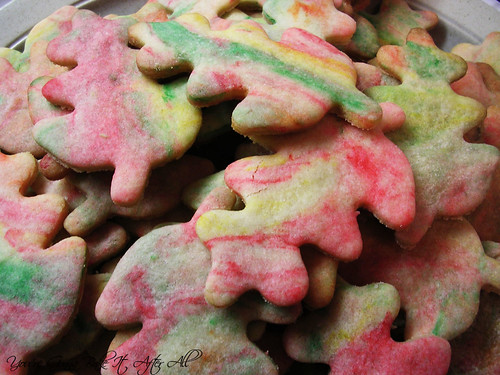
5. Take a small piece of dough from each color and mix them together just a little bit. Roll the dough and cut out the cookies to 1/4 inch thick or preferred thickness. This will produce the streaky color pattern (see below). You can add the scraps to fresh dough and this will combine the colors even more. Certain areas may look brown from the combination of colors, but this will make the cookies more realistic looking.
6. Place the cut cookies on a greased baking sheet or a baking sheet lined with parchment paper or a SILPAT. Bake for 6-10 minutes or until just starting to brown on the edges. The time will depend on the thickness of the cookie and how crisp or soft you like them.
Source: Friend of my mom's (Susan M.)


Heh, those are wicked cool looking. I'm not a big crispy sugar cookie fan either, but I won't turn up my nose to them.
ReplyDeleteoh wow awesome colorful cookies
ReplyDeleteThose cookies look gorgeous and so seasonal!! I'm a fan of softer sugar cookies too, but I don't think I could resist one of these!
ReplyDeleteGreat idea!
ReplyDeleteThis is such a great idea. Kids would love to help out with these sugar cookies. Hmmm...why didn't I think of that!
ReplyDeleteYour cookies are stunning! Thanks for sharing:)
ReplyDeleteWhat a cute idea, they look great!! I'm actually a huge sugar cookie fan, they have always been my favorite!
ReplyDeleteSo unique!! Sugar cookies are perfect for any season, but these colored ones would be great for fall or the holiday season. So glad you decided to share! :o)
ReplyDelete