Search This Blog

Sunday, November 13, 2011

Turkey-Pumpkin Meatloaf Muffins with Cranberry Glaze

DSC_0590_labeled

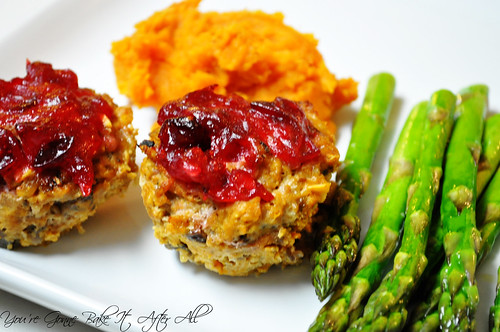
This is the ultimate November recipe if you ask me - turkey, pumpkin, and cranberries?! I spoke before about my desire to incorporate more pumpkin into heathy dishes, and this recipe does just that. The ground turkey is combined with chopped and sauteed mushrooms and onions, and then with rolled oats, egg whites, and of course pumpkin. Just like the Turkey-Pumpkin Chili, the pumpkin flavor isn't prominent here, if you can distinguish it at all, but rather it adds some moisture. The simple cranberry glaze is a nice addition - a bit of sweet and sour baked on top. I may try playing around with the herbs next time. This time I added thyme and rosemary and may swap the rosemary for sage or another seasoning commonly used with turkey.

I love meatloaf muffins because they are already divided into individual portions, and it's super easy to pack up a couple for lunches. Bob and I were both excited that there was enough leftover for both of us to have a lunch the next day, and then some. I served these with Smashed Sweet Potatoes and roasted asparagus. With how busy we've been lately, I haven't had much time to focus on make truly balanced dinners, so it felt really good to get back to it. This dinner really got us pumped for Thanksgiving!

Turkey-Pumpkin Meatloaf Muffins with Cranberry Glaze

Servings: 12 muffins

Ingredients:
For the muffins:
2 teaspoons extra-virgin olive oil
1 cup finely chopped onion
1 8-ounce package mushrooms, chopped finely
2 cloves minced garlic (or pressed through a garlic press)
1 pound 93% lean ground turkey
1 cup pumpkin puree
1 egg white
1/3 cup rolled oats
1 tablespoon Worcestershire sauce
1/4 teaspoon dried thyme, broken into smaller pieces (or sage)
1/4 teaspoon dried rosemary
1/2 teaspoon kosher salt (I just guessed an amount and thought it could use more salt, so you may want to up this to 3/4 teaspoon)
freshly ground black pepper

For the glaze:
1 cup fresh cranberries
1/4 cup sugar
1/4 cup water

Directions:
Preheat oven to 400F. Spray a standard 12-cup muffin tin with nonstick cooking spray.

1. Heat the oil in a nonstick skillet over medium heat. Cook the onions until softened, about 8 minutes. Add the mushrooms and garlic and cook for about 5 minutes more, or until vegetables are tender.

2. Add veggies to a bowl with the turkey, pumpkin, egg white, oats, Worcestershire, herbs, salt, and pepper. Toss gently to combine. Divide the mixture evenly among the muffin tin. Place in the oven, bake for 20 minutes.

3. Meanwhile, combine cranberries, sugar, and water in a small saucepan. Bring to a boil and then simmer for 10 - 15 minutes. Spoon onto the meatloaf muffins, and bake for another 15 minutes. Make sure to test the internal temperature of the meatloaves to make sure it registers at a safe temperature for poultry (165F being the absolute lowest, although mine were considerably above and still very moist). Remove from the oven and let rest for 5 minutes before serving.

Source: Adapted from Cara's Cravings

Thursday, November 3, 2011

Pumpkin Yeast Bread


This is an oooold recipe - meaning that I made it a long time ago. In fact, these photos were taken in my apartment kitchen in Chicago . . . in December 2009! By the time I loaded them on my computer, pumpkin season was pretty much over. I planned to post this recipe last fall but never did. So here we are.

This is a really good bread recipe - just a hint of sweetness and a mellow pumpkin flavor. It's great for the leftover turkey sandwiches that we all love to enjoy throughout the holidays. I plan to make this again this year and follow Annie's example of creating a Thanksgiving leftover panini - yum!
Pumpkin Yeast Bread

Ingredients:

1/2 cup warm water

1 1/2 tablespoon instant yeast

2/3 cup warm milk

2 large eggs

1 1/2 cups pumpkin puree

2 tablespoons vegetable oil

1/2 cup brown sugar

2 teaspoons salt

1/2 teaspoon ground cinnamon

1/4 teaspoon ground ginger

1/4 teaspoon ground nutmeg

Dash of ground cloves

6 1/2 cups bread flour (approximately)

Directions:

1. In the bowl of an electric mixer fitted with the paddle attachment, combine the warm water and yeast. Add in the milk, eggs, pumpkin, oil, brown sugar, salt, and spices. Mix briefly to combine.

2. Add 4 cups of the bread flour to the bowl, and mix until a sticky dough has formed. Switch to the dough hook. With the mixer on low speed, gradually add the remaining flour until you have a dough that is smooth and elastic, and not sticky.

3. Transfer the dough to a well-oiled bowl, turning once to coat the dough. Cover the bowl with a damp kitchen towel and let the dough rise until doubled in size, about 1 hour.

4. Turn the dough out onto a lightly floured work surface. Divide in half. Press each pieces into a rectangle about 1 inch thick and no longer than 9 inches long. With the long side of the dough facing you, roll the dough firmly into a cylinder, pressing down to make sure the dough sticks to itself. Turn the loaf seam-side up and pinch the seam closed. Place the loaves in two well-oiled 9 x 5-inch loaf pans and press down gently so the dough touches all four sides of the pan. Cover with a towel and let rise until almost doubled, about 45 minutes.

5. Preheat the oven to 375F. Bake the loaves for about 30 minutes, or until an instant-read thermometer inserted into the loaf reads 190F. Transfer to a wire rack and let cool.

Source: Annie's Eats, originally adapted from King Arthur Flour

Monday, October 31, 2011

Honey Butter

DSCN7329_labeled

Wow, there's a lot of 1's in the date today...and just think about what it will be like in 10 days!

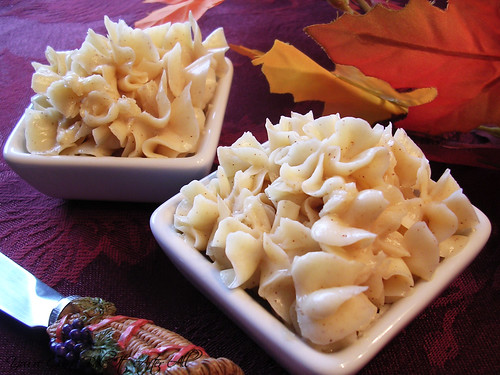
Last year, Bob and I hosted our first Thanksgiving. Because my family's Thanksgiving menu has remained virtually unchanged for 30+ years, I had to be creative with how I would add my personal touch to the meal without sacrificing the dishes we've all come to expect and love. A few years ago, the amazing Annie posted some compound butters that she served at her first Thanksgiving. I thought this was a fantastic idea! No one would mind having a few extra choices to add to their roll, so it was a great opportunity for me to add a little something extra without causing a scene :-)

I found this honey butter recipe of Alton Brown's. I loved that it had cinnamon and some extra flavors. As I mentioned last year when I posted the delicious Herb Butter that these butters were my brother-in-law's favorite part of the entire meal! Either the butters were that good, or the meal was that bad (just kidding! We have our dishes down to a science at this point!)

Compound butters are not only great for holidays but there are nice way to add a little something extra to a dinner party or a small, intimate gathering with friends. Plus, they are so completely easy to make!

Honey Butter

Ingredients:
8 tablespoons (1 stick) salted butter, cut into chunks
1 tablespoon honey
1/8 teaspoon ground cinnamon
1/4 8 teaspoon vanilla extract

Directions:
1. To loosen the butter, place butter into the bowl of a mixer (or you may use a hand mixer) and beat at low speed using the whisk attachment.

2. Increase the speed to medium and add the honey, cinnamon, and vanilla extract and beat until well combined, about 5 to 7 minutes.

3. Remove butter from bowl and spoon onto parchment paper or plastic wrap. Roll into a log and refrigerate for at least 2 hours. Alternatively, use decorative tip and piping bag to pipe butter into small dishes, cover with plastic wrap, and refrigerate for at least 2 hours.

Happy Halloween with Pumpkin Pancakes!!!

DSC_0625

DSC_0627

DSC_0652

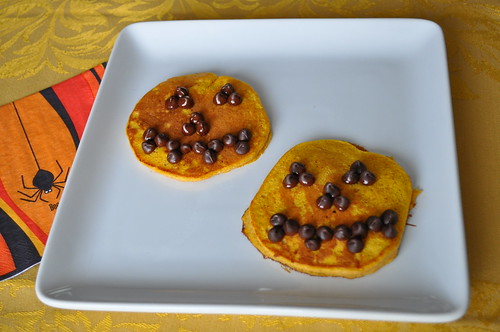
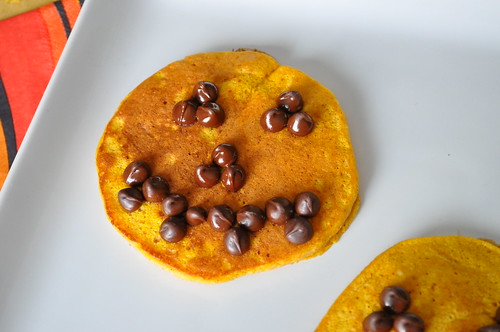
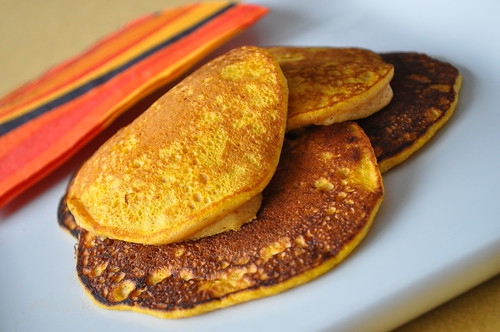
Happy Halloween! Just a last minute recipe with an idea that turns ordinary pancakes into a festive treat. I have wanted to try pumpkin pancakes for a while now, and I started thinking about how to make them more Halloween-oriented - why not use chocolate chips to make them into jack-o-lanterns? My mom used to make pancakes in Mickey Mouse shapes and used chocolate chips for the face, so this concept is virtually the same.

In my opinion, pancakes should be light and fluffy, but too often the pancakes I order in restaurants are heavy and dense. Like the pumpkin waffles, this recipe uses the technique of whipping up egg whites to fold into the batter; I think this creates a super fluffy pancake. We really loved these pancakes, although they could use more pumpkin spice flavor. Next time I'll probably double the pumpkin pie spice.

Have a spooktacular day!

Pumpkin Pancakes

Servings: 2 - 3

Ingredients:
1/2 cup all-purpose flour
1 tablespoon sugar
1 teaspoon baking powder
1/2 teaspoon pumpkin pie spice (double this to bump up pumpkin spice flavor)
1/4 teaspoon salt
1/2 cup skim milk
1/2 cup pumpkin puree
2 large eggs, separated
2 tablespoon unsalted butter, melted
1/2 teaspoon vanilla extract

Directions:
1. In a large bowl, whisk together the flour, sugar, baking powder, pumpkin pie spice, and salt.

2. In a separate bowl, combine the milk, pumpkin puree, egg yolks, melted butter, and vanilla extract together, whisking to blend until smooth.

3. Add the wet ingredients to the dry ingredients, mixing with a spatula until just combined.

4. In the bowl of an electric mixer, beat the egg whites until thick and stiff.

5. Gently fold the egg whites into the pancake batter until fully incorporated.

6. Meanwhile, heat a frying pan over medium heat.

7. Lightly spray the pan with cooking spray or use butter or butter substitute (we like Brummel & Brown). Pour batter onto pan in 1/4-cup increments (I like scooping it with a 1/4 cup measuring cup and using the bottom of the cup to smooth out the thick batter).

8. Cook each pancake until lightly browned on each side, about 1 minute per side. Air bubbles will start to reach the surface of the pancake and escape, indicating that it may be time to flip.

9. Transfer each cooked pancake to a warm plate (or one in the microwave to prevent cooling) and repeat with the remaining batter.

10. Serve with your favorite pancake toppings.

Source: Adapted from The Curvy Carrot, originally from Bon Appetit via Epicurious


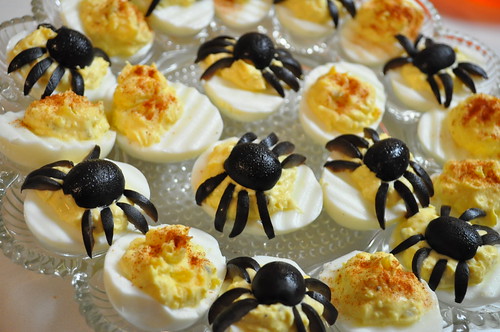
Some deviled eggs my mom made with black olive spiders on top! :)

DSC_0623

HAPPY HALLOWEEN!!!

Wednesday, October 26, 2011

Apple Pie Floats

DSC_0319_ed

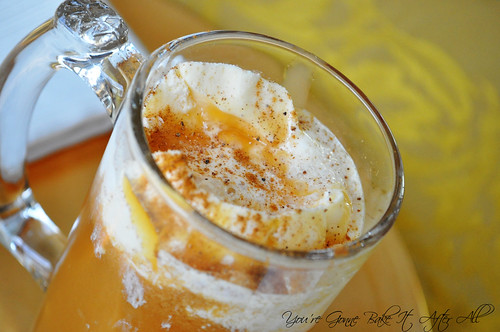
Do you ever find yourself looking for ways to use up that big container of apple cider? I always buy a big gallon of it at the apple orchard each year and then end up scrambling to finish it. This idea for an ice cream float with apple cider is fantastic! I've never thought of it before. I made one of these for Bob and I to share. Not knowing the name of this recipe, Bob took a sip and said "it tastes like apple pie!" :) He did comment that he would prefer a tad more ginger ale, so I've made a note in the recipe below to adjust to your own taste. Happy Fall!!!

Apple Pie Floats

Yield: 1 serving

Ingredients:
1 cup apple cider
1/2 cup ginger ale, or a little extra depending on personal preference
1 - 2 scoops vanilla ice cream, or any seasonal flavor such as cinnamon or apple pie
ground cinnamon and nutmeg for sprinkling
1 - 2 tablespoons jarred caramel sauce

Directions:
1. Pour apple cider and ginger ale into a glass.

2. Add vanilla ice cream.

3. Sprinkle on nutmeg and cinnamon to taste and drizzle caramel sauce on top.

4. Serve immediately with a straw and a spoon.

Sunday, October 23, 2011

Crescent Mummy Dogs

DSCN7232_labeled_ed

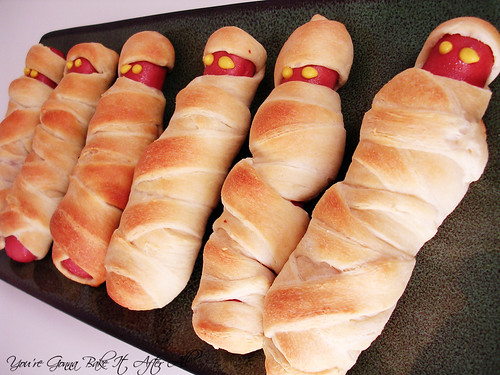
After seeing these adorable Mummy Dogs on Picky Palate, I made them for a little pre-Halloween get together last year. I didn't get a chance to post them before Halloween, so I saved the post for this year. I used light crescent rolls and turkey hot dogs to make them a bit healthier. You can even use breadstick dough if you prefer. These were delicious and so festive! They are perfect for a Halloween party - whether as a main dish or as a snack. I think kids would love these as well.

Crescent Mummy Dogs

Ingredients:
1 can of crescent rolls (I used light); you may use breadstick dough if you prefer
1 package hot dogs (I used turkey hot dogs)
mustard
nonstick cooking spray

Directions:
Preheat oven to 375F.
1. Separate crescent roll dough at perforations. Cut into thin strips of dough.

2. Wrap strips of dough around each hot dog to resemble mummy wrappings (as shown in photo), pressing loose edges together so they stick and stay in place.

3. Place wrapped hot dogs on a baking sheet and spray dough lightly with cooking spray.

4. Bake for 13 - 17 minutes, or until dough is light golden brown and hot dogs are heated through.

5. Use mustard to dot eyes onto mummy faces, and serve with your favorite condiments.

Source: Inspiration from Picky Palate, recipe from Pillsbury

Wednesday, October 19, 2011

Pumpkin Cornbread

DSC_0250_ed

DSC_0228_ed

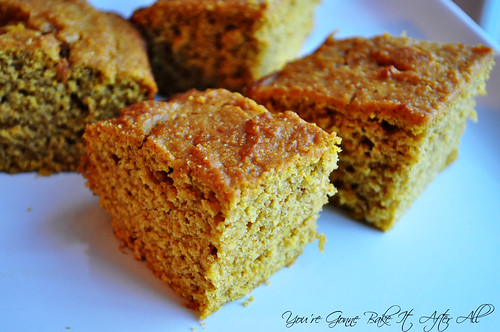
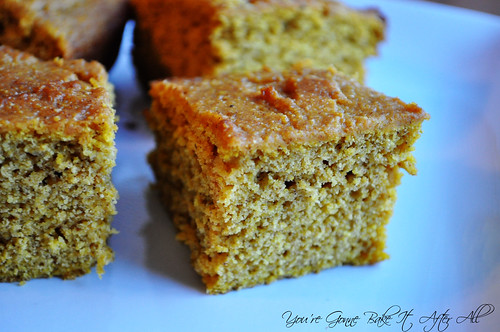
I saw this Pumpkin Cornbread recipe the day before I planned to make the Turkey Pumpkin Chili - score! Cornbread is the perfect accompaniment to chili, and what better side to serve with pumpkin chili than pumpkin cornbread?!

This cornbread was fantastic! Some cornbread recipes result in bread that is slightly on the dry side, but this one isn't. It's not moist like a cake, but in cornbread terms it's definitely moist; I think the olive oil helps keep it from getting dry. This recipe is simple and quick to throw together. We both loved this cornbread and will be making it again soon!

Pumpkin Cornbread

Ingredients:
1 cup all-purpose flour
1 tablespoon baking powder
1 teaspoon Kosher salt
1/2 tablespoons ground cinnamon
1/4 teaspoons ground nutmeg
1/2 cup packed brown sugar
1 cup cornmeal
2 whole eggs
1 cup pumpkin puree
1/4 cup olive oil
1 tablespoon molasses

Directions:
Preheat the oven to 400F and grease an 8 x 8-inch baking dish (or spray with nonstick cooking spray).

1. In a medium bowl, whisk together the flour, baking powder, salt, spices, brown sugar, and cornmeal.

2. In a small bowl or glass measuring cup, lightly beat the eggs, and then stir in the pumpkin, oil, and molasses.

3. Stir the wet ingredients into the dry ingredients just until combined, and then pour the batter into the pan, smoothing out the top as much as possible.

4. Bake 30 minutes or until a knife inserted in the center comes out clean. Serve warm.

Sunday, October 16, 2011

Turkey Pumpkin Chili

DSC_0210_ed

As if it isn't already apparent, I love cooking and baking with pumpkin. Pumpkin is actually very healthy; it's high in vitamin A and fiber. The problem is that most pumpkin recipes are desserts or sweets where the health benefits are often overshadowed by sugar, butter, oil, etc. Don't get me wrong, I certainly enjoy those recipes, but I love to find healthy recipes that incorporate pumpkin as well.

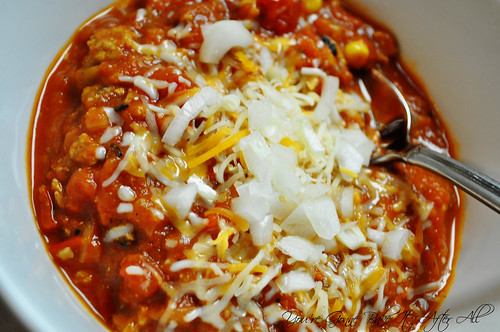
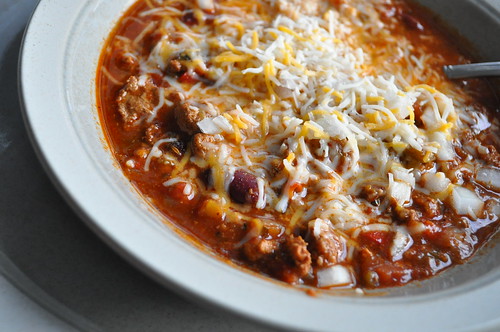
Cara posted this Turkey Pumpkin Chili last year and I immediately bookmarked it. After making the very spicy Turkey Chili last month, I decided to try another variety. This chili is no where near as spicy as the Turkey Chili I posted last month; it actually has a nice amount of spice for my taste. While you may not even taste the pumpkin itself, it nicely thickens the chili and adds an almost creamy element. The labs on our floor are having a Pumpkin and Chili potluck next month, and I plan to bring this chili - it covers both categories!

Turkey Pumpkin Chili

Ingredients:
1 cup chopped onion
3 cloves of garlic, minced
2 medium sized green peppers (or 1 red; 1 green), diced
1 pound ground turkey
1 tablespoon chili powder
2 teaspoon cumin
1 teaspoon cinnamon
1 teaspoon Mexican oregano (I used regular oregano)
1 small can (4-ounce) diced green chili peppers
15 ounce can beans of choice, drained and rinsed
1/2 cup frozen corn kernels
28-ounce can crushed tomatoes
14-ounce can diced tomatoes
15-ounce can pumpkin puree, or 2 cups homemade
Pumpkin beer, optional

Directions:
1. Spray a large pot with nonstick cooking spray and place over medium heat. Add the onions and cook for about 5 minutes, until just softened. Add the garlic and bell peppers, and cook about 5 minutes more until tender. Add the ground turkey and cook until browned, breaking it up into bite-sized pieces. Season with salt, pepper, chili powder, cumin, cinnamon, and oregano.

2. Add pumpkin beer if using. Cook until mostly reduced, then continue.

3. Stir in remaining ingredients, bring to a boil, then reduce heat and simmer for 20-30 minutes to blend flavors.

Alternatively, just brown the turkey with the seasonings and combine with remaining ingredients in a crockpot. Cook on low for 6-8 hours.

4. Serve with your favorite chili toppings - ours are shredded cheese and chopped onions.

Thursday, October 13, 2011

Pumpkin Waffles

DSC_0370_ed

DSC_0372_ed

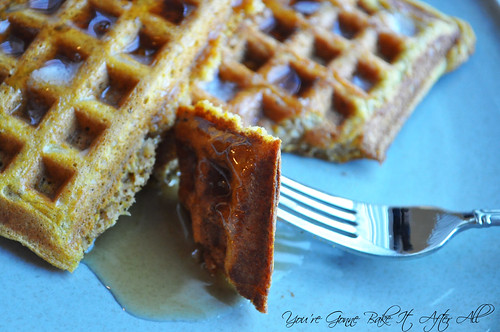
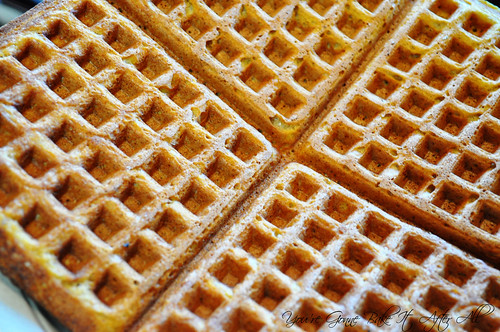
I had a recipe for pumpkin waffles that required the batter sit in the fridge overnight, intending to make the batter on a Saturday night so we could have them for breakfast on Sunday. Time got away from me and it was too late to start making waffle batter, so I decided to search for a recipe in the morning that didn't require an overnight incubation. Thankfully I found this one on Smitten Kitchen.

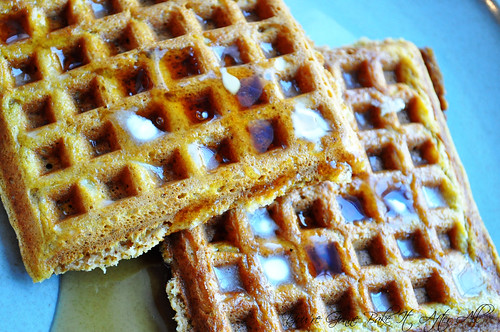
We loved these waffles! The whipped egg whites make for a fluffy interior, and the outside is still nice and crispy like a waffle should be in my opinion. These sort of taste like pumpkin bread! This recipes makes a lot of waffles, so we have the leftovers in our freezer. I look forward to being able to pop one in the toaster for a quick weekday breakfast!

Pumpkin Waffles


Makes 5 full traditional (not Belgian) waffles (20 squares)

Ingredients:
2 1/2 cups all-purpose flour

1/3 cup packed light brown sugar

2 1/4 teaspoons baking powder

1 teaspoon baking soda

1/2 teaspoon salt

2 teaspoons ground cinnamon

1 teaspoon ground ginger

1/4 teaspoon ground cloves

4 large eggs, separated

2 cups well-shaken buttermilk*

1 cup canned solid-pack pumpkin

3/4 stick (6 tablespoons) unsalted butter, melted

Vegetable oil for brushing waffle iron or cooking spray

*Or use 2 cups milk with 2 tablespoons vinegar and allow to curdle for 10 minutes.

Directions:
Preheat oven to 250°F and preheat waffle iron.

1. Sift together flour, brown sugar, baking powder, baking soda, salt, and spices.

2. Whisk egg yolks in a large bowl with buttermilk, pumpkin, and butter until smooth. Whisk in dry ingredients just until combined.

3. In a mixing bowl with a whisk attachment, whisk the egg whites until they hold soft peaks. Fold them gently into the waffle batter until just combined.

4. Brush waffle iron lightly with oil or spray with cooking spray (I like to use Pam for Grilling because it's a high temperature formula and holds up better to heat of my waffle iron). Pour or spoon batter into waffle iron, spreading quickly. Cook according to manufacturer’s instructions. (When I make waffles, I like to transfer the batter to a pourable measuring cup and pour it onto the waffle iron. I don't even bother spreading the batter because the weight of my waffle iron's lid spreads it nicely).

5. If serving many people, transfer waffles to rack in oven to keep warm and crisp. Repeat with remaining batter. I just cool my extra waffles on a cooling rack, break up the squares, wrap them in waxed paper, and pack them up in freezer bags. Then they are ready to pop in the toaster from frozen.

DSC_0359_ed

Source: Adapted from Smitten Kitchen

Sunday, October 9, 2011

Pumpkin Scones

DSC_0290_ed

DSC_0295_ed

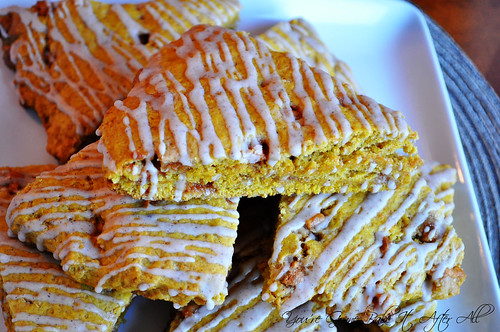
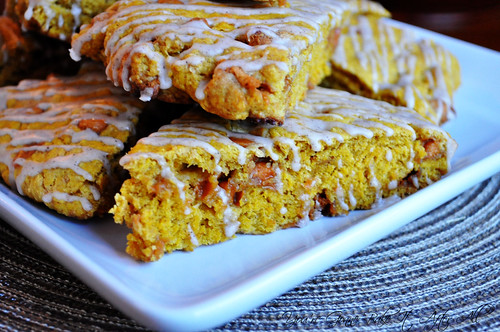
I've only made scones one other time (Chocolate Chip Scones), and I really loved them. When Annie posted these pumpkin scones almost two years ago, I immediately planned to make them. I mentioned before that sometimes I never get around to making a recipe and it gets pushed to the next year . . . that is exactly what happened with these scones, although twice. I've even bought the buttermilk twice before!

I was determined this fall to finally make these scones! We had planned a girls shopping day so I decided to bring the scones to have before we started our day. These scones are not what I think of as typical scones; they are more like a cake. My mom didn't even want to try one because she's not a big scone fan, but she thought these were more like a coffee cake, and she loved them! In fact, everyone loved these, including Bob who is a self-proclaimed pumpkin-hater! (We have since discovered his dislike of pumpkin is really a dislike of the texture of pumpkin pie!) The butterscotch chips really do add a great flavor to the scones, and the spicy glaze is nice as well. Bob has already asked me, several times, to make these again - that's a winner in my book!

Pumpkin Scones

Ingredients:

For the scones:

2 cups all-purpose flour

1/3 cup packed brown sugar

1/2 teaspoon ground ginger

1/2 teaspoon ground cinnamon

1 teaspoon baking powder

1/2 teaspoon baking soda

1/4 teaspoon salt

8 tablespoons cold, unsalted butter, cut into pieces

1/3-1/2 cup butterscotch chips

1/2 cup buttermilk

1/2 cup pumpkin puree

1 teaspoon vanilla extract

For the glaze:

1 cup powdered sugar

1/4 teaspoon ground cinnamon

Dash of ground nutmeg

Dash of ground ginger

Dash of ground cloves

2 tablespoons milk

Directions:

Preheat the oven to 400° F. Line a baking sheet with parchment paper or a baking mat.

1. In a medium mixing bowl, combine the flour, brown sugar, spices, baking powder, baking soda and salt; whisk to combine.

2. Add the cold butter chunks to the bowl and stir with a fork to combine. Cut the butter into the dry ingredients using two forks or a pastry blender until the mixture resembles coarse crumbs and the largest butter pieces are no bigger than peas. Mix in the butterscotch chips.

3. In a small bowl or measuring cup, combine the buttermilk, pumpkin puree, and vanilla extract.

4. Add the wet ingredients to the bowl with the dry ingredients and stir together gently just until the dough comes together. If necessary, knead a bit with your hands, but be careful not to overwork the dough or you will end up with tough scones.

5. Transfer the sticky mass of dough to the prepared baking sheet. Pat the dough into a 8 or 9-inch round. I sprayed my hands with non-stick cooking spray to make this process easier and prevent the dough from sticking too much to my hands. It also helps to smooth out the surface a bit.

6. Bake the round until a toothpick inserted in the center comes out clean, about 17-25 minutes. (The original recipe stated 22 - 25 minutes, but mine cooked in closer to 17 minutes.) Allow to cool to room temperature. Slice the dough round into 8 wedges.

7. To make the glaze, combine the powdered sugar and spices in a small bowl. Add the milk and whisk to combine, until a thick glaze is formed. (If necessary, add a bit more milk to achieve a consistency good for drizzling the glaze.)

8. Use a whisk or a plastic bag with the tip cut off to drizzle the glaze over the finished scones. Allow the glaze to set before serving.

Source: Annie's Eats, originally adapted from Joy of Baking

Sunday, October 2, 2011

Chocolate-Pumpkin Cheesecake Bars

DSC_0082_ed

DSC_0074_ed

DSC_0059_ed

Does anyone else feel like they have so many fall recipes that they want to try, but there simply isn't enough time?! I have felt this way for several years, and have an ongoing list that I just roll-over to the next year. I am really trying to make an effort to enjoy this fall to the fullest and squeeze in as much baking as I can, especially because I'm told I'll have a lot less free time in a couple months :-)

This recipe is one that I found on MarthaStewart.com, perhaps last year? I had it saved, and it jumped out at me as I was looking through my recipes. I really love the combination of pumpkin and chocolate (most notably in the Pumpkin-Chocolate Tart), and adding in cheesecake (like the mini-pumpkin cheesecakes) just made it sound even more appealing.

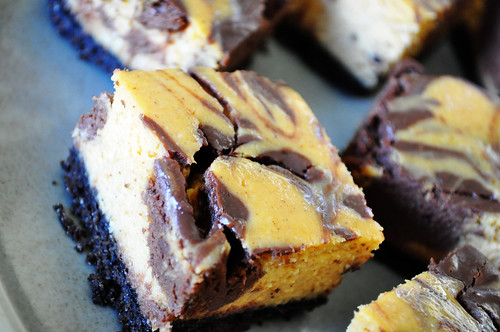
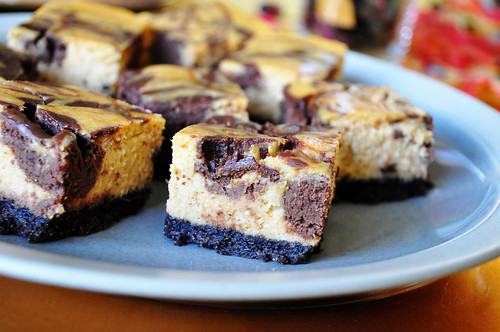
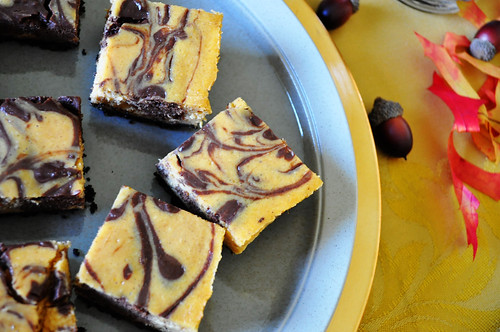
I really cannot gush over these as much as they deserve - they are fantastic! I knew I would like them, but I didn't expect this much. These bars consist of a basic chocolate cookie crust, topped with pumpkin cheesecake, and a portion of the cheesecake mixture is combined with melted chocolate and then swirled in to create pockets of pumpkin-spiced chocolate cheesecake! The cheesecake is perfectly creamy and the chocolate adds a nice touch but isn't overpowering. If you love pumpkin, chocolate, and cheesecake as much as I do, you are sure to love these!

Chocolate-Pumpkin Cheesecake Bars

Ingredients:
For The Crust:
20 chocolate wafer cookies (half a 9-ounce package) (I used 4.5 ounces of chocolate animal crackers/cookies)
2 tablespoons sugar
4 tablespoons unsalted butter, melted

For The Filling:
2 8-ounces packages cream cheese (I used light cream cheese)
1 cup sugar
1 cup canned solid-pack pumpkin puree
3 large eggs
3 tablespoons all-purpose flour
1 teaspoon pumpkin-pie spice
1/2 teaspoon salt
4 ounces semisweet chocolate, chopped (I used chocolate chips)

Directions:
1. Preheat oven to 350 degrees. Line bottom and sides of an 8-inch square baking pan with parchment paper or aluminum foil, leaving an overhang on all sides. Set aside.

2. In a food processor, blend cookies with sugar until finely ground (you should have about 1 cup crumbs); add butter, and pulse until moistened.

3. Transfer crumb mixture to prepared pan, and press gently into bottom. Bake until fragrant and slightly firm, 12 to 15 minutes. Set aside to cool.

4. Place cream cheese in food processor or the bowl of a stand mixer fitted with the paddle attachment; blend until smooth. Add sugar, pumpkin puree, eggs, flour, pumpkin-pie spice, and salt; process until combined. Set aside.

5. Place chocolate in a microwave-safe bowl; microwave in 30-second increments, stirring between each, until melted. Add 1 cup pumpkin mixture; stir to combine. Set aside.

6. Pour remaining pumpkin mixture into prepared pan. Drop dollops of chocolate mixture onto pumpkin mixture; swirl by dragging paring knife through the chocolate and pumpkin several times to create marbled pattern. Bake until cheesecake is set but jiggles slightly when gently shaken, 40 to 50 minutes.

7. Cool in pan. Cover; chill until firm, at least 2 hours (and up to 2 days). Using overhang, transfer cake to work surface. With a knife dipped in water, cut into 16 squares. Serve.

Source: Adapted from MarthaStewart.com

Tuesday, September 27, 2011

Apple Cider Doughnuts

DSC_0174

DSC_0136

DSC_0152

DSC_0167

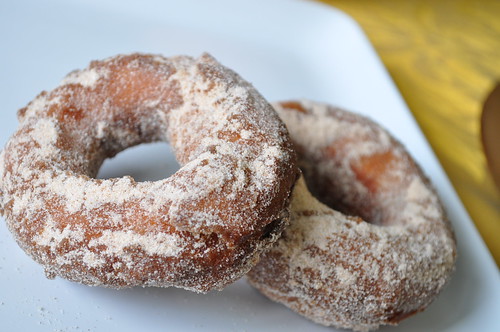
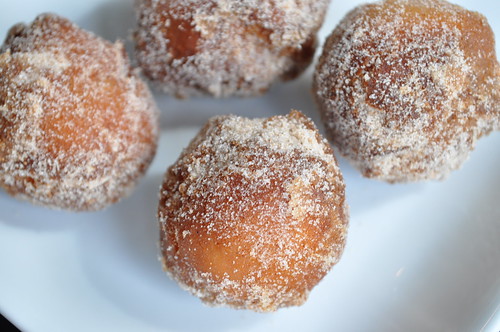
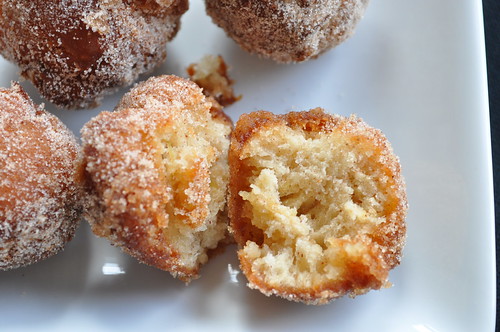
Apple picking is one of my favorite fall activities. My mom and aunt used to take my sister and I apple picking when we were kids. When I lived in Chicago, my friend Kathleen and I decided to carry on the tradition. We found this awesome orchard County Line and looked forward to our yearly visits. One of our favorite parts was the apple spiced donuts! They were best fresh - warm and slightly crispy on the outside, perfect spiced apple cake-doughnut texture on the inside, covered in loads of cinnamon sugar! We would even stop at a gas station on the way in or out and get some milk to have with the doughnuts!

When we made the big move to St. Louis last year, I knew that I would be missing out on the apple doughnuts. We still pick apples here, but to my knowledge the local orchards don't serve these doughnuts...in fact, a lot of people around here have never heard of them.

Last fall, when I saw Megan post this Apple Cider Doughnut recipe, I got really excited that it might closely mimic my favorite orchard doughnuts! We had a very busy fall last year - moving into our house, still settling into our new jobs, getting our home ready to host our first Thanksgiving - things were a little hectic. The thought of making homemade doughnuts wasn't an option. Plus, I didn't have a proper vessel to use for deep frying... Then this spring, Kathleen used her amazing discount for the kitchen store she works for to help me purchase something I've been dreaming about for years - a Le Creuset French Oven!

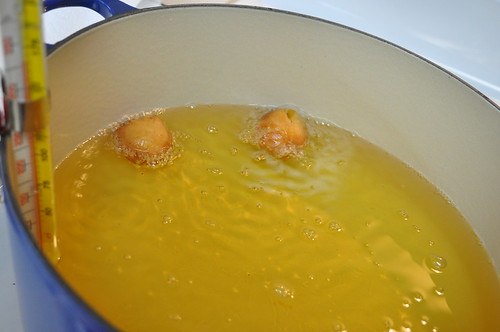
The Le Creuset is perfect for deep frying, so I made these doughnuts a priority this year. I have to admit, I was a bit nervous to deep fry. I've never done it before, but I had a candy/fry thermometer and some baking soda/fire extinguisher on hand, so I went for it. I got fresh apples and apple cider from a local orchard on a Saturday, made the dough on Saturday night, and on Sunday morning we enjoyed these babies. And I have to say, they were better than the ones at County Line! Bob said they are probably his favorite thing I've ever made! Wow - that is huge. He's surprisingly picky. I invited my sister and brother-in-law over since they've actually made homemade doughnuts before, and they loved these as well. Everyone commented on how the real flavor of the apples and the cider comes through. I love that! I'm thinking the doughnuts sold at orchards are probably from a mix, not from fresh apples and cider!

This recipe isn't difficult, but it does take some patience. Fresh apples are simmered in apple cider until soft, then pureed into a fresh apple sauce, which is reduced and incorporated into a cake doughnut dough. The dough chills for at least 2 hours (preferably overnight). Once chilled, the dough can be shaped however you'd like - traditional doughnuts or doughnut holes - and then fried, dipped in a reduced cider glaze, and rolled in cinnamon-sugar. YUM!

I found that I ran out of the cider glaze, likely because instead of following the original recipe and only dipping one side of the doughnuts in glaze and cinnamon sugar, we preferred to coat the entire thing (that's how County Line does it!). Because of this, I've doubled the amount in the recipe below. I also bumped up the cinnamon sugar because I used most of it and didn't make the full batch of doughnuts...some of the dough is in the freezer for another time!

I think we've decided to make these doughnuts a yearly tradition in our house. I hope our daughter will love apple picking as much as I do, and I'm sure she'll love these doughnuts! :-)

The Best Apple Cider Doughnuts

Ingredients:
For the doughnuts:
2 apples (they suggest red such as Cortland or McIntosh, I used my favorite Golden Delicious)
1 1/2 cups apple cider
3 1/2 cups all-purpose flour, plus more for dusting
4 teaspoons baking powder
1/4 teaspoon baking soda
1 1/2 teaspoons ground cinnamon
1 teaspoon salt
1/4 teaspoon nutmeg
2/3 cup granulated sugar
3 tablespoons vegetable shortening
1 egg plus 1 egg yolk
1/4 cup buttermilk
1 teaspoon vanilla extract

Vegetable oil, for frying (I needed about 2 1/2 quarts)

For the glaze:
2 cups apple cider
1/2 cup confectioners' sugar

For the topping:
1 1/2 cup sugar
1 tablespoon ground cinnamon (feel free to add more if you prefer a higher cinnamon to sugar ratio)

Directions:
1. To make the doughnuts: core and coarsely chop the apples (do not peel). Combine the apples with 1 1/2 cups cider in a medium saucepan over medium heat; cover and cook until softened, about 8 minutes. Uncover and continue cooking until the apples are tender and the cider is almost completely reduced, about 5 minutes.

2. Pour the mixture into a food processor, and puree until smooth (or use an immersion blender). Pour the applesauce into a measuring cup. If you have more than 1 cup, return the applesauce to the saucepan, and boil until reduced to 1 cup. (I had to do this step). Let cool slightly.

3. While the apples are cooking, whisk the flour, baking powder, baking soda, 1 1/2 teaspoons cinnamon, salt, and nutmeg in a medium bowl.

4. In bowl of electric mixer fitted with the paddle attachment, combine 2/3 cup granulated sugar and the shortening, and beat on medium speed until sandy.

5. Beat in the egg and yolk, and then gradually mix in the applesauce, scraping the bowl. Mix in half of the flour mixture, then the buttermilk and vanilla, and then the remaining flour mixture. Mix to make a sticky dough; do not overmix.

6. Scrape the dough onto a lightly floured sheet of parchment paper laid on a sheet pan turned upside down. Roll dough in the flour to lightly coat (I added this step, as the dough stuck to the parchment so perhaps this will help). Pat dough into a 7-by-11-inch rectangle, about 1/2 inch thick. Cover with plastic wrap and refrigerate for at least 2 hours or overnight. (Overnight is recommended because the colder the dough is, the easier it is to work with. It's a very sticky dough.)

7. When you're ready to make the doughnuts, heat 2 inches of vegetable oil in a large heavy-bottomed pot over medium-high heat until a deep-fry thermometer registers 350 degrees.

8. While the oil is heating, make the glaze: simmer 2 cups cider in a small saucepan over medium heat until reduced to 1/2 cup. Whisk in the confectioners' sugar, and set the glaze aside.

9. Then make the topping: Mix 1 1/2 cups granulated sugar and 1 tablespoon (or more) cinnamon in a shallow bowl or pie plate; set aside.

10. Line a baking sheet with paper towels, and set it near the stove.

11. Cut the chilled dough into rounds, using a floured-dipped 3-inch biscuit cutter. Cut out the centers of the doughnuts, using a 1- or 1.5-inch biscuit cutter. Or simply use the small biscuit cutter to cut all doughnut holes. (The dough expands when it hits the oil, so I ended up halving the doughnut holes made with a 1.5-inch biscuit cutter). At this point, I found it useful to lightly dust/roll the doughnuts in flour so they weren't so sticky. This really helped and didn't affect the frying process or the resulting taste of the doughnuts.

12. Using a skimmer, tongs, or your hands (be very careful!!!), slip 2 or 3 doughnuts or 4 or 5 doughnut holes at a time into the hot oil and fry until golden brown, 1 to 2 minutes per side for regular doughnuts, approximately 3 1/2 - 5 minutes for doughnut holes (this will depend on the temperature of the oil. I had a hard time regulating it with my electric range...perhaps gas is better for this?) I suggest starting out with one doughnut hole and seeing how long it takes to get the center totally cooked. This will give you a good idea of the outside color when the inside is cooked. Our first doughnut hole was gooey on the inside, but every other doughnut after that was perfectly cooked.
DSC_0111

13. Transfer to the paper towels to drain. If you prefer to eat the doughnuts hot and fresh (like we did!), only allow the doughnuts to drain for a minute or so, then drop a doughnut into the cider glaze, roll around using tongs, and then transfer to cinnamon-sugar mixture and roll around to coat entirely. The original recipe suggests to just dip one side of each doughnut, but we like them totally coated in cinnamon-sugar!

14. Repeat with remaining dough. Check the oil temperature periodically, and adjust the heat as needed.

Note: You may want to return the remaining dough to the fridge in between fry batches so it doesn't get too warm and sticky. I found it helpful to keep plenty of flour on hand if the dough is sticking too much.

Source: Adapted from Delicious Dishings, originally from Food Network Magazine

Tuesday, September 20, 2011

Turkey Chili

DSC_0966

Wow, it's been a long time since I've posted! Getting ready for a baby is a lot of work! I have still been cooking and photographing, so I have lots of posts to share. Plus, now that it's fall (soooo exciting), I have so many recipes planned!

I made this turkey chili on one of the first chilly Saturdays of the season. Bob and my dad were working hard all day on some home improvement projects we were trying to squeeze in, so this was a nice dinner to have for when they took a football break.

I didn't really read the description for the chili or I would have noticed that this is a VERY spicy chili. They weren't kidding - this was insane! I would definitely adjust the heat next time, as it was almost difficult to eat without a big glass of milk. It was very, very good though! One ingredient I found interesting was the packet of hot chocolate mix! I didn't notice it at all so I'm sure it just blends with the tomato and spice flavors...sort of similar to the concept of a mole sauce.

I made this chili in the morning and put it in the crockpot on low all day - it turned out great. I've included the original directions, as well as what I did using the crockpot. This is definitely going to be one of the freezer meals I make to have on hand for after our baby girl is born!

Hope you're all enjoying the cooler weather as much as I am - perfect for baking!!! :-)

Turkey Chili

Ingredients:
2 tablespoons olive oil
1 onion, chopped
5 cloves garlic, minced
2 small green bell peppers, seeded and chopped (I also added a red and yellow pepper since I had them on hand)
1 habanero pepper, seeded and chopped (optional - may omit if worried about spiciness)
1 1/2 pounds lean ground turkey
2 tablespoons chili powder
2 teaspoons red pepper flakes (may use less and adjust later for desired spiciness)
1 tablespoon paprika
1 tablespoon ground cumin
2 teaspoons dried oregano
1 teaspoon ground black pepper
1 1-ounce envelope instant hot chocolate mix
1 - 2 teaspoons salt (may want to start with 1 and add more to your taste)
1 tablespoon Worcestershire sauce
2 14.5-ounce cans diced tomatoes with green chile peppers (or 3 10-ounce cans Rotel), drained
1 8-ounce can tomato sauce
1 15-ounce can kidney beans, drained
1/2 cup cheap beer

Directions:
1. Heat the olive oil in a large saucepan over medium heat. Add the onion, garlic, green peppers and habanero pepper, if using; cook and stir until the onion is transparent.

2. Add in the ground turkey and cook until turkey is no longer pink, stirring occasionally to break up turkey into smaller pieces. (At this point, I transfered the turkey and veggies to the crockpot and added the rest of the ingredients directly to it).

3. Season with chili powder, red pepper flakes, paprika, cumin, oregano, pepper, hot cocoa mix, and salt. Stir in Worcestershire sauce, diced tomatoes with green chilies, tomato sauce, and kidney beans. Add the beer, and stir to mix.

4. Partially cover the pan, and simmer over medium heat for about 50 minutes, stirring occasionally. (Or cook in crockpot on low for several hours or more until ready to serve).

5. Serve chili with your favorite chili toppings (like chopped onion and shredded cheese!).

Source: Adapted from Allrecipes.com

Friday, August 5, 2011

Turkey Burgers

DSC_0495_2_ed

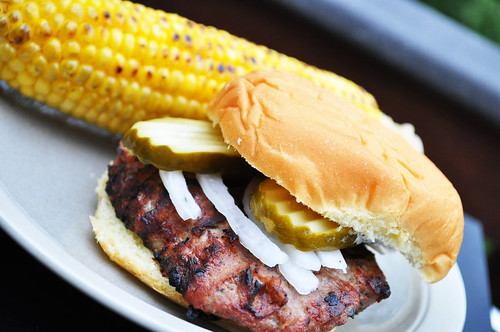
I wanted to make sure I got this recipe posted while there's still plenty of grilling time left this summer. I first made these turkey burgers a year ago, and we thought they were fantastic! The photo I took was very poor, but I have since made them many times and managed to get a semi-decent shot of them.

Since I don't eat red meat, turkey burgers are a must in our house, and this is my go-to recipe. We love the spices in these burgers, and the cooked red onions really add some moisture and a great flavor. This recipe is easily adjustable to your specific tastes. For example, my mom has a strong aversion to rosemary, so when we had her over I just left that out - they still tasted great. I often used dried herbs in these too, especially when I don't have any fresh herbs growing or on hand from other recipes (they're expensive at the store!) I usually cut this recipe in half, but I've also made up a big batch of these (the full 8 burgers) and frozen them as raw patties. Just let them thaw for a bit and throw them on the grill - delicious. These burgers also taste great made in pan on the stove, so they certainly aren't a summer-only meal!

Turkey Burgers

Yield: 8 burgers

Ingredients:
3 tablespoons olive oil, divided
1/3 cup finely chopped red onion
4 cloves garlic, minced
2 pounds ground turkey
1 teaspoon. kosher salt
1 teaspoon black pepper
¼ cup chopped fresh parsley (or 1 tablespoon dried)
1 tablespoon minced fresh rosemary (or 1 teaspoon dried)
1 tablespoon minced fresh sage (or 1 teaspoon dried)
2 teaspoons fresh thyme leaves (or 1/2 teaspoon dried)

Directions:
1. Heat 2 tablespoons of olive oil in a medium skillet over medium heat. Add the onion and sauté about 3 minutes. Add the garlic and cook about 2 minutes longer, until the onion is tender. Remove from the heat and transfer to a large mixing bowl and allow to cool.

2. Add the ground turkey, salt, pepper, herbs, and remaining 1 tablespoon of olive oil to the bowl containing the cooled onion mixture. Mix well to blend. Divide into 8 equal portions and form into patties.

3. Grill on lightly oiled grates of a gas or charcoal grill (or in a pan brushed with olive oil) until cooked through.

Source: Adapted from Annie's Eats, originally from Simply Recipes

Tuesday, July 26, 2011

We're having a . . .

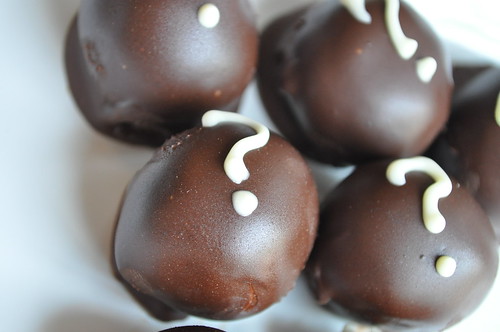
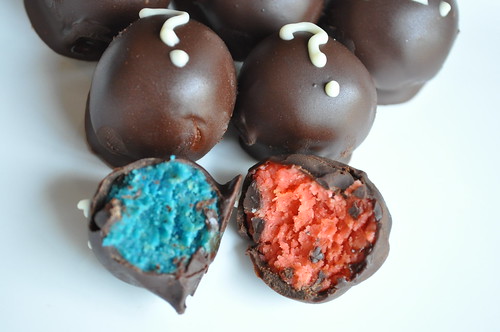
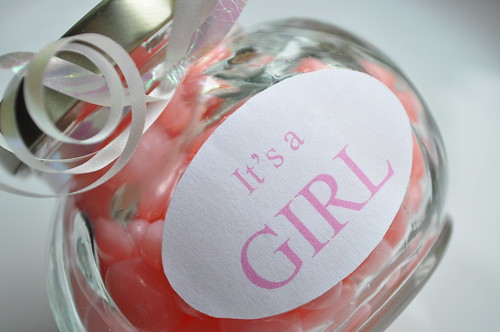
Bob and I revealed the sex of the baby this weekend to some of our friends and family by having them each bite into an Oreo truffle and look to see whether the inside was blue or pink . . .

DSC_0285

DSC_0295

I thought of this idea before I was pregnant and have been so excited and anxious to do this "Truffle Reveal" ever since.

After coming up with this idea and thinking it was completely novel, I saw on Saturday Night Live (the Weekend Update segment) that some people have started revealing the sex of their babies by having people cut into a cake with a blue or pink inside. I guess I wasn't as original as I thought, but I still maintain that these truffles are the way to go because you can announce to different groups of people, and each person gets to participate in the reveal. We ended up doing this in several shifts with different family and friends, so it ended up being the perfect way for us to announce since each truffle is individually concealed (unlike a cake that, when cut, is open for everyone to see). It's a win-win situation - we got to see each person's reaction, and they got a yummy truffle! I even took some to work yesterday and shared the news with my coworkers. We had so much fun with this!

On Thursday night, the night before our big appointment, I made up about 7 of each color. I took them to our appointment in a cooler, and afterwards we headed straight to dinner for our first reveal with my parents and sister. We did it in the bar area of a restaurant because we simply could not wait to be seated. My Mom said she was equally excited for a boy or a girl, but my Dad and my sister wanted it to be a girl.

Their reactions to this news . . .

DSC_0300

were priceless.

My Mom squealed and then leaned looked over to the woman sitting at the table next to us, who was obviously aware something was going on, and said, "Oh sorry! We just found out we're having a girl! --I mean, she's having a girl!!!" It was so cute! My Dad was smiling and saying, "I knew it!!!" and my sister was jumping up and down. My Mom even ordered a Pink Squirrel (a drink if you've never heard of it) to celebrate.

Saturday morning I made the rest of the truffles (in pink!), and we had our next reveal. We ended up being seated in a private room with a long table at a restaurant, and it was perfect! Those of us who knew sat on one side of the table and those who didn't sat on the other so we could watch their reactions. One of my aunts in particular REALLY wanted us to have a girl, so she was dancing in her seat when she found out!

The rest of the weekend was filled with more reveals and more celebrations. The love and support I felt from our family and friends was incredible, and I know our little girl is going to feel that too. We are so excited and feel so blessed to announce that we're expecting a daughter!

DSC_0315

If you're wondering how I made Oreo truffles look pink or blue, here's what I did:

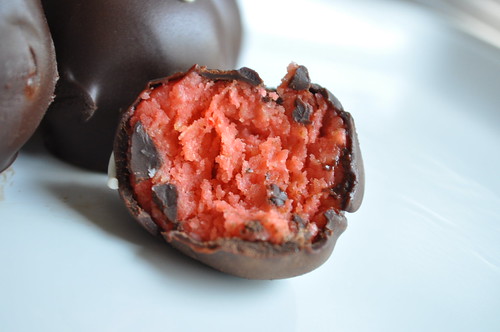
I followed the classic Oreo truffle recipe (also see HERE for truffle tips), using Golden Oreos instead of regular. I added red or blue food coloring gel to the cream cheese and crushed cookies before mixing it up. I put on disposable kitchen gloves and used my hands - much easier than a spoon, and you don't risk dying your hands!

Because these cookies are slightly yellow, my colors ended up being a little more teal and coral but obviously could not be confused!

Thursday, July 21, 2011

Salsa Showdown!

When my good friends Melissa and Kathleen visited in May, I wanted to do something fun and special. The three of us absolutely love the salsa from our favorite Mexican restaurant in Peoria, IL (where we went to college). The restaurant is Carlos O'Kelly's. Yes it's a chain, but their salsa is made in-house (Melissa should know, she worked there!) Our plan was for them to drive from Chicago and stop in Springfield at the Carlos O'Kelly's that's right off the highway to pick up some salsa on their way to St. Louis. Unfortunately, Melissa was informed that the restaurant had suddenly closed! I had no choice but to arrange a Salsa Showdown and make my three favorite salsas for us to taste test!

My all-time favorite salsa for years has been the Black Bean(less) Salsa. If you read my original post about it, you'll know that it was this very salsa that got Kathleen to eat red onions! One day, I saw this Fresh Homemade Salsa on Annie's blog and it looked so delicious. I loved that it closely resembled restaurant-style salsa in appearance. Of course I have room in my life for more than one salsa, right? Especially when they are as different as these two! Wow, this salsa is amazing and I was happy to have a more traditional salsa to serve with enchiladas, quesadillas, and fajitas. Then I did a dumb thing...or a brilliant thing...I saw Pioneer Woman's Restaurant-Style salsa and just HAD to try it. Uh oh, I loved it. Now what was I to do? The Black Bean(less) Salsa is very different and I actually prefer it with just tortilla chips, not on other Mexican food, so it doesn't really count, but these two red salsas are very similar...almost similar enough that I had to choose one, but how? I don't know about you, but I simply cannot make a decision unless I have two things side-by-side. This called for a Salsa Showdown, not unlike my Magic Brownie showdown, Ricotta Pancakes two ways, and my Great Pumpkin Bread-Off. I had wanted to do this, oh, ever since I tried Pioneer Woman's salsa. Finally I had the perfect opportunity and the perfect little guinea pigs (or fruit flies if you know what I do for a living) for my experiment :-)

I made the three salsas in one night and stored them in ambiguously marked containers labeled A, B, and C. Only I knew the identity of the salsas. Now let's get down to the details of the Showdown:

The taste testers: Bob, Melissa, and Kathleen.
The mission: determine the best salsa according to taste, texture, and overall appeal.
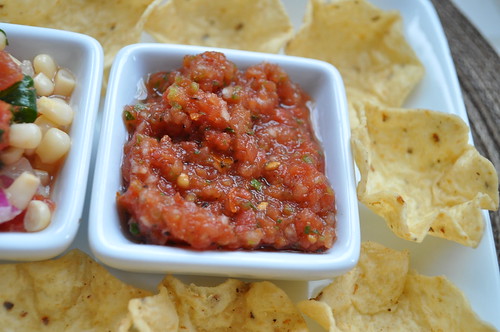
The vehicle for said salsas: Tostitos scoops.

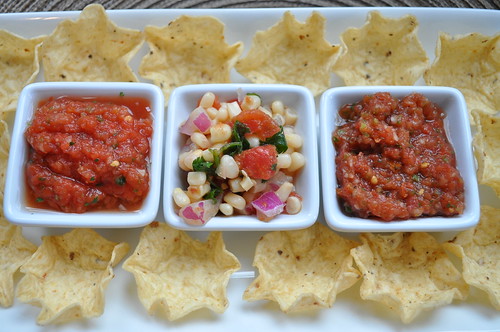
Meet the contenders:

DSC_0586_2

In this (left) corner, weighing in at 3 ounces (just kidding!) we have Salsa A from Pioneer Woman.

DSC_0583_2

And in this (right) corner, we have Salsa B from Annie's Eats.

DSC_0585_2

It's pretty obvious, but Salsa C is the Black Bean(less) Salsa in the center.

DSC_0584_2

To be fair, I told the taste testers not to consider this salsa in their vote since it is so different. I really just made it because it's Kathleen's fav and I wanted Melissa to try it out (oh and I love it too!)

A little description of each:

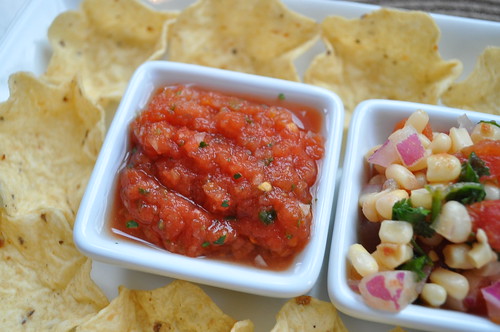
Salsa A: A scrumptious combination of Rotel tomatoes, canned whole tomatoes, onion, jalapeno, and all the usual yummy suspects.

Salsa B: A delectable blend of fresh tomatoes, canned fire-roasted tomatoes (my personal addition), yellow onion, cumin, jalapenos, garlic, and a touch of red wine vinegar.
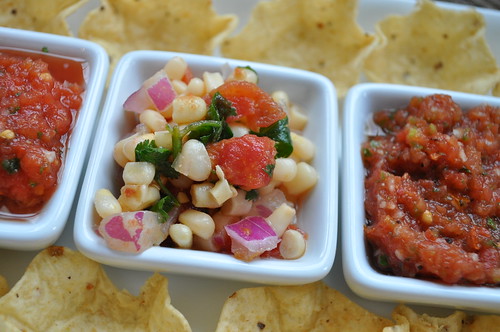
Salsa C: This salsa combines the sweetness of shoepeg corn, the spiciness of Rotel tomatoes, and the zestiness of red onions. Cumin, fresh lime juice, and cilantro add brightness and freshness.
The verdicts (wow it's even hard for me to type that word after the horrific Anthony trial!):

1) Because Bob has a hard time following directions, he performed his test before they arrived. His immediate answer was "Salsa A" - he thought it had a fresher taste. I thought this was funny because this salsa has no actual fresh tomatoes in it, as opposed to Salsa B which does.

2) Melissa agreed with Bob - Salsa A was the winner for her, though this was a close call. Also citing "fresh tasting" as a reason for her choice.

3) Kathleen also agreed that Salsa A was her preference. Again the "fresh" word came up, and this was close for her too.

4) So maybe you're wondering what I think?? Sorry folks, it's a hung jury - I sort of prefer Salsa B! I think it's because I used fire-roasted tomatoes and I just love that smoky taste they impart. I probably shouldn't have done that for fairness. I feel like I performed an uncontrolled experiment! I love both Salsa A and Salsa B, but I kept going back to Salsa B . . . again . . . and again. This presents a major problem for me because I was hoping Bob and I would agree on a clear winner and I would have my "go to" recipe. No such luck!

Now on the tasters' opinions of the Black Bean(less) Salsa - all 3 agreed that they loved this salsa and that it wasn't fair to compare it to the more traditional salsas. Personally, I could not agree more. It's just wonderful! No, seriously try it!

So there you have it, mostly a win for Pioneer Woman's Restaurant-Style Salsa with one holdout (me!) for Annie's Eats Fresh Homemade Salsa.

Have I finished my salsa quest? Not a chance. I still plan to make an at-home version of one of my favorite restaurant salsas...and no, it's NOT Carlos O'Kelly's ;-)

Tuesday, July 19, 2011

Mexican Chocolate Black Bottom Cupcakes

DSC_0554_2

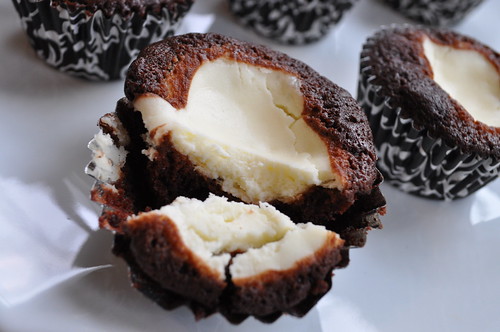
In December I won a giveaway on Nicole's blog Baking Bites. I was so excited to get my package in the mail - 2 bars of Scharffen Berger chocolate and an autographed copy of her Baking Bites cookbook! I immediately wanted to make just about every recipe in the book! One recipe that caught my eye in particular was these Mexican Chocolate Black Bottom Cupcakes. The chocolate batter is mixed with Mexican spices and then a cheesecake/coconut layer is dolloped on top! The recipe makes 24 cupcakes, so I chose to make them for 2 events - lab birthdays and the visit of my two great friends Kathleen and Melissa.

I was really bummed when I finished making these and discovered I had left out the coconut by mistake! In my defense, the recipe in the cookbook said to combine salt with the cream cheese mixture, and there was no mention of coconut. Salt was not listed in the filling ingredients so I just added a pinch and moved forward. It was too late by the time I realized that the coconut was not listed in the directions and I had left it out. Regardless, these cupcakes were fantastic and I can only imagine that they'd be even better with the coconut. I've added it to the directions below.

24 cupcakes is a lot, so I had leftovers after both events and my mom and aunt tried them. My mom said they were the best thing I've ever baked! Wow - did she forget about the dessert table? Just kidding! It's funny how people can have such different tastes because these were not at the top of Bob's list (his all time favorite is the Tres Leches Coconut Cupcakes with Dulce de Leche Buttercream!) I wasn't entirely surprised by Bob's preference though because he's not big on cheesecake (I know - what?!). I thought these cupcakes were super moist and flavorful, and I'm excited to try them again with coconut!

DSC_0560_2

Mexican Chocolate Black Bottom Cupcakes

Yield: 24 cupcakes

Ingredients:
For the cream cheese filling:
16 ounces (2 packages) cream cheese, room temperature
1/2 cup sugar
2 large egg whites, room temperature
2 tablespoons milk
2/3 cup sweetened, shredded coconut, finely chopped

For the cake:
1 1/2 cups all-purpose flour
1/2 cup cocoa powder
1 1/4 cups sugar
1/2 teaspoon salt
1 1/4 teaspoons baking soda
1 1/2 teaspoon ground cinnamon
1/4 teaspoon ground cayenne pepper
3/4 cup buttermilk
1 1/3 cups water
1/2 cup butter, melted and cooled
1 teaspoon vanilla extract
1/4 teaspoon almond extract

Directions:
Preheat oven to 350F. Line two 12-cup muffin pans with paper liners.
1. Make the filling: In a medium bowl, beat together cream cheese and sugar until smooth. Blend in egg whites and milk, mixing until filling is well-blended. Stir in coconut. Set aside.

2. Make the cake: In a large bowl, sift together flour, cocoa powder, sugar, salt, baking soda, and spices.

3. Make a well in the center and add the buttermilk, water, melted butter, vanilla extract, and almond extract. Stir together until just combined and no streaks of flour remain.

4. Divide cake batter evenly among 24 cupcakes. Top each portion of batter with 1 rounded tablespoon cream cheese mixture (there may be some left over).

5. Bake for 20 - 25 minutes. If using two racks, rotate pans halfway through baking. A toothpick inserted into cake only portion should come out with a few moist crumbs on it.

6. Cool in pans for 5 minutes. Filling will sink slightly as the cake cools (I assume this is if you have the coconut in there, as mine did not). Remove cupcakes to wire racks to cool completely.

Source: Adapted from the Baking Bites Cookbook

Friday, July 15, 2011

Jalapeno Popper Dip

DSC_0905

DSC_0914

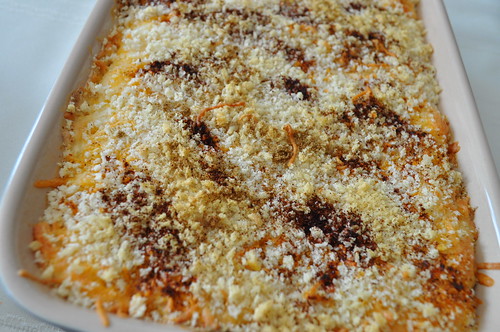
I've posted before about my love of dips. I think they're the perfect party food, and there are so many options. When I saw this recipe for Jalapeno Popper Dip, I immediately saved it to try. Jalapeno poppers are pretty popular in my family, so I thought a dip that combines those flavors would go over well.

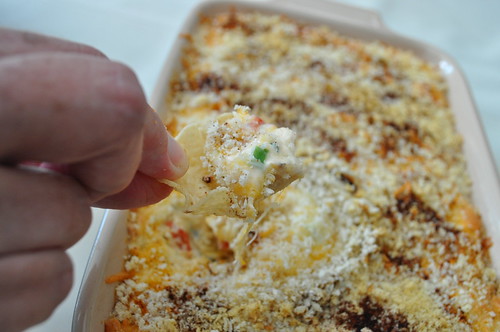
Bob and I hosted a graduation party BBQ for my new brother-in-law Steve, and I thought this dip would be a nice addition. Diced jalapenos mixed with cream cheese and spices, topped with a delicious layer of Mexican blend cheese and panko bread crumbs? Yum. This dip was delicious, and the fam loved it. It's definitely not too spicy but had a nice balance of flavors. I'm sure it would be great served with carrots and celery, but I prefer Tostitos Scoops!

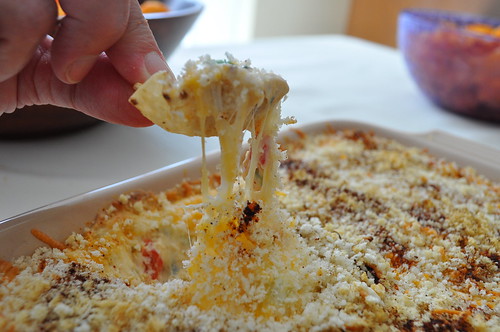
And just look at that cheesiness!
DSC_0912

Thanks for lending me a "hand" Mom!

Jalapeno Popper Dip

Ingredients:
2 8-ounce packages cream cheese (I used 1/3 less fat), at room temperature
1/2 cup mayonnaise (I used light)
1/2 cup roasted red bell peppers, chopped
6 jalapeno peppers, seeded, ribbed and finely diced
2 cloves garlic, minced
2 tablespoons cilantro, finely chopped
2 tablespoons lime juice
1 1/2 cups Mexican blend shredded cheese, divided
1 teaspoon Ancho chili powder
1 teaspoon ground cumin
1 cup panko bread crumbs (I actually reduced this to about 1/2 cup)

Directions:
Preheat oven to 350 degrees.
1. In a medium bowl, combine cream cheese and mayo.

2. Add bell peppers, jalapenos, garlic, cilantro, lime juice, 1/2 cup shredded cheese, and half of the chili powder and cumin. Mix well to combine to a uniform mixture.

3. Spread dip into a baking dish, smoothing into an even layer. (I used an 11 x 7-inch dish)

4. Top with remaining shredded cheese, cover with bread crumbs and sprinkle with remaining chili powder and cumin.

5. Bake approximately 30 minutes until cheese is hot and bubbly and the breadcrumbs are golden brown.

6. Serve warm or at room temperature with tortilla chips.

Source: Adapted from Homemade by Holman

Thursday, June 23, 2011

Eggless Cookie Dough ;-)

DSC_0897_ed

I've mentioned before that I usually ignore the warnings about raw eggs. I've made custard using a raw egg base and I eat cookie dough by the spoonful whenever I bake. In my opinion, raw eggs aren't something to be that concerned about unless you are in a high-risk group: those with suppressed immune systems, the elderly, children, and pregnant women. So, I've never had a reason to worry, until now . . . Yep, I'm pregnant! 16 weeks today, so I'm due in early December.

Bob and I are so excited! This is our first child, and we couldn't be more thrilled. I've felt very lucky to have had a relatively easy first trimester, although the fatigue has been pretty intense, hence the lack of blogging. I rarely cooked and when I did it was more heating up something frozen or making pasta with jarred sauce. My beloved chicken sounded absolutely unappealing for many weeks, and a lot of the new recipes I'd see just did not look good. I had a lot of posts that needed to be written, but the last thing I wanted to do was spend time on my computer when I got home from work when I could be napping. Thankfully my energy is slowly starting to pick up, as is my desire to try new recipes.

I'm not sure about any of you, but when I'm told I can't have something, I want it more. (I won't even go into how much I've been craving a cold sub sandwich from my favorite local deli!) One of the first things I thought when I found out I was pregnant was: Uh oh - no cookie dough! Luckily, I remembered seeing eggless cookie dough recipes specifically for pregnant women, so I relaxed a little.

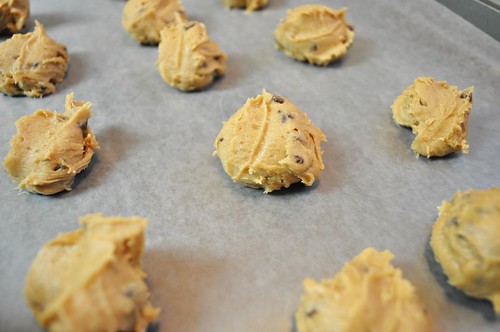
I decided to make the dough and then scoop it out into small portions to freeze. Now I can have a little ball of cookie dough anytime I want! The dough is definitely not as tasty as real cookie dough, so I may play around with the recipe a bit, but it's a good starting point.

Eggless Cookie Dough

Ingredients:
3/4 cup brown sugar
1/4 cup butter, softened
1/4 teaspoon vanilla
1/4 cup milk
1 cup flour
Pinch salt
1/4 cup mini chocolate chips

Directions:
1. In a medium bowl, mix together the brown sugar and butter until smooth.

2. Stir in vanilla and milk. Mix in the flour, salt, and chocolate chips until well blended.

3. Chill in the refrigerator, or scoop onto waxed paper covered baking sheet and freeze.

Source: Adapted from Fun Foods on a Budget


Have a great weekend!!!!!!!

Monday, June 20, 2011

My First Dessert Table!

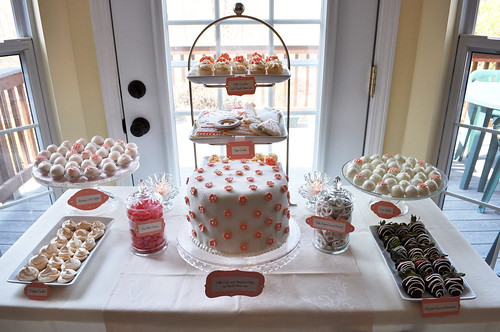
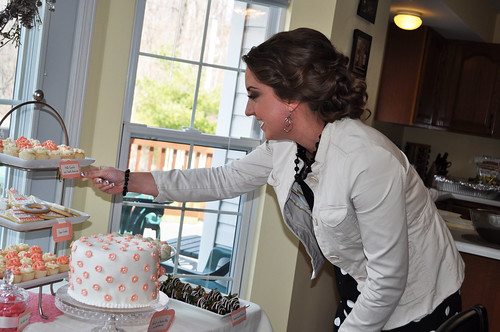
I've mentioned this in several posts, but I threw my sister Lisa a bridal shower in March and tackled my first dessert table! When my sister got engaged last summer, I immediately started brainstorming ideas for her shower. I had never hosted a shower before, and I wanted it to be so special for her. I had such an amazing bridal shower, thanks to my sister, my aunts, and my cousins, and I wanted Lisa to feel the same way.

I've been inspired to do a sweet/dessert table ever since first hearing about them from my friend Kat (and seeing her amazing work!). Lisa absolutely loves desserts, and I thought this was the perfect idea for her shower. Her colors were coral and ivory, so I decided to make that the theme of the shower. After many months of planning, shopping, and sketches, here is what I came up with:

DSC_0480_ed

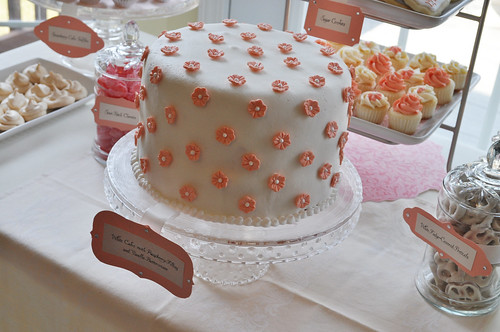
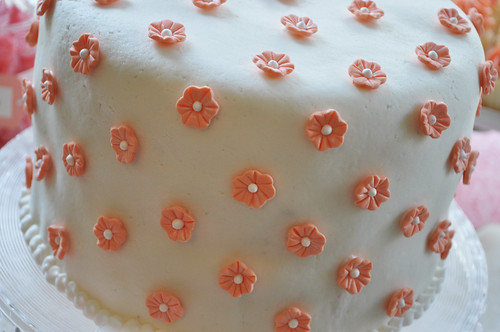
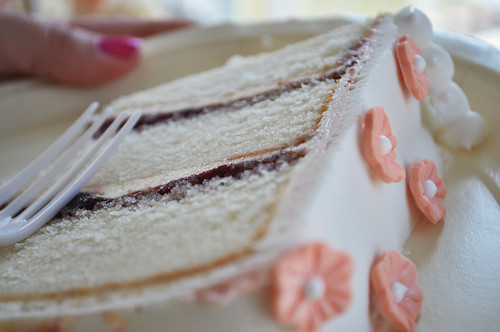
And one of the biggest feats: the cake!

DSC_0476_ed

DSC_0529_ed

DSC_0473_ed

DSC_0614_ed

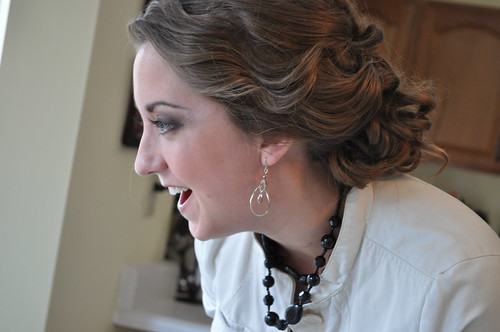
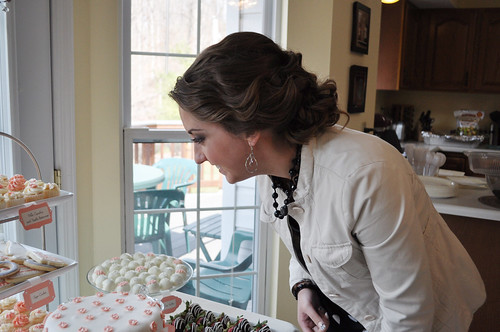
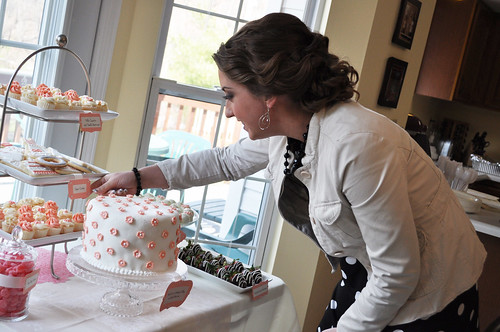
Here are Lisa's first reactions (priceless in my opinion!) - sorry for the paparazzi-style photos- I wanted to capture each moment!:

DSC_0547

DSC_0534_ed

DSC_0544

DSC_0545

DSC_0542

DSC_0540

DSC_0539

DSC_0537

DSC_0536

DSC_0532

DSC_0543_ed

DSC_0538_ed

DSC_0535_ed


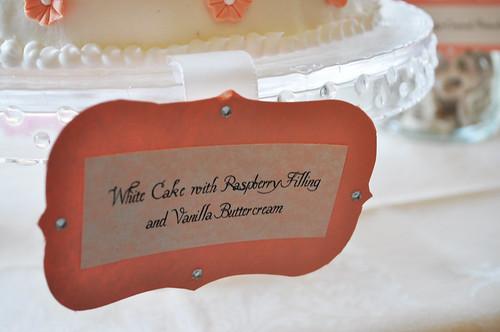
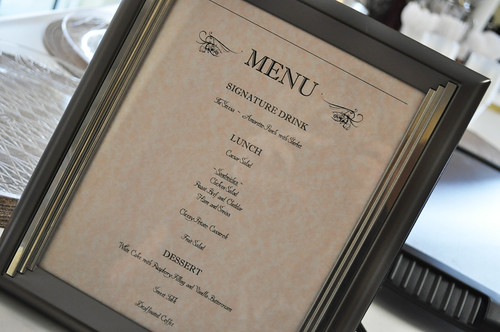
The menu (you can sort of see my reflection in the glass!):

DSC_0488_ed

The table went over very well with the guests too. I think it was fun for them to get to sample a variety of desserts but still partake in the main dessert, the cake. I will be sharing the recipes for the desserts over the course of several posts. Here is the complete run-down of the desserts so you know what to expect:

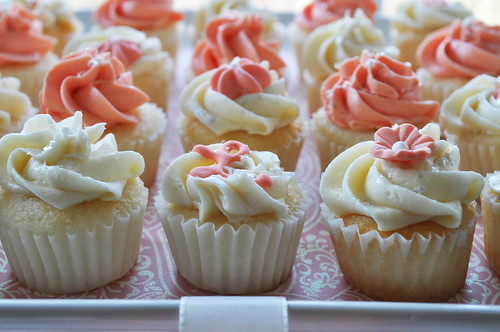
Mini Cupcakes with Vanilla Buttercream

DSC_0455_ed

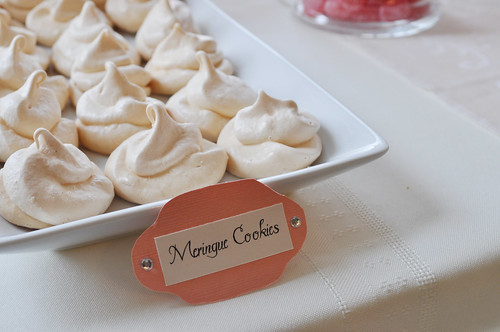
Meringue Cookies

DSC_0470_ed

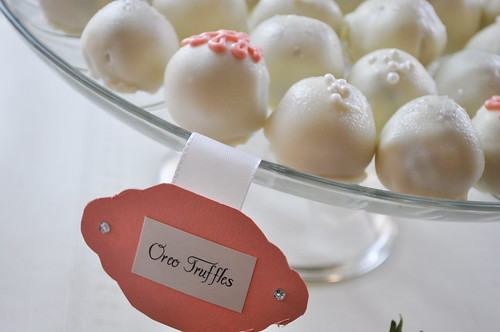
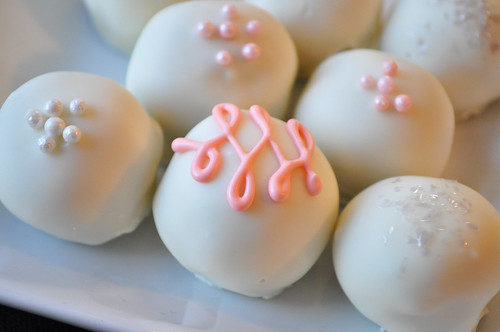
Oreo Truffles

DSC_0450_ed

DSC_0391_ed

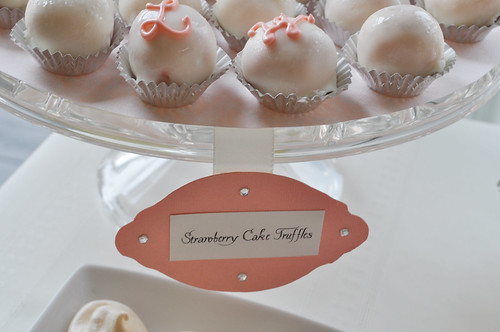
Strawberry Cake Truffles
(the truffles were stored in the freezer, hence the condensation)

DSC_0465_ed

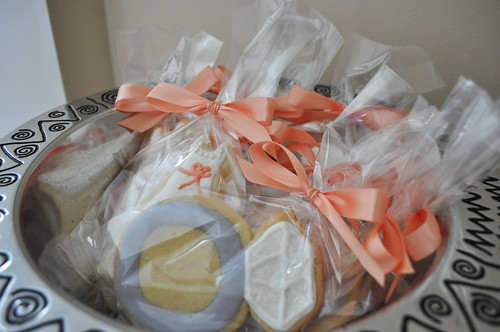
Decorated Sugar Cookies: wedding dresses, wedding cakes, and diamond rings

DSC_0458_ed

(they were also the favor)

DSC_0515_ed

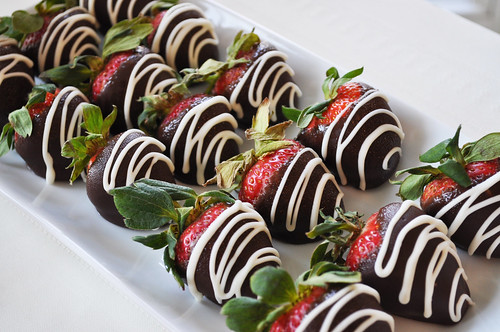
Chocolate-Covered Strawberries

DSC_0453_ed


I also used Sour Patch Cherries

DSC_0472_ed

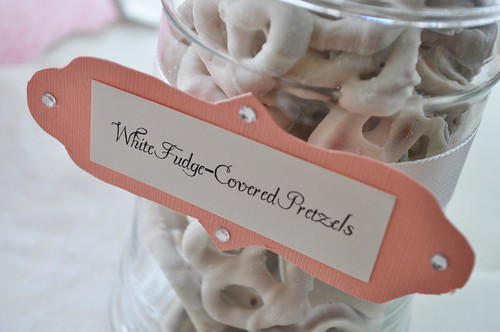
and White Fudge-Covered Pretzels

DSC_0454_ed

I hope you come back soon to check out the fun posts I have coming up, including the recipes for these desserts, a Salsa Showdown, and the Groom's Cake I made for my sister and her new husband's rehearsal dinner! :)

  © Blogger template Brownium by Ourblogtemplates.com 2009

Back to TOP