Search This Blog

Friday, January 29, 2010

Soft Wrap Bread

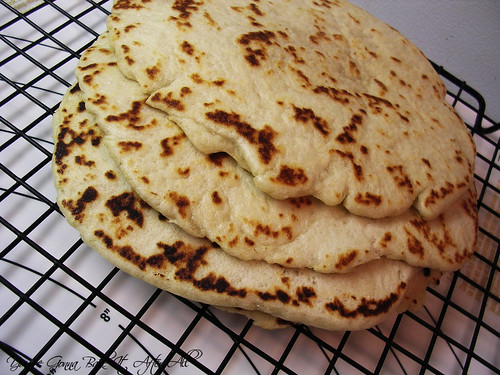
I made homemade pitas several months ago, but never got around to posting them. They were alright, but were more like pita pocket bread, which is not what I had intended. Then I saw this wrap bread on Skinny Bovine's Kitchen (which she got from My Kitchen Cafe). She made it to go with the chicken gyros. This is the recipe I will stick with it from now on - it is so much better for gyros in my opinion. The original recipe comes from King Arthur Flour and was made to replicate Taco Bell gorditas, but I think it would be great for any kind of sandwich.

The first time I made these, I thought I did something wrong. The dough was very dry and didn't rise much. Luckily I stuck with it and finished them, and they turned out fantastic! After this, I found the original recipe on the King Arthur blog, which has step-by-step pictures. It's so helpful for this recipe since it's not your typical yeast dough. Once you get to the step where you roll the dough out, it is very easy to work with - no fighting back!

This last time making these I froze half of the dough balls (after the rise times, so through step 7 below). I will give an update once I've thawed and used them to confirm it's good, but I read an article on Cook's Illustrated online where they tested freezing dough - they say it's best to let it rise and then freeze and it doesn't affect flavor (rather than freezing before rising which may kill or affect the growth of the yeast). If you are making gyros or any kind of sandwich that requires a pita, try these out!!!

My gyros here definitely don't look as good as they did before (I decided to bake the chicken so I could use my meat thermometer - big mistake! Just doesn't get the same color and texture as when you use the broiler.)
Soft Wrap Bread

Ingredients:
3 cups unbleached all-purpose flour, divided
1 1/4 cups boiling water
1/4 cup potato flour (or flakes or buds)*
1 1/4 teaspoon salt
2 Tablespoons vegetable oil
1 teaspoon instant yeast

*If you use flakes/buds, I might recommend processing them in the food processor so they are more the consistency of flour. The first time I made these I did not do this, and I found it difficult to incorporate them into the dough.

Directions:
1. Place 2 cups flour in a large mixing bowl and stir in the boiling water. Stir until smooth. Cover the bowl and set the mixture aside for 30 minutes.

2. In a separate bowl, combine the potato flour with the remaining 1 cup flour and the salt, oil, and yeast.

3. Whisk until crumbly. Add to the cooled flour/water mixture.

4. Stir together. It will seem dry at first but the dough will eventually pick up the flour/potato mixture. Scrape the bowl as necessary to facilitate this process.

5. Knead by hand, mixer, or bread machine for several minutes. The dough will remain soft and somewhat sticky, and finally become smooth.

6. Transfer the dough to a greased bowl or container. Cover and let rise for 1 hour (it will not rise as much as a typical dough because of the small amount of yeast).

7. Divide the dough into 8 equal piece (using a digital kitchen scale will make this much easier). Roll each piece into a ball, and cover them. Let the dough balls rest for 15 to 30 minutes.

8. Using your hands, flatten each ball into a circle measuring about 5 inches in diameter. Using a rolling pin, roll the circles to about 7" to 8" in diameter.

9. Heat a skillet over medium heat (no oil necessary). Place the bread into the skillet one at a time (or two at a time if you have a double burner pan). Cook until brown underneath, about 1 minute. The bread will puff up a bit. Turn over, and cook until the other side is brown, about 1 minute. If any air bubbles develop, prick them to release the air. The bread will flatten under the pressure of a spatula.

10. As the bread comes off the skillet, stack them on top of one another to keep them soft and moist. When cool, store in a plastic bag (if there's any left!)

Wednesday, January 27, 2010

Blue Cornmeal Pancakes

My sister and her boyfriend Steve spent New Year's with us in Chicago. They have been talking about these blue cornmeal pancakes for a while, so I convinced Steve to make them for us. It was a big pain actually finding the blue cornmeal - I actually wasn't able to find it in Chicago at all. Luckily a grocery store back home carries it so I picked up a bag over Christmas. The brand we used is Bob's Red Mill.
Apparently the blue cornmeal is manufactured separately from all the other Bob's Red Mill products, so just because your store carries the products doesn't necessarily mean they will have the blue cornmeal. I've heard it's easier to find in the southwestern U.S...

If you do find it, these pancakes are fantastic! And really you could make them with regular cornmeal and I'm sure they'd taste practically the same. The texture reminded me of the blueberry ricotta pancakes in that it was very soft and light, but you still get the firm pieces of cornmeal. For a new twist on pancakes (and a pretty blue color) these were great!

If you're wondering what to do with your leftover blue cornmeal, I just discovered that the Bob's Red Mill website has other recipes too!


Blue Cornmeal Pancakes

Ingredients:
3/4 cup blue cornmeal (medium grind) OR traditional cornmeal
1 teaspoon salt
1 Tablespoon sugar
1 cup boiling water
1 egg, beaten
1/2 cup milk
2 Tablespoons butter, melted
3/4 cup unbleached white flour
2 teaspoons baking powder

Directions:
1. In a medium bowl, mix together the blue cornmeal, salt, and sugar. Stir in the boiling water until all of the ingredients are wet. Cover, and let stand for a few minutes.

2. In a measuring cup, combine the milk, egg, and melted butter. Stir the milk mixture into the cornmeal mixture. Combine the the flour and baking powder in a small bowl. Stir this into the cornmeal mixture until just mixed. If the batter is stiff, add a little more milk until the batter flows off of the spoon thickly, but smoothly.

3. Heat a large skillet over medium heat, and grease with a dab of oil or butter. Use about 2 Tablespoons of batter for each pancake. When the entire surfaces of the pancakes are covered with bubbles, flip them over and cook until golden.

4. Serve immediately with maple syrup or fruit preserves.

Serves 4 (we had a few leftover so it may actually serve 5)

Monday, January 25, 2010

Monkey Face Cookies

My great friend Jenny is expecting her first baby in March, and her baby shower was yesterday. She and her husband Jeff have decided not to find out the sex of the baby, so she's tried to design her nursery around a gender-neutral theme - monkeys! All of the things for the nursery are so adorable! Unfortunately I couldn't make it to town for her shower, but I wanted to do something special, so I decided to make some sugar cookies with royal icing in the shapes of monkey faces.


I started by finding a cute cartoon picture of a monkey face (although he kind of makes my cookies look less cute!):

I needed a monkey-face shaped cookie cutter, but the only ones I could find were online and wouldn't get here in time. I decided to wing it and use a series of shapes to build the monkey face.

Although I've worked with royal icing once before, I looked to a great tutorial Annie recently posted. Since I don't have a particular sugar cookie recipe I always use, I used her favorite one. Bake at 350 has also been posting some FAQ's on royal icing and helpful hints.

This ended up being a long, long, and did I mention LONG day! Over 18 hours to be exact. My problem was that I wasn't sure how many cookies I would get out 1 batch of dough and instead of erring on the side of caution and making 2, I just made 1, and 1 batch of royal icing. I then discovered I would need more of each, so I had to make them again separately. That combined with the fact that I'm new to piping and the drying time makes for a very long day. I did take 1 break for dinner and to go to Target. I know it would NOT take this long next time (or if any of you decide to make these) - because I have the steps down and know how much it makes. I was kind of making up how to do it as I went along. Plus, you can always make the royal icing, dough, or even bake the cookies ahead of time instead of cramming it all into 1 day.

Knowing that I was sending these cookie to my parents' house, I knew I needed to include a cookie for my dad. He has this idea that he should get to try any dessert that comes through their doors :) Since my dad is a huge Cardinals fan - the baseball team and the birds themselves - I bought this Cardinal cookie cutter this past fall with the intent of making him Cardinal cookies...I decided to just make him 1 since I needed the rest of the dough for the monkeys. I think it turned out pretty good, except my flooding icing was not thin enough so it was a little clumpy in some spots (I didn't care at that point because I had been making and decorating cookies for almost 18 hours!)


Monkey Face Cookies

Yield: 28 large cookies

Ingredients & equipment:
1 large and 1 small round biscuit cutters
2 batches royal icing (recipes here or here)
Gel icing colors: black, brown, and ivory
2 squirt bottles
Disposable pastry bag fitted with a #3 tip

Directions:
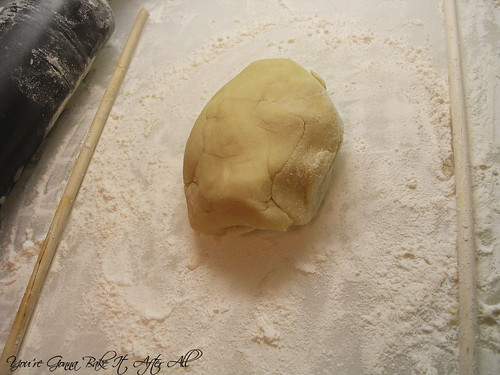
1. Roll dough out on well-floured surface to a thickness of 1/4-inch. I used two wooden dowel rods set up like this to guide my rolling and it worked so well! I am SO glad I bought these rods because I always have trouble rolling evenly, especially on the edges.


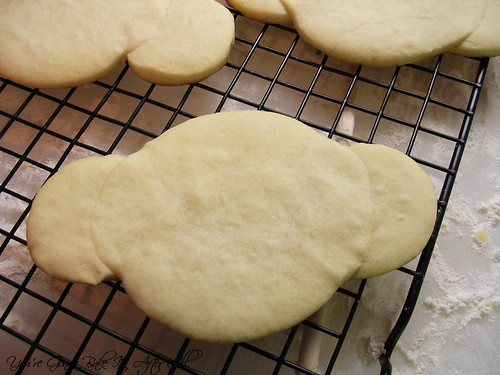
2. Use the large and small round biscuit cutters to cut out circles and transfer to a cold cooking sheet lined with parchment paper. Use a knife to slice the smaller circles in half as shown:
Then overlap the half circles onto the large circle to create the appearance of ears on the monkey face as shown above.

3. When all of the ears have been secured, give them an extra press to make sure they are attached, and bake the cookies according to recipe directions. When you remove them from the oven, let them sit on the cookie sheet for about 2 minutes, then carefully transfer to cooling racks. Cool completely. (Ignore that the ears in the picture below are underneath the face - it worked much better with them on top!)


4. Meanwhile, color your outlining icing: Take about 1/2 cup royal icing into a fresh bowl and color first with brown icing gel, then add black icing gel to achieve a deep, black color. Fill a disposable pastry bag fitted with a #3 tip. Set in a glass filled with a few millimeters of water so that the tip contacts the water (this prevents the icing from drying out).

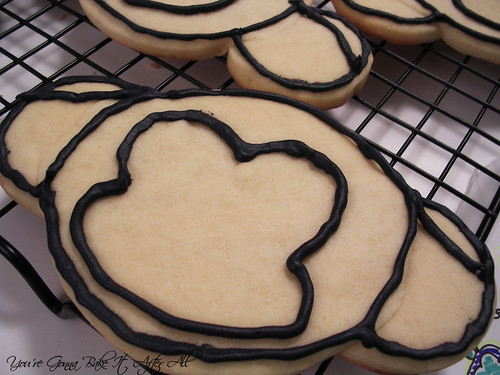
5. Using the cooled cookies, carefully pipe the black icing as shown (or with an even steadier hand!):

6. Set cookies aside to dry for 1 hour. Meanwhile, prepare your flooding icing: Take about 3/4 cup of royal icing into each of 2 bowls. Add water by the teaspoon to achieve a thin consistency. You want the icing to run off the back of the spoon and the drips to disappear back into the icing below within 5 to 10 seconds. Once you have achieved the right consistency, add brown coloring gel to one of the bowls. This may take quite a bit of gel to get a nice, dark color. Then add the beige to the next bowl - this will take much less so add it slowly.

7. Once you are satisfied with your colors, add each of them to one of two plastic squirt bottles. Use a small piece of plastic wrap to cover the opening if your bottles aren't equipped with a cap. The bottles are now ready to flood.

8. After the outlining has dried for at least 1 hour, flood the sections as shown:


Use a toothpick to help guide the icing to the edges if necessary.

9. Let cookies dry for several hours or overnight (I did overnight). You can just let them sit out at room temperature, uncovered. You may also leave the black piping icing in the bag as long as there is enough water in the bottom of the glass it's in (maybe a quarter-inch).

10. After the cookies have sufficiently dried, use the black frosting to pipe a face onto the monkey as shown:


11. Allow icing to dry for at least an hour, if not more. I did my face piping in the morning and let them sit out all day before packaging them up for mailing.

Source: Sugar cookie and icing recipes, as well as many helpful tips, from Annie's Eats, cookie design by You're Gonna Bake It After All

Friday, January 22, 2010

Coconut-crusted Chicken Tenders

A few months ago Bob and I were walking by The Goddess and Grocer and realized that, although we've driven by it a million times, we've never actually been inside! So we strolled in and found an awesome selection of pre-made items (like Chicken Marbella!), sandwiches, and specialty foods and drinks. One of the items in the case was Coconut-crusted Chicken. What a great idea! I've never heard of it before but immediately decided I would make a version at home. I though crusting in coconut alone might be a bit much, so I did a 50/50 mix of toasted Panko and toasted coconut. Instead of using the traditional egg dip for breaded chicken, I used light coconut milk. We really, really liked this chicken!!! The chicken stayed moist, the crust was crispy and slightly sweet from the coconut. Took us right back to Hawaii!

For my birthday back in October I bought myself an instant read digital thermometer at Williams-Sonoma. It has been SOOO nice not having to cut into chicken multiple times to see if it's done! Especially with strips like these, it can really ruin the presentation of the dish to have big cuts throughout the chicken tender. This thermometer leaves the most inconspicuous hole that practically closes itself!

With a pina colada dipping sauce. I found the sauce recipe online, but it wasn't that great so I'm not posting it.

Coconut-crusted Chicken Tenders

Ingredients:
1 package boneless, skinless chicken tenders
1/2 Tablespoon vegetable/Canola oil
3/4 cup panko bread crumbs
3/4 cup shredded sweetened coconut
1/3 can light coconut milk
1/2 cup flour
1 Tablespoon salt
1 teaspoon freshly ground black pepper

Directions:
Preheat oven to 400F.
1. Heat oil in a non-stick skillet. Add panko and cook until golden. Remove to a shallow dish to cool.

2. Using the same skillet, add coconut and brown slightly - do not overdo or the coconut will burn in the oven when the chicken is baked. Toss coconut with panko in the shallow dish.

3. Pour coconut milk into a second shallow dish. In a third dish, combine 1/2 cup flour with salt and pepper.

4. Line a baking sheet with foil and spray with cooking spray. Wash chicken and dry with paper towels. Dredge in flour, then dip in coconut milk, followed by coconut/panko mixture. Place on baking sheet.

5. Bake for 15-20 minutes or until cooked through (I used my instant read thermometer to cook to 165 - 170F and it worked PERFECTLY!) Make sure to keep on eye on them because the coconut can burn if you don't watch it.

6. Serve with dipping sauce(s) of choice, if desired!

Wednesday, January 20, 2010

Perfect Crispy Potatoes and Anytime Skillet

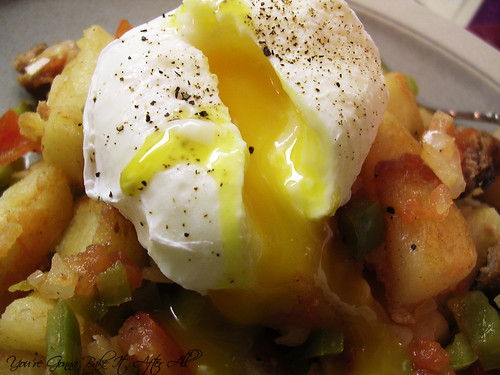
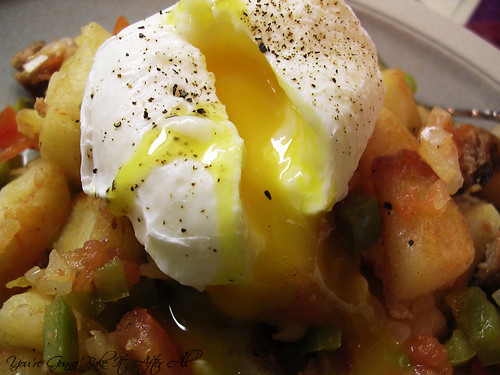
When Kerstin and I met for breakfast at Yolk, I got a "Skillet Your Way," which consists of diced red potatoes sauteed with 3 ingredients of your choice, sprinkled with cheddar cheese, and topped with two eggs cooked your way. My ingredients were turkey sausage, onion, and green pepper. I wanted to add tomato as well, but didn't want pay extra! My choice for the eggs was poached, with the idea that I could break the yolk over the rest of the skillet components. It was fantastic! I knew I had to recreate this one at home because it's such a simple concept. As the holidays approached, this fell to the bottom of my to do list, but thankfully was not forgotten.

My first order of business was to find a good potato recipe. My mom was raving about Melissa d'Arabian's Perfect Crispy Potatoes, and I decided those would be a great fit for the skillet. Once this recipe was chosen, the rest fell into place.

I served this as a dinner for Bob and I and we both LOVED it! First of all, Melissa's potatoes are, as their name suggests, PERFECT! So crispy and actually pretty quick. They are a great stand-alone side dish for any dinner - and the possibilities for seasoning are endless - add some chili powder, some Italian herbs, etc.. I definitely plan to make them again as a side dish and in skillet form.

I really just love this skillet. I think the combination of ingredients works so well together. I had intended to add shredded cheddar cheese on top but ended up forgetting and it was delicious regardless. I hesitate to call it a breakfast skillet because it's good for any meal, hence the "anytime skillet" title. One of my favorite parts is breaking the egg yolk and watching it run over the potatoes. If this is your type of thing, you'll love this recipe!

Anytime Skillet

Ingredients:
1 batch Perfect Crispy Potatoes (recipe below)
6 links turkey breakfast sausage, casing removed if desired (I used Jennie-O)
2 vine-ripened tomatoes
1/2 yellow onion, diced
1/2 green bell pepper, diced
grated cheddar cheese, optional
salt and pepper to taste
1 - 2 eggs per person

Directions:
1. Prepare the Perfect Crispy Potatoes as directed below. While they are baking and using the same pan in which the potatoes were sauteed and steamed, heat onion and green pepper over medium-low heat until softened. Lightly season with salt and pepper. The residual butter and oil from the potatoes should be enough for the veggies; if not add a little more oil. Add tomatoes and stir. Cook for a few minutes until heated through. Remove from heat and set aside.

2. Prepare poaching liquid: Fill a straight-sided pan with 2 inches of water and 1 Tablespoon white vinegar. The white vinegar helps keep the egg from spreading in the water. Heat to a boil and then reduce to simmer.

3. Meanwhile, cook the turkey sausage in a small skillet until cooked through. Transfer to a plate lined with paper towels to drain. When cool, slice.

4. Poach the eggs: Break each egg individually into a small bowl. Swirl simmering water with a spoon to create a little whirlpool. Hold bowl containing raw egg close to the simmering water and, using a quick motion, dump each egg into the water. Cook approximately 3 1/2 minutes. Remove each egg from water using a slotted spoon and carefully place on a plate covered with paper towels to drain.

5. Assemble the skillet: Toss the crispy potatoes in the pan with the onion, peppers, and tomatoes. Add turkey sausage, and toss to combine. Add cheddar cheese, if desired, and allow to melt. Plate the mixture and top with the poached eggs.

Serves: 2 - 3

Source: Inspired by a skillet I created at Yolk


Perfect Crispy Potatoes

Ingredients:
2 Tablespoons vegetable/Canola oil
2 large russet potatoes, washed, peeled, and diced into equal 1/2-inch cubes
Kosher salt and freshly ground pepper, to taste
2 Tablespoons water
1/2 Tablespoon unsalted butter

Directions:
Preheat oven to 375F.
1. In a large saute pan, heat the oil over medium-high heat. Add the potato cubes, and season with salt and pepper, to taste. Saute, stirring frequently, for 5 minutes.

2. Turn the heat up to high. Add the water, stir, and cover pan with a lid. Steam the potatoes until the water evaporates, about 3 or 4 more minutes. Every 1 to 2 minutes, open the lid long enough to stir the potatoes so they don't stick.

3. Lower the heat to medium, and saute another 1 to 2 minutes until all traces of water are gone. (I did this without the lid). Toss in the butter and stir to coat the potatoes.

4. Spread the potatoes out on a baking sheet. Bake in the oven until the potatoes are crisp and browned to your liking, about 15 to 25 minutes.

Source: Adapted from Melissa d'Arabian

Monday, January 18, 2010

Raspberry Sorbet

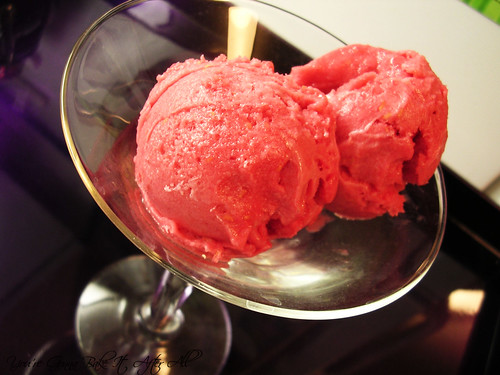
One of the biggest reasons I wanted the Cuisinart Ice Cream Maker is for homemade sorbets. When I saw raspberries on sale at the grocery store, I knew that Raspberry Sorbet was in order. My Ben & Jerry's cookbook had a recipe that really intrigued me, particularly because it has red wine in it.

I had some trouble with this recipe, but I think I've worked out the kinks, and it should be perfect the next time I make it. My first problem was that the recipe says to gently stir the ingredients and then dump in the ice cream maker. It felt wrong not to mush up the raspberries or blend them in a food processor, but I went with it. Big mistake. The raspberries started to freeze and the sugary liquid stayed liquid. I tried smashing up the frozen raspberries, but by that time the ice cream machine was starting to thaw. I finally just ended up putting the mixture in the fridge, re-freezing the ice cream maker, processing the mixture in the food processor the next day, then putting it back in the ice cream maker. This worked very well.

Bob and I both loved the flavor of this sorbet! We thought the red wine added a great flavor, although it's not a prominent wine taste, which is a good thing in my opinion. If you don't like wine, I'm sure you could add either grape juice or water in its place. Our only complaint was the raspberry seeds - they were so annoying! Next time I will strain them out before freezing. Then the sorbet will be excellent!


Raspberry Sorbet

Ingredients:
12 ounces fresh raspberries
1 1/2 cups sugar
juice of 1/2 lemon
1/4 cup dry red wine
1/4 cup light corn syrup
1 cup cold water

Directions:
1. Combine the raspberries, sugar, and lemon juice in a mixing bowl. Refrigerate covered at least 1 hour.
2. When ready to freeze, add the red wine, corn syrup, and water, and stir gently until blended. Here is where I disagree. I recommend transferring to a food processor or blender and process until smooth. I also recommend straining the seeds at this point.

3. Transfer the mixture to an ice cream maker and freeze following the manufacturer's instructions.

4. Transfer the frozen mixture to an airtight container and freeze until ready to enjoy. I preferred the texture of the sorbet after it had been frozen at least overnight.

Make 1 quart.

Source: Adapted from the Ben & Jerry's Homemade Ice Cream & Dessert Book

Friday, January 15, 2010

Baked Ricotta Cavatelli in a Mascarpone Cheese Sauce

Back in October when Bob's and my families came to Chicago for my thesis seminar, we went to Carmine's restaurant. Carmine's is located on one of the hottest streets in Chicago, Rush Street, very close to what is referred to as "viagra triangle." I don't need to get into that, but basically it's a premium location.

The restaurant has a nice ambiance. The first floor has a bar area that is louder than the table-only upstairs. Our party of 10 was seated upstairs away from the windows, but I can imagine that a table by the windows would give you an incredible view of Rush Street.

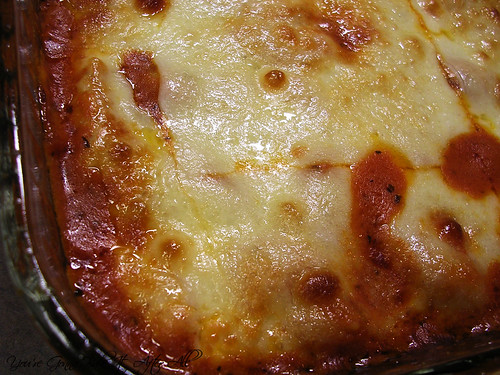
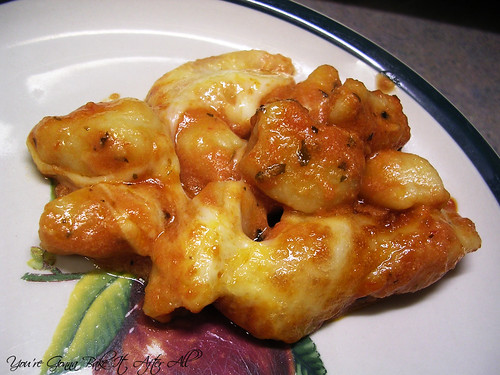
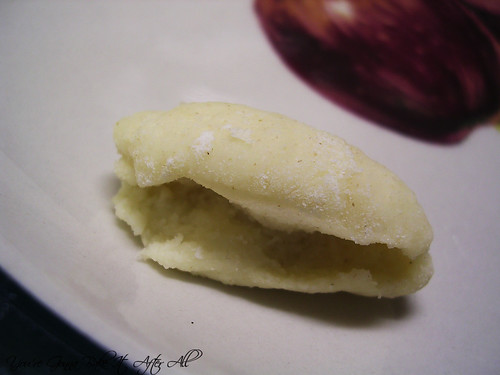
I ordered the most delicious pasta dish called the "Cavatelli al Forno," described as "Homemade ricotta dumplings simmered in marinara with imported cheeses, topped with mozzarella and baked." The cavatelli had a texture almost gnocchi-like; dense but soft. I loved everything about this dish. It was super rich, but unbelievably tasty. Coincidently, I had a recipe for ricotta cavatelli saved on my laptop desktop for quite some time before this visit to Carmine's, and this was just the push I needed to try making it at home. I decided to try to recreate the entire dish, or at least my interpretation of it.

I've never made my own pasta before, and although this is a tad different than most homemade pastas, I really enjoyed the experience! Shaping the cavatelli took quite a bit of time, but it was fun. This was a really delicious dinner! It's very rich, filling, and satisfying. My only problem was that the cavatelli recipe doesn't call for salt. I figured this was not a problem given the ricotta and the fact that the pasta is bathed in cheesy tomato sauce and topped with mozzarella, but I thought that the actual cavatelli themselves were a little bland. A sprinkle of salt into the dough would have made a big difference, so I've added it to the recipe below.

I definitely recommend this dish!


Handmade Italian Ricotta Cavatelli

Ingredients:
3 cups (1 pound) all-purpose flour
1 pound ricotta cheese
2 large eggs, lightly beaten
Salt, if desired (this recipe suggests 1/2 teaspoon)

Directions:
1. Put 2 1/2 cups of the flour into a bowl, make a well in the flour, and add the cheese and eggs (add salt at this point if desired). Gradually work the mixture together, adding more flour if necessary, to make a soft but not sticky dough.

2. On a lightly floured surface, knead the dough until it is smooth. Let the dough rest at room temperature, covered with an inverted bowl or wrapped in plastic, for 30 minutes.

3. Form the dough into a round and cut into quarters. Working with one quarter at a time (cover the remaining dough with an inverted bowl to keep the dough from drying out), on a lightly floured surface, roll the dough into a rope 1/4-inch in diameter (mine was closer to 1/2-inch).

4. With a knife, cut the rope into 1/2-inch pieces (mine were closer to 1-inch). With your index and middle fingers held together, gently press down on each piece, beginning at the top and moving down toward the bottom, dragging your fingers toward you and causing the pasta to roll over on itself.
Will look something like this:


5. Transfer the formed pasta to a lightly floured jelly-roll pan and let dry at room temperature for at least 30 minutes. Meanwhile, bring a saucepan of water to a boil.

6. Salt the water, and add the pasta. Cook until the cavatelli are al dente, 6 to 8 minutes. They are done when they float to the top (mine took closer to 4 minutes or even less!) Drain and proceed with recipe below, add your favorite sauce, or freeze.

Source: Adapted from FoodNetwork

Baked Ricotta Cavatelli in a Mascarpone Cheese Sauce

Ingredients:
1 batch Handmade Italian Ricotta Cavatelli (see above)
~23 ounces of your favorite pasta sauce (I used Prego Traditional)
8-ounces mascarpone cheese
grated Parmesan cheese
8 slices mozzarella cheese, or enough to cover the dish
olive oil for greasing baking dish

Directions:
Preheat oven to 400F.
1. In a large saucepan, melt mascarpone cheese over medium heat. Stir in pasta sauce. Season with a little Parmesan cheese, if desired.

2. Add ricotta cavatelli to sauce and stir to coat. Transfer to a 13 x 9-inch baking dish that has been lightly greased with olive oil. Top with mozzarella slices.

3. Bake until cheese is melted, approximately 20 minutes.

Source: Inspired by the Cavatelli al Forno at Carmine's

Wednesday, January 13, 2010

Pomegranate Cream Cheese Frosting

In the fall I was sent some POM Wonderful Pomegranate Juice to try for recipes. I immediately went on the POM website and found this recipe for POM Velvet Cupcakes with POM Cream Cheese Frosting. They looked so delicious, so I decided to try it out for my girls holiday potluck lunch in December.

Since there would be other desserts at the party, I made mini-cupcakes. The full recipe makes 30 regular cupcakes, so I figured a half batch would be good for 24 mini cupcakes with a little batter left over. Well, I ended up with a ton of batter left over - enough for 12 full-sized cupcakes! This wouldn't have been such a problem if I hadn't run out of frosting after 14 mini-cupcakes. It may have been my fault, since I was a little heavy on the frosting, but I highly doubt the frosting recipe is enough for 30 regular cupcakes frosted as heavily as shown in the picture on the POM website.

As far as taste goes, the cupcakes were just ok in my opinion (although Bob liked them). Good flavor but a little bit dry. Definitely not a prominent pomegranate flavor coming through. I really hate when I go to the trouble of making a homemade cake and it comes out worse than if I would have just made a box mix. And this cake was a big of pain with the double-sifting and multiple bowls of dry ingredients. For these reasons, I'm not posting the cupcake recipe.

The frosting on the other hand was great! Most people can't pass up cream cheese frosting, but I loved the added flavor of the pomegranate juice reduction. I would definitely make the frosting again, but the only thing I would change would be to add a little red food coloring. It had a pink tint when first made but by the time I got to my party it had faded to a grayish color - not too appetizing. Oh and did I mention that on my drive to the party the sealed container of cupcakes fell off the back seat and flipped upside down, destroying my piping? Yeah, that was fun ...grrr.

I have big plans for the rest of my POM juice, so stay tuned!


Pomegranate Cream Cheese Frosting

Ingredients:
1 1/2 cups POM Wonderful 100% Pomegranate Juice
4 ounces unsalted butter, softened
8 ounces cream cheese, at room temperature
14 ounces powdered sugar
red food coloring gel or liquid, if desired

Directions:
1. In a saucepan over low heat, reduce the pomegranate juice down to 3 fluid ounces. Allow to cool.
2. Place butter into an electric mixer bowl with paddle attachment and cream on medium-high speed for 1 minute. Add the cream cheese and continue to mix for 2 more minutes.

3. Turn the speed down to low and slowly add in the powdered sugar and the pomegranate juice reduction. Mix until the sugar is fully combined. Add food coloring now if desired.

4. Remove icing from the mixer and place into a piping bag with a round or star tip to decorate cooled cupcakes.

Makes enough to frost 30 cupcakes (In my hands it would only be enough for maybe 15).

Monday, January 11, 2010

Turkey Meatloaf

With the start of a new year comes the New Year's Resolutions, and for most people that involves eating healthier and/or exercising more. We've all heard about the overload of people at gyms in January, much to the dismay of regular gym-goers. Thankfully I work out at home, but I experienced something just as terrifying at the grocery store last Sunday afternoon. I strolled over to the ground turkey section of the meat case only to discover there were only 2 packages of ground turkey left!!! It was not even on sale! My theory: the gung-ho New Year's Resolution-ites are buying up all the ground turkey in an effort to cook more healthfully. I felt just like one of these regular gym goers - I am a loyal turkey purchaser who counts on the stuff just being there; I guess I shouldn't take it for granted! Anyway, I quickly picked up 1 package of turkey and hid it in my cart as I continued shopping. Never know when a turkey thief is lurking around the aisle.

So, what exactly were my plans for said turkey? Last month I finally tried out this turkey meatloaf recipe I saw on Annie's Eats a long time ago. It's adapted from Ina Garten, so I figured I would love it. I had made turkey meatloaf only once before and it turned out very watery - perhaps ground turkey has more liquid/water content than ground beef? Annie had the genius idea of lining the loaf pan with sandwich bread to absorb this liquid and let me tell you, no more soggy meatloaf!

This recipe was so fantastic that I couldn't wait to make it again. This time I made meatloaf muffins, and this is how I will make them from now on. I love how they are pre-portioned and each one is like a capsule, keeping in all of the moisture. I'm not exactly sure what makes this meatloaf so tasty - I think it's that the onions are cooked and then seasoned with Worcestershire and tomato paste. Mmm. And the ketchup on top is fantastic. My mom never put ketchup on our meatloaf, but I really like it. Bob said it was like "frosting on top of the meatloaf cupcakes." Whatever works for him :)

I was so tempted to apply the label "Muffins" to this post, but I'll refrain...

The first time:
The second time, in muffin form. Notice the sweet potato side dish which I will post soon - making side dishes is one of my New Year's Resolutions.

Turkey Meatloaf Muffins

Ingredients:
3 slices of sandwich bread (I used wheat)
1 cup chopped yellow onion
2 teaspoons olive oil
1/2 teaspoon kosher salt
1/4 teaspoon pepper
1/8 teaspoon dried thyme leaves
2 Tablespoon Worcestershire sauce
1/4 cup chicken stock
1 Tablespoon tomato paste
1 pound ground turkey (if you buy Jennie-O, it may be ~1.25 lbs.; that's ok too)
1/3 cup bread crumbs
1 egg, beaten
1/4 cup ketchup

Directions:
Preheat oven to 325F.
1. Use a small biscuit cutter or a small cup/glass to cut sandwich bread into circles to fit in the bottom of a 6-cup muffin tin.
2. Over medium-low heat, cook the onions, olive oil, salt, pepper, and thyme until onions are translucent but not browned, approximately 15 minutes.

3. Add the Worcestershire sauce, chicken stock, and tomato paste. Mix well. Allow mixture to cool to room temperature.

4. In a large bowl, combine the bread crumbs, egg, and onion mixture. Add ground turkey and mix until completely incorporated.

5. Press turkey into muffin cups. Spread ketchup on top. Bake until the internal temperature reaches 165F and the meatloaf is cooked through. (This takes about 1 - 1 1/2 hours for meatloaf in a loaf pan and much less time, about 35 minutes or so, for the muffins).

6. Let meatloaf muffins stand 10 minutes, then carefully remove them from tin, gently removing and discarding the soggy bread from the bottom.

Source: Adapted from Annie's Eats, originally from Ina Garten

Thursday, January 7, 2010

Roasted Vegetable Orzo

Ina Garten is my hero! Everything I've made of hers has been fantastic and this dish just hammers home that point. I first saw this on Live.Love.Eat., and it looked so fresh and so good. Although it's great for summer, I thought it would be a nice year-round dish. My lab had a holiday potluck lunch and, in addition to the Buche de Noel, I wanted to bring a meatless option for a vegetarian graduate student in the lab (and for my poultry-only self!) This dish was perfect! The awesome roasted vegetable flavors, the tender orzo, the light dressing, the fresh basil - SO SO SO good. I made it the night before and it was perfect - any dish that can be made in advance is a plus in my book.

Last month I was dabbling a bit in reducing my dairy intake, and in the process visited a few vegan cooking blogs, so I'm more aware of vegan dishes. I realized that I am not prepared to give up my precious dairy, but I'm conscious of when I eat it and whether it's absolutely necessary in the dishes I prepare. I actually thought the feta cheese was a little much for this - I may have preferred it without. Don't get me wrong, it does add an interesting flavor and creaminess, but I think this would still be an outstanding dish without it. If any of you out there are vegan or vegetarian, or cooking for someone who is, I highly recommend this dish!
Roasted Vegetable Orzo

Ingredients:
1 small eggplant, peeled and diced into 3/4-inch pieces
1 red bell pepper, cut into 1-inch pieces
1 yellow (or orange) bell pepper, cut into 1-inch pieces
1 red onion, cut into 1-inch pieces
2 cloves of garlic, minced
1/3 cup good olive oil
1 1/2 teaspoon Kosher salt
1/2 teaspoon freshly ground black pepper
1/2 pound (8 ounces - dry) orzo pasta

For the dressing:
1/3 cup good olive oil
1/3 cup freshly squeezed lemon juice (1-2 lemons)
salt
freshly ground black pepper

Finishing touches:
green onions,
feta cheese,
pine nuts (I omitted)
15 fresh basil leaves, chiffonade

Directions:
Preheat oven to 425F.
1. Toss the eggplant, bell peppers, onion, and garlic with the olive oil, salt, and pepper on a large baking sheet. Roast for 40 minutes, or until browned, turning once with a spatula.

2. Meanwhile, cook orzo in boiling salted water for 7 to 9 minutes (according to package directions), until tender. Drain and transfer to a large serving bowl.

3. Add roasted vegetables to the orzo, scraping all the liquid and seasoning from the roasting pan into the pasta bowl.

4. For the dressing, combine lemon juice, olive oil, salt, and pepper, and pour on orzo/vegetable mixture. Cool to room temperature.

5. Add the scallions, feta, pine nuts, and basil, if using. Check the seasonings and adjust with salt and pepper if necessary (not necessary for my taste). Serve at room temperature.

Makes 6 servings.

Source: Adapted from Live.Love.Eat., originally from the Barefoot Contessa

Tuesday, January 5, 2010

Mint Chocolate Chunk Ice Cream

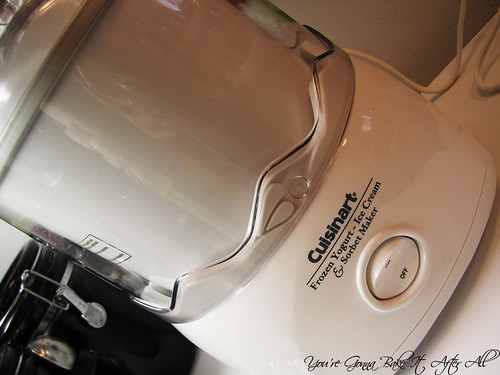
Meet one of my favorite Christmas gifts - the Cuisinart Frozen Yogurt - Ice cream, & Sorbet Maker! In addition to other great kitchen tools, my generous in-laws gave me this gift, as well as the Ben & Jerry's Homemade Ice Cream & Dessert Book. This ice cream maker is top rated by Cook's Illustrated (as well as used by Coconut & Lime). I have wanted an ice cream maker for a long time - particularly for sorbets and frozen yogurts. I also love sno-cones/slushies and was so excited to learn that this machine can make those too!


For my very first frozen treat, I decided to do Mint Chocolate Chunk ice cream. Mint Chocolate Chip/Chunk is one of my favorites - the cool mint is so refreshing. I used the Ben & Jerry's Mint Oreo recipe but subbed chopped semi-sweet chocolate for the Oreos. My only issue was that the chocolate took a long time to melt after frozen - as in it gets stuck in your teeth. I used Ghiradelli chocolate, so maybe a different chocolate would be better?

As far as the taste of the ice cream - fantastic! I'm amazed that I can make this at home. Great texture, creamy and delicious. I'm excited to try many more flavors, especially ones that are hard or impossible to find in stores.

The basic idea of Mint Chocolate Chunk can be applied to different ice cream bases - you don't have to use the egg-containing base that I did. I almost had to hide the ingredient list to get Bob to eat it; raw eggs creep him out :)


Mint Chocolate Chunk Ice Cream

Ingredients:
2 large eggs
3/4 cup sugar
2 cups heavy or whipping cream
1 cup milk*
2 teaspoon mint/peppermint extract
4 ounces semi-sweet chocolate, chopped into pieces smaller than a chocolate chip
optional: tiny bit of food coloring gel - a little goes a long way!

*I used skim milk, and it turned out great. The Ben & Jerry's book talks about fat percentages of cream, half-and-half, and different types of milk and how you can play around with it in the recipes.

Directions:
1. Whisk eggs in a mixing bowl until light and fluffy, about 1-2 minutes (I did this in my KA mixer with the whisk attachment).

2. Add the sugar slowly while whisking, then whisk for about a minute more until completely blended.

3. Add the cream and milk while whisking to blend.

4. Add mint extract and blend again. Add food coloring at this point if desired.

5. Add mixture to your ice cream maker and prepare according to manufacturer's instructions. For mine, it calls to add the chocolate chunks in the last 5 minutes of mixing.

6. Serve immediately if desired or transfer to an airtight container and freeze. I preferred the texture of the ice cream after it was frozen overnight.

Sunday, January 3, 2010

Welcome 2010!

Happy New Year! I have been dreaming about 2010 for a LONG time. I started graduate school in Chicago in 2004 knowing that I would not be done until close to 2010, at which point I planned to move back to St. Louis where my entire family lives. Meanwhile, Bob decided to go back to school, knowing he would graduate in the spring of 2010. We both feel that our lives have sort of been on hold during this time - waiting to have more time (and space) for our hobbies and interests. So, 2010 is a big year for Bob and I:

His graduation and my hooding ceremony:


A big move to St. Louis:

New jobs: (Bob will be working as a PT and I'll be working with fruit flies!)


House shopping:


And one of my favorite parts is that my cousin Chris, who joined the Navy just as I was starting graduate school, will have completed his service and is moving back to St. Louis too.
I am beyond excited to be near my parents and extended family again!

Since it's the beginning of a brand new year, I'd like to reflect back on 2009. I feel like I have grown so much in my cooking since starting this blog last March - it has really pushed me beyond my comfort zone and forced me to try new things. I have now worked with mock marzipan, royal icing, and yeast breads, just to name a few. I am so thankful to each and every one of you who read my blog and who comment on the recipes I post!

To celebrate the occasion, I've decided to go through the things I made in 2009 and choose my favorites. I realized I couldn't pick just one favorite of each category of food, so I decided to just pick my top recipes and list them here. This is hard because I typically only post something if I really like it, so I usually recommend it all. To be featured in this list, the recipe must meet my standards - most importantly, taste amazing - when I read the title of these recipes my mouth actually starts watering - that's how good they are. As a cooking blogger, it's difficult for me to repeat recipes because there are SO MANY fabulous ones out there to try (I have about a million starred in Google reader to prove it!) To be honest, it's really only the super special recipes that I actually make a second time. These are recipes that I plan to make again and again. Sometimes it's not even my choice - it's that Bob requests them over and over. Funnily enough, a lot of my top recipes are from Giada De Laurentiis! Not on purpose, it's just how it turned out.

In no particular order, this is my list of "must makes" from 2009:

Blueberry Ricotta Pancakes - This is a simple recipe from Giada because it uses store bought pancake mix, but it's a semi-homemade approach that tastes incredible. The ricotta cheese really elevates the pancakes to a new level. I am a pancake snob and only like them super light and fluffy, and these pancakes deliver!

Panzanella - I absolutely LOVE this classic tomato and bread salad recipe of Giada's. Perfect for summer when tomatoes are at their peak, but still great the rest of the year.

Chicken Tortilla Soup - I have made many chicken tortilla soups before and never quite found the right one . . . until this one. I love it's simplicity - no corn, no beans, just a super tasty broth with a few veggies, and some chicken of course. The toppings are exceptional. I think each of them adds another flavor dimension. I recently made this for my family and they loved it!

Ribollita - I would have to say this was one of my most surprising recipes (it's Giada's). The whole time making it I was convinced I would hate it - it didn't look appetizing and I really planned on having to eat crackers for dinner. Not only did I eat the soup, I had a second bowl. It was that good. And now here it is on my top recipes lists for 2009. Go figure!

Chicken Gyros - I have made these at least 5 times in the last 5 months! They are SOOO good. The most recent time I made an amazingly delicious flat bread, which I will post soon. It took these from awesome to indescribable :)

Garlic Chicken - Serve with rice, serve with rice noodles, just serve!

Triple T Deluxe Pizza - One of the only recipe on this list that is my own, and it's not even a recipe! The crust is from Cook's Illustrated and truly makes the pizza. The toppings are a great combination, I think. This was the first time I made pizza at home and thought, "hey, this is better than I can get delivered" - no joke.

Rigatoni with Sausage, Pepper, and Onions - Just thinking about this dish makes my mouth water (another Giada recipe). The sweet onions and peppers, the tangy tomato sauce, the comforting pasta, and one of my favorite flavors - marsala wine. This is one of my favorite dishes of all time!

Chicken with Dijon Mascarpone Sauce - Love this recipe! Yet another one from Giada - what can I say, she's knows good Italian food! Get your mascarpone cheese at Trader Joe's if you can - so much cheaper. This recipe is so indulgent. I save it for special occasions and company.

Fresh Salsa - The first time I made this, I was skeptical. How could I like it more than the great salsas you get in Mexican restaurants? I was mistaken - this salsa is right up there with the best of them. It's fantastic served with quesadillas, enchiladas, or tacos, or by itself with tortilla chips. I served this as an appetizer when my cousin and her boyfriend were over one night. He kept saying how good it was, then kept apologizing for repeating himself - it was cute :)

Spinach and Chicken Quesadillas - My favorite quesadilla recipe so far! In my opinion it's the fajita seasoning that makes it special (I credit Annie for that addition!) It was through this recipe that I realized my love of Monterey Jack cheese - it's perfect for Mexican food!

Tres Leches Coconut Cupcakes with Dulce de Leche Buttercream - Wow. Seriously that word sums it up. These were incredible. I still have people at work say to me "you know, you can make those anytime, you don't have to dress them up as Easter Chicks." I take a LOT of desserts into work, and for this one to stand out as much as it did really shows it's a great recipe. I can't wait to make these for my dad because I know he will LOVE them!

Pumpkin-Chocolate Tart - Not only is this one of my favorite desserts in terms of decoration, but this tart is fantastic. The combination of the sour cream and pumpkin makes a super tasty filling. The gingerbread-tasting crust is spicy and delicious, and it's coated in solid chocolate! I plan to make this again next fall for sure.

Chocolate and Toasted Coconut Covered Homemade Marshmallows - Homemade marshmallows are fabulous on their own, but as soon as I dipped them in chocolate and rolled them in toasted coconut, I had a hit! These are just like candy. My only mistake was not making more of them! Next year, I will be prepared with plenty of chocolate and coconut on hand to make a bunch of these.

Triple Chocolate Biscotti - I'm certainly not a biscotti expert, since these were the first I've ever tasted, but what a great little cookie! I loved the combination of white and bittersweet chocolates. These are great on their own or dipped in your favorite coffee, tea, or even milk.

Chicken Marbella - This is such a famous recipe and probably needs no introduction, but if you've never tried it, you must. Great for a crowd or a small group with yummy leftovers, the flavors in this dish are truly wonderful.

Double Chocolate Layer Cake - Decadent and rich - this dessert is perfect for chocolate lovers like yours truly. I'm not surprised it's the most accessed recipe on Epicurious.com!

Spicy Roasted Chicken - Pam has several great looking chicken recipes - all of which I'd love to try. This one is so delicious. I love the spices and the chicken turned out very juicy.

Chicken Pesto Pizza - I loved this pizza! It's a blend of sweet peppers, zucchini, and chicken, flavored with Italian seasoning. The ingredients magically combine to make one fantastic dish.

Bailey's Irish Cream Cheesecake - Of all the cheesecakes I've made, this is my favorite. Such a creamy filling covered in ganache - yum!

And just for fun, these are the top posts that have received the most hits according to Google Analytics:

1. Bacon Stuffed Cherry Tomato Appetizers (Thanks for the recipe Kat!!!)

  © Blogger template Brownium by Ourblogtemplates.com 2009

Back to TOP