Search This Blog

Monday, August 31, 2009

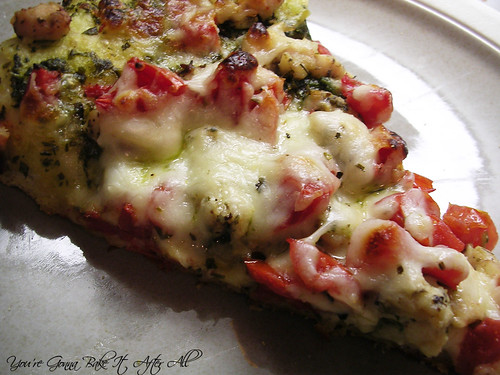
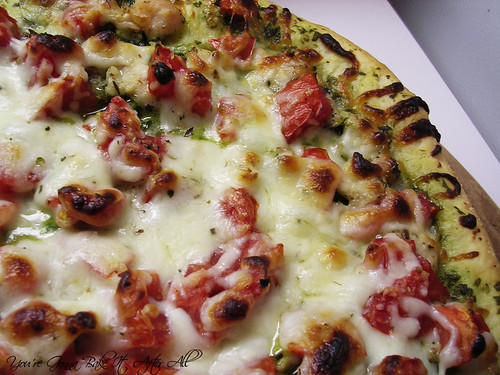
Chicken Pistou Pizza

Earlier this summer, I had a moment of weakness - well really my husband had a moment of weakness. He said that I had been pining over a pizza/baking stone and an immersion blender for so long that I should just get them. (I had thought I could just wait until my birthday in October but I don't think he wanted to listen to me talk about them for the next 2 months!) So, we grabbed two of our trusty blue coupons from the car trunk (you know the store I'm talking about!) and made these purchases. A few days later when I mentioned it to my mom, she told me that she never uses her pizza stone or immersion blender and I could just have hers! Thankfully, mine were still in the store bag with the receipt safely tucked inside! I actually wrote this post before the Roasted Tomato Soup post to announce the immersion blender, but I forgot and posted the soup first, so I spilled the beans - oh well! :)

One of the main reasons I wanted a pizza stone is because this wonderful pizza crust is supposed to be baked on one. While I thought it was completely delicious baked on a regular cookie sheet, I couldn't help but wonder how different it would be if the recipe was followed. Plus, I had the perfect pizza recipe to try. I've made a Chicken Pesto Pizza before, but then I saw this on Annie's Eats and loved her combination of chicken with tomatoes. I had some homegrown tomatoes from my parents' neighbor that were just begging to be used.

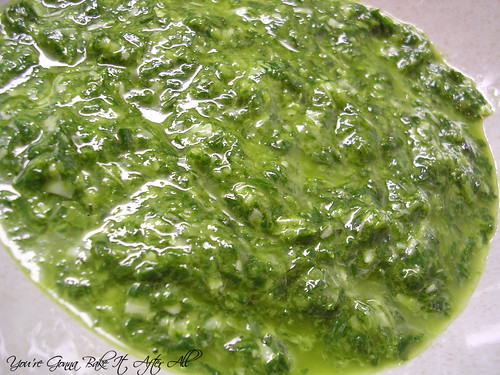
I decided to incorporate the method from this pizza for making the chicken. Because of my nut allergy, I had to make a pinenut-less pesto, and after some googling, I discovered the French Pistou - a combination of olive oil, basil, and garlic (and never pinenuts); hence the Chicken Pistou Pizza was born!

By the way, if you were wondering if the pizza stone improved the crust, the answer is YES! :)

Chicken Pistou Pizza

Ingredients:
1/2 batch pizza crust, or enough crust for 1 large pizza
1 large chicken breast, diced in small pieces
1 Tablespoon olive oil, plus more for cooking chicken
1 Tablespoon Italian or Pizza seasoning, plus extra for sprinkling
2-3 small, vine-ripened tomatoes, juice and seeds removed, diced
Sun-dried tomatoes, optional
Pesto or pistou (see below)
Mozzarella cheese
Parmesan cheese, if desired

Directions:
1. Marinate the chicken: Place diced chicken in a resealable plastic bag filled with 1 Tablespoon Italian seasoning and 1 Tablespoon olive oil. Refrigerate for 30 minutes to 1 hour.

2. Place pizza stone in the oven and preheat to 500F.

3. Cook the chicken in a pan with some olive oil, if necessary, until fully cooked.

4. Coat a surface liberally* with corn meal. Roll dough out into a pizza. Top with Pistou, cooked chicken, fresh and sun-dried tomatoes (if using), and mozzarella cheese. Sprinkle with a dash of Italian or Pizza Seasoning and top with Parmesan cheese, if desired.

5. Remove the baking stone from the oven and carefully transfer the pizza onto it. Place in oven and bake for 12-15 minutes, or until crust is golden and cheese is melted.

*This is very important. I underscored the need for corn meal and suffered the consequences. It took 3 of us to transfer the pizza from to the baking stone! I then did some research about pizza making and read that corn meal is the 'ball bearings of pizza making' - great analogy! My advice - use a LOT!

Source: Adapted from Annie's Eats

French Pistou

Ingredients:
4 cloves of garlic (I think I used 2 to make sure it wasn't too garlicky)
1/2 teaspoon salt *Mine was pretty salty, maybe start out with less!
~1 cup slightly packed basil leaves
olive oil (~4 Tablespoons, give or take)
grated Parmesan cheese to taste, optional

Directions:
1. Crush the garlic using a mortar and pestle. Add the salt and use the pestle to make a garlic paste.

2. Add torn basil leaves and olive oil and continue using the pestle to make the pistou.

3. Transfer mixture to a mini food processor to achieve consistency, if desired.
Friday, August 28, 2009

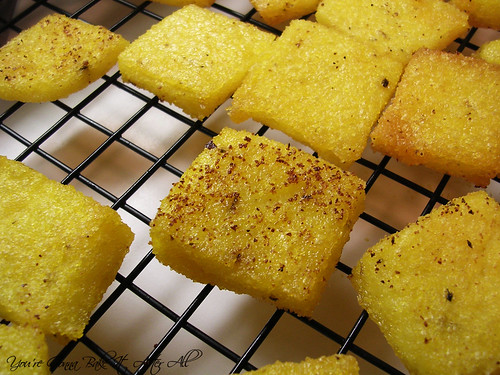
Parmesan Garlic Polenta Croutons

As promised, here is the recipe for the Parmesan Garlic Polenta Croutons. Now I thought these would be great in the tomato soup, particularly because one of my favorite Panera soups (Creamy Tomato, now discontinued --grrr) is served with Asiago Cheese Croutons. The only problem is that when I put these in the soup, they softened pretty quickly and became mushy. So, we decided to either put them in one at a time, or to dip them in the soup, and that was delicious. I recently had a salad at a restaurant with Jalapeno Polenta Croutons, which were deep fried, and those were good too. There's a lot of possibilities here - I've even seen someone on Food Network make polenta with chicken broth instead of water, which I'm sure would be great. The thickness of the croutons depends on how much polenta you use and how big your pan is, so you can always adjust that depending on how you like the croutons. This isn't an exact recipe, so use you judgement. I noted about how much of each ingredient I used. My garlic salt got a little toasty, as you can see in the picture, but the great thing about these is that you can season them anyway you want!

Parmesan Garlic Polenta Croutons

Ingredients:
Instant polenta (I used 1 cup)
Grated Parmesan cheese (I used ~1/4 cup)
Herbs to taste (rosemary, thyme, etc)
Olive oil for drizzling
Garlic powder or salt to taste

Directions:
1. Prepare instant polenta according to package directions, using a whisk. I decided on 1 cup because that's what my package called for.

2. Add in herbs, if using, and grated Parmesan cheese.

3. Coat a baking sheet or pyrex/ceramic dish with cooking spray (I used a 13 x 9 and mine were somewhat thin, I probably could have used an 11 x 7 and been fine). Spread the polenta mixture into the pan quickly, and spread evenly with a spatula. Place pan in refrigerator to cool and set for 30 minutes. Meanwhile, preheat oven to 400F.

4. Cut the polenta into squares or triangles (or any shape you prefer really!).

5. Drizzle both sides of polenta pieces with olive oil and sprinkle with garlic powder/salt (if using). Bake at 400F for about 45 minutes, or until crispy. (Mine took a little longer to crisp.) Turn them half-way through to make sure they get crispy on both sides. Cool on a rack when done.

6. Best if used the same day, but you can store them in an airtight container in the refrigerator and reheat them until crisp the next day.

Source: Adapted from Proud Italian Cook

Wednesday, August 26, 2009

Roasted Tomato Soup

I know it's still warm out, but I wanted to make this soup while the delicious summer tomatoes are still in stores and while my basil plant still has some life in it! This soup was SO delicious! The red pepper flakes make it pretty spicy, which is nice. We had just the soup, but it would be great alongside a grilled cheese sandwich. This was also my first time using my immersion blender- LOVE IT! I can't tell you how much easier it is not to transfer the soup to food processor and back. I made some Parmesan Garlic Polenta Croutons (adapted from Proud Italian Cook) to go with it, which I'll post next, so stay tuned!
Roasted Tomato Soup

Ingredients:
3 lbs. vine-ripened tomatoes, cut in half and insides removed
1/4 cup + 2 Tablespoons olive oil
1 Tablespoon kosher salt
1 1/2 teaspoons pepper
2 cups chopped onions
6 garlic cloves
2 Tablespoons butter
1/2 teaspoon crushed red pepper flakes
1 28-ounce can whole or chopped tomatoes, with juice
2 cups fresh basil leaves
1 teaspoon dried thyme
4 cups chicken stock

Directions:
Preheat oven to 400F.
1. Toss tomatoes with 1/4 cup olive oil, salt, and pepper in a large mixing bowl. Spread the tomatoes in 1 layer on a baking sheet covered in foil and roast in the oven for 45 minutes.

2. In a large stockpot over medium heat, saute the onions and garlic with 2 Tablespoons olive oil, butter, and red pepper flakes for 10 minutes until the onions start to brown. Add the canned tomatoes, roasted tomatoes, basil, thyme, and chicken stock. Bring to a boil and simmer uncovered for 40 minutes.

3. Use an immersion blender (or food processor) to puree the soup.

Source: Annie's Eats

Friday, August 21, 2009

Garlic Chicken Take 2

Happy Friday! I'm excited for the weekend because I will feel like I'm entitled to a break from writing :)

I recently made my mom's Garlic Chicken, but I tossed it with some thick stick rice noodles instead of serving with rice. We loved this!!! Bob even said it was as good as anything he could order in a restaurant - that's a big compliment coming from him! This is really just a repeat of a previous recipe (with a slightly better picture!), so I'm just linking the original Garlic Chicken recipe and the method for softening the rice noodles below. Have a great weekend!!!

Simply stir drained rice noodles into pan of stir fry and continue cooking for a few minutes until noodles reach desired doneness. Enjoy!

Wednesday, August 19, 2009

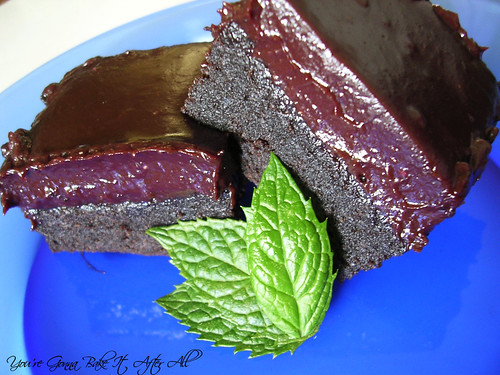
Dark Chocolate Mascarpone Brownies with Blueberry Ganache

I feel like such a blog slacker lately!  Between all of the traveling we have been doing and writing my dissertation, things have been so busy this month! Luckily I have been able to make a few things in the meantime.

Sometimes I like going through the archives of my favorite cooking blogs to discover recipes that may have been posted before I became a reader. Several months ago, I was doing this for Jenny's blog, Picky Palate. I came across this recipe for Dark Chocolate Mascarpone Brownies with Blueberry Ganache - don't they just sound decadent?!? I saved the recipe to my desktop and waited for an excuse to make them. Each time I opened my laptop, there the recipe sat taunting me. I finally made the decision that I would make these for a lunch our lab was having to say goodbye to our summer undergraduate student before she returned to college. 

These brownies were delicious! Although I prefer a more chewy brownie, these are more cake-like, so I just pretended it was a very moist cake. My favorite part is the ganache - seriously brilliant idea of Jenny's to add the blueberry sauce/syrup - it gives the best flavor. I think many other versions of this would be great too - add a little raspberry or strawberry syrup, or even some Framboise! In summary, the brownies were good, but the ganache was amazing!!!

One question to toss out there - why do people pronounce it "maRSCapone" when it's spelled "maSCARpone"???  I think in Italian the proper way to say it "mas-car-pon-AY," but what do we say in America without sounding like don't know the word? This always bugs me!
Dark Chocolate Mascarpone Brownies with Blueberry Ganache

Ingredients:
1 cup unsalted butter
2/4 cup best-quality semisweet chocolate chips (such as Ghirardelli)
1 cup sugar
1/2 cup Hershey's Dark cocoa powder
8 ounces mascarpone cheese, softened
6 eggs
2 teaspoons vanilla extract
1 cup all-purpose flour
1/2 teaspoon fine salt
Ganache, recipe below

Directions:
Preheat oven to 325F.  
1. Butter a 13 x 9-inch pan or 2 9-inch round pans and set aside.

2. In a small saucepan, melt the butter and bring it to just below a boil. Place the chocolate chips in a large bowl. Pour the hot butter over the chips and let stand for 30 seconds. Stir until completely melted. 

3. Sift in the sugar and cocoa powder. Beat in the mascarpone, eggs, and vanilla.  Mix until smooth. Gently fold the flour and salt into the batter.

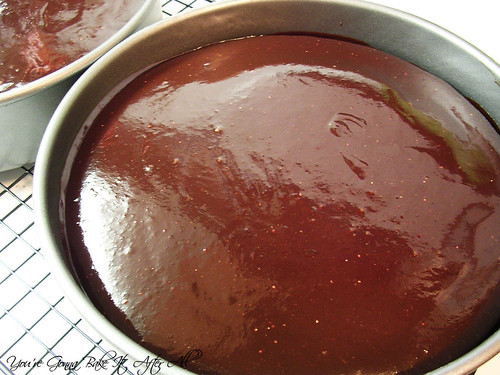
4. Pour the batter into the prepared baking pan(s) and spread evenly. Bake for 45 - 50 minutes for the 13 x 9 pan (I used 2 9-inch round pans and it only took 20 minutes!)

5. Cool for 10 - 15 minutes. Spread the warm ganache over the brownies. Allow the ganache to set completely before cutting into squares.


Blueberry Ganache

Ingredients:
1 12-ounce bag best-quality semisweet chocolate chips
2 cups frozen blueberries
1/2 cup sugar
1/2 cup heavy cream
4 Tablespoons unsalted butter

Directions:
1. Place the chocolate chips in a large mixing bowl and set aside.

2. Place the blueberries and sugar in a small saucepan over medium heat. Cook and stir until the mixture becomes sauce-like and bubbly. Pour into a sieve or strainer that is placed over the bowl containing the chocolate chips to catch the blueberry liquid. Discard the remaining blueberries. 

3. Bring the cream and butter to just below boiling in a small saucepan over medium heat. Pour the hot mixture over the chocolate and let stand for 30 seconds. Stir the mixture until smooth. The ganache should be warm when used for spreading.

Source: Picky Palate

Monday, August 10, 2009

Honey Yogurt Dip

My favorite fruit dips usually contain marshmallow fluff as the main ingredient, so I was delighted to discover that I love this Honey Yogurt Dip! It's so good! The combination of honey and cinnamon reminds me of sopaipillas. Not that I don't still love the marshmallow fluff dip, but I can't rationalize having it around for an everyday snack. I think the Greek Yogurt is really important for this recipe, otherwise the dip would be too liquidy. You can serve this dip with any fruit, but I especially like it with sliced apples. Apples + cinnamon + honey = delish! What a great recipe for the upcoming apple season (did I mention how excited I am for fall?!?)
Honey Yogurt Dip

Ingredients:
1 7- or 8-ounce container of Greek Yogurt
1/4 cup honey
dash of cinnamon

Directions:
1. Combine ingredients in a small bowl and store in refrigerator. 

2. Serve with your favorite fruit!

Source: Annie's Eats

Thursday, August 6, 2009

Chicken Tostadas with Cilantro Lime Drizzle

Recently I've had a culinary block and can't seem to figure out what to make for dinner. Hot weather deters me from some of my favorite baked pasta dishes and soups. This past weekend, I had Bob choose some dinners out of my saved recipes from other cooking blogs. His first pick was this recipe for Chicken Tostadas. I was excited for two reasons: 1) the tostadas are served with a cilantro lime ranch drizzle which sounded amazing, and 2) it gave me an excuse to whip up a batch of delicious homemade salsa! We both loved this dinner and will make it again!
Chicken Tostadas with Cilantro Lime Drizzle

Ingredients:
For the tostadas:
1 boneless, skinless chicken breast, shredded (see method below)
6-inch corn or flour tortillas
1 can black beans, rinsed and drained (optional) 
Suggested toppings:  diced plum/Roma tomato, shredded Romaine lettuce, shredded cheese, light sour cream, salsa  

For the Cilantro Lime Drizzle:
1/2 cup light Ranch salad dressing
juice of 1 lime
handful of cilantro

Directions:
1. Prepare shredded chicken:  I followed a method outlined here and here. I cut 1 chicken breast into 3 pieces, put them into a medium saucepan, then topped them with 1 14-ounce can of chicken broth, the equivalent of 1/4 of that can of water, a sprinkle of cumin and chili powder, and some fresh ground pepper. I brought it to a boil, uncovered, then reduced heat to a simmer, partially covered, for 7 minutes. Then covered completely, removed pan from heat and let sit for 30 minutes. I removed the chicken from the broth and shred it with 2 forks.

2. Prepare Cilantro Lime Drizzle: Add all ingredients to a mini food processor and blend well.

3. Heat oven to 450F. Lay tortillas on racks to crisp (just a few minutes, watch closely). 

4. Top tortillas with black beans, if desired, chicken, and other suggested toppings. Drizzle Cilantro Lime sauce on top. 

Serves 2

Source: Adapted from Skinny Bovine's Kitchen

Tuesday, August 4, 2009

Fresh Blueberry Pie

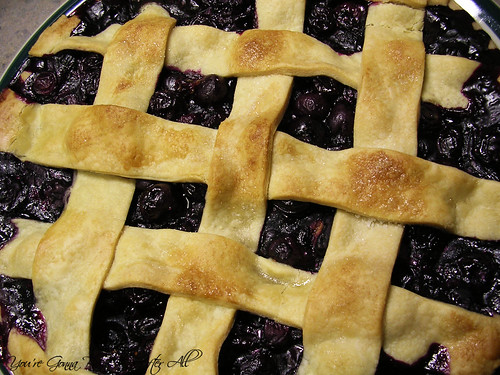
Last week blueberries on sale for 99 cents a pint!  (They are typically $4.99 a pint at our store). So, I bought 4 pints to use and freeze! My dad suggested that I make a pie with a "criss-cross top," which I thought was a fantastic idea considering I've never made a lattice topped pie before but have always wanted to.  This pie was delicious! It was a little less sweet than the Mixed Berry Pie, which was almost like a jam . . . mmm jam. This pie was perfect paired with whipped cream!

Fresh Blueberry Pie

Ingredients:
Pie crust for a 2-crust 9-inch pie
4 cups fresh blueberries, rinsed and dried
1/2 cup sugar
2 Tablespoons lemon juice (~1 medium lemon)
2 teaspoons finely grated lemon zest (I used all of the zest of the medium lemon)
2 Tablespoons cornstarch
dash of salt
milk to brush on crust and sugar to sprinkle on top

Directions:
Preheat oven to 425F.
1. Prepare crust. Press the bottom crust in a pie plate. 

2. In a large bowl, add sugar, lemon juice and zest, cornstarch, and salt. Mix well. Add fresh berries and stir to coat evenly. Transfer berries to pie plate containing the bottom crust.

3. Roll top crust out into a large oval (~10 inches x 8 inches). Using a clear plastic ruler and a knife or pizza cutter, cut strips of desired width (mine were 1-inch).  Lay parallel strips across the berries, all in one direction.  Fold back every other strip and then lay a strip perpendicularly across berries (to make lattice). Continue to do this by alternating which strips are folded back. You may leave as much space as you desire between the strips - you can even leave no space at all, which simply makes a solid top crust with a beautiful design, but in this case you might want to roll the dough thinner otherwise the top crust will be a double layer (and you would run out of dough!)

4. If desired, brush top crust with milk (I used skim), then sprinkle with sugar.

5. Bake for 40-50 minutes or until crust is golden. You may need to cover the edges with aluminum foil after 10-20 minutes to prevent them from over-browning.

6. After baking, let pie cool at least a few hours before slicing. Enjoy with some whipped cream!!! 

Source: Adapted from the Pie and Pastry Bible

  © Blogger template Brownium by Ourblogtemplates.com 2009

Back to TOP