Search This Blog

Tuesday, March 31, 2009

Spring Green Risotto

I've never made risotto before . . . I may have never really eaten risotto before either, unless the kind from the box counts. I always choose pasta over rice at Italian restaurants, I'm not sure why. Anyway, I've been wanting to make risotto for a long time now, so when I saw Ina Garten make this primavera version, on a particularly 'spring-like' weekend temperature-wise, I decided this was the recipe. This was wonderful! I loved the colors of the green vegetables, and the creaminess of the dish, even though you don't use cream. The lemon zest and juice really brighten the flavor. I've never worked with fennel bulb before, so I was excited to try it. I knew it was supposed to have a slight anise flavor when raw, which I could taste in the raw piece I tried, but I didn't taste that in the finished dish. I'm not quite sure what flavor it imparted, but it's always nice to try new things.
Spring Green Risotto

Ingredients:
1 1/2 Tablespoons good olive oil
1 1/2 Tablespoons unsalted butter
3 cups chopped leeks, white and light green parts (2 leeks)
1 cup chopped fennel
1 1/2 cups Arborio rice
2/3 cup dry white wine
4 to 5 cups simmering chicken stock, preferably homemade
1 pound thin asparagus
10 ounces frozen peas, defrosted, or 1 1/2 cups shelled fresh peas
1 Tablespoon freshly grated lemon zest (2 lemons)
Kosher salt and freshly ground black pepper
2 Tablespoons freshly squeezed lemon juice
1/3 cup mascarpone cheese, preferably Italian
1/2 cup freshly grated Parmesan cheese, plus extra for serving
3 Tablespoons mince fresh chives, plus extra for serving

*My notes about the ingredients: I used salted butter, so I just used less salt later in the recipe. I ended up needing close to 6 cups of chicken broth (canned) because my rice took longer to soften. I just had a BIG can of chicken broth and used the whole thing. I used frozen petite peas. I didn't use mascarpone because it's expensive, and it was already costing a decent amount between all the veges and the Arborio, so I used 1/3 red fat cream cheese instead. We didn't think that mascarpone would have added that much more, so I'm glad I didn't splurge on it. And lastly, I didn't use the chives. Again, it's about $3 for a pack of chives in our store, so I just left them out. If I had a private, year-round garden in the Hamptons like Ina, I'd use them too ;)

Directions:
1. Heat the olive oil and butter in a medium saucepan over medium heat. Add the leeks and fennel and saute for 5 to 7 minutes, until tender. Add the rice and stir for a minute to coat with the vegetables, oil, and butter. Add the white wine and simmer over low heat, stirring constantly, until most of the wine has been absorbed. Add the chicken stock, 2 ladles at a time, stirring almost constantly and waiting for the stock to be absorbed before adding more. This process should take 25 to 30 minutes.

2. Meanwhile, cut the asparagus diagonally into 1 1/2-inch lengths and discard the tough ends. Blanch in boiling salted water for 4 to 5 minutes, until al dente. Drain and cool immediately in ice water. (If using fresh peas, blanch them in boiling water for a few minutes until the starchiness is gone.)

3. When the risotto has been cooking for 15 minutes, drain the asparagus and add it to the risotto with the peas, lemon zest, 2 teaspoons salt, and 1 teaspoon pepper Continue cooking and adding stock, stirring almost constantly, until the rice is tender but still firm.

4. Whisk the lemon juice and the mascarpone together in a small bowl. When the risotto is done, turn off the heat and stir in the mascarpone mixture plus the Parmesan cheese and chives. Set aside, off the heat, for a few minutes, sprinkle with salt and pepper, and serve hot with a sprinkling of chives and more Parmesan cheese.

Recipe notes: I blanched the asparagus right away, not 'meanwhile.' I just didn't think I'd be able to do that and babysit the rice at the same time. I'm glad I got it out of the way, because I still was trying to zest the lemons and prepare the cheese/lemon juice mixture while stirring. I really need to learn how to 'prep' better! The process of softening the rice took me quite a bit longer. I might have had the heat too low, I'm not sure. I just kept adding more broth until the rice was cooked.

Source: Adapted from Ina Garten's recipe on Food Network

Sunday, March 29, 2009

Baked Oatmeal

A few weeks ago, we enjoyed a day of 65 degrees weather. We went to sleep and woke up to 15 degree weather! Luckily, I had just seen this recipe for Baked Oatmeal and had the ingredients on hand. This is a great recipe! It smells like a big oatmeal cookie baking in the oven. Bob loved this - he said "it's the perfect amount of sweetness, and the raisins just burst in your mouth." The leftovers keep for many days and reheat well. This recipe is definitely a keeper!
Baked Oatmeal

Ingredients:
2 cups uncooked oats
1/2 cup packed light brown sugar (I only had dark)
1/3 cup raisins (or dried fruit of choice)
1 Tablespoon chopped walnuts (or nut of choice - omitted)
1 teaspoon baking powder
1 1/2 cups milk
1/2 cup applesauce
2 Tablespoons butter, melted
1 large egg, beaten
Cooking spray

Directions:
1. Preheat oven to 375F. Coat an 8-inch square baking dish with cooking spray.

2. Combine the first 5 ingredients (or 4 if omitting nuts) in a large bowl. Combine the milk, applesauce, butter, and egg in a separate bowl. Add milk mixture to oat mixture; stir well. Pour oat mixture into prepared dish. Bake for 20 minutes*. Serve warm.

*Note: My oven is possessed, so I had to bake this much longer to get it to the right consistency, but it was worth the wait! This would be really good with craisins too.

Source: Adapted from Brown Eyed Baker, originally from Cooking Light

Friday, March 27, 2009

Fiesta Chicken and Spinach Enchiladas

This is a great recipe courtesy of Jenny at Picky Palate. Jenny always posts delicious-sounding (and looking!) recipes and most are her own creations! She also has a wonderful ability to sneak in vegetables and make them taste great at the same time. I've made these Fiesta Chicken and Spinach Enchiladas following the traditional recipe, and as a casserole (courtesy of Mary Ann at Meet Me in the Kitchen). Both ways are wonderful. I've tried both flour and corn tortillas, and I think I prefer the corn only because they hold up better against the sauce, especially with leftovers, which you probably will have! And these are delicious leftover. Make them on a Sunday and have lunch for the rest of the week!

See the pretty colors:
This is a picture from when I made these as a casserole. Our grocery store has these super cheap corn tortillas (39 cents for ~12!) but the catch is, they're so small that they don't stay rolled, so I find a casserole is just easier. Please visit Jenny and Mary Ann's blogs for their beautiful pictures of this dish!

Fiesta Chicken and Spinach Enchiladas

Ingredients:
For the filling:
2 Tablespoons extra virgin olive oil
1 large onion, finely minced
1 jalapeno, minced*
3 fresh garlic cloves, minced
10 oz bag baby spinach leaves, chopped (I used a 6 oz bag)
4 boneless, skinless chicken breasts, cooked and shredded**
1 teaspoon salt
1/2 teaspoon pepper
1/4 teaspoon garlic salt
1 1/2 Tablespoons ground cumin
1 10-ounce can Mild Rotel diced tomatoes with Green Chilies*

For the sauce:
1 lb (large family size can) cream of chicken soup***
1 cup red enchilada sauce*
8 ounces sour cream (light is fine)
1/2 cup milk (I used skim)
pinch of salt

corn tortillas
2 cups shredded Mexican blend cheese (2% red. fat is fine)

Directions:
1. Preheat oven to 350F. Place oil into a large skillet or dutch oven over medium heat. Saute onion and jalapeno until softened, about 5 minutes. Stir in garlic and cook for 1 minute. Add chopped spinach and cook until wilted down. Stir in chicken, salt, pepper, garlic salt, cumin, and diced tomatoes. Reduce heat to low and simmer.

2. Place soup, enchilada sauce, sour cream, milk, and salt into a large saucepan over medium heat. Stir until warmed through.

3. Ladle a small amount of sauce into the bottom of a large 9x13-inch baking dish (or bigger if you have one), just enough to cover the bottom. Place a spoonful of chicken mixture inside of corn tortillas, roll, and place seam side down. Fill tortillas until chicken filling is used up. Top evenly with sauce and shredded cheese. Bake for 25-30 minutes until hot and bubbly.

10-12 servings

My notes:
*Much to my dismay, our grocery store does not sell the mild Rotel, so I got the regular. To adjust for spiciness, I eliminated the jalapeno and bought mild enchilada sauce, which our store does sell, funnily enough.
**I used 2 very large breasts and there was plenty of meat.
***I weighed out 1 pound (16 ounces) of Healthy Request (Red. fat/red. sodium) cream of chicken soup, which is almost 2 cans (roughly 1 3/4).

Source: Adapted from Picky Palate and Meet Me in the Kitchen

Wednesday, March 25, 2009

Almost-Fudge Gateau

It seems like I'm posting a ton of desserts, but I'm just catching up on things I've made (and taken pictures of) in the last year. I actually don't bake that much! :)

In my quest for new cooking blogs, I stumbled upon a group of bloggers called Tuesdays with Dorie. Each Tuesday they make a recipe out of the cookbook Baking: From My Home to Yours by Dorie Greenspan. I think the idea of such a group is really neat - almost a way to force yourself to make recipes that you'd like to but otherwise might not. I can't commit to a group like this at the present time, but I can pick out the recipes that are particularly appealing to me. This brings me to another factoid: I love chocolate. As in, I've never had a chocolate dessert and said "this is too rich"-kind of love. As long as I have a glass of cold skim milk, I'm good to go. I think I'd always take chocolate dessert over fruity (my husband is the opposite), even though I like both. That being said, when I saw the cake called "Almost-Fudge Gateau," I couldn't resist. I made this for a few friends in January, and it was great. Gateau in French means cake, and like the name suggests, it really was 'almost-fudge.'

This picture was taken after part of the cake had been frozen and thawed, so it became more crumbly. The fresh cake would not have come apart like this:

Almost-Fudge Gateau

Ingredients:
For the cake:
5 large eggs
9 oz. bittersweet chocolate, coarsely cho
pped (or broken into squares)
1 cup sugar
5 Tablespoons unsalted butter, cut into chunks (I used salted)
2 Tablespoons coffee or water (I used prepared instant decaf coffee)
1/3 cup all-purpose flour
pinch of salt

For the glaze:
4 ounces bittersweet chocolate, coarsely chopped
1/2 cup heavy cream
2 teaspoons light corn syrup

Directions:
1. Center a rack in the oven and preheat to 350F. Butter a 9-inch springform pan, line the bottom with parchment paper, butter the paper, dust the inside of the pan with flour and tap out the excess. Place pan on a baking sheet.

2. Separate the eggs, putting the whites in a large mixing bowl and the yolks in a small bowl.

3. To the top of a double boiler (or a small heatproof bowl placed above simmering water), add the chocolate, sugar, butter, and coffee. Stir occasionally until the chocolate and butter are melted; the sugar may still be grainy - that is fine.

4. Transfer the mixture to the counter and let sit for 3 minutes. Using a rubber spatula, stir in the yolks one by one, then fold in the flour.

5. Working with the whisk attachment of a hand- or stand-mixer, beat the egg whites with a pinch of salt until they hold firm but glossy peaks. Using the spatula, stir about one quarter of the beaten egg whites into the batter, then gently fold in the rest.

6. Scrape the batter into the prepared pan and jibble the pan from side to side a couple of times to even the batter.

7. Bake for 35-45 minutes, or until the cake has risen evenly (it might rise around the edges and you'll think it's done, but give it a few more minutes, and the center will puff too) and the top has firmed (it will probably be cracked) and doesn't shimmy when tapped; a thin knife inserted into the center should come out just slightly streaked with chocolate. Transfer pan to a cooling rack and let cake rest for 5 to 10 minutes.

8. Run a blunt knife gently around the edges of the cake and remove the sides of the pan. Carefully turn the cake over onto a cooling rack and remove the pan bottom and the parchment paper. Invert the cake onto another cooling rack and cool to room temperature right side up. As the cake cools it may sink.

9. To make the glaze, turn the cooled cake onto another cooling rack so you will be glazing the flat bottom, and place the rack over a baking sheet lined with parchment or wax paper to catch any drips.

10. Put the chocolate in the top of a double boiler and melt above simmering water (or use microwave to melt). The chocolate should be just melted and only warm, not hot. Meanwhile, bring the cream to a boil in a small saucepan. Pour the hot cream over the chocolate and stir very gently with a rubber spatula until the mixture is smooth and shiny. Stir in the corn syrup.

11. Pour the glaze over the cake and smooth the top with a long metal icing spatula. Don't worry if the glaze drips unevenly down the sides of the cake, it will add to its charm. Decorate if desired (see note below). Allow the glaze to set at room temperature, or slip the cake into the refrigerator about 20 minutes.

My notes: This cake can be decorated however you wish. After I put the glaze on the cake, I sprinkled some mini-chocolate chips around the edges, and then pressed in some Hershey's Kissables in red, pink, and white for Valentine's Day. Then I put the cake in the fridge. I served the cake slightly chilled with a simple homemade strawberry sauce (see below), and vanilla ice cream. The cake may have tasted better at room temperature, or even warmed up, but we didn't try that.

Source: Adapted from Annie's Eats, originally from Dorie Greenspan's Baking: From My Home to Yours


Strawberry Sauce

I had some strawberries that I got on sale, but all the recipes I found for strawberry sauce were pretty involved. I just came up with this recipe on the fly, but it was pretty good.

Ingredients:
Strawberries
Water
Sugar (to taste, optional)

Directions:
1. Wash and dry a package of strawberries. Remove stems with huller or knife. Cut in half and place in a mini-food processor (a blender might work for this too).

2. Add a little water and puree the strawberries to a thick, yet still liquid, consistency. The amount of water is not critical because it can be adjusted in the next step.

3. Pour the puree through a fine metal strainer to remove strawberry pulp. Transfer remaining mixture to a small saucepan and heat to simmering, stirring often. At this step, you can decide the thickness and sweetness of the sauce. If the sauce is too thin, let the sauce reduce by cooking longer. If the sauce is too thick, add water. Add sugar to taste. I don't think mine needed any, if if did it was around 1 Tablespoon.

4. Store sauce in the fridge until ready to use.

Note: I just plated the sauce underneath each slice of cake, but this sauce
would be great on ice cream or other desserts.

Monday, March 23, 2009

Rigatoni with Sausage, Pepper, and Onions

I first found this recipe on Food Network, and when I got Everyday Pasta, I realized it's part of the "Hearty Pastas" section. Again, Giada does not disappoint. The Marsala wine really adds a wonderful flavor. And the best part, Giada calls for turkey sausages, so I didn't have to change the recipe! I do, however, remove them from their casing, because I don't even like to think about the source of that casing (although I know what it is). I've made this many times, and it's never failed. It is SO good - probably one of our favorite dinners. I do have to space out my recipes that call for red pepper though - Bob gets heartburn! He's only 26, so I can't imagine how he'll be when he's older!

This recipe serves 4 to 6, so when I make it for just Bob and I, I halve the recipe, and there's *sometimes* some left over :)
Rigatoni with Sausage, Peppers, and Onions

Ingredients:
1/4 cup extra-virgin olive oil
1 pound sweet Italian turkey sausages (optional: remove from casing)
2 red bell peppers, cored, seeded, and sliced
2 yellow onions, sliced
1 teaspoon salt
1 teaspoon freshly ground black pepper
4 garlic cloves, chopped
1/2 teaspoon dried oregano
1/2 cup chopped fresh basil (or 2 Tablespoons + 2 teaspoons dried)
2 Tablespoons tomato paste
1 cup Marsala wine
1 14.5-ounce can diced tomatoes, with juice*
1/4 teaspoon crushed red pepper flakes (optional)
1 pound rigatoni pasta
Freshly grated Parmesan cheese, for garnish

*I use petite cut diced tomatoes

Ingredients:
1. Heat the oil in a large, heavy skillet over medium heat. Add the sausages and cook until brown on all sides, 7 to 10 minutes. Remove the sausages from the pan. I find that I don't even need oil since I remove the sausage from the casing, so I might just add a bit before the next step.

2. Keeping the pan over medium heat, add the bell peppers, onions, salt, and pepper and cook until golden, 5 minutes. Add the garlic, oregano, and basil and cook for 2 minutes. Add the tomato paste and stir until incorporated, then add the Marsala, tomatoes with their juice, and red pepper flakes, if using. Stir to combine, scraping the bottom of the pan with a wooden spoon to release all the brown bits. Bring to a simmer.

3. Cut the sausages into 4 to 6 pieces each. Return the sausages to the pan. Simmer uncovered until the sauce has thickened, about 20 minutes. *Note: I never let it simmer this long. I usually just do 5-7 minutes. We like it to have a little more sauce! Because of this, I start the water boiling during step 1 and cook the pasta while I make the sauce.

4. While the sauce simmers, bring a large pot of salted water to a boil over high heat. Add the pasta and cook until tender but still firm to the bite, stirring occasionally, 8 to 10 minutes. Drain the pasta and add to the thickened sauce; toss to combine. Spoon into individual bowls and sprinkle each serving with Parmesan cheese.

Source: Adapted from Everyday Pasta by Giada De Laurentiis

Saturday, March 21, 2009

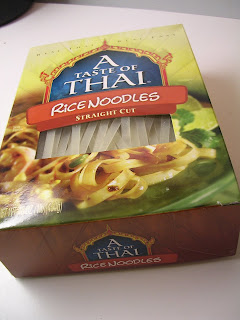
Simplified Pad Thai

My undergrad research adviser sent me "The Best 30 Minute Recipe" cookbook as a wedding gift. All of the recipes are designed to take 30 minutes from start to finish, and each has been optimized in their test kitchen. All of the dinners I've made from it have been really good. Because of my allergy to peanuts/tree nuts, I try to avoid Thai restaurants, which is extremely unfortunate because I love Thai food - actually all types of Asian cooking. So, I must resort to making these dishes at home. Bob and I love this Simplified Pad Thai. I'm not sure how authentic it is, but it's quick and tasty.


Simplified Pad Thai

Ingredients:
8 ounces thick rice stick noodles
1/4 cup fresh lime juice
1/3 cup water
3 Tablespoons fish sauce*
1 Tablespoon rice vinegar
3 Tablespoons brown sugar
4 Tablespoons vegetable oil (I always use olive oil, and not this much)
3/4 pound medium (40/50) shrimp, peeled and deveined**
3 garlic cloves, minced
2 large eggs, beaten lightly
Salt
6 Tablespoons chopped unsalted roasted peanuts
3 cups bean sprouts, well rinsed (I use an 8 ounce bag)
5 scallions, sliced thin
1 lime, cut into wedges (for serving)
Sweet chilli sauce (optional for a little heat, found in Asian cooking section)

*I don't use fish sauce. Just reading the label that explains what it actually is makes me cringe. I substitute 3 T water with a little salt.

**I usually use chicken in place of the shrimp, or leave the dish vegetarian, but I thought I'd type out the shrimp directions because a lot of people like shrimp. If I use chicken, it's usually boneless, skinless chicken breasts that I've cut into small pieces, seasoned with salt & pepper, and sauteed in some olive oil. Our favorite way was when I generously sprinkled salt & pepper on boneless, skinless chicken thighs, cooked them in olive oil, then shredded them using 2 forks - adding the meat to the dish at the end.

Directions:
1. Cover noodles with hot tap water in a large bowl and soak until softened, pliable, and limp but not fully tender, about 20 minutes. Drain noodles and set aside.

2. While noodles soak, stir lime juice, water, fish sauce, rice vinegar, brown sugar, and 2 tablespoons of oil together and set aside.

3. Pat shrimp dry with paper towels. Heat 1 more tablespoon of oil in a 12-inch nonstick skillet over high heat until just smoking. Add shrimp, spread into single layer, and cook without stirring for 1 minute. Stir shrimp and continue to cook until spotty brown and just pink around the edges, about 30 seconds. Transfer shrimp to clean bowl, cover, and set aside.

4. Add remaining tablespoon oil and garlic to skillet and return to medium heat until fragrant, about 30 seconds. Add eggs and 1/4 teaspoon salt and cook, stirring vigorously until eggs are scrambled, about 20 seconds.

5. Stir soaked noodles into eggs. Add fish sauce mixture, increase heat to high, and cook, tossing constantly, until noodles are evenly coated. Add 1/4 cup of peanuts***, bean sprouts, all but 1/4 cup of scallions, and cooked shrimp (or chicken). Continue to cook, tossing constantly, until noodles are tender, about 2 minutes (if not yet tender add 2 tablespoons water to skillet and continue to cook until tender).

6. Transfer noodles to serving bowls and sprinkle with remaining scallions and peanuts. Serve, passing lime wedges separately.

***I leave the peanuts out of this step and let Bob put his own on at the end. If you have someone in your house who has a nut allergy and still feel comfortable having them in the house, you can do the same.

Source: Adapted from The Best 30 Minute Recipe cookbook

Thursday, March 19, 2009

Creamy Orzo

I received Everyday Pasta by Giada De Lauretiis from my MIL.  I have yet to find a disappointing recipe of Giada's!  I really love orzo pasta, and the taste and texture of this dish are just great.  I try to avoid using heavy cream except in desserts but decided to try it the first time.  It was a little too creamy for my taste, so I've included suggestions below on how to lighten it up a bit. 

When I was shopping for the ingredients, I noticed "petite peas" in the freezer case.  I tend to like anything 'mini,' so of course I opted for them, and I loved their smaller size and sweeter taste.  It wasn't until several days later that I picked up a copy of Cooks Illustrated my mom had given me and noticed an article on petite peas, also called petit pois or baby sweet peas, and how their taste testers found them to be sweeter and less starchy than regular-sized peas. I found this quite amusing and will be using them from now on.

I halved this recipe but used the full amount of shallot and garlic as not to waste them.

Creamy Orzo

Ingredients:
1 pound orzo (rice-shaped pasta)*
2 Tablespoons olive oil
1 large shallot, finely chopped
1 garlic clove, minced
1 14.5-ounce can diced tomatoes, drained**
1 1/4 cups heavy cream
1 cup frozen peas, thawed (regular or petite)
3/4 cup freshly grated Parmesan cheese
Salt and freshly ground black pepper

*I like Barilla brand for orzo because the 'grains' of pasta are small.  I bought Prince brand once and don't like how big they are.

**I like using petite cut diced tomatoes so there aren't big chunks.

Directions:
1. Bring a large, heavy saucepan of salted water to a boil over high heat. Add the orzo and cook until tender but still firm to the bite, stirring often, about 8 minutes. Drain, reserving 1 cup of the pasta water.

2. Meanwhile, heat the oil in a large, heavy frying pan over medium heat. Add the shallot and garlic, and saute until tender, about 2 minutes. Add the tomatoes and cook until they are tender, about 8 minutes. Stir in the cream and peas. Add the orzo and toss to coat. 

3. Remove the skillet from the heat. Add the Parmesan cheese to the pasta mixture and toss to coat. Stir the pasta mixture until the sauce coats the pasta thickly, adding enough of the reserved pasta water to create a creamy consistency. Season with salt and pepper and serve.

Note:  For a lighter version, you could try replacing some or all of the heavy cream with fat-free half-and-half, milk, or a mixture of cottage cheese and milk (seen here at Cara's Cravings).

Source:  Adapted from Everyday Pasta by Giada De Laurentiis

Tuesday, March 17, 2009

Happy St. Patrick's Day!!!

I'm not Irish.  Not even a little bit.  But my name is Meghan, and I married an Irish boy with a very Irish last name, so I consider myself Irish by proxy.  St. Patrick's Day is one of my favorite holidays.  As a kid, my mom always made corned beef and cabbage, my aunt prepared her famous Grasshopper Pie, and we had green snake bread and green popcorn. (Again, I'm not Irish). In college, St. Pat's was always about fun parties and bars.  Green beer, green shots, Shamrock stickers, beads, etc. Not that I don't still enjoy that type of thing (and not that I didn't partake in a 'Leprechaun pee shot' a few weekends ago-ew), but now this holiday is also an excuse for me to make festive desserts. I've been wanting to try royal icing for a while now, after seeing the beautiful cookies Annie made

I looked everywhere for a shamrock cookie cutter (ok, so Michael's and Dollar Tree are not everywhere, but still). Bob suggested I look on Amazon - why didn't I think of that?! We ordered one in the parking lot of Dollar Tree, thanks to his iPhone, and it arrived a few days later. It's quite a bit smaller than I imagined, but that's ok. 

This is my first time making these sugar cookies. I'm not a big fan of sugar cookies in general, but these are pretty tasty. The lemon zest and almond extract give them a little something extra. I made a half batch, as listed below, so see the linked source for the full recipe.

Can you tell I'm trying to work on my photography? :)


Sugar Cookies

Ingredients:
1 1/2 sticks (3/4 cup) butter
3/4 cup granulated sugar
1/4 cup powdered sugar
2 eggs
1/2 teaspoon vanilla
1/4 teaspoon almond extract (pure or imitation)
1/2 Tablespoon lemon zest
2 1/2 cups flour
1 teaspoon baking powder
1/2 teaspoon salt
Powdered sugar, for rolling
Wilton icing color gel, optional

Directions:
1. Preheat oven to 400F.

2. Cream butter and sugars in a mixer for 5 minutes. Add in eggs one at a time, mixing thoroughly. 

3. Add in vanilla, almond, and lemon zest. Beat for 10 seconds. Add in baking powder and salt, beat again.

4. Add in flour 1 cup at a time, mix for 15 seconds between each addition. Do not over mix.

5. Chill dough for up to a week in the fridge, or roll and cut right away. At this point, I split the dough in half and added Wilton icing gel in Kelly Green to one portion. I then flattened each dough ball into a disc and wrapped in plastic wrap to store in the fridge overnight.

6. Bake on parchment lined cookie sheet for about 7 minutes, or until golden brown on the bottom.

Source:  Adapted from Good Things Catered


Royal Icing 

Ingredients:
3 Tablespoons Wilton Meringue Powder 
4 cups powdered sugar
6 Tablespoons warm water (for stiffer icing, use 1 T less)

Makes 3 cups

Directions:
1. Prepare the base icing: Beat all ingredients until icing forms peaks (7-10 minutes at low speed with a heavy-duty mixer, 10-12 minutes at high speed with a hand-held mixer).

2. Transfer mixture to airtight container. This can be stored at room temperature as long as it is covered. 

3. Prepare the piping icing: Remove a small amount of the base icing mixture to a bowl and add small amount of water (1 tablespoon at a time, or less) to achieve a consistency that allows for easy piping. Add icing color if desired. At any point, if mixture is too thick, add water; too thin, add more powdered sugar. Always keep the icing mixture covered, either with an airtight lid or a piece of plastic wrap, to prevent it from hardening or drying out.

4. Place a pastry bag in a glass about 3 inches shorter than the bag; fold top of bag over edge of glass to form a cuff. Fill bag with icing. Squeeze out air and close opening of bag, securing it closed with a twist tie. This can also be done with a large resealable plastic bag. I bought some cheap icing tips but didn't get an adapter, so I just cut off the tip of the bag (just a few millimeters from the end). You can place a damp paper towel or washcloth in the bottom of the glass at this point to create a place to set the icing bag and prevent the icing on the tip of the bag from hardening.

5. Outline your cookies as desired. Let icing set. 

6. Prepare the flooding icing: Either using the rest of the icing from step 3 or some fresh icing from step 2, thin out the icing with water until the consistency is quite fluid - when you allow the icing to drip off the spoon/spatula, it should disappear into the rest of the icing within 3-5 seconds. Again, fill a pastry bag or resealable plastic bag with the icing. Snip off tip if you don't have an icing tip. Apply the thinned icing inside each outlined cookie. The outline provides a 'dam' to hold in the fluid icing. Use a toothpick to help the icing get to the edges, if necessary. 

7. Allow the icing to set. This may take several hours, or up to 24. You can gently transfer the cookies to an airtight container to store overnight, but be careful not to stack them, even if using waxed paper between layer, or you might disrupt the icing (not that I did that or anything ;)

8. After the flooded icing has dried completely, pipe on thicker icing (freshly prepared from mixture in step 2 or leftover from step 3) in designs as desired.

Source: Adapted from instructions provided with Wilton Meringue Powder and tips provided by Annie's Eats and Baking 911

Monday, March 16, 2009

Five-Veggie, Four-Cheese Lasagna

My mom gave me the "Favorite Family Dinners" cookbook for Christmas.  The Five-Veggie, Four-Cheese Lasagna looked so delicious, I had to try it.  This recipe is actually from Jamie and Bobby Deen's (Paula son's!) cookbook "Y'All Come Eat."  Usually anything with spinach and artichokes is right up my ally.  This was really good the first night we had it.  Then I ate it for lunch . . . everyday . . . for 4 days.  By Friday I was so sick of this lasagna I couldn't even look at it anymore, and we ended up tossing out the rest.  I hate to waste food - I think from now on I will be making a half pan!  If you like lasagna and these vegetables, I think you'll enjoy this recipe!  The roasted red onions were especially good.  I omitted the mushrooms, so I guess my lasagna was really Four-Veggie, Four-Cheese, and I also added turkey sausage to the sauce, but whatev.

Five-Veggie, Four-Cheese Lasagna

Ingredients:
9 uncooked lasagna noodles
3 Tablespoons extra virgin olive oil, plus additional for drizzling
6 ounces portobello mushrooms, sliced into 1/4-inch-thick pieces (I omitted these)
1 medium zucchini, sliced lengthwise into 1/4-inch-thick strips
1 red onion, sliced into 1/4-inch-thick rings
Freshly ground black pepper
1 14-ounce can artichoke hearts, drained and quartered (I used frozen from Trader Joe's because they are cheaper, thawed)
1 10-ounce package frozen chopped spinach, thawed, all excess water squeezed out (I used roughly chopped fresh spinach, a 6-ounce bag I think)
1 26-ounce jar spaghetti sauce
1 package turkey sausage (hot or sweet), casing removed 
8 ounces ricotta cheese*
4 ounces provolone cheese, shredded (about 1 cup)
4 ounces Parmesan cheese, freshly grated (about 1 cup) (I used shredded Parmesan)
8 ounces fresh mozzarella cheese, thinly sliced (about 2 cups) (I used sliced deli-style Mozzarella)

Directions:
1. Preheat oven to 375F. Bring a large pot of salted water to a boil. Add the lasagna noodles and cook according to package directions until al dente; drain well.  Arrange noodles in a single layer on a dish towel-lined baking sheet.  Drizzle lightly with oil oil (I did not use the olive oil and had no problems); set aside.

2. Spread the mushrooms on a baking sheet.  On a separate baking sheet, spread the zucchini and onion in a layer.  Drizzle 1 1/2 Tablespoons oil over each; season with salt and pepper. Roast until golden and caramelized (25 minutes for the mushrooms and 35 minutes for the zucchini and onion); cool. In a bowl, combine the vegetables with the artichoke hearts and spinach. (I wilted the chopped spinach in a small saucepan before adding it to the vegetable mixture).

3. In a small saucepan, heat the sauce over medium heat for 5 minutes.  I browned the turkey sausage in a skillet, drained off the grease (well since turkey sausage doesn't produce much grease, I usually use paper towels to wipe out the pan and squeeze out some grease from the meat), then added the sauce to the meat and simmered for about 5 to 10 minutes. 

4. Spread one-fourth of the sauce over the bottom of a 13x9x2-inch baking pan. Top with a single layer of lasagna noodles (3 noodles), one-third of the ricotta, and an additional one-fourth of the sauce. Spread half the vegetable mixture on top of the sauce, then layer one-third of the provolone, Parmesan, and mozzarella on top of the vegetables.  Layer another 3 noodles, another one-fourth of the sauce, the remaining vegetable mixture, and another one-third of all the cheeses. Top with remaining pasta, sauce, and cheeses.** 

5. Cover the lasagna loosely with foil. Bake 40 to 45 minutes or until bubbling and golden. Remove the foil, increase the oven temperature to 450F, and continue baking about 10 minutes more or until the cheese is brown around the edges. Let stand for at least 10 minutes before serving.

*Instead of just ricotta, I used a version of the ricotta layer in my mom's lasagna. I combined 8 ounces of ricotta with salt, pepper, garlic powder, and 1 egg.

**I realize this is an overly complicated step, but that's how it's written in the recipe. I'm not sure the best way to write it, so I'll just leave it as is for now.

Source:  Adapted from the Favorite Family Dinners cookbook

Saturday, March 14, 2009

Mixed Berry Pie for Pi Day!

My sister is a high school math teacher, which is why I know that today is Pi Day.  You know, pi = 3.14 and it's March 14th, get it? Anyone? No? Right . . .   

Anyway, in honor of Pi Day, I am posting the first from-scratch pie I ever made.  Back in 2007, my boss brought in her copy of Rose Levy Beranbaum's The Pie and Pastry Bible for a lab mate of mine, who then baked a Blueberry/Peach pie to share with the lab.  I had never tried blueberry pie before and didn't think I would like it, but it was sooooo good!  I don't know why I ever hesitated to try blueberry pie!  And the crust was amazing, which is odd because I usually don't like crust.  It turns out, she made it from scratch!  What?!  A pie crust that didn't come from a Pillsbury box?  (No offense, Mom!)  I never thought making a crust from scratch could be so different from the store bought ones, but it was.  
Doesn't the tart on the cover look delish?!?  I had this copy of the cookbook on loan until I received my own, along with Ms. Beranbaum's Cake Bible (more on that later), for Christmas 2008 from my mother-in-law - are you seeing a theme here :)  We both love cookbooks!  I absolutely love The Pie and Pastry Bible.  First of all, Ms. Beranbaum includes all of her measurements in terms of weight, which I love.  She also explains a lot of the science of baking - why certain steps are taken, what it really means if dough is under/over-worked, etc. And she includes tips for successful baking and troubleshooting ideas.  I can see where some might get overwhelmed by all the text - I did at first - but it really is a great, comprehensive guide to pies and pastries.  

I am also inspired by Ms. Beranbaum's beginnings as a baker.  She had no experience baking when she first got married, and learned everything she knows throughout her adult life.  That reassures me that I'm not 'behind' the learning curve; there's still hope!

Now on to the pie.  After discovering my love for blueberry pie, I decided to make one on my own following the recipe for "Blueberry/Cranberry Internet Pie" as a guide.  I love all kinds of berries, so I though substituting mixed berries (strawberries, raspberries, blackberries, and blueberries) for the cranberries would be a good start.  The pie was so awesome that I made it again for my dad's birthday last year.  I'm including the recipe for both the crust and the filling. I love this crust recipe because it can be made in a food processor.  Unfortunately, I don't have a KitchenAid stand mixer (yet!  That's another post all it's own), so a lot of recipes are off limits for me, specifically a lot of breads and doughs - that is unless I want to knead by hand all day, which I don't!  

This is a pretty long recipe, so if you have your own crust in mind, just skip to the filling part. The whole process is a bit time consuming, but can be broken up over the course of a few days, so it's not too bad.  

The filling burst through the top crust, so I recommend more slits to vent.

Basic Flaky Pie Crust

For a 2-crust 9-inch pie

Ingredients:
14 Tablespoons (200 g) unsalted butter, cold
2 1/4 c. + 2 Tablespoons (or 2 1/4 c. dip and sweep method*, or 320 g) pastry flour** or bleached all-purpose flour
1/4 + 1/8 teaspoon salt
Optional:  1/4 teaspoon baking powder (if not using, double the salt)
5 to 7 Tablespoons ice water
1 Tablespoon cider vinegar

*Dip and sweep method is explained under "Pointers for success for making flaky pie crusts"
**Commercial or homemade pastry flour is recommended , as it will result in a more tender crust than one made with all-purpose flour (see below how to make your own pastry flour)

Directions:
1. Divide the butter into two parts, about two thirds to one third:  4.5 oz and 2.5 oz (9 T and 5 T).  Cut the butter into 3/4-inch cubes.  Wrap each portion of butter with plastic wrap. Refrigerate the larger amount and freeze the smaller amount for at least 30 minutes.  Place the flour, salt, and optional baking powder in a recloseable gallon-size freezer bag and freeze for at least 30 minutes.  

2. Place the flour mixture in a food processor with the metal blade and process for a few seconds to combine.  Set the bag aside.  

3. Add the larger amount of butter cubes to the flour and process for about 20 seconds or until the mixture resembles course meal.  Add the remaining frozen butter cubes and pulse until all the frozen butter is the size of peas.  (Toss with a fork to see it better).

4. Add the lowest amount of ice water and the vinegar and pulse 6 times.  Pinch a small amount of the mixture together between your fingers.  If it does not hold together, add half the remaining water and pulse 3 times.  Try pinching the mixture again.  If necessary, add the remaining water, pulsing 3 times to incorporate it.  The mixture will be in particles and will not hold together without being pinched.

5. Divide the crust mixture in half at this point (for top and bottom crusts), place each portion in a plastic bag.

6. Holding both ends of the bag opening with your fingers, knead the mixture by alternately pressing it, from the outside of the bag, with the knuckles and heels of your hand until the mixture holds together in one piece and feels slightly stretchy when pulled.

7. Separately wrap doughs with plastic wrap, flatten into discs, and refrigerate for at least 45 minutes, preferably overnight.  

Storage:  Refrigerated, up to 2 days; frozen, up to 3 months.

Making your own pastry flour:  if using a scale, do two thirds bleached all-purpose flour to one third cake flour by weight.  If measuring by volume, use the following proportions:  4 cups of bleached all-purpose flour, measured by dip and sweep, and 2 1/4 cups of cake flour, measured by dip and sweep.  Stir the flours lightly before measuring and mix them well after combining them to blend them evenly.  This will make 6 1/4 cups of pastry flour (almost 2 pounds).  Store it airtight.

POINTERS FOR SUCCESS FOR MAKING FLAKY PIE CRUSTS

* For flaky crust, ingredients must be cold to start with and stay cold.
* Use the correct flour.  It is practically impossible to make a flaky crust or even one that holds together using cake flour and equally difficult to make a tender crust using unbleached all-purpose or bread flour.
* If using baking powder, be sure not to use SAS baking powders, which contain sodium aluminum sulfate, or the crust will have a bitter aftertaste.  Use an all-phosphate product containing calcium acid phosphate, such as Rumford, available in some supermarkets and most health food stores. (I found Rumford at my local grocery store - it's next to the Clabber Girl brand in a red container).
* If not weighing the flour, use the dip and sweep method:  Lightly stir the flour, then dip the cup into the flour and sweep off the excess with a metal spatula or knife.
* Brush off any excess flour on top of the dough after shaping it, as it will taste bitter after baking.


Blueberry/Mixed Berry Pie 

Ingredients:
Basic Flaky Pie Crust for a 2-crust 9-inch pie
1 1/2 cups sugar (amount for the blue/cran pie, so you can probably reduce it, I used between 3/4 cup to 1 cup)
1/3 cup cornstarch (dip and sweep method)
1 Tablespoon finely grated lemon zest 
3 Tablespoons freshly squeezed lemon juice
a pinch of salt
2 packages or 1 1/2 pounds (680 grams) frozen blueberries
1 package frozen mixed berries
1 Tablespoon heavy cream or milk
1 Tablespoon sugar

Directions:
1. Make the dough.

2. Remove the dough for the bottom crust from the refrigerator.  If necessary, allow it to sit for about 10 minutes or until it is soft enough to roll.

3. On a floured pastry cloth or between two sheets of lightly floured plastic wrap, roll the bottom crust 1/8 inch thick or less and large enough to cut a 13-inch circle.  Transfer it to the pie pan, easing it in to fit up against the sides.  Trim, if necessary, to 1/4 inch past the edge of the pan.  Cover it with plastic wrap and refrigerate it for a minimum of 30 minutes and a maximum of 3 hours.

4. In a large non-reactive saucepan, stir together the sugar, cornstarch, lemon zest, lemon juice, and salt.  Add the blueberries and mixed berries and toss to coat them well.  Allow the mixture to sit for about 30 minutes or until a little liquid starts to form.  

5. Cook the berries over medium heat, stirring constantly, until very thickened and some of the the berries are just beginning to burst, about 8 to 10 minutes after it comes to a boil.  Remove the pan from heat and allow the mixture to cool completely, without stirring, about 1 hour.

6. Transfer the berry mixture to the pie shell.

7. Roll out the top crust large enough to cut a 12-inch circle.  Use an expandable flan ring or a cardboard template and a sharp knife as a guide to cut the circle.

8. Moisten the edges of the bottom crust with water and place the top crust over the fruit.  Tuck the overhang under the bottom crust border and press down all around the top to seal it.  Reroll the scraps no more than 1/8 inch thick and cut them into decorative shapes.  Brush the top crust with cream or milk and arrange the decorative pieces on top of it, overlapping them slightly.  Brush them with the remaining cream or milk and sprinkle all over with the sugar.

9. Cover the pie loosely with plastic wrap and refrigerate it for 1 hour before baking to chill and relax the pastry.  This will maintain flakiness and help to keep the crust from skrinking.

10. Preheat the oven to 375F at least 20 minutes before baking.  Set one oven rack at the lowest level and one at the highest level and place a baking stone or baking sheet on the lower rack before preheating.  

11. To make a steam vent use a small cutter, the bottom of a pastry tube, or a knife to cut a small hole (about 1 inch) in the middle of the top crust.  Lift out the cut round of pastry and discard it.  I think a few slits should be cut to prevent the mixture from splitting through the top crust, which happened the first time I made this pie as shown in the picture above.  Set the pie directly on the stone and bake for 40 minutes.  Transfer the pie to the upper rack and continue baking for 20 to 30 minutes or until the crust is golden brown.  (The filling will not bubble).  After 1 hour, protect the edges from overbrowning with a foil ring.

12. Cool the pie on a rack for at least 6 hours before serving.

Store:  Room temperature, up to 3 days.

Her notes:  I find that in my oven it works well to bake this pie for the first 40 minutes directly on the floor of the oven instead of the bottom shelf.  Frozen blueberries work well for this filling because they release their juices more quickly than fresh ones, but fresh blueberries are fine to use as well.

My notes:  I tried baking on the oven floor, and even the lowest rack, and the bottom got too brown, too fast.  I suggest just baking it on the middle rack and monitoring it every so often.

Source:  Adapted from The Pie and Pastry Bible

Friday, March 13, 2009

Stuffed Green Peppers

On New Year's Eve, Bob decided to become a vegetarian for the new year, sort of as a joke. After being teased by my family that he wouldn't be able to do it, he became determined to stick with it. Five days and four vegetarian dinners later, he headed to Portillo's for a Maxwell St. Polish Sausage. C'est la vie! His breaking point was the vegetarian curry dish he prepared using Garbanzo beans, spinach, and tofu . . . One good thing that did come out of this phase was this recipe for Stuffed Green Peppers. I had seen it on Aggie's Kitchen blog and thought this was the perfect opportunity to fit it in to our meal schedule. We both really enjoyed this dinner. Probably my favorite part was the tomato sauce. Our peppers got really soft, so much of the pepper flavor leached into the sauce during baking and produced this wonderfully spiced flavor. We will make these again, even though Bob is back to his regularly scheduled meat eating.

I just realized that we changed this recipe a bit, so I'll just type what we made and at the bottom provide the link to the original recipe (which includes ground meat and mushrooms).


Stuffed Green Peppers

Ingredients:
1 cup uncooked brown rice
1 can chicken broth
3 large green peppers, all around the same size so they cook evenly
1 large onion, chopped
3 garlic cloves, minced
2 regular cans of Diced Italian Seasoned Tomatoes
1 large can of Tomato Sauce
large pinch of dried basil (small palmful)
large pinch of oregano (small palmful)
large pinch of dried thyme (small palmful)
salt and pepper
shredded mozzarella cheese

Directions:
Preheat oven to 400F.

1. Cook rice: bring can of chicken broth to boil, add 1 cup rice, bring back to boil and then turn the temperature all the way down to let simmer, cover tightly with lid and leave alone for about 30 minutes. Don't take the lid off during cook time.

2. Prepare the peppers: cut the tops of peppers off so there is a hole, remove ribs and seed on the inside, wash them. In deep baking dish, line them up. Sprinkle salt and pepper inside peppers before filling them.

3. For filling, saute chopped onion and minced garlic in some olive oil in a large skillet. Season with salt and pepper. When soft, season with thyme, basil and oregano. Add 2 cans of diced tomatoes and cook through. When rice is done, add rice to skillet and mix everything together. Spoon filling into each pepper.

4. To bake, pour a large can of tomato sauce all over peppers. Add water to leftover sauce in can (about 1/4 of the can), swirl around to get all the sauce then add to the bottom of the baking dish. Wrap tightly with foil or place lid on top. Bake for about an hour, until peppers are soft. Take off foil, add mozzarella cheese, bake another 20 minutes to finish off and melt cheese.

Source: Adapted from Aggie's Kitchen

Thursday, March 12, 2009

Grasshopper Pie

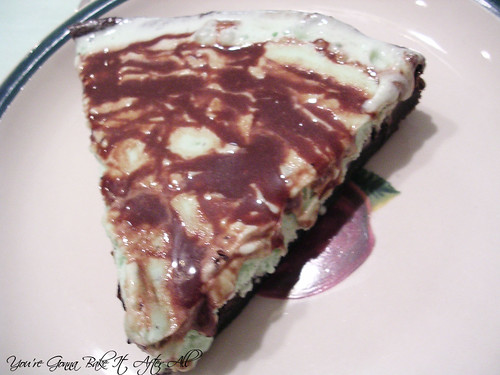
Ever since I can remember, my Aunt Suey has made Grasshopper Pie for St. Patrick's Day. This is one of my all-time favorite desserts. Not only do I love mint chocolate-chip ice cream, but the crust on this 'pie' is out of this world! It's seriously soooooooo good. You'd think it was an ohh-so chocolaty compressed brownie, but even that doesn't describe it. There are no words :) If you have been looking for a dessert to make to celebrate St. P's Day - look no further!  

I will add a picture after St. Patrick's Day, but for now this will have to do:

UPDATE!!!

My aunt made these Grasshopper Pies in March for our St. Patrick's Day celebration, and she was kind enough to let me photograph her assembling the pies. Here are the pictures from our photo shoot:


Grasshopper Pie

Ingredients:
For the crust/shell:
1 package Pillsbury Plus dark chocolate cake mix*
3/4 cup water
3/4 cup Pillsbury Supreme chocolate fudge frosting
1/4 cup oil

For the filling:
1/2 gallon mint chocolate chip ice cream, softened

For the drizzle:
The remainder of the can of chocolate frosting

*I'm not sure if they still make Pillsbury Plus, but she recommends using a dark chocolate cake mix (like Pillsbury Moist Supreme dark chocolate cake mix); using dark chocolate/fudge for the mix and frosting will make the crust fudgy and chewy.

Directions:
1. Heat oven to 350F. Grease bottom and sides of 2 9-inch pie or cake pans.

2. In a large bowl, beat all ingredients for 2 minutes on high. The batter will be kind of fluffy. Pour 1/2 of the batter into each pan.  DO NOT SPREAD OUT.

3. Bake 25-30 minutes. It will be very puffy and soft. The cake will fall when taken out of the oven. Use a spoon to flatten it down as much as possible while it's still warm. When flattening, the cake will be up the sides a little - this is ok because it's the "crust."  Let cool.

4. Fill cooled shell with softened ice cream.

5. Melt remaining frosting from the can in the microwave and drizzle on top.  

6. Cover pans with press-and-seal or foil and freeze for at least 2 hours.

My notes:  This is best baked in a metal pan that you don't mind being scratched with a knife when you cut the slices.  This pie is a bit of a pain to get out of the pan, and I wouldn't be comfortable making it in my coated non-stick pans. 
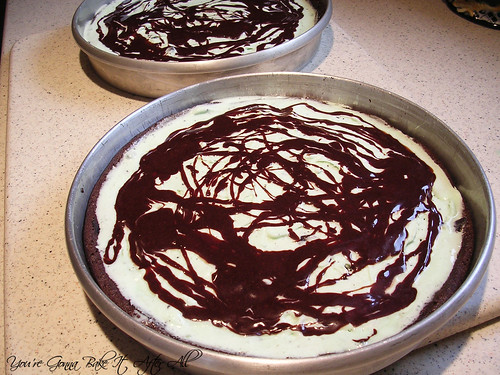
If you prefer, you can use light or even reduced sugar/sugar free mint chocolate chip ice cream to lighten it up.  This recipe is not limited to St. Patrick's Day obviously - you could use any flavor/color combo - like strawberry for Valentine's Day, or vanilla/chocolate-chip for any day!  Edy's French Silk ice cream (one of my fav's) would be AMAZING!

Source: My Aunt Suey!


Wednesday, March 11, 2009

Chicken Parmesan

This recipe for Chicken Parmesan is fantastic! Usually when I try to bake Chicken Parmesan, it comes out soggy on the bottom, but this recipe is so crispy and delicious you'd think it was fried. I have to attribute this to the toasted Panko. The first time I made it, I had 1% lowfat buttermilk left over from the Red Velvet Cheesecake, and have seen Giada de Laurentiis dip chicken in buttermilk before breading, so I used it instead of the egg whites. The result: perfection. The second time I made it, I used 1 whole egg plus a little water, slightly beaten, because I couldn't bear to waste 3 innocent, perfectly good egg yolks. This time, I was lazy and pressed for time (my man was hungry!) and I knew the chicken pieces did not fit into the dish I had prepared, but I squished them in knowing it was at the expense of the crispiness . . . and I was right. The bottoms and tops were still crispy, just not the sides where the chicken pieces were touching. Oh well, it was still a great meal. See the pictures in the blogs linked below - they are much better than mine!
First time:

Second time:

Chicken Parmesan

Ingredients:
1 1/2 cups Panko breadcrumbs
1 Tablespoon olive oil
1/2 cup grated Parmesan cheese (first time I used shredded Parm and it was great!)
1/2 cup all-purpose flour
1 1/2 teaspoons garlic powder
salt and pepper
3 large egg whites (or 1% lowfat buttermilk, or 1 whole egg mixed with water)
1 Tablespoon water
vegetable cooking spray
2 large boneless, skinless chicken breasts, butterflied and cut into halves (4 pieces total)
2 cups marinara sauce, warmed
1/2 cup shredded mozzarella cheese
1 Tablespoon minced fresh basil (didn't use this)

Directions:
1. Adjust oven rack to middle position, and preheat oven to 475F.

2. Combine the breadcrumbs and the oil in a 12-inch skillet and toast over medium heat until golden, stirring often, about 10 minutes. Spread the breadcrumbs in a shallow dish and allow to cool slightly; when cook, stir in the Parmesan.

3. In a second shallow dish, combine the flour, garlic powder, 1 Tablespoon salt, and 1/2 teaspoon pepper together.

4. In third shallow dish whisk together the egg whites and water (or whatever you decide to use for this step).

5. Line a rimmed baking sheet with foil and spray with vegetable oil spray. Pat the chicken dry with paper towels, then season with salt and pepper. Lightly dredge each chicken piece in the flour to coat completely, shaking off the excess. Then dip into the egg whites and finally coat with the breadcrumb mixture. Press on the breadcrumbs to make sure they adhere. Place the chicken pieces on the prepared baking sheet.

6. Bake until the chicken is no longer pink and feels firm when pressed with a finger, about 15 minutes. Remove the chicken from the oven. Spoon 2 Tablespoons of marinara sauce over the top of each piece of chicken and top with 2 Tablespoons of the shredded mozzarella. Return the chicken to the oven and continue to bake until the cheese is melted, about 5 minutes. Sprinkle with the fresh basil and serve as desired.

My notes: Any boneless, skinless chicken breast meat will do. As you can see from the pictures, I used chicken tenders the second time, and they were just as good. I think drying the chicken is an important step to ensure the flour sticks properly and doesn't turn gummy. Using cooking spray (or oil) on the foil is important or the chicken will stick. We ran out of spray while coating the foil the first time I made it, so only had about half the amount necessary, and the chicken took a little prying to loosen after baking.

Source: Adapted from Annie's Eats and Brown Eyed Baker, originally from Cook's Illustrated, October 2006

Monday, March 9, 2009

Double (or Triple) Chocolate Layer Cake

I first heard about this cake last year on the Today Show, where they reported that it was the most popular recipe at Epicurious.com.  I made it for my sister's birthday, and we loved it!  My dad said it was one of the best chocolate cakes he's ever had.  He doesn't often give out compliments, so it means a lot.  The picture is really unfortunate looking - I apologize.  I made it at my parents' house, and my mom didn't have any 10-inch pans, so I used two 8-inch pans and a 9-inch pan, which explains why the cake is a little bottom-heavy.  I just made the normal amount of frosting, so it didn't cover completely, but it was still good!  I'm sure it would be even better made the right way.  Looking back, I probably should have just done two 9-inch pans and used the leftover batter to make a few cupcakes!
Double Chocolate Layer Cake

Ingredients:
For cake layers:
3 ounces fine-quality semisweet chocolate such as Callebaut
1 1/2 cups hot brewed coffee
3 cups sugar
2 1/2 cups all-purpose flour
1 1/2 cups unsweetened cocoa powder (not Dutch process)
2 teaspoons baking soda
3/4 teaspoon baking powder
1 1/4 teaspoons salt
3 large eggs
3/4 cup vegetable oil
1 1/2 cups well-shaken buttermilk
3/4 teaspoon vanilla

For ganache frosting:
1 pound fine-quality semisweet chocolate such as Callebaut
1 cup heavy cream
2 Tablespoons sugar
2 Tablespoons light corn syrup
1/2 stick (1/4 cup) unsalted butter

Special equipment:
Two 10- by 2-inch round cake pans

Directions:
Make cake layers:
Preheat oven to 300F and grease pans.  Line bottoms with rounds of wax paper and grease paper.

Finely chop chocolate and in a bowl combine with hot coffee.  Let mixture stand, stirring occasionally, until chocolate is melted and mixture is smooth.

Into a large bowl sift together sugar, flour, cocoa powder, baking soda, baking powder, and salt.  In another bowl with an electric mixer beat eggs until thickened slightly and lemon colored (about 3 minutes with a standing mixer or 5 minutes with a hand-held mixer).  Slowly add oil, buttermilk, vanilla, and melted chocolate mixture to eggs, beating until combined well.  Add sugar mixture on medium speed until just combined well.  Divide batter between pans and bake in middle of oven until tested inserted in center comes out clean, 1 hour to 1 hour and 10 minutes.

Cool layers completely in pans on racks.  Run a thin knife around edges of pan and invert layers onto racks.  Carefully remove wax paper and cool layers completely.  Cake layers may be made 1 day ahead and kept, wrapped well in plastic wrap, at room temperature.

Make frosting:
Finely chop chocolate.  In a 1 1/2- to 2-quart saucepan bring cream, sugar, and corn syrup to a boil over moderately low heat, whisking until sugar is dissolved.  Remove pan from heat and add chocolate, whisking until chocolate is melted.  Cut butter into pieces and add to frosting, whisking until smooth.

Transfer frosting to a bowl and cool, stirring occasionally, until spreadable (depending on chocolate used it may be necessary to chill frosting to spreadable consistency).

Spread frosting between cake layers and over top and sides.  Cake keeps, covered and chilled, 3 days.  Bring cake to room temperature before serving.

Source:  Adapted from Epicurious.com

Saturday, March 7, 2009

Baked Quesadillas with Creamy Cilantro-Jalapeno Sauce and Fresh Pico de Gallo

I saw a recipe for Skillet-Grilled Burritos on Aggie's Kitchen blog, and thought they sounded good.  As I started to go through the recipe, I decided to turn these into quesadillas - to just divide up the mixture into 2 servings spread between two large tortillas.  This worked fine, but it was a lot of food!  I probably should have divided the mixture into 4 quesadillas and kept two as leftovers.  Instead of cooking these in a skillet, I made them in the oven on a pizza pan.  So what started out as Skilled-Grilled Burritos ended up as Baked Quesadillas.  I made enough changes that I'm typing up my version below and linking the original at the end.  Despite the changes, this is a great recipe.  I was amazed how the vegetables gained such a bright and cheerful color during cooking - maybe because I used fresh corn.  We like the creamy sauce and the pico de gallo.  Although, I think the pico de gallo will be much better during the summer when the tomatoes are more flavorful.

Baked Quesadillas

Ingredients:
2 baked chicken breasts, shredded 
1 ear of corn, kernels removed from the cob with a knife
1 red pepper, chopped
1-10 ounce package fresh spinach, chopped
1 cup shredded 2% reduced fat cheddar cheese
Creamy Cilantro-Jalapeno Sauce (recipe below)
2 large flour tortillas, warmed (I recommend using at least 4)
Cooking spray
Pica de Gallo (recipe below)

Directions:
1. In a saucepan, cook the corn and the red pepper in a little olive oil for a few minutes, then add the fresh spinach and cook until wilted.  Remove from heat.  Add vegetable mixture to a bowl containing the shredded chicken, and then stir in 1/2 cup Creamy Cilantro-Jalapeno Sauce.  

2. Divide the chicken mixture among tortillas.  Fold over tortillas and coat outside with cooking spray.

3. Place quesadillas on a pizza pan and bake in a hot oven (350-400F) until warmed through and lightly browned.  Serve with remaining Creamy Cilantro-Jalapeno Sauce and fresh pico de gallo.


Creamy Cilantro-Jalapeno Sauce

Ingredients:
1 cup light sour cream
1/2 cup loosely packed fresh cilantro leaves, chopped
1-4 ounce can chopped green chilies
2 teaspoons chopped yellow onion
2 teaspoons Dijon mustard
1 teaspoon lime zest

Stir together all ingredients in a small bowl.  Cover and chill for 30 minute.  Store in airtight container for up to 2 days.

Source:  Adapted from Aggie's Kitchen and Southern Living


Pico de Gallo

Ingredients:
6 Roma tomatoes
1/2 medium sweet onion, diced finely
1/2 of a good sized jalapeno
2 Tablespoons fresh cilantro, minced
Juice of 1/2 large lime
1/2 Tablespoon extra virgin olive oil
pinch of salt
dash of ground black pepper

Directions:
1. Wash tomatoes, halve and scoop out to discard seeds and innards.

2. Slice tomato halves into thin strips and finely dice.

3. Place diced tomatoes into large bowl.

4. Halve jalapeno and scoop out to discard seeds.

5. Slice jalapeno into thin strips and mince.

6. Place into bowl with tomatoes.

7. Add remaining ingredients, salt and pepper only to taste and serve.

Source:  Adapted from Good Things Catered 

  © Blogger template Brownium by Ourblogtemplates.com 2009

Back to TOP