Search This Blog

Tuesday, January 18, 2011

Samoa Bars

DSCN7776_labeled

DSCN7780_labeled

DSCN7785_labeled

DSCN7779_labeled

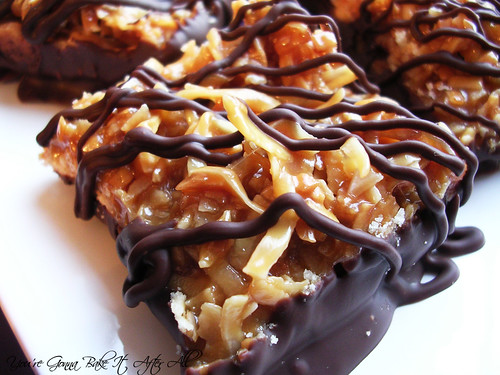
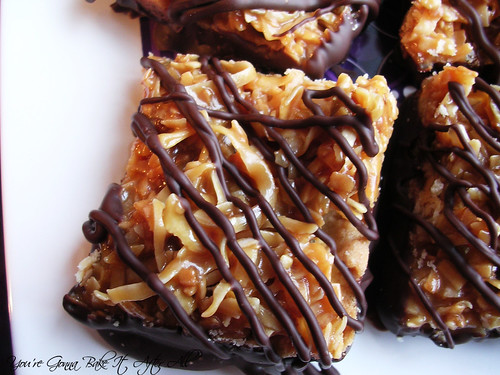
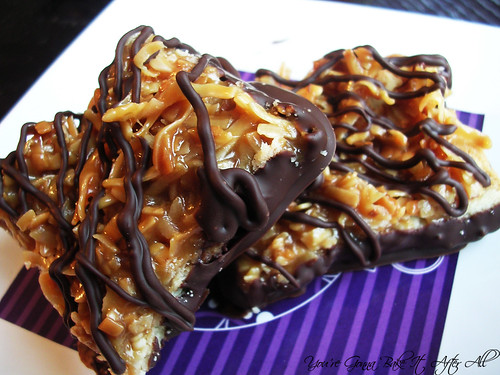
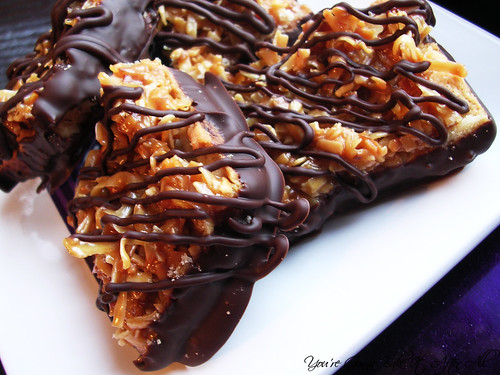
Samoas/Caramel DeLites are my favorite Girl Scout cookie, tied with Thin Mints that is. When I saw this recipe on Baking Bites (quite a long time ago!), I was so excited and quickly bookmarked it. As usual, I took my time getting to this recipe but finally decided it was time. I thought these bar cookies were great! They really do taste like Samoas! I love the combination of the toasted coconut and caramel - I could eat that by itself!

Samoa Bars

Yield: 30 bar cookies

Ingredients:
Cookie Base:
1/2 cup sugar
3/4 cup butter (1 1/2 sticks), softened
1 large egg
1/2 teaspoon vanilla extract
2 cups all-purpose flour
1/4 teaspoon salt

Topping:
3 cups shredded coconut (sweetened or unsweetened), toasted
12 ounces good-quality chewy caramels
1/4 teaspoon salt
3 tablespoons milk
10 ounces dark or semisweet chocolate (chocolate chips are fine) (I needed about 2 ounces more for drizzling the bars)

Directions:
Preheat oven to 350F.
1. Make the crust: Lightly grease a 13 x 9-inch baking pan, or line with parchment paper.
In a large bowl, cream together sugar and butter until fluffy. Beat in egg and vanilla extract. Working at a low speed, gradually beat in flour and salt until mixture is crumbly, like wet sand. The dough does not need to come together.

2. Pour crumbly dough into prepapred pan and press into an even layer. Bake for 20 - 25 minutes, until base is set and edges are lightly browned. Cool completely on a wire rack before topping.

3. Make the topping: Place the unwrapped caramels in a large microwave-safe bowl with milk and salt. Cook on high for 3 - 4 minutes, stopping to stir a few times to help the caramel melt. When smooth, fold in toasted coconut with a spatula.

4. Put dollops of the topping all over the shortbread base. Using the spatula, spread topping into an even layer. Let topping set until cooled.

5. When cooled, cut into 30 bars with a large knife or a pizza cutter (I used a large pizza chopper) .

6. Once bars are cut, melt chocolate in a small bowl by heating on high in the microwave in 45 second intervals, stirring thoroughly to prevent scorching. Dip the bottom of each bar into the chocolate and place on a clean piece of parchment or wax paper.

7. Transfer all remaining chocolate (or melt a bit of additional chocolate, if necessary) into a piping bag or a sandwich/storage bag with the corner snipped off and drizzle bars with chocolate to finish. Let chocolate set completely before storing in an airtight container. These bars also freeze well.

Note: For an easier finish, you can simply drizzle chocolate on top of the bars before slicing. You will not need as much chocolate as noted above, and you will not exactly get the Samoas look, but the results will still be delicious.

Source: Adapted from Baking Bites

Friday, January 14, 2011

Red Velvet Brownies with Cheesecake Swirl and Giveaway Winner!!!


DSCN7817_labeled

DSCN7832_labeled

And the Giveaway winner is . . .


Congratulations Natalie!!! You have won a $75 gift certificate to CSN Stores! Please email me at mtmbakesblog AT gmail.com to claim your prize. Thank you to CSN Stores for sponsoring this giveaway!

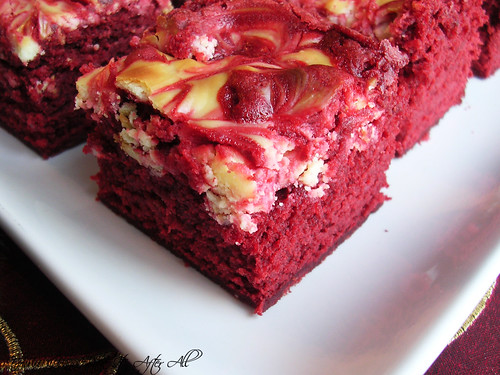
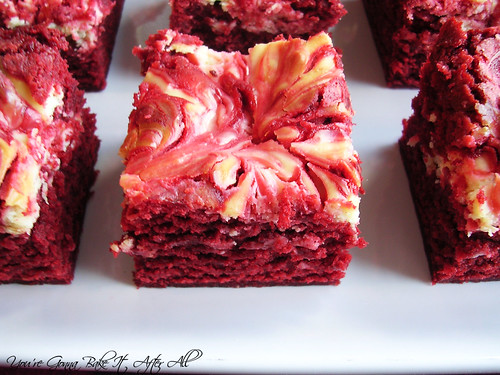
Now I must tell you about these brownies. I made them the night before having our good friends Jenny and Jeff, and their baby Andrew, over for dinner (you may remember them from the Monkey Cookies!) I had these in the oven for about 10 minutes when our power went out!! I was really annoyed thinking they were probably ruined. Not knowing how long it would be before power was restored, I moved the brownies to the very cold garage. After about an hour, the power came back and I put the brownies back in the oven until done. I have no idea how this affected them, but they did turn out very tall! These were really good brownies, definitely more cake-like than fudgey, but I can't say whether that's due to how I baked them. I loved the cheesecake swirl on top. These are definitely festive and would be perfect for Valentine's Day!

After deciding to make these brownies, I saw a similar recipe for Red Velvet Cheesecake Brownies on Baking Bites that looks fantastic as well!

Red Velvet Brownies with Cheesecake Swirl

Ingredients:
For the brownies:
4 ounces bittersweet chocolate, chopped
3/4 cup (1 1/2 sticks) butter
2 cups sugar
4 large eggs
1 1/2 cups all-purpose flour
1 (1-ounce) bottle red food coloring (I used about 1/2 container of Wilton icing gel)
1 1/2 teaspoons baking powder
1/8 teaspoon salt
1 teaspoon vanilla extract
1/4 cup buttermilk
1 teaspoon white vinegar

For the cream cheese swirl:
4 ounces cream cheese, at room temperature
2 tablespoons sugar
2 tablespoons sour cream
1/4 teaspoon vanilla extract
1/2 large egg yolk

Directions:
Preheat the oven to 350F.

1. Line a 9 x 9-inch square baking dish with two pieces of aluminum foil, folding ends over the edges. Spray with cooking spray.

2. Combine the chocolate and butter in a large, microwave safe bowl. Cook 30 seconds at a time until melted, stirring well after each time. Whisk in the sugar.

3. One at a time, add the eggs, whisking well between each addition. Stir in the flour, food coloring, baking powder, salt, buttermilk, vanilla, and vinegar. Combine well, then pour into the prepared baking dish.

4. In the bowl of a stand mixer fitted with a paddle attachment, beat the cream cheese, sugar, vanilla, and egg yolk. Drop spoonfuls over the brownie batter, then use a table knife to swirl into the batter.

5. Bake 40-50 minutes, or until a toothpick inserted into the center comes out with just a few crumbs attached. Allow to cool completely before slicing.

Source: Adapted from Pink Parsley

Friday, January 7, 2011

All I Wanted for Christmas...Giveaway!

Happy New Year! I took a small blogging break for the holidays, but it certainly wasn't a break from cooking and baking! I've updated the sidebar with some healthier recipes for the start of a new year!

I hope everyone had a very happy Holidays! Is there anything in particular that was on your list this holiday season and you didn't get? Or maybe you just thought of something you accidentally left off your list? Perhaps you've been pining after a kitchen item that's a tad out of your budget? I know that always happens to me. You are in luck - CSN Stores has offered to give one lucky person a $75 gift certificate! I've done a giveaway from CSN in the past, as well as a product review. They have over 200 stores, selling practically everything ranging from modern furniture to cookware, my personal favorite. I think this is fantastic because you can use it to get $75 worth of merchandise (from any one of their stores!), or you can choose to purchase a more expensive item and consider it $75 off your total!

There are several ways to enter (you do NOT have to have a blog to enter!):

1) Leave a comment stating what you plan to buy with the gift certificate.

2) Blog about this giveaway and leave a separate comment with a link to your post.

3) Post about this giveaway on Facebook and leave a separate comment with the link.

Entries must be in by 9:00 pm on Thursday, January 13.

Winner will be chosen using random.org. Note that the gift certificate can not be used towards shipping charges, but I'm sure you'll find many items on their site that have free shipping or that ship for a minimal charge. Free shipping was one of the criteria I used in choosing my product review!

Good luck!!! :)

Friday, December 24, 2010

Christmas Sugar Cookies

DSCN7693_labeled

DSCN7698_labeled

DSCN7687_labeled

DSCN7685_labeled

I couldn't resist making just one more batch of sugar cookies this year. I found the inspiration behind these cookies last year on Torie Jayne's post "a pretty pastel Christmas." The cookie idea is from hellonaomi.

DSCN7696_labeled

As a rule, I'm a purist when it comes to Christmas - I like red and green, along with some silver and gold, but you won't find blue ornaments or a white tree in my home. I actually think both of those can be very beautiful, but it's not "Christmas-y" enough to me. These cookies are the exception. I think they are so beautiful and elegant, and it doesn't bother me that they are not traditional Christmas colors. In fact, I've seen some gorgeous pastel Christmas concepts lately that have me rethinking my stance!

I went with a different cookie dough than I've used in the past - [Not My] Granny's Sugar Cookies. My mom, sister, and future brother-in-law all agreed that this recipe is even better than the one I had been using, so I'm officially switching. It's also easier to roll out because it doesn't stick as much to the surface and rolling pin - bonus!

As with the mittens, I used the royal icing glaze recipe - thinned mixture to outline and immediately flood, then and after sufficient drying time (24 hours for me) a thicker (but still thinned from the original thick "stock") icing for the decorations on top - some white and pink sugar pearls. When the cookies were completely dry, I used a small craft paint brush to brush on edible shimmer dust - I love this look! I think it elevates these cookies from pretty to spectacular, at least in person. They are so sparkly - and those of you who know me well know how much I love sparkle! :)

DSCN7682_labeled

For those who celebrate Christmas, I hope you have a wonderful holiday filled with family and friends!

Thursday, December 23, 2010

Brown Sugar and Spice Cookies

A loooong time ago, I mentioned I was doing a product review for CSN Stores. Well it took me some time to decide on a product, mainly because they have such a large selection of kitchen products, but I finally settled on this Calphalon Stainless Steel Stock Pot.
It ended up being good timing because I dropped my only stockpot (a different brand) on my kitchen floor, and it dented! I was very upset because the lid no longer fit, so that sort of made my product choice easy - must replace the stock pot! This is a great product! It's so heavy and lives up the quality you'd expect from a brand like Calphalon. I highly doubt this pot would dent should I drop it, although I'm trying to be much more careful in the kitchen :) Thank you so much CSN!

Now to the mittens . . .

DSCN7567_labeled

Sometime in the last year or so I saw some super cute red mitten cookies. I couldn’t wait to make them for Christmas, and I actually ordered the cookie cutter this summer!

DSCN7566_labeled

I had planned to make these mittens with Bridget’s Brown Sugar and Spice Cookies instead of my go-to sugar cookie recipe, and seeing them on Annie's Eats reaffirmed my plan.

DSCN7556_labeled

These mittens were a lot of fun to make – and I was assisted by one of my favorite kitchen helpers, my sister Lisa. She came up with some very creative designs for the mittens, and she’s getting to be so talented with royal icing. I think it’s so fun to make these cookies, but it’s even better to make them with someone you love. Thanks for helping, Lisa! ☺

DSCN7572_labeled

Several people have commented that they would like to learn how to do the royal icing. I have provided links to other blogs in the past, but would anyone benefit from me doing a photo-tutorial in the future? There are a lot of great tutorials on other blogs (like Marian's, Bridget's, and Annie's!) so I don’t want to do it unless it would be useful to my readers. Please let me know!

DSCN7574_labeled

DSCN7561_labeled

Brown Sugar and Spice Cookies

Ingredients:
3 cups all-purpose flour
2 teaspoons baking powder
1/2 teaspoon cinnamon
1/4 teaspoon ginger
1/8 teaspoon nutmeg
1/8 teaspoon allspice
1/2 cup granulated sugar
1/2 cup light brown sugar, packed
2 sticks butter
1 egg
1 teaspoon pure vanilla extract

Directions:
Preheat oven to 350.
1. Whisk the flour, baking powder, and spices; set aside.

2. Cream the sugar and butter. Add the egg and extracts, and mix until well-blended.

3. Gradually add the flour mixture and beat just until combined, scraping down the bowl, especially the bottom. (The dough will be quite thick...you may need to knead in stray bits of flour from the bottom of the bowl by hand.)

4. Roll on a floured surface and cut into shapes. Place on parchment lined baking sheets and bake for 9 - 12 minutes, depending on the size of your cookie cutter.

5. Let sit a few minutes on the sheet, then transfer to a cooling rack.

6. To decorate these cookies, I used a thinned royal icing glaze to outline and immediately flood (red), let that dry overnight, then used lightly thinned icing to pipe designs, plus pearl balls.

Source: Bake at 350

Wednesday, December 22, 2010

Gingerbread Cookies and Truffle Tips!

DSCN7594_labeled

In the interest of time (i.e. days until Christmas!), I'm tacking on some Truffle Tips to the end of this post, so scroll down if you've ever had trouble dipping truffles!

DSCN7583_labeled

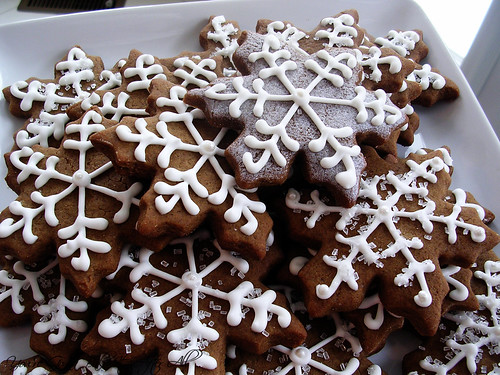
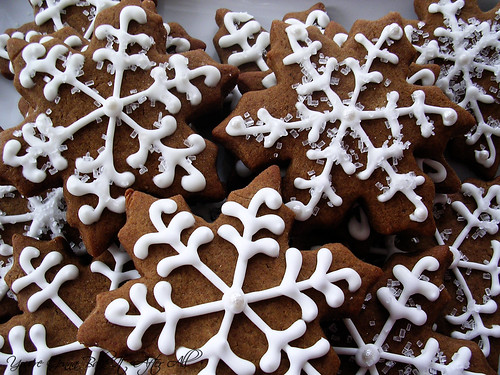
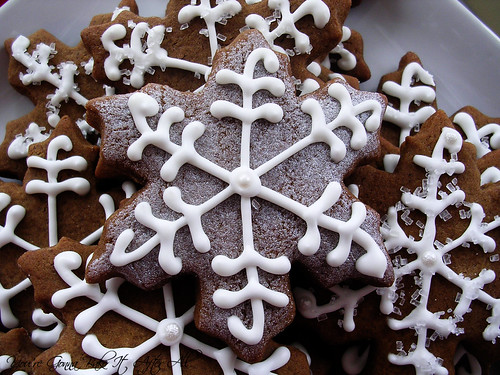
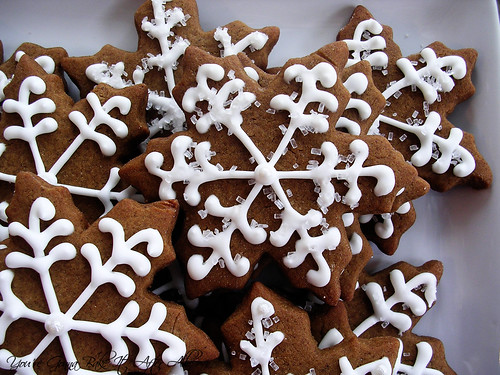
As a child, I always thought Gingerbread Cookies, specifically Gingerbread "people" were so cool, probably because we didn't make gingerbread cookies as part of our Christmas baking tradition. One year, my sister and I convinced my mom to buy a box mix of gingerbread, and we made the cookies. We loved them and had so much fun decorating them. They are one of those cookies that I never considered making from scratch, that is until I saw them two years ago on the blog Good Things Catered. Katie made such beautiful snowflakes that I promptly saved the recipe and planned to make them the next year. Seeing them featured on Annie's Eats last December reminded me about this recipe that I had forgotten, and I made a point to remember this year!

I had so much fun decorating these because they are so pretty! I decided to use sparkly sugar, candy pearl balls, and even some edible shimmer. I had my favorite kitchen helper, my sister Lisa, who did the majority of decorating. This recipe makes a TON of cookies! I served them at the Holiday Party, took some to work, and froze a bunch for later. Some people commented that they were too pretty to eat but were glad when they did because they're delicious!

Gingerbread Cookies

Ingredients:

4 cups all-purpose flour

1 teaspoon salt

1 1/2 teaspoons baking powder

1/2 teaspoon baking soda

1 teaspoon ground cinnamon

1 1/2 teaspoon ground cloves

2 teaspoon ground ginger

1 teaspoon ground nutmeg

1 cup (16 tablespoons) unsalted butter, at room temperature

1 cup sugar

1 cup molasses

1 large egg

Directions:

1. In a large mixing bowl, whisk together the flour, salt, baking powder, baking soda, and spices to combine; set aside.

2. In the bowl of a stand mixer fitted with the paddle attachment, cream the butter and sugar on medium-high speed until light and fluffy, about 2 minutes.

3. Mix in the molasses and egg until combined. Add in the dry ingredients and mix just until incorporated. Cover the bowl and chill the dough for at least one hour.

4. Preheat the oven to 350F, and line baking sheets with parchment paper.

5. Roll the dough out on a lightly floured work surface to about 1/4-inch thickness. Cut into desired shapes with cookie cutters.

6. Place the cookie shapes onto the prepared baking sheets, about 2 inches apart. Bake for 10 minutes, rotating the pans halfway through baking.

7. Remove from the oven and let cool on the baking sheets for 10 minutes. Transfer to a wire cooling rack and let cool completely.

8. To decorate, brush cookie with edible shimmer or leave plain, then use Royal Icing to pipe on designs. Sprinkle with large-grain sugar and/or add pearl balls, if desired.

DSCN7587_labeled

DSCN7578_labeled

Source: Annie's Eats, originally from Good Things Catered

And now for some Truffle Tips:


DSCN7610_labeled

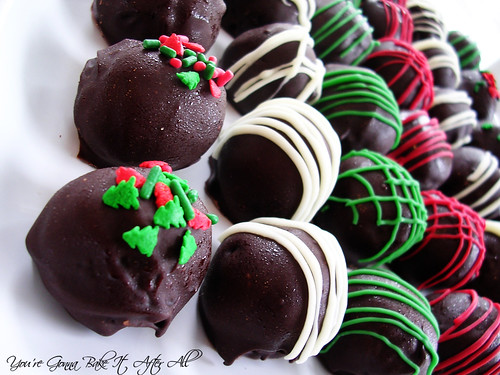
I've had a few people tell me that they have trouble dipping truffles, and I actually had quite a bit of trouble dipping the Cookie Dough Truffles. While I am not a truffle expert by any means, I've complied a few tips that I've found from trial and error.

First you need to get your chocolate the right consistency for dipping. While you can melt the dipping chocolate in the microwave, I prefer to melt it in a double boiler (or in a glass bowl set over a pan of barely simmering water - make sure water does not touch bottom of bowl). This way, the chocolate is continuously heated during the dipping process. Melt the chocolate and add a little vegetable shortening (Crisco) - this really helps thin out the chocolate. You can start with a teaspoon of shortening and keep adding a little more - maybe a total of a tablespoon depending on how much chocolate you are using. Basically, you want the chocolate to be thin enough so that dipping isn't a pain in the butt. I've read that vegetable oil works similarly, but I've never tried it.

Next, determine a method for dipping that works well for you. The way I found that worked best was to drop the formed truffle into the chocolate, one at a time, roll it around gently with two forks, then use only one fork to life it out, shaking off the excess chocolate as you lift up, then transfer the coated truffle to wax paper by gently sliding the truffle off the fork. To be clear, the fork does not stab the truffle, it is just use like a "fork-lift" if you will. This should help reduce the excess chocolate running off the truffle as it sits on the wax paper and pools at the bottom, making it look like a big blob.

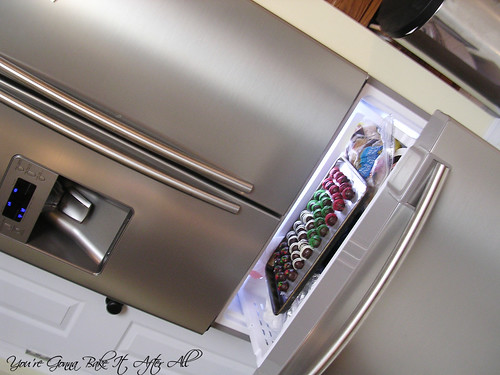
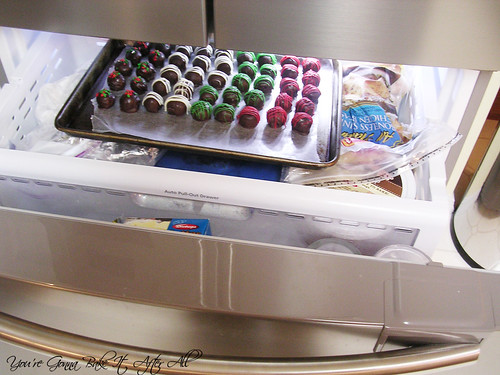
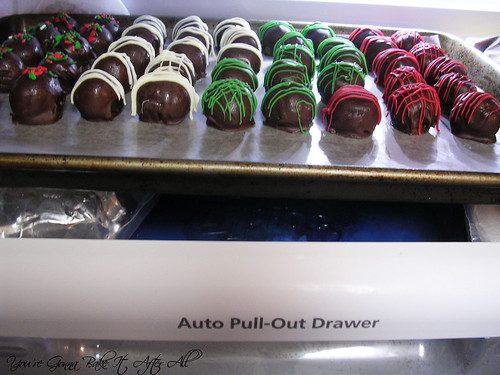
One other thing that might make the process easier is freezing the truffles (even if just for 30 minutes) before you dip them in chocolate; I did this with the cookie dough truffles, but not the Oreo, but I might try it next time. I made my truffles all the way through, then froze them for a week before the party - they turned out perfect! In fact, and I'm a little embarrassed to admit this, but I actually chose our particular fridge/freezer partly because it's conducive to freezing trays of candy!

DSCN7469_labeled

DSCN7465_labeled

DSCN7463_labeled

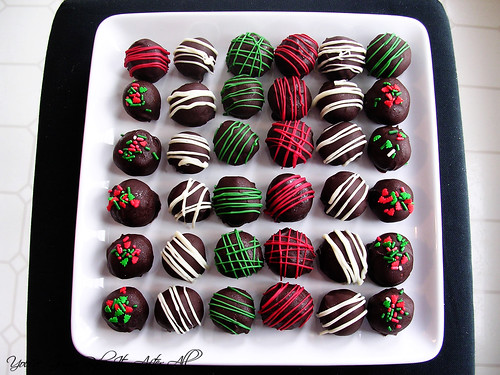
In my experience, chocolate is much easier to work with than white chocolate (and tastes better in my opinion!), so from now on I mostly plan to use white chocolate for the design on top rather than dipping the whole truffle. But, the easiest way to melt white chocolate is the same exact way - double boiler and Crisco to thin. You can also do it in the microwave, but it's more difficult to control the temperature, and white chocolate is more prone to seizing up in my hands.
DSCN7623_labeled

When I do the designs on top, I just put the melted chocolate into a small resealable sandwich bag and snip off a corner. You can use a pastry bag of course, but I find that I can get enough control out of a sandwich bag without having to clean a pastry tip and coupler!

Happy Candy Making!!!

Tuesday, December 21, 2010

Bailey's Irish Cream Mini-Cheesecakes

DSCN7545_labeled

DSCN7497_labeled

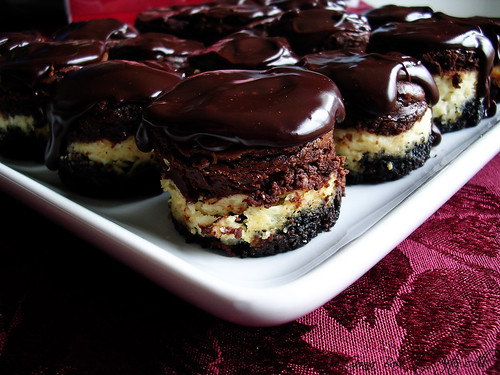
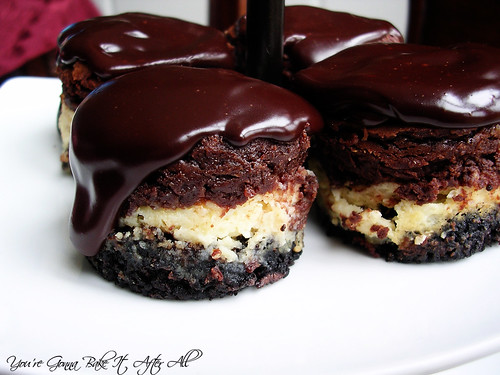
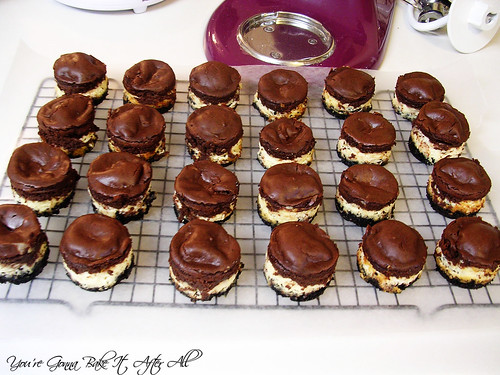
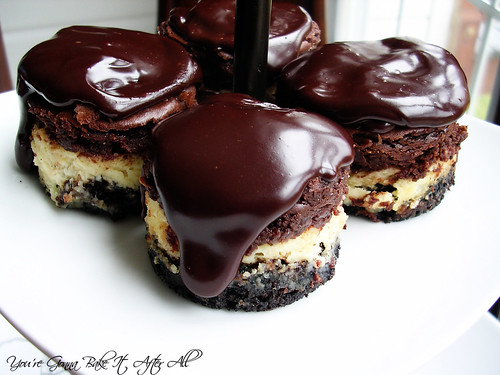
Bob’s work Holiday Party was earlier this month, and everyone was encouraged to bring a snack or dessert. This party fell on the same weekend as our Holiday Open House, so I was already in full dessert mode – what’s one more?! I thought for a while about what to make, then remembered my mini-cheesecake pans. It’s rare that I get the opportunity to use them, and this seemed like the perfect event for a bite-sized, easy-to-grab dessert. One of my favorite cheesecakes is the Bailey’s Irish Cream Cheesecake, so I decided to adapt the recipe to a mini-version. I wasn’t sure how this would work, but they turned out great! They were a big hit at the party, and I had many requests for the recipe. They are actually pretty simple to make, but certainly don’t look simple.

I realize that very few people actually own a mini-cheesecake pan. A friend of mine tried the Pumpkin Spice Magic Bar Mini’s in a muffin pan and she had a very difficult time getting them out of the pan – in fact they fell apart. I can see why this happened considering the cheesecake pan allows you to push the removable bottom up to remove the cheesecake from the pan without disrupting the crust. If you would like to make this recipe and don’t have a mini-cheesecake pan, go ahead and use a muffin tin, but make sure you use paper liners. You can always remove them before you top with ganache - just make sure you coat them with nonstick cooking spray!

Bailey’s Irish Cream Mini-Cheesecakes

Yield: 24 mini-cakes (make a half recipe if just using 1 mini-cheesecake pan, which yields 12)

Ingredients:
For the crust:
16 whole Oreos, finely ground in food processor
3 tablespoons melted butter

For the filling:
16 ounces (2 8-ounce packages) cream cheese
1/2 cup sugar
2 eggs
1 1/3 cups sour cream
3 Tablespoons Bailey's Irish Cream
1 teaspoon vanilla extract
6 ounces semi-sweet chocolate, melted and cooled slightly

For the ganache glaze:
4 ounces bittersweet chocolate, coarsely chopped
1/2 cup heavy cream
2 teaspoons light corn syrup

Directions:
Preheat oven to 350F.
1. Combine the ground Oreos and melted butter into a bowl until well combined. Spoon into 24 mini cheesecake cups. Press into the bottom of each cup so the crust is flat. If you have a small cup or container small enough, that works well. Partially bake for 10 minutes then remove from oven.

2. In a large bowl with a handheld or stand mixer, beat the cream cheese and sugar until light and fluffy. Beat in eggs, one at a time. Stir in sour cream, Bailey's, and vanilla.

3. Pour or spoon batter into cheesecake pan cups to fill to a little less than half of the cup. Then add the melted chocolate to the rest of the batter. Fill the cups to about 3/4 full.

4. Bake for 25-28 minutes until cheesecake is cooked through. Remove to a wire rack to cool.

5. Once the cheesecakes have cooled, loosen the edges with a plastic knife and remove them from the pan by pushing up on the removable bottoms. Arrange them on a piece of waxed paper and make the glaze.

DSCN7482_labeled

6. To make the ganache glaze, put the chocolate in the top of a double boiler and melt above simmering water (or use microwave to melt). The chocolate should be just melted and only warm, not hot. Meanwhile, bring the cream to a boil in a small saucepan. Pour the hot cream over the chocolate and stir very gently with a rubber spatula until the mixture is smooth and shiny. Stir in the corn syrup.

7. Pour the glaze over the cheesecakes and smooth the top with the back of a spoon or a metal icing spatula. Don't worry if the glaze drips unevenly down the sides of the cheesecakes, it actually makes for a pretty presentation. Alternatively, you could leave the cheesecakes in the pan and pour the glaze on top, let set (best to put in fridge), then run a plastic knife around to loosen, lift the cakes out, and have a nice ganache layer on top with no drips!

8. Refrigerate cheesecakes until ready to serve. If keeping overnight or longer, wait until glaze sets, then cover with foil.

Sources: Adapted recipes - Crust, Cheesecake, Ganache

DSCN7492_labeled

  © Blogger template Brownium by Ourblogtemplates.com 2009

Back to TOP