
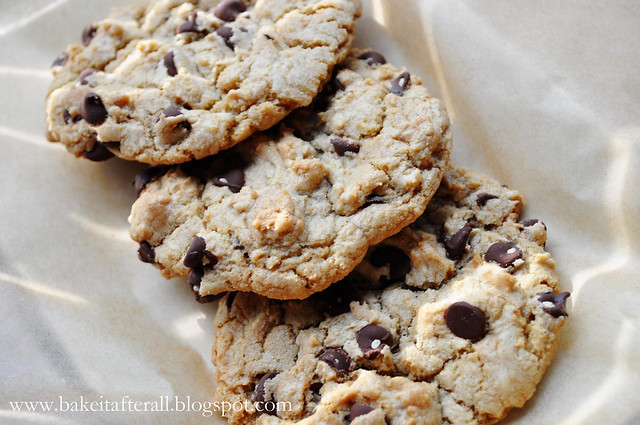
These cookies were just as the name describes - thick and chewy - just like from a bakery. The dough freezes well so you can make up a batch of batter and bake them as needed. Having a batch of cookie dough ready to bake at a moment's notice sounds like something a Super Hostess would do. Friends stopping by unannounced? You can have warm cookies in a matter of minutes. I'd like to think that we could always have these cookies on-hand in our freezer, but in all honesty we would probably just eat them! :-)
Thick and Chewy Chocolate Chip Cookies
Makes about 18 large cookies
Ingredients:
2 cups plus 2 tablespoons (10 5/8 ounces) unbleached all-purpose flour
1/2 teaspoon baking soda
1/2 teaspoon salt
12 tablespoons unsalted butter, melted and cooled until warm
1 cup packed (7 ounces) light or dark brown sugar
1/2 cup (3 1/2 onces) granulated sugar
1 large egg plus 1 egg yolk
2 teaspoons vanilla extract
1 - 1 1/2 cups semisweet chocolate chips
Directions:
1. Adjust oven racks to upper- and lower-middle positions. Head oven to 325F.
2. Line 2 large (or oversized) baking sheets with parchment paper or spray with nonstick cooking spray.
3. Whisk the flour, baking soda, and salt together in a medium bowl and set aside.
4. Using an electric mixer, mix the butter and sugars until blended thoroughly. Beat in the egg and yolk and the vanilla until combined.
5. Add the dry ingredients and beat at low speed until just combined. Stir in the chips to taste.
6. Roll a scant 1/4 cup of dough into a ball. (At this point, you may freeze the balls of dough if you desire). Hold the dough ball with the fingertips of both hands and pull into 2 equal halves. Rotate the halves 90 degrees and, with the jagged surfaces facing up, join the halves together at their base, again forming a single ball, being careful not to smooth the dough's uneven surface.
7. Place the formed dough balls on the prepared baking sheets, jagged surface up, spacing them 2 1/2 inches apart. If you have smaller baking sheets, you will need to bake the cookies in batches to ensure they are properly spaced on the sheets.
8. Bake until the cookies are light golden brown and the outer edges start to harden yet the centers are still soft and puffy, 15 to 18 minutes, rotating the baking sheets from front to back and from top to bottom halfway through baking time.
9. Cool the cookies on the baking sheets (this is an important step!)
10. Remove the cooled cookies from the baking sheets with a metal spatula. The cookies are best served warm from the oven but will retain texture when cooled.
Source: Brown Eyed Baker, originally from Baking Illustrated


do you really have to take a ball of dough and then pull it apart? These cookies look good. I don't think you have made them for me yet..
ReplyDelete