Search This Blog

Showing posts with label Side dish. Show all posts

Sunday, November 1, 2015

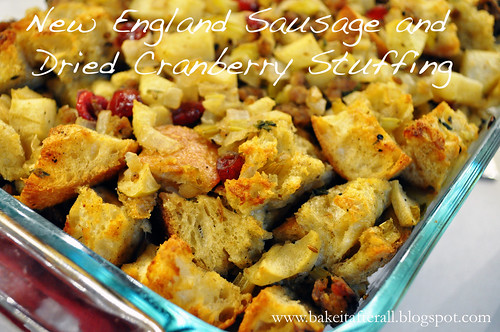
New England Sausage and Dried Cranberry Stuffing

_NewEnglandStuffing

Now that Halloween is officially over, it's time to start getting our Thanksgiving menus together. We always have our traditional Thanksgiving Dressing on Turkey Day, but a few years ago when my we started having a December "Dickens Dinner" with my sister's family, I started making this New England Sausage and Dried Cranberry Stuffing. Since I don't eat pork, I substitute chicken or turkey sausage and even the pork-eaters love this stuffing. Whether you're looking for a new recipe for Thanksgiving or one of the many holiday dinners ahead of us, this recipe is worth trying!

New England Sausage and Dried Cranberry Stuffing

Serves 5 - 6 

Ingredients: 
6 cups white bread, cut into 3/4-inch cubes
1/2 pound sausage, casings removed (traditional, chicken, or turkey)
1/4 stick butter
3 cups onion
1/2 pound tart green apples (or your choice), peeled, cored, chopped
1 cup celery, chopped
1/2 tablespoon poultry seasoning
1/4 cup dried cranberries
1 tablespoon dried parsley
1 1/2 eggs, beaten
3/4 cup chicken broth 

Directions:
1. Place bread cubes on a large baking sheet and bake until slightly dry, about 15 - 20 minutes. Cool completely. You can also leave the cubes out overnight to dry.

2. Sauté the sausage in a large skillet over medium-high heat until cooked through, crumbling coarsely with the back of a spoon, about 10 minutes. Using a slotted spoon, transfer the sausage to a large bowl. Pour off any drippings from the skillet.

3. Using the same skillet, melt the butter. Add the onions, apples, celery, and poultry seasoning to the skillet. Sauté until onions are softened, about 5 – 8 minutes.

4. Mix in dried cranberries. Add the mixture to the sausage, then mix in the bread, eggs, and parsley. Season stuffing to taste with salt and pepper. Add the chicken broth to moisten stuffing depending on how most you like it (can be prepared one day ahead. Cover and refrigerate).

5. Butter a baking dish (I used a 7 x 11-inch glass dish). Transfer stuffing to the dish, cover, and bake at 350F until heated through, about 45 minutes. Uncover and bake until top is golden brown, about 15 minutes.

Source: Adapted from The Food Channel.com

Notes: I halved the original recipe, which serves 10. It calls for 4 teaspoons of chopped fresh rosemary (so that would be 2 teaspoons for the half batch) and the parsley to be fresh. Due to personal preference, I omitted the rosemary and substituted dried parsley.

Wednesday, September 30, 2015

Cheddar Bay Biscuits

IMG_0432_CheddarBayBiscuits

As I mentioned in the last post, I used to love the Sonoma Chicken Stew at Panera. It was served with Dry Jack Cheese Biscuits, which I thought were amazing. They had a delicious, peppery flavor. In fact, on the way to the hospital when I was in labor with Ava, I had Bob stop at Panera so I could get a biscuit since I knew once I got to the hospital I would be strictly confined to clear liquids.

When my sister and I decided to recreate the Sonoma Chicken Stew, she suggested we try these Cheddar Bay Biscuits, since we like the ones at Red Lobster. I am happy to report that these are even better than the biscuits at Red Lobster! The fresh shredded Parmesan forms little pockets of cheese in the biscuits and really transforms these into some of the best biscuits we've ever had.  They really are best warm, so if possible aim to serve them that way.

Cheddar Bay Biscuits

Makes 12 biscuits

Ingredients:
2 cups Bisquick, store bought or homemade
2/3 cup milk (2%)
2/3 cup shredded cheddar cheese
1/3 cup freshly shredded (not grated) Parmesan cheese
1/4 tsp garlic powder
1/2 tsp Old Bay Seasoning
1/4 cup sour cream
2 tablespoons fresh chives, chopped
4 tablespoons melted butter

Directions:
1. Heat oven to 450F.

2. Mix all ingredients except for butter.

3. Drop onto ungreased baking sheet by spoonful.

4. Bake for 8 - 12 minutes or until golden brown.

5. Brush with melted butter, then bake an additional 1 - 2 minutes. Serve warm.

Optional: finish with sprinkle of fleur de sel (flaky sea salt)


Wednesday, September 23, 2015

Cheddar Dill Scones

DSC_0347_CheddarDillScones


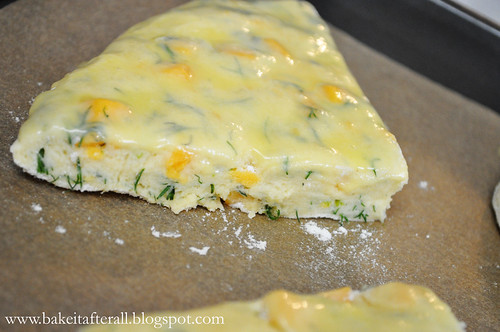
In my spare time, I love to watch episodes of Barefoot Contessa. Ava shares my love of cooking, and she absolutely adores Ina!  She will often ask to watch "Barefoot" as she calls her. One particular episode of the Barefoot Contessa titled "Ladies Who Lunch" featured chicken salad and Cheddar-Dill Scones. I served these scones with Harvest Chicken Salad.  We all really loved them; I don't think I've ever made one of Ina's recipes that we didn't like!

Cheddar Dill Scones

Ingredients:
4 cups plus 1 tablespoon all-purpose flour, divided
2 tablespoons baking powder
2 teaspoons salt
3/4 pound cold unsalted butter, diced
4 extra-large eggs, beaten lightly
1 cup cold heavy cream
1/2 pound extra-sharp yellow Cheddar, small-diced
1 cup minced fresh dill
1 egg beaten with 1 tablespoon water or milk, for egg wash

Directions:
Preheat the oven to 400F.

1. Combine 4 cups of flour, the baking powder, and salt in the bowl of an electric mixer fitted with a paddle attachment.

2. Add the butter and mix on low speed until the butter is in pea-sized pieces. Mix the eggs and heavy cream and quickly add them to the flour-and-butter mixture. Combine until just blended.

3. Toss together the Cheddar, dill, and 1 tablespoon of flour and add them to the dough. Mix until they are almost incorporated.

4. Dump the dough onto a well-floured surface and knead it for 1 minute, until the Cheddar and dill are well distributed. Roll the dough 3/4-inch thick. Cut into 4-inch squares and then in half diagonally to make triangles. Brush the tops with egg wash.

DSC_0325_CheddarDillScones1

5. Bake on a baking sheet lined with parchment paper for 20 to 25 minutes, until the outside is crusty and the inside is fully baked.

Source: Barefoot Contessa


Thursday, August 13, 2015

Oven-Dried Tomato Bruschetta


DSC_0072_ed


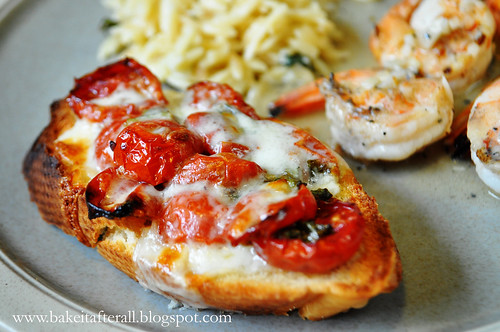
One of my favorite appetizers is this Double Tomato Bruschetta. It combines fresh and sun-dried tomatoes with the usual bruschetta ingredients and is topped with mozzarella cheese prior to baking. When I had some leftover Oven-Dried Tomatoes in the fridge, I decided to turn them into bruschetta.  The result was amazing!  We served it with Parmesan Basil Orzo and Grilled Shrimp.  Delicious!

Oven-Dried Tomato Bruschetta

Ingredients:
~2 cups Oven-Dried Tomatoes
1 clove minced garlic
1 tablespoon olive oil
2 tablespoons balsamic vinegar
1/4 cup fresh basil, stems removed
Salt and pepper to taste
1 French baguette
shredded mozzarella cheese (depends on the number of bruschetta you make, approx. 2 cups for a full loaf of bread)

 Directions:
Preheat oven on broiler setting.

1. In a large bowl, combine the tomatoes, garlic, olive oil, vinegar, basil, salt, and pepper. Allow the mixture to sit for 10 minutes.

 2. Meanwhile, cut the baguette into 3/4-inch slices. On a jelly roll pan covered in foil, drizzle olive oil and spread evenly with a pastry brush. Place the baguette slices on top, then drizzled them with olive oil and spread evenly with a pastry brush.

3. Broil the bread slices until crispy, turning halfway through (a few minutes on each side- watch closely as things can burn quickly under the broiler).

4. Using a slotted spoon to leave behind excess liquid, divide the tomato mixture evenly over the baguette slices. Top the slices with mozzarella cheese.

5. Broil for 5 minutes, or until the cheese is melted.


Thursday, August 6, 2015

Parmesan Potatoes

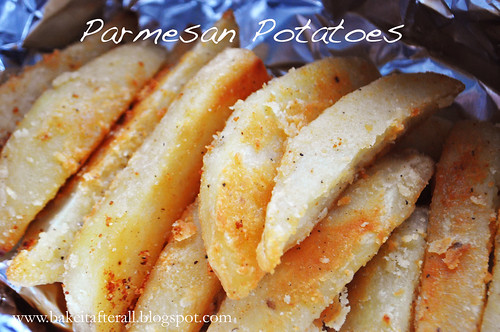
My aunt and my mom have been making these Parmesan Potatoes for as long as I can remember. They are the perfect side dish for BBQ.  I like mine with ketchup but some prefer them plain. One of my favorite summer meals is BBQ'd chicken, Parmesan Potatoes, and Garlic Bread!

DSC_0871_ed


Parmesan Potatoes

Ingredients:
6 large potatoes, peeled, cut lengthwise into sixths (cut potato in half lengthwise then each half into thirds)
1/2 cup (1 stick) of butter
1/2 cup flour
1/2 cup Parmesan cheese
Salt and pepper to taste

Directions:
Preheat oven to 375F.

1. Add the butter to a shallow baking pan and place in the oven to melt.

2. Add the cut potatoes to a bowl of water to soak for a few minutes.

3. In a resealable gallon-sized bag, add the flour, Parmesan cheese, and salt and pepper to taste.

4. Add cut potatoes to the bag a few at a time and shake. The moisture from the water soak will help the coating stick. Remove potatoes and lay them on a flat side in the pan with the melted butter. Repeat with remaining potato wedges.

5. Bake potatoes for 20 - 25 minutes, then turn them to the other flat side and bake an additional 20 - 25, or until golden brown.

Source: family friend Jeanette


Sunday, November 24, 2013

Thanksgiving Dressing


Some families have the same meal every Thanksgiving, using the same tried-and-true recipes year after year; while other's menu is constantly evolving to include new twists on classic dishes. For many years, my family's Thanksgiving was the former: the menu never changed. As Bob and I started hosting Thanksgiving at our house 3 years ago, we have tweaked the menu slightly- not eliminating dishes but rather adding a few of our own (like these Mashed Potatoes with Root Vegetables, Compound Herb Butter, and Honey Butter-YUM!) Each year we learn more about which dishes need tweaking and how to better execute the meal. One thing that we will never mess with is our traditional Thanksgiving Dressing. Dressing is basically "stuffing" that is cooked in a separate dish, not in the turkey. For that reason, it can get a crispy top and edges depending on how you bake it, which I think is one of the best parts! My family has never made stuffing in a turkey (and now it's actually not recommended because you either undercook your stuffing or overcook your bird). Our dressing recipe is very basic - no organ meat, sausage, or other fancy add-ins. It's actually the simplicity that I love, and it's one of my favorite dishes at Thanksgiving. My mom and my aunt got this recipe from their mother and have each adapted their own way to make it. I've taken each of their recipes and combined them into one master recipe. This dressing was designed to go well with chicken or turkey, so it's the perfect side dish any time of year!  

Thanksgiving Dressing

Ingredients:
1 stick butter                                               
¾ cup onion, diced small                                   
1 cup celery (boiled and diced small)   
1 loaf white sandwich bread (frozen and cubed into ½-inch cubes- crust and all)                                
1 tsp. salt                                                    
½ tsp. pepper
2 tsp. poultry seasoning
¾ cup celery water, hot
¾ cup chicken stock, hot

Directions:
1. Boil pieces of celery until soft. Remove strings.
2. Chop celery and onion into small dice.
3. Melt butter in pan, sauté onions and celery until onions are soft. 
4. Combine the celery water and chicken broth in a measuring cup, making sure it is hot (heat it up if it’s not).
5. Add bread cubes to a large bowl/pan, add the salt, pepper, and poultry seasoning.  Add the cooked onion/celery mixture and the hot celery water/chicken stock.  Stir until the bread is moist.  It is better to have the bread too moist than not enough because it will be baked.
6. Spoon the bread mixture into a pan. Do not flatten it out – leave little hills and valleys for the turkey juice or gravy to settle into.
7. Bake covered at 350F for around 40 minutes, then uncover for the last 20 minutes to brown (cook time total of 1 hour).  You may also add gravy to the top intermittently during the baking process, but not the last 20 minutes because you're looking to get that crispy top.

Notes:  Aunt Suey always doubles this recipe for Thanksgiving.  The dressing needs at least 1 hour in the oven depending on how deep the pan is.  Cook at 400F for a double batch. 

Source: Adapted from my Aunt Suey and my Mom


Wednesday, October 19, 2011

Pumpkin Cornbread

DSC_0250_ed

DSC_0228_ed

I saw this Pumpkin Cornbread recipe the day before I planned to make the Turkey Pumpkin Chili - score! Cornbread is the perfect accompaniment to chili, and what better side to serve with pumpkin chili than pumpkin cornbread?!

This cornbread was fantastic! Some cornbread recipes result in bread that is slightly on the dry side, but this one isn't. It's not moist like a cake, but in cornbread terms it's definitely moist; I think the olive oil helps keep it from getting dry. This recipe is simple and quick to throw together. We both loved this cornbread and will be making it again soon!

Pumpkin Cornbread

Ingredients:
1 cup all-purpose flour
1 tablespoon baking powder
1 teaspoon Kosher salt
1/2 tablespoons ground cinnamon
1/4 teaspoons ground nutmeg
1/2 cup packed brown sugar
1 cup cornmeal
2 whole eggs
1 cup pumpkin puree
1/4 cup olive oil
1 tablespoon molasses

Directions:
Preheat the oven to 400F and grease an 8 x 8-inch baking dish (or spray with nonstick cooking spray).

1. In a medium bowl, whisk together the flour, baking powder, salt, spices, brown sugar, and cornmeal.

2. In a small bowl or glass measuring cup, lightly beat the eggs, and then stir in the pumpkin, oil, and molasses.

3. Stir the wet ingredients into the dry ingredients just until combined, and then pour the batter into the pan, smoothing out the top as much as possible.

4. Bake 30 minutes or until a knife inserted in the center comes out clean. Serve warm.

Wednesday, March 2, 2011

Mashed Potatoes and Root Vegetables

DSCN8077_labeled

I realize it's now March (how did that happen?!), but it's still chilly in these parts so I have a few more winter recipes for you. I wanted to make these mashed potatoes the moment I first flipped through my America's Test Kitchen cookbook last March, but decided to wait for winter for the seasonal produce. Although the recipe calls for some vegetables I have NEVER worked with (or eaten for that matter!), it just sounded so wintery and hearty.

I am SO glad we made this recipe because these mashed potatoes are the BEST ever!!! Bob and I both agreed that they are our favorite mashed potatoes of all time - better than any restaurant or homemade version. The root veggies are caramelized in butter, which brings out a distinct sweetness. The potatoes are unbelievably creamy in texture (thanks to the butter and half-and-half), while still maintaining small chunks of potato so you know it's the real stuff. We served these with a delicious chicken recipe I'll be posting soon!

Mashed Potatoes and Root Vegetables

Serves 4

Ingredients:
4 tablespoons (1/2 stick) unsalted butter
8 ounces carrots, parsnips, turnips, or celery root, peeled; carrots or parsnips cut into 1/4-inch thick half-moons; turnips or celery root cut into 1/2-inch dice (about 1 1/2 cups)*
1 1/2 pounds Yukon Gold potatoes (about 3 medium), peeled, quartered lengthwise, and cut crosswise into 1/4-inch-thick slices; rinsed well in 3 or 4 changes of cold water and drained well
1/3 cup low-sodium chicken broth
Table salt
3/4 cup half-and-half, warmed
3 tablespoons minced fresh chives, optional
Ground black pepper

*I used all 4, approximately 2 ounces of each.

Directions:
1. Melt the butter in a large saucepan over medium heat. Add the root vegetables and cook, stirring occasionally, until the butter is browned and the vegetables are dark brown and caramelized, 10 to 12 minutes. (If after 4 minutes the veggies have not started to brown, increase the heat to medium-high).

2. Add the potatoes, broth, and 3/4 teaspoon salt, and stir to combine. Cook, covered, over low heat (the broth should simmer gently; do not boil), stirring occasionally, until the potatoes fall apart easily when poked with a fork and all the liquid has been absorbed, 25 to 30 minutes. (If the liquid does not gently simmer after a few minutes, increase the heat to medium-low). Remove the pan from the heat; remove the lid and allow the steam to escape for 2 minutes.

3. Gently mash the potatoes and root vegetables in the saucepan with a potato masher (do not mash vigorously). Gently fold in the half-and-half and chives. Season with salt and pepper to taste and serve.

Source: The Complete America's Test Kitchen TV Show Cookbook

Thursday, February 10, 2011

Sweet Corn Cake

DSCN7906_labeled

As I mentioned earlier this week, we had my parents over for a Mexican night. My mom jokingly asked if I was making Sweet Corn Cake, that delicious, scoop-able side dish served with your meal at popular Mexican chain restaurants (Chevy's being my favorite). I had seen recipes for this in the past, and even made one from a packet before, so I decided we would have it for dessert.

I found this recipe and decided to make a few adjustments, namely cutting the amount of butter in half. I had never heard of masa harina, but a little Googling informed me that it's a Mexican corn flour, and surprisingly I found it in my grocery store next to the Mexican grocery items!

This corn cake was so yummy! It was the perfect ending to our wonderful Mexican feast!

Sweet Corn Cake

Ingredients:
4 tablespoons butter, softened
1/3 cup masa harina (Mexican corn flour)
1/4 cup water
1 14-ounce can cream-style corn
1/4 cup cornmeal
1/3 cup sugar
2 tablespoons milk
1/4 teaspoon salt
1/2 teaspoon baking powder

Directions:
Preheat oven to 350F.

1. In a medium bowl beat butter until it is creamy. Add the Mexican corn flour and water and beat until well mixed.

2. Using a food processor, process the corn, but leave chunky. Stir into the butter mixture.

3. In a separate bowl, mix cornmeal, sugar, milk, salt, and baking powder. Add to corn flour mixture and stir to combine.

4. Pour batter into an ungreased 8 x 8-inch baking pan. Smooth batter and cover with aluminum foil. Place pan into a 9x13 inch baking dish that is filled 1/3 of the way with water.

5. Bake for 50 to 60 minutes. Allow to cool for 10 minutes. Use an ice cream scoop for easy removal from pan.

Source: Adapted from Allrecipes.com

Friday, June 25, 2010

Italian Charcoal-Grilled Corn


DSCN6650_labeled

DSCN6655_labeled

My aunt and uncle recently gave Bob and I a small charcoal grill for a housewarming gift. We have used it several times and love the taste of charcoal-grilled food. My dad bought us a chimney starter, and it's amazing! I highly recommend it to anyone who cooks with charcoal. It seriously makes the entire process go so much faster.

For Father's Day, Bob and I made dinner for my Dad and Mom, and I knew I wanted to use the grill for a portion of the meal. Bob decided to make steak with a special sauce from my Complete America's Test Kitchen TV Show Cookbook, which is actually made on the stovetop and in the oven. I turned to this cookbook for a side dish. Charcoal-grilled corn stood out as something unique, and the Mexican-Style corn looked fantastic. Because we were going for more of an Italian theme (I served antipasti and Double Tomato Bruschetta - my Dad's FAVORITE - as appetizers), I decided to give the corn an Italian twist by using basil instead of cilantro, Parmesan cheese instead of queso fresco, and lemon juice instead of lime. I also decided to grill the corn with the cheese/herb mixture on it, instead of tossing the grilled corn in the mixture.

This corn is simple to whip up and is really delicious. The charcoal gave the corn a nice flavor, as did the coating. The corn is perfectly seasoned with this recipe - no need for extra salt or butter!

Italian Charcoal-Grilled Corn

Ingredients:
4 teaspoons vegetable poil plus extra for the cooking grate
1 1/2 ounces Parmesan cheese, grated (about 1/2 cup)
1/4 cup mayonnaise
3 tablespoons sour cream
3 tablespoons chopped fresh basil leaves
4 teaspoon juice from 1 lemon
1 medium garlic clove, minced or pressed through a garlic press (about 1 tsp)
1/4 teaspoon ground black pepper
1/4 teaspoon table salt
6 large ears corn, husks and silk removed

Directions:
1. Light a lareg chimney started filled with charcoal (about 6 quarts) and allow to burn until the coals are partially covered witha layer of ash, about 20 minutes.

2. Build a modified two-level fire by arranging all the coals over half of the grill, leaving the other half empty. Set the cooking grate in place, cover, and heat the grate until hot, about 5 minutes. Use a grill brush to scrape the cooking grate clean. Dip a wad of paper towels in vegetable oil holding the wad with tongs, oil the cooking grate (we just used Pam for grilling and sprayed it on the grate while it was suspended in the air with tongs - away from the flames!)

3. Meanwhile, combine the cheese, mayonnaise, sour cream, basil, lemon juice, garlic, pepper, and salt in a large bowl. Add corn and toss to coat evenly.

4. Grill the corn until lightly charred on all sides, 7 to 12 minutes total. Serve immediately.

Source: Adapted from the Complete America's Test Kitchen TV Show Cookbook


DSCN6652_labeled

Friday, June 18, 2010

Pasta with Sun-dried Tomatoes

DSCN6596_labeled

This is a great summer pasta! Tomatoes, mozzarella, and basil are some of my favorite flavors, and this dish combines them in perfect balance. Ina has a knack for great pasta dishes, so I knew I would love this one. I served it as our main dish, but it would be a great side as well.

I cut this recipe in half except for the pasta because I wanted to stretch the ingredients; however, I think Ina had it right, so I've posted the original. I also left out the olives because Bob hates them. I had intended to add them to my plate but forgot. This is especially great if you have a ton of fresh basil in your garden like I do - the leaves are gigantic! :)

Pasta with Sun-dried Tomatoes

Ingredients:
1/2 pound fusilli (spirals) pasta, or pasta of choice (I used angel hair)
Kosher salt
Olive oil
1 pound ripe tomatoes, medium-diced
3/4 cup good black olives, such as kalamata, pitted and diced (optional)
1 pound fresh mozzarella, medium-diced
6 sun-dried tomatoes in oil, drained and chopped

For the dressing:
5 sun-dried tomatoes in oil, drained
2 tablespoons red wine vinegar
6 tablespoons good olive oil
1 garlic clove, diced
1 teaspoon capers, drained
2 teaspoons kosher salt
3/4 teaspoon freshly ground black pepper
1 cup freshly grated Parmesan
1 cup packed basil leaves, julienned

Directions:
1. Cook the pasta in a large pot of boiling salted water with a splash of oil to keep it from sticking together. Boil for 12 minutes, or according to the directions on the package. Drain well and allow to cool.

2. Place the pasta in a bowl and add the tomatoes, olives, mozzarella, and chopped sun-dried tomatoes.

3. For the dressing, combine the sun-dried tomatoes, vinegar, olive oil, garlic, capers, salt, and pepper in a food processor until almost smooth.

4. Pour the dressing over the pasta, sprinkle with the Parmesan and basil, and toss well.

Source: Ina Garten's Barefoot Contessa Family Style via Foodnetwork.com

Friday, April 23, 2010

Spinach Souffle

Happy Friday!!! Next week is my last week at work before the big move. I can't believe that I will be leaving after 6 years in my lab. It's been a lot of work winding things down and organizing all of my notes and supplies in a way that my project can be continued after I leave, so there's been absolutely no time for new recipes. I am so anxious to get back into the kitchen!!!

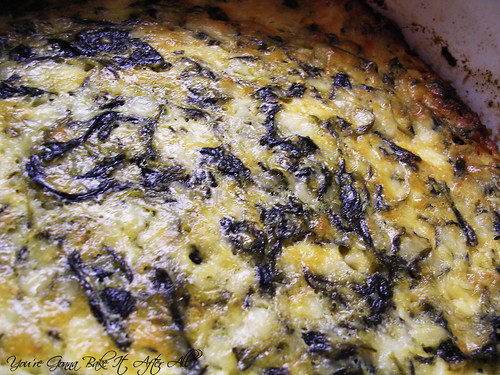
I made this souffle for the Christmas dinner I hosted for Bob's parents last year. It's my mom's recipe, which she received from a friend many years ago. Although I counted this as one of the vegetables at our meal, it's one of those vegetable dishes that has so much other delicious stuff (like butter, cheese, and eggs!) that probably cancel out the healthfulness of the actual veggie! My mother-in-law suggested it could be used as a quiche filling, because the texture of this souffle is very similar to that of quiche. I think other veggies could be added to this recipe, like artichokes or mushrooms.

One note about this recipe is that it has to be made in advance so it can sit in the fridge for 4-5 hours. For big dinners where you're trying to coordinate multiple dishes, this can actually be an advantage because you prep it early and pop it in the oven an hour before dinner!

Spinach Souffle

Ingredients:
1 package frozen spinach, thawed and all liquid squeezed out
1 pound cottage cheese
3 eggs
1/4 cup (1/2 stick) butter, melted
4 ounces grated cheddar cheese
3 Tablespoons flour
1/2 teaspoon salt

Directions:
Preheat oven to 350F and grease a casserole dish (I used a 10-inch round dish).
1. Mix in order listed above. Pour into casserole dish. Place in refrigerator for 4-5 hours.

2. Stir mixture, then bake for 1 hour.

Source: My Mom

Thursday, April 8, 2010

Crash Hot Potatoes


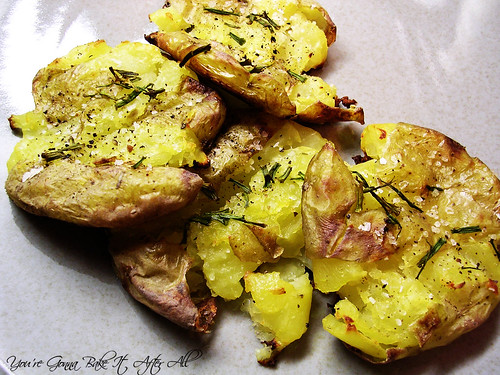
Here is another recipe from the Pioneer Woman. It may sound simple, but I don't have a problem with simple - I actually like a simple recipe if the results are delicious, which these are. I made the full recipe thinking that we'd have a lot leftover . . . turns out we didn't! These were so tasty that Bob and I kept going back for more until they were gone! I think I even pushed the main dish aside in favor of more potatoes :)

These are my submission to this month's Side Dish Showdown. I have made a real effort to make more side dishes this year, even though it's tough for me. This is yet another potato, but for so long I was a little intimidated by potatoes that once I got on a roll, I just kept going!

Side Dish Showdown Blogger Event

I can't remember what I served these with, but it was definitely some type of chicken. These potatoes would go perfectly with steak too!

Crash Hot Potatoes

Ingredients:
12 whole new potatoes or other small round potatoes
3 Tablespoons olive oil
Kosher salt, to taste
Black pepper, to taste
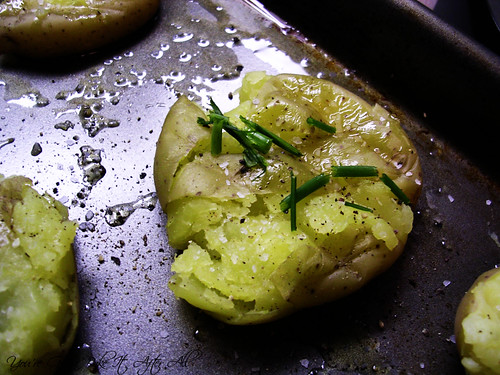
Rosemary or other herbs of choice (I used chives), to taste

Directions:
Preheat oven to 450F.
1. Bring a pot of water to a boil. Add a generous amount of salt. Add potatoes and cook until fork-tender.

2. On a sheet pan, generously drizzle olive oil. Place tender potatoes on the cookie sheet leaving plenty of room between each potato.

3. With a potato masher, gently press down each potato until it slightly mashes, rotate the potato masher 90 degrees and mash again. Brush the tops of each crushed potato genouersly with more olive oil.

4. Sprinkle potatoes with kosher salt, fresh ground black pepper, and fresh chopped herbs.


5. Bake for 20 - 25 minutes until golden brown.

Source: Adapted from The Pioneer Woman Cooks

Wednesday, March 24, 2010

Chinese Slaw

Today is the last day to enter my giveaway - contest ends at 10pm CST!

My mom has been making this slaw for years, and I'm sure there are many versions of it floating around, but we really love it so I thought I'd share ours. This is not your traditional slaw - it has a light-tasting vinaigrette dressing and a nice crunch from the Ramen noodles, sunflower seeds, and almonds (if you use them!). The weather here in Chicago is starting to turn milder, so I figured it was a good time to share this slaw. It always reminds me of barbecues and summer, but it's great any time of year.

Chinese Slaw

Ingredients:
Slaw:
1 pound shredded cabbage (bagged; I like the kind with carrots and green/purple cabbage for color)
2 packages Ramen dry soup mix (beef flavored is traditionally used but I've made it with chicken)
1 bunch green onions, sliced thin
1 small package sliced almonds (about 2/3 cup), toasted (or use roasted Almond Accents)*
1 cup dry roasted sunflower seed kernels

Dressing:
Spices from Ramen noodles
1/2 cup sugar
1 cup salad oil (I used Canola)
1/3 cup cider vinegar

*We eliminate these if I'm eating it because of my nut allergy. No one seems to notice or mind too much :)

Directions:
1. Crush Ramen package before opening to crumble noodles. Remove seasoning packet and prepare dressing. Refrigerate dressing.

2. Layer slaw ingredients in a bowl, cover and refrigerate.

3. Toss slaw with dressing just before serving.

Source: My mom (through family friends)

Monday, March 8, 2010

Garlic Parmesan Oven Fries


This is my March submission for Reeni's Side Dish Showdown. This month's theme is Anything Goes.
Side Dish Showdown Blogger Event

These oven fries are so delicious! They're crispy, flavorful, and the perfect accompaniment to any main dish. With so few ingredients, they are so easy to whip up on a weeknight. You don't even have to peel the potatoes! Once they're in the oven, you can concentrate on making the rest of the meal. The original recipe served 4, so I cut it in half. You can easily scale up depending on how many you're serving.

Looking for ideas for what to serve with these? How about a Guacamole Turkey Burger or a Pepper Jack Stuffed Turkey Burger?!

Garlic Parmesan Oven Fries

Serves 2

Ingredients:
1 large russet potato, scrubbed and dried
2 Tablespoons extra virgin olive oil
1/2 teaspoon kosher salt
1/2 garlic clove, minced
2 Tablespoons grated Parmigiano-Reggiano cheese
1 teaspoon dried parsley (or 1 Tablespoon chopped fresh flat leaf)

Directions:
1. Preheat oven to 425F.

2. Cut the potatoes in half lengthwise. Then cut the halves lengthwise into fourths to make 8 wedges (depending on the size of your potato, you may wish to make more wedges).

3. Toss the potatoes with the olive oil, salt, and minced garlic in a large bowl. Place onto a metal baking sheet (I lined mine with aluminum foil sprayed with cooking spray). Spread into a single layer

4. Roast the potatoes for 30 - 35 minutes, until cooked through, brown, and crispy. Don't shake or turn the fries while they're cooking. The longer they sit in contact with the metal baking sheet, the crisper they get. *My garlic burned a little, probably because of my oven, so keep a close watch on them towards the end.

5. Toss the fries in a big bowl with the cheese and parsley, and serve hot.

Source: Joelen's Culinary Adventures, originally from Tyler Florence

Friday, February 12, 2010

Mexican Rice

I have a major backlog of posts waiting, but I'm trying to spread them out. This one is from November! :)

One of my favorite things about Mexican restaurants, other than the chips and salsa, is the rice. Usually rice and beans are served with your entree and people tend to push them to the side. Not me. I always ask to substitute the beans with extra rice, and if I don't eat the rice at the restaurant, I will take it home. I love that it's, for lack of a better word, dry - meaning that it's not saucy but still very flavorful. I've never really tried to make Mexican rice at home (other than Rice-a-Roni!) so I decided to give it a shot, especially since this recipe is originally from Cook's Illustrated. I was a little nervous during the cooking process that there would be too much liquid, but that wasn't the case at all. The end result was a rice that rivals the best Mexican restaurant!

Mexican Rice

Ingredients:
2 ripe tomatoes, cored and quartered
1 medium white onion, peeled, trimmed and quartered
2 cups long grain white rice
1/3 cup Canola oil
4 cloves garlic, minced or pressed through a garlic press
3 medium jalapenos, ribbed, seeded, and minced
2 cups low-sodium chicken broth
1 Tablespoon tomato paste
1 1/2 teaspoons salt
1/2 cup minced fresh cilantro (optional)
1 lime, cut into wedges for serving

Directions:
Preheat oven to 350F and move a rack to the middle position.
1. Process tomatoes and onions in the food processor until smooth and thoroughly pureed, about 15 seconds, scraping down the bowl if necessary. Transfer the mixture to a liquid measuring cup; you should have 2 cups. If necessary, spoon off excess or add water so that the volume equals 2 cups.

2. Place the rice in a large fine mesh strainer and rinse under cold running water until the water runs clear, about 1 1/2 minutes. Shake rice vigorously in a strainer to remove all excess water.

3. Heat the oil in a heavy-bottomed oven-safe Dutch oven or straight-sided saute pan with a tight-fitting lid over medium-high heat, 1 to 2 minutes. Add the rice and fry, stirring frequently, until it is golden and translucent, 6 to 8 minutes. Reduce the heat to medium; add the garlic and minced jalapenos; cook, stirring constantly, until fragrant, about 1 1/2 minutes.

4. Stir in pureed tomatoes and onions, chicken broth, tomato paste, and salt; increase heat to medium-hight and bring to a boil. Cover the pan and transfer to the oven; bake until the liquid is absorbed and rice is tender, 30 to 35 minutes, stirring well after 15 minutes.

5. Stir in cilantro, if desired, and serve with lime wedges.

Source: Adapted from Annie's Eats, originally from Cook's Illustrated.

Wednesday, February 10, 2010

Haricots Verts with Shallots

Last week I stopped off at Trader Joe's on my walk home to get a few things I needed for dinner. I saw this huge package of haricots verts (French-style green beans), and I couldn't help but get them. As soon as I got home I Googled "haricot vert recipes" (at this time not completely sure of the plural form) and found this awesome one on Smitten Kitchen. Unfortunately, I didn't have any of the ingredients except the haricots verts and butter - no problem, it was still fantastic!

The next day I got the other ingredients and made the dish exactly as the recipe states, and it was incredible - I love this recipe so much. The shallots cooked in butter are amazing, and I love the slight crunch of the beans. These are the perfect side dish - quick, healthy, and delicious. I highly recommend the cooking technique even if you don't use the shallots, tomatoes, and lemon - the beans turn out perfect. I'm so happy to add this to my side dish repertoire :)

Update: I've submitted this entry to the Side Dish Showdown hosted by Reeni of Cinnamon Spice & Everything nice!

Side Dish Showdown Blogger Event


Haricots Verts with Shallots

Ingredients:
1/2 pound haricots verts, trimmed
2 teaspoon butter
1 small shallot, sliced
Salt and pepper to taste
2 Tablespoons diced tomato
Wedge of lemon

Directions:
1. Cook beans in boiling, salted water for 3 1/2 minutes. Quickly strain and submerge into cold water to stop cooking process.

2. In the same pot that you cooked the beans, melt the butter over medium heat. Add the shallots and cook until just translucent but not brown, 1 - 2 minutes.

3. Add the drained beans back to the pot and season with salt and pepper. Cook until heated through.

4. Transfer beans to a serving platter, top with tomatoes, and squeeze lemon juice over the dish. Serve immediately.

Friday, February 5, 2010

Garlic Roasted Cauliflower

This must be the week of side dishes because here is yet another! I've never really liked cauliflower. My mom always just steamed it in the microwave, and I never understood why people ate it. As I was searching for side dish recipes in early January, I found this Garlic Roasted Cauliflower on Good Things Catered. Katie always posts such delicious recipes so I figured I would trust her on this one, especially since roasting vegetables can bring out unique flavors. I'm so glad I did, because this was a huge hit! Bob had a second helping of this cauliflower before he even started on his main course! He said it was the best cauliflower he's ever had. Now I call that a successful side dish!

Garlic Roasted Cauliflower

Ingredients:
1 large head cauliflower, cut into florets
4 large cloves garlic, minced or pressed
2 Tablespoons olive oil
generous sprinkle of salt and pepper
1 Tablespoon chopped parsley (or 1 teaspoon dried parsley)

Directions:
Preheat oven to 450F.
1. In a large nonstick baking pan, combine all ingredients except for parsley, and toss to combine well.

2. Bake, tossing occasionally during baking, until lightly browned and softened, about 25-30 minutes.

3. Remove from oven, toss with parsley and serve immediately.

Source: Adapted from Good Things Catered

Wednesday, February 3, 2010

Smashed Sweet Potatoes for Two

In my effort to make more side dishes for dinner, I tried this recipe for Smashed Sweet Potatoes by Ina Garten. These were delicious! They have a prominent orange flavor from the orange juice, which I didn't mind, but I think any light colored juice would work - like apple or even pineapple. I scaled the recipe down for two, but the original make much more, so it's an easy recipe to adapt for as many people as needed. These sweet potatoes go great with turkey meatloaf muffins!

Smashed Sweet Potatoes for Two

Ingredients:
1 large sweet potato
1 Tablespoon plus 1 teaspoon orange juice
1 Tablespoon plus 1 teaspoon heavy cream or milk (I used skim)
2 teaspoon unsalted butter, melted
2 teaspoons light brown sugar
dash of ground nutmeg
dash of ground cinnamon
kosher salt, to taste (approximately 1/3 teaspoon)
freshly ground black pepper, to taste (approximately 1/6 teaspoon)

Directions:
Preheat oven to 375F.
1. Scrub potato and poke several times with a knife or fork. If desired, place on a plate in the microwave for about 5 - 10 minutes to get a head start on the cooking process.

2. Bake sweet potato in oven for about 1 hour (if you pre-cooked in the microwave, this may be as little as 30 minutes), or until very soft when pierced with a knife.

3. When sweet potato is cool enough to handle, carefully cut the skin and peel it off, scraping the insides into a large mixing bowl.

4. Using a stand fitted with a paddle attachment (or a handheld mixer or potato masher), combine the cooked sweet potato with the orange juice, cream or milk, butter, brown sugar, spices, and salt/pepper. Mix to desired consistency.

5. Transfer potatoes to a small baking dish and bake for 20 to 30 minutes until heated through.

Source: Adapted from Ina Garten/Barefoot Contessa

Monday, February 1, 2010

Cilantro Coconut Rice


There's not much else to say about this rice expect that it was so, so, so good! I'm not kidding - I really loved it. I used Jasmine rice instead of basmati. I love the sweetness of the coconut in this rice and the freshness of the ginger, jalapenos, cilantro, and scallions. Pair this with Coconut-crusted Chicken and you've got a very coco-nutty meal :)

Cilantro Coconut Rice

Ingredients:
1 1/2 cups (10 ounces) basmati (or jasmine) rice
scant 1/2 cup sweetened flaked coconut
1 Tablespoon finely chopped peeled fresh ginger
2 Tablespoon finely chopped fresh jalapeno, including seeds
2 Tablespoons vegetable/Canola oil
2 cups water
1 teaspoon salt
1 cup packed fresh cilantro
3 scallions, chopped

Directions:
1. Wash rice in several changes of cold water in a bowl until water is almost clear. Soak rice in cold water 30 minutes, then drain well in a sieve. (I did not do 30 minutes...maybe 10).

2. Spread coconut in a skillet and toast over medium heat, stirring occasionally, until pale golden; watch carefully so it doesn't brown too much or burn. Cool completely.

3. Cook ginger and jalapeno in 1 Tablespoon oil in a 4-quart heavy pot over moderate heat, stirring, until chile is softened, about 2 minutes. Add rice and cook, stirring, until fragrant, about 2 minutes.

4. Stir in water and 1/2 teaspoon salt and bring to a boil, covered. Reduce heat to low and cook, covered, until rice is tender and water is absorbed, 12-15 minutes.

5. Remove from heat and let stand, covered, 5 minutes. Fluff rice with a fork and transfer to a large bowl.

6. While rice cooks, pulse together coconut, cilantro, scallions, and remaining Tablespoon oil and 1/2 teaspoon salt in a food processor until finely chopped.

7. Add cilantro mixture to cooked rice and stir gently until combined well.

Source: Adapted from APPLE A DAY, originally from Gourmet, found on Epicurious.com

  © Blogger template Brownium by Ourblogtemplates.com 2009

Back to TOP