Search This Blog

Wednesday, April 29, 2009

Blueberry Muffins

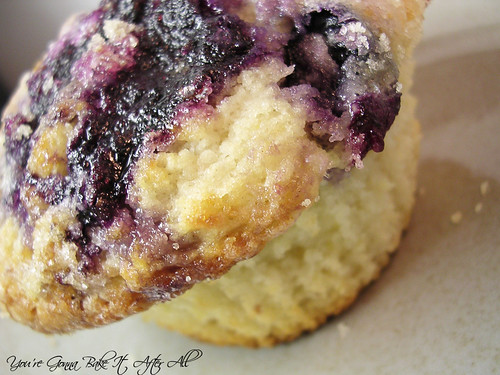
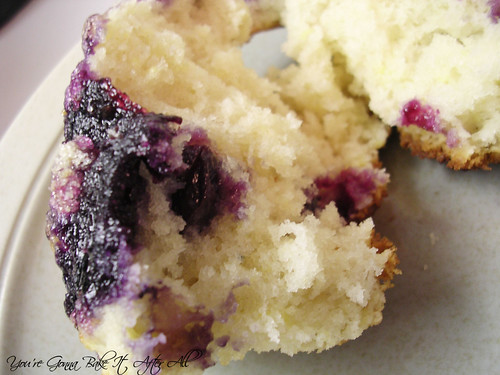
Two Saturdays ago, half of my lab had to go into work for a big radioactivity experiment. I had seen this Blueberry Muffin recipe in Cook's Illustrated and thought this was the perfect opportunity to try it out. Maybe because it was early on a Saturday, but I totally messed up making this recipe. In my defense, I think the directions could have been a tad more clear (I've amended the recipe below). Despite my errors, they turned out delicious! I'm sure they'd be even better made the right way :)

The idea behind this recipe, according to the author, is to have a blueberry muffin recipe that works with any kind of blueberry - even the 'watery supermarket kind.' To do this, she came up with a simple jam that you swirl into the batter before baking. She also provided a few options for topping the muffins. I went with the lemon-sugar as listed in the original recipe, but I'd love to try the streusel topping next!
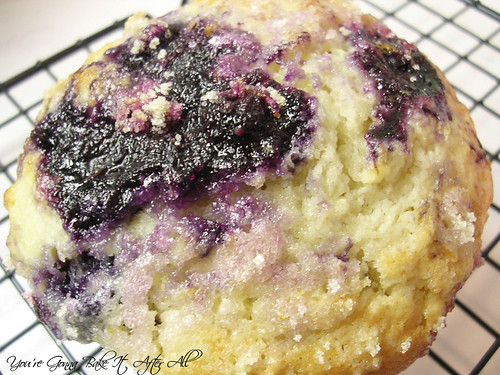
Best Blueberry Muffins

Makes 12 muffins

Ingredients:
For the Lemon-Sugar Topping:
1/2 cup (2 1/3 ounces) sugar
1 1/2 teaspoons finely grated lemon zest from 1 lemon


For the Muffins:
2 cups (about 10 ounces) fresh blueberries, picked over*
1 1/8 cups (8 ounces) plus 1 teaspoon sugar
2 1/2 cups (12 1/2 ounces) unbleached all-purpose flour
2 1/2 teaspoons baking powder
1 teaspoon table salt
2 large eggs
4 Tablespoons (1/2 stick) unsalted butter, melted and cooled slightly
1/4 cup vegetable oil
1 cup buttermilk**
1 1/2 teaspoons vanilla extract

Notes:
*To use frozen blueberries, substitute 2 cups frozen blueberries for fresh. Cook 1 cup berries as directed in step 3. Rinse remaining cup berries under cold water and dry well. In step 4, toss dried berries in flour mixture before adding egg mixture.

**If buttermilk is unavailable, substitute 3/4 cup plain whole-milk or low-fat yogurt thinned with 1/4 cup milk. I made my own buttermilk by adding 1 Tablespoon white vinegar to 1 cup of skim milk.

Directions:
Make the topping:
1. Stir together sugar and lemon zest in a small bowl until combined; set aside.
Make the muffins:
2. Adjust oven rack to upper-middle position and heat to 425F. Spray standard muffin tin with nonstick cooking spray. I used a silicon muffin pan with muffin liners.

3. Bring 1 cup blueberries and 1 teaspoon sugar to simmer in a small saucepan over medium heat. Cook, mashing berries with spoon several times and stirring frequently, until berries have broken down and mixture is thickened and reduced to 1/4 cup, about 6 minutes. Transfer to small bowl and cool to room temperature, 10 to 15 minutes.

4. Whisk flour, baking powder, and salt together in a large bowl.

5. In a separate, medium-sized bowl, whisk remaining 1 1/8 cups sugar and eggs together until thick and homogenous, about 45 seconds. Slowly whisk in butter and oil until combined. Whisk in buttermilk and vanilla until combined.

6. Using a rubber spatula, fold egg mixture and remaining cup blueberries into flour mixture until just moistened. Batter will be very lumpy with a few spots of dry flour; do not overmix.

7. Use an ice cream scoop or large spoon to divide batter equally among prepared muffin cups. Batter should completely fill cups and mound slightly.

8. Spoon a teaspoon of cooked berry mixture into the center of each mound of batter. Using a chopstick or skewer, gently swirl berry filling into batter using figure-eight motion. Sprinkle lemon-sugar evenly over muffins. Try not to sprinkle evenly over pan like I did - I was in a hurry :)
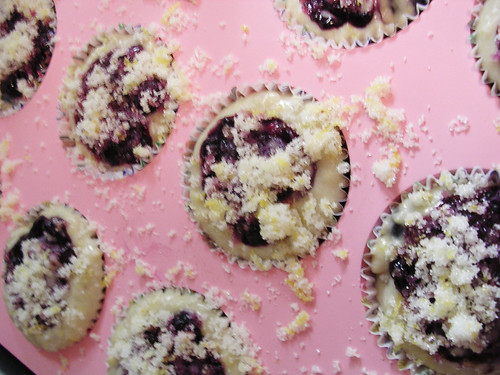
9. Bake until muffin tops are golden and just firm, 17 to 19 minutes, rotating muffin tin from front to back halfway through baking time. Cool muffins in muffin tin for 5 minutes, then transfer too wire rack and cool 5 minutes before serving.

Streusel Topping

Follow Best Bleuberry Muffin recipe, omitting Lemon-Sugar Topping. Prepare streusel by combining 3 Tablespoons granulated sugar, 3 Tablespoons dark brown sugar, a pinch of table salt, and 1/2 cup plus 3 Tablespoons (3 1/2 ounces) unbleached all-purpose flour in a small bowl. Drizzle with 5 Tablespoons warm, melted unsalted butter and toss with a fork until evenly moistened and misture forms large chunks and some pea-sized pieces throughout. Proceed with recipe as directed, sprinkle streusel topping over muffins before baking.

Source: Adapted from Cook's Illustrated

Monday, April 27, 2009

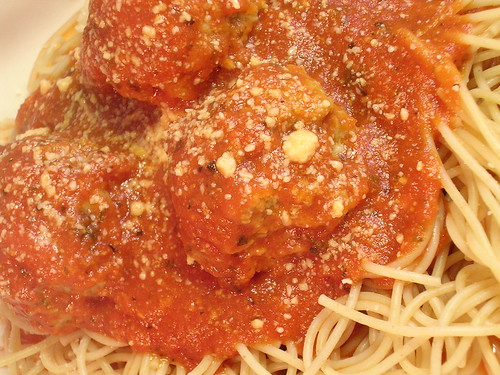
Spaghetti and Mozzarella Stuffed Turkey Meatballs

I originally found this Rachael Ray recipe on Annie's Eats and tried it right away. I of course substituted ground turkey for the beef, and used my favorite jarred spaghetti sauce instead of Rachael's because I have yet to find a homemade sauce that is better than Prego, in my humble opinion. Below I've included the recipe for how to turn jarred spaghetti sauce into Arrabiatta (thanks to Giada) in case you feel like jazzing it up.

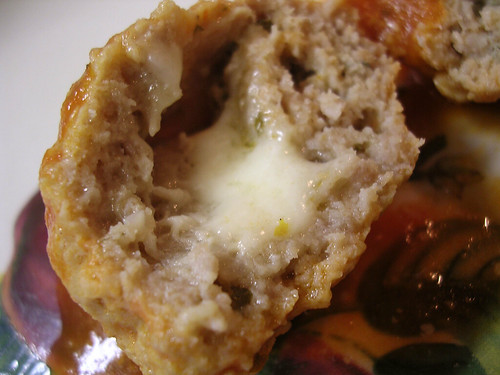
These meatballs are so good! It's not just the mozzarella surprise inside, of course that helps, but the actual flavor of the meatballs is incredible. It reminds me of something you would get in a really good Italian restaurant. I think I am turning in my old turkey meatball recipe (which was adapted from the Betty Crocker Cookbook) for this one. The other BIG plus of this recipe is that it's FAST because the meatballs cook in the sauce - which also means less clean-up. Plus, cooking the meatballs in the sauce gives the sauce a really delicious flavor. The last time I made these was for my family, and they loved them! My sister who hates spaghetti even liked the dinner!

Although this is a Rachael Ray recipe, I saw Giada De Laurentiis make a very similar one - again a mozzarella-stuffed meatball. The best tip Giada gave - which might be obvious to most but wasn't to me - is to make the meatball and then create a small hole to put the mozzarella cube inside. I wasn't even thinking when I made the recipe the first time that forming the meat around the cheese is not exactly the most efficient way. I tried pre-forming the meatballs the last time I made these and it was a little dificult to do using the turkey mixture because it's much softer and stickier than ground beef - maybe it would still be difficult with beef using this meatball recipe, I'm not sure. Anyway, I've made the change to the recipe below.

Spaghetti and Mozzarella Stuffed Turkey Meatballs

Ingredients:
For the sauce:
1 Tablespoon olive oil
2 garlic cloves, grated*
crushed red pepper flakes (optional)
2 26-ounce jars spaghetti sauce (my favorite is Prego Traditional)

For the meatballs:
1/4 cup bread crumbs
1/2 cup milk
1 package (~1 lb) lean ground turkey (I like Purdue or Jennie-O)**
1 garlic clove, grated
2 teaspoons dried parsley
1/2 cup Parmesan cheese
1 egg
1 teaspoon salt
4 ounces mozzarella cheese, cut into 16 equal-sized cubes***
cooking spray

spaghetti, regular or whole-wheat

*I grate my garlic with a Microplane grater. I find that it's super fast and releases much more flavor than chopping, and it's easier to clean than my garlic press.

**I've seen Giada make meatballs using a mixture of ground turkey and turkey sausage before - I think around 2/3 ground to 1/3 sausage. I plan to try this sometime. Jennie-O makes spicy or sweet Italian sausage - both of which we really like depending on the recipe.

***I thought it might be easier to cut uniform pieces using low-moisture, part-skim mozzarella string cheese. I compared the melting properties of equal-sized pieces of regular mozzarella to the string cheese. Both melted and solidfied similarly, so I think the string cheese is a good option if you want to make cutting the cheese easier.

Directions:
1. In a large bowl, soak the bread crumbs in the milk.

2. Heat olive oil in a skillet. Add 2 cloves of grated garlic and cook for 1-2 minutes. If you like your sauce a little spicy (a la Arrabbiata sauce), toss in some crushed red pepper flakes - probably an 1/8 teaspoon is plenty. Add jarred spaghetti sauce. Meanwhile, boil a large pot of water for the spaghetti.

3. Add the ground turkey, 1 clove of grated garlic, parsley, Parmesan, egg, and salt to the bread crumbs. Stir with a fork until mixed.

4. Divide the meatball mixture into fourths, then form 4 meatballs out of each portion (for a total of 16). Make a hole in the center of each meatball and place a cube of mozzarella inside. Reform the meatball so the mozzarella is completely covered with the meat mixture. Place each meatball on a sheet of waxed paper sprayed with cooking spray after cheese has been placed inside, so that all of the meatballs can go in the sauce at the same time.

5. Place meatballs in sauce so they are submerged. Cook for 20 minutes over medium-low, or until meat is cooked completely. I find that I must cover the pot at this point to prevent spaghetti sauce from splattering all over. You may want to vent the lid to allow some moisture to escape so the sauce is a little thicker in the end. When only 8-9 minutes remain, add spaghetti to boiling water and cook according to package directions.

Enjoy! :)

Source: Sauce adapted from Everyday Pasta; meatballs adapted from Annie's Eats and Rachael Ray, with technical support from Giada De Laurentiis

Friday, April 24, 2009

Chicken, Leek, and Tomato Soup

Years ago when I was living by myself in my studio apartment on Lake Shore Drive (my Mary Tyler Moore Days!), my aunt gave me a little cookbook called "Quick Short Chicken Recipes." It's been a lot of fun going through the cookbook every once in a while and rediscovering recipes, as my palate expands and my knowledge of different cooking techniques improves. Each time I look through it, I find a new recipe that I wouldn't have considered making before, either because it used butter (gasp!), cream, peppers, asparagus, etc. This recipe is actually one I've made for a few years now, and it is delicious. It sounds pretty simple, and it is, but it's just a great tasting soup that both Bob and I love, and it's pretty healthy, with a few modifications!

The original recipe serves 4. I've also typed out the version I usually make for just Bob and I, which is the same amount of broth but less chicken, leeks, and butter. It makes enough for us to have the soup as a dinner, and sometimes a lunch-sized leftover depending on how hungry we are.
Chicken, Leek, and Tomato Soup

Serves 4

Ingredients:
2 1/2 ounces butter
3 leeks, thinly sliced
3 chicken breasts
3 cups chicken stock
2 cloves garlic, crushed
15-ounce can crushed tomatoes
1/4 teaspoon soft brown sugar
1 Tablespoon chopped basil leaves
extra chopped basil, to garnish

My version:
Ingredients:
1 Tablespoon butter
2 leeks, thinly sliced
1 chicken breast
3 cups chicken broth
2 cloves garlic, grated
15-ounce can crushed tomatoes
1/4 teaspoon soft brown sugar
1 Tablespoon chopped basil leaves (or 1 teaspoon dried)
extra chopped basil, to garnish

Directions:
1. Melt butter in a large saucepan over medium heat. Add the leek and cook for 2 minutes without browning.

2. Thinly slice raw chicken breasts. Increase heat and add the chicken to the saucepan. Cook for 3 minutes or until the chicken is browned.

3. Add the stock/broth, garlic, tomatoes, sugar, and basil. Bring to a boil, then reduce the heat and simmer for 5-6 minutes, or until the chicken is tender. Season and garnish with extra fresh basil. Serve with crusty bread.*

Source: Adapted from the Quick Short Chicken Recipes cookbook

*This time I modified the recipe for Tomato Bread instead. I took 2 slices of French bread and drizzled them lightly with extra virgin olive oil. I then used a silicone brush to spread the oil over the bread. I broiled the bread until brown, meanwhile removing the skin from a clove of garlic and slicing the clove in half. When the bread was toasted, I removed it from the oven and rubbed the garlic over each piece. I then placed the bread on the soup and grated Parmesan cheese on top. You could also make homemade croutons like this (sprinkle the bread with garlic powder or salt before broiling), which would be a nice addition to the soup. Another idea is to add Asiago cheese to the bread or croutons before broiling. My favorite soup at Panera (creamy tomato) comes with Asiago croutons!

Wednesday, April 22, 2009

The Best Salsa in the World!

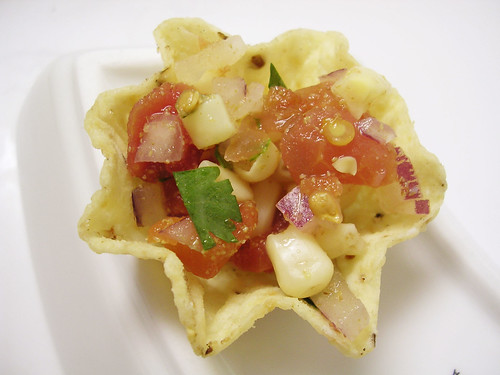
That might be an overstatement, but it's what I call the recipe for Black Bean Salsa that my mom makes. The catch is, I don't include the black beans . . . which my husband finds oddly amusing. He now refers to it as "Black Bean Salsa, black beans optional" because of how it's typed up in the M Family Cookbook his mom made. I have nothing against black beans, but for some reason I like this salsa better without them. The rest of my family disagrees, so if the recipe looks good to you, judge for yourself. I usually make a double batch because this salsa doesn't last long around us!

Bob's all-time favorite snack is chips and salsa. I have to admit, when I first met him I didn't understand the appeal - definitely not my first choice in a snack. But now, after almost 9 years together (!!!), it's become one of my favorites too. Needless to say, we've had quite a few versions of our favorite treat over the years, but this salsa is our favorite hands down!

My college roommate and good friend Kathleen used to be a super picky eater, but after trying this salsa our senior year, she started eating red onions. She now has a very diverse palate. I'm not saying that this salsa works miracles or anything, but . . . :)
Black Bean Salsa

Ingredients:
1 can black beans, rinsed and drained (optional)
1 can Rotel tomatoes*
1 can white shoepeg corn, drained**
3 Tablespoons lime juice (~1-2 limes)
1 Tablespoon olive oil***
1/2 red onion, finely chopped
1 Tablespoon (or more to taste) fresh cilantro, chopped
1 Tablespoon cumin
dash of garlic salt, or to taste

*Original or Mild, sometimes if I'm making a double batch, I'll use 1 can of each.
**This is important; shoepeg really is different than normal canned corn. I buy mine when I go home to St. Louis because it's hard to find in Chicago! If you can't find it, use a sweet, white, small kernel corn.
***Optional, I almost never include this.

Directions:
1. Mix all ingredients and chill, preferably overnight. It takes time for the flavors to blend.

2. Serve with tortilla chips, preferably Tostito's Scoops. This can also be used in place of salsa for any other dish, such as tacos, quesadillas, fajitas, etc.

Note: I think it's important to use fresh limes and cilantro for the most fresh-tasting salsa, although we've made it using jarred lime juice and dried cilantro, and it's still good. I add a LOT more cilantro than the recipe calls for because, in my opinion, you can never have too much cilantro!

Source: Adapted from a recipe given to my mom by a friend

Monday, April 20, 2009

Chicken Pesto Pizza

When I saw this recipe for Pesto Pizza, I knew I had to try it. The combination of the vegetables, chicken, and Italian seasoning that is cooked together before put on the pizza just sounded great. This dinner was so delicious, and very adaptable to any kind of vegetable you want to throw in. I had some Trader Joe's refrigerated pizza dough, so I used that. For some reason, I don't have much luck with this dough . . . it always sticks to the pan - even if I put copious amounts of olive oil underneath - and who wants to do that?! Bob and I both agreed that a more substantial crust was necessary to stand up to these ingredients. He even came up with an awesome variation that we are going to try next (stay tuned!)

Bob was watching a show about Venetian food on the Travel Channel as I was preparing this dinner, can you tell I was inspired?

There is a cutting mat underneath those veggies, I promise!


Chicken Pesto Pizza

Original ingredients:
1 pound chicken breast tenders
1 Tablespoon dried Italian seasoning
3 Tablespoons pesto
1 cup mozzarella cheese
2 medium zucchini, halved twice and thinly sliced
yellow, red, orange, and green bell peppers, chopped
mushrooms, thinly sliced

Also see the link below for a homemade pizza dough recipe!

My ingredients:
2 chicken breasts, cut into small pieces
1 Tablespoon, give or take, "Pizza seasoning" (same stuff as Italian)
1 medium zucchini, diced
1 yellow onion, diced
1 red pepper, diced
1 green pepper, diced
1/2 orange pepper, diced
~2-3 Tablespoons basil mixture (see below)
1 cup, give or take, shredded mozzarella cheese
1/2 package Trader Joe's refrigerated pizza dough - I can't recommend this! :( I think Boboli would be good though!

Directions:

Preheat oven to 450F.

1. Heat a little bit of olive oil over medium/high heat, and cook the chicken for a few minutes. Sprinkle with Italian seasoning.

2. Before chicken is cooked through, add vegetables and more Italian seasoning. Cook until chicken is done and veggies are tender.

3. Roll out dough on pan sprayed with cooking spray or greased with oil. Prebake crust for a few minutes.

4. Spread pesto evenly over pizza crust. Top with chicken/veggie mixture. Top with mozzarella cheese. Bake for 5 minutes or until cheese melts.

So, I'm calling my pesto a "basil mixture" because most pesto has pine nuts and I obviously can't use those. What I did was use about 1/2 tablespoon basil puree (comes in a tube at the grocery store), added a little grated Parmesan and some olive oil and whisked it together. That's it!

Source: Adapted from Meet Me in the Kitchen

Friday, April 17, 2009

Bailey's Irish Cream Cheesecake

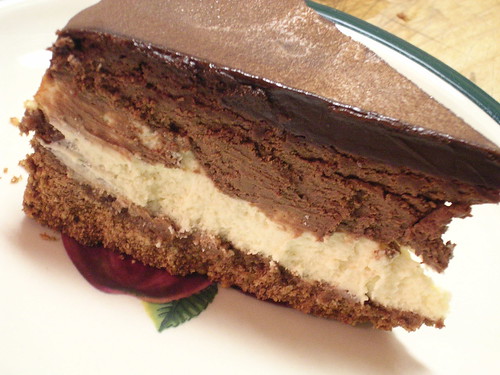
Bob's and my friend Jason had us over for a St. Patrick's Day party last year. His girlfriend Kerry made this awesome Bailey's Irish Cream Cheesecake. My dad loves Bailey's and cheesecake, so I knew this would be the perfect dessert for his birthday last month. This cheesecake is soooo delicious. I especially love the chocolate layer - it was super creamy. I have some ideas for a future cheesecake using that portion of the recipe, but I won't be making that for a while. Are you in suspense? :)

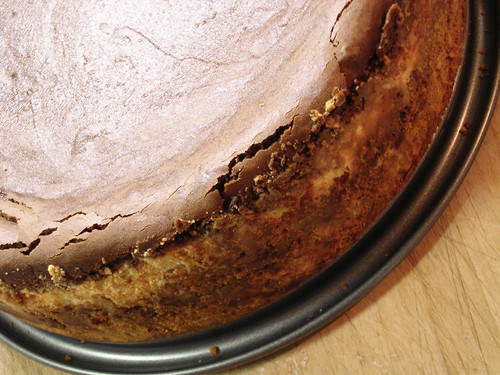
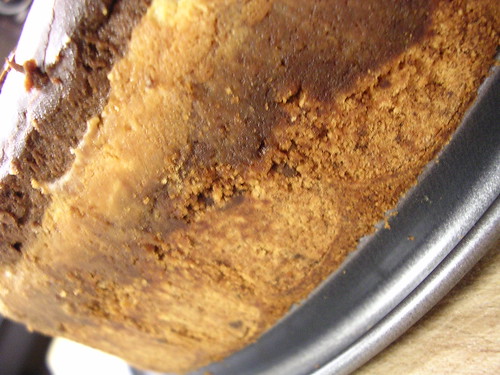
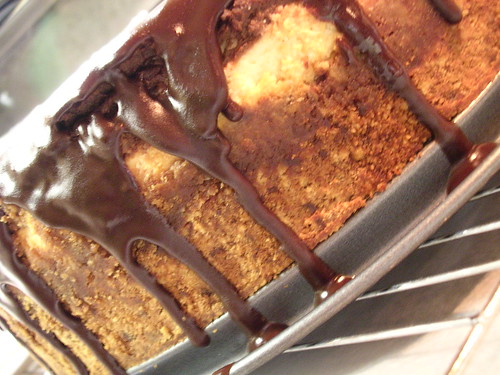
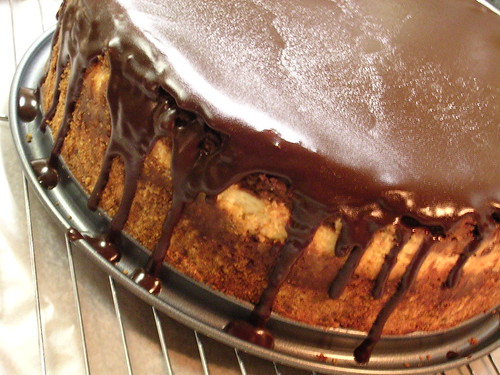
The crust for this cake is very thick compared to traditional cheesecake crust (as you can see in the last few pictures). If you prefer a thinner crust, just scale down the crust recipe. While I think it's great as is, this cheesecake could be made with a graham cracker crust, an Oreo crust (shown here), or a different ganache recipe (featured here). This ganache turned white-ish on top after I put the cake in the fridge overnight, uncovered. That didn't happen with the Almost-Fudge Gateau ganache (which I did cover), so the white could be due to the lack of cover or the actual ganache itself . . . I don't really feel like testing it out! Regardless, anything with a ganache topping has my vote! Plus using a topping covers up any cracks or imperfections :) The recipe did not say to take off the springform sides before topping, but I love the look of the ganache dripping over the sides, so I did - either way works well!


Bailey's Irish Cream Cheesecake

Ingredients:
For the crust:
4 Tablespoons unsalted butter, melted
1/4 cup sugar
1/4 cup cocoa
1 package vanilla wafers, ground to crumbs in food processor

For the filling:
3 8-ounce packages cream cheese, softened
3/4 cup sugar
3 eggs
2 cups sour cream
1/4 cup Bailey's Irish Cream liqueur
1 teaspoon vanilla extract
6 1-ounce squares semi-sweet chocolate, melted

For the ganache topping:
5 1-ounce squares semi-sweet chocolate, coarsely chopped
1/2 cup whipping cream
2 Tablespoons butter
1/2 teaspoon vanilla extract

Directions:
Make the crust:
1. Preheat oven to 350F, and grease the bottom of a 9-inch springform pan. I lined the pan with greased waxed paper (can also use parchment) because I always do.

2. Combine butter, sugar, and cocoa powder. Stir in wafer crumbs. Press evenly over bottom of the springform pan and bake at 350 for 10 minutes. Cool pan and grease sides, if desired.

Make the filling:
1. In a large mixer bowl, beat cream cheese and sugar until light and fluffy. Add eggs one at a time while beating. Stir in sour cream, Bailey's, and vanilla. Pour 2/3 of the cheesecake mixture over the crust.

2. To the remaining mixture, stir the melted chocolate. Spoon the chocolate mixture by large spoonfuls over the plain cheesecake mixture. Run a knife through it a few times to create a marbled effect. I thought there was so much filling that making a marbled effect was quite difficult. It was almost as if the chocolate mixture was just another layer - which was fine with me!

3. Bake at 325F for about 1 1/2 hours, until the center is raised and set. Let cool to room temperature. Remove springform pan sides before topping if you prefer the look of ganache drips on the sides of the cheesecake.

Make the topping:
1. Mix chopped chocolate with whipping cream and butter and melt (in a saucepan on the stove or in a bowl in the microwave). Stir in vanilla. At this point, I used a whisk to get the ganache nice and smooth, then let it cool a bit. Hopefully my whisking isn't what made the ganache turn white-ish on top! Spread over top of the cheesecake.

2. Refrigerate at least 6 hours, or overnight.

Source: Adapted from a recipe by Kerry M.

Wednesday, April 15, 2009

Miss Chicken and Caprese Stuffed Chicken

When Bob and I traveled to Europe after we graduated college, we went with a tour group. 8 countries in 3 weeks - yes, we were one of those groups in the big buses that get to zip to the front of the line at the Vatican and the Eiffel Tower - sorry :) Our tour guide Rosey was amazing. I told her upfront about my aversion to any non-bird meat, so she made sure I was taken care of at every restaurant. Because of this, she called me "Miss Chicken" the entire trip, a name that caught on with the other members of our tour group. I started thinking about how I haven't posted that many chicken recipes on this blog. Since college, I've discovered the magic that is turkey sausage, ground turkey, and Trader Joe's chicken sausage. Don't get me wrong, I still love my traditional chicken, but it now has to share it's place with these "fancier" meats (don't you just love the word "meats"?)

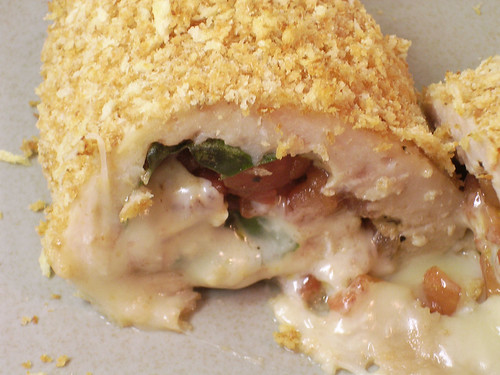
Anyway, I was watching Tyler Florence over Bob's spring break (ok I took off too!), and he made this recipe for the "ultimate" Chicken Cordon Bleu, and I liked his idea of how he wrapped up the chicken to avoid using toothpicks, so I came up with this Caprese Stuffed Chicken. It might come as no surprise from past posts, but I love love love tomatoes and basil. I could probably eat the combination every day. Throw in some mozzarella - even better! I've made the recipe for 2 portions, which may or may not serve more than 2 people, depending on the size of your chicken breasts. You won't see too many original recipes from me, but this is one of them.

Caprese Stuffed Chicken

Ingredients:
2 boneless/skinless chicken breasts
1 Tablespoon extra virgin olive oil, divided
1/2 Tablespoon balsamic vinegar
1 Roma/plum tomato, finely chopped
1-2 ounces mozzarella cheese
4 very large basil leaves, or several more smaller ones
1 cup panko breadcrumbs
1/2 clove of garlic, grated (optional)
3 Tablespoons grated Parmesan cheese
1/4 cup all-purpose flour
1/8 teaspoon ground (cayenne) red pepper, optional
1/2 cup lowfat buttermilk
Salt and freshly ground pepper to taste

Directions:
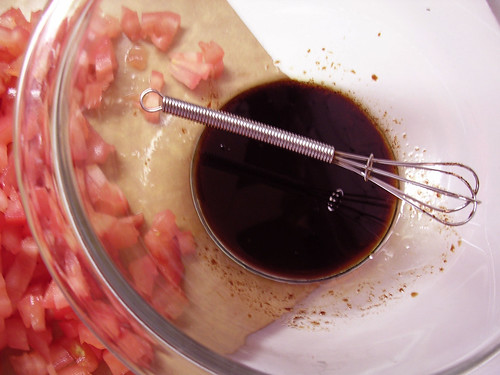
1. Whisk together the balsamic vinegar and 1/2 tablespoon olive oil in a small bowl to make the dressing.

I have this adorable little whisk, but it's obviously not necessary!

2. Add chopped tomato to the dressing and season with salt and pepper. Thoroughly combine and set aside.

3. Pound chicken until very thin. Dry with paper towels and season with salt and pepper. Place each chicken breast on a large piece of plastic wrap.

4. On each breast, arrange 2 basil leaves, slices of mozzarella, and top with chopped tomatoes, using a slotted spoon to transfer them as to leave behind the excess dressing.

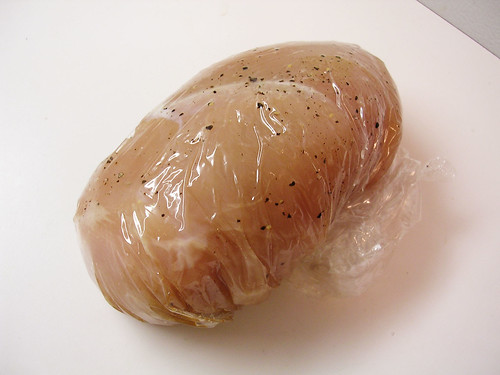
5. Roll the chicken very tightly, using the plastic wrap as a guide. When you are finished, the chicken should be very tightly rolled and completely covered in plastic wrap like this:

6. Place chicken rolls in refrigerator for 30 minutes to set. Preheat oven to 350F.

7. Meanwhile, heat the remaining 1/2 tablespoon of oil over medium-high heat in a small skillet. Toast the panko until golden, about 7 minutes.

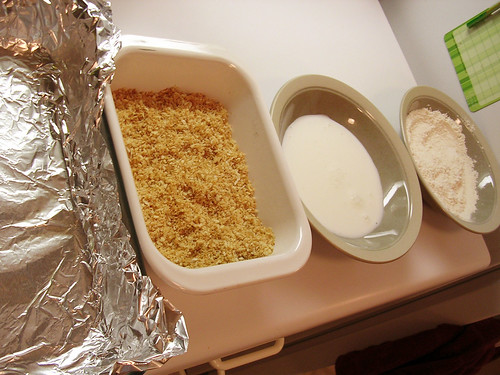
8. Transfer panko to a shallow dish to cool. In a bowl, combine flour and cayenne (if using) with salt and pepper. Pour buttermilk into a second bowl.

9. Once panko bread crumbs have cooled, grate 1/2 garlic clove into them (if you like garlic), and stir in Parmesan cheese. Combine well. Line a baking dish with aluminum foil lightly greased with olive oil or cooking spray.

Now your stations should look like this:

10. After 30 minutes has elapsed, remove chicken rolls from fridge. Unwrap and dip into flour mixture to coat. Tap off excess. Dip roll into buttermilk, then into panko, making sure to press the panko on if it's not sticking. Place roll into baking dish and repeat with second roll.

11. Bake uncovered for 40 minutes, or until chicken is no longer pink. Note: You could also start cooking the rolls in a skillet with olive oil for a few minutes then transferring them to a baking dish to place in the oven.

  © Blogger template Brownium by Ourblogtemplates.com 2009

Back to TOP